Let's talk omelets, my friends! Not those thin, rubbery things you sometimes get at cafes, but the real deal: fluffy, cloud-like omelets bursting with flavour. The kind that make you sigh with contentment and say, "That's the good stuff!"
I've been perfecting my omelet game for years, trying out all sorts of techniques and ingredients. And let me tell you, there's a real art to it. But fear not, because I'm about to share all my secrets with you.
This is your ultimate guide to making omelets that are not only delicious but also seriously impressive. We'll cover everything from the basics to more advanced techniques, and I'll even throw in some of my favourite fillings and toppings. So grab a whisk, a frying pan, and let's get started!
(Part 1) Understanding the Fundamentals

1. The Right Pan Makes All the Difference
You can't make a great omelet without the right tools, and a non-stick pan is absolutely essential. You don't want your precious creation sticking to the bottom, trust me.
I prefer a medium-sized pan, about 8 or 10 inches in diameter. It's big enough for a decent-sized omelet but not too big that it takes ages to cook. And while you're at it, make sure your pan is in good shape. A scratched or worn-out non-stick surface won't do the job.
2. The Power of the Whisk: Beyond Beating
You've probably got a whisk hanging around in your kitchen drawer somewhere. Now's the time to whip it out!
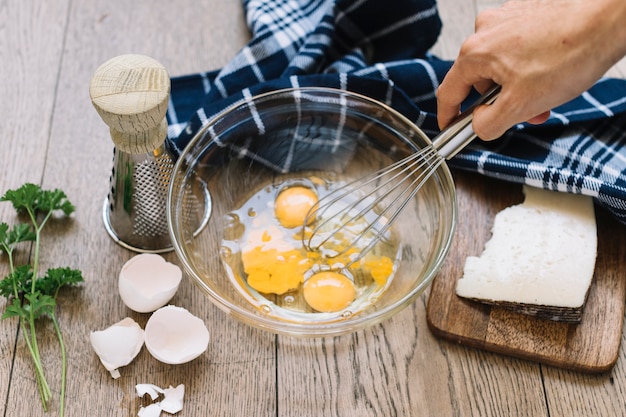
Whipping the eggs is crucial for achieving that fluffy texture. It's all about incorporating air into the mixture, which helps create those lovely airy pockets. Think of it like this: the more air you get into the eggs, the fluffier your omelet will be.
Remember, you want to whisk the eggs vigorously for about 30 seconds to a minute, until they're light and frothy. Don't be shy – give those eggs a good workout! You'll know you've done it right when the mixture looks pale and almost bubbly.
3. Temperature is King (and Queen): Finding the Sweet Spot
You're going to need a medium-high heat for cooking your omelet. The goal is to get the pan nice and hot, but not so hot that it burns the eggs.
How do you know if the pan is hot enough? You can test it by placing a drop of water on the pan. If it sizzles and evaporates quickly, you're good to go.
Once the pan is heated, you can add a small amount of oil or butter. I prefer a good knob of unsalted butter, but feel free to experiment with different fats. Just make sure it's spread evenly across the pan.
4. The Secret Ingredient: Time
Time is a crucial element in achieving the perfect omelet. You need to give the eggs enough time to set, but not so much that they become dry and rubbery.
We'll talk more about timing in the next section, but keep in mind that the longer you cook the omelet, the denser it will become.
(Part 2) The Art of the Omelet: Crafting a Culinary Masterpiece

5. The Perfect Pour: A Gentle Stream of Eggs
Now, it's time to pour your whisked eggs into the hot pan.
This is where it gets a bit tricky. You want to pour the eggs in a smooth, even motion, creating a thin layer that covers the base of the pan. Avoid splashing the eggs too much, as this can lead to a less-than-perfect omelet.
Think of it like pouring a thin crepe batter. You want the eggs to spread out evenly without forming any big clumps.
6. The Fold and the Flip: A Dance of Precision
Once the eggs start to set, it's time to fold and flip. Use a spatula to gently lift one side of the omelet and gently fold it over.
Then, using your spatula, carefully flip the omelet over to cook the other side. Don't worry, it's not as daunting as it sounds. Just go slowly and steadily, and you'll get it!
The trick is to let the omelet cook until it's just set on the bottom. You should be able to gently lift an edge and see that the egg has solidified.
7. Timing is Everything: Finding Your Omelet Sweet Spot
How long you cook your omelet depends on your preference. Some people like their omelets slightly runny, while others prefer them cooked through.
The general rule of thumb is to cook the omelet for about 2-3 minutes on each side. But, again, it's all about experimenting and finding what you like best.
One way to tell if your omelet is cooked through is to gently shake the pan. If the omelet moves freely and doesn't jiggle too much, it's done.
(Part 3) Filling it Up: A World of Flavour

8. The Filling Dilemma: A Delicious Choice
Now comes the fun part: choosing your fillings! You can go classic with cheese and ham, or get creative with all sorts of delicious combinations.
But remember, less is more when it comes to fillings. You don't want to overload your omelet, making it difficult to fold and cook properly.
A good rule of thumb is to use about 1/4 cup of fillings per omelet. But, again, feel free to adjust to your liking.
Here are some of my favourite fillings:
Classic Cheese: Cheddar, Gruyere, Parmesan, you name it. It’s a go-to for a reason! Don't be afraid to experiment with different cheeses, from sharp and tangy to mild and creamy.
smoked salmon: A luxurious and flavourful choice, perfect for a weekend brunch. You can add a dollop of cream cheese or sour cream for extra richness.
Spinach and Feta: A healthy and delicious combination that's packed with flavour. You can sauté the spinach with a little garlic for extra flavour.
Sautéed Mushrooms and Onions: A classic pairing that always works well. Try adding a little balsamic vinegar to the pan for a touch of acidity.
Chorizo and Peppers: A spicy and vibrant filling that will add a kick to your omelet. Use sweet peppers for a milder flavour or hot peppers for a fiery kick.
9. The Art of Timing: Adding Fillings at the Right Moment
To ensure your fillings are cooked to perfection and your omelet stays fluffy, there's a right time to add them.
The ideal moment to add your fillings is just before you fold the omelet. This allows the fillings to heat through without causing the omelet to become too dry.
If you're using ingredients that require extra cooking time, like mushrooms or spinach, sauté them separately before adding them to the omelet.
(Part 4) Top It Off: A Finishing Touch of Flavour
10. Toppings Galore: A Finishing Touch of Deliciousness
Once your omelet is cooked, it's time to add those finishing touches! You can go simple with a sprinkle of fresh herbs, or get creative with some delicious toppings.
My personal favourites include:
Fresh Herbs: Basil, parsley, chives – they add a burst of fresh flavour that makes all the difference. Chopped finely, they add a bright and fragrant element to the omelet.
Sliced Avocado: Creamy and delicious, avocado is a fantastic topping for omelets. It adds a touch of healthy fats and a richness that complements the eggs beautifully.
Sour Cream or Crème Fra??che: A touch of tanginess that balances out the richness of the eggs. Choose full-fat sour cream or crème fra??che for the best flavour and texture.
Hot Sauce: A dash of heat can elevate any omelet, especially if you're using a milder filling. Try different types of hot sauce to find your favourite level of heat.
Salt and Pepper: Don't forget the basics! Salt and pepper are essential for seasoning your omelet to perfection. A pinch of each is all you need to enhance the flavour.
(Part 5) Beyond the Basics: Elevating Your Omelet Game
11. The French Connection: The Art of the French Omelet
Now, if you're feeling adventurous, let's talk about the French omelet, a culinary masterpiece. It's known for its super-smooth texture and subtle browning on the outside.
The secret lies in not overcooking the eggs. You want to cook them just long enough for them to set, but still have a slight jiggle in the centre.
The French omelet is a delicate creation that requires a steady hand and a good understanding of heat. It's all about achieving a perfectly cooked omelet that is still slightly runny in the centre.
12. The Swirl Method: Creating a Smooth and Elegant Omelet
Another technique that elevates your omelet game is the swirl method.
After pouring the eggs into the pan, gently swirl the pan in a circular motion, allowing the eggs to spread and cook evenly. You can then add your fillings and continue swirling to create a beautiful, uniform omelet.
This technique is especially useful for making a French omelet, as it helps to create a smooth and evenly cooked omelet.
(Part 6) Troubleshooting Tips: Solving Common Omelet Challenges
13. The Stick Situation: Preventing Your Omelet from Sticking
Let's face it, even the best cooks can encounter a few bumps in the road.
One common problem is the omelet sticking to the pan. This can happen if your pan isn't hot enough or if you don't use enough oil or butter.
To prevent sticking, make sure your pan is nice and hot, and use a good amount of fat. You can also try using a silicone spatula to avoid scratching the non-stick surface of your pan.
Another helpful tip is to gently lift the edges of the omelet as it cooks to ensure that it's not sticking to the pan.
14. The Overcooked Dilemma: Avoiding Dry and Rubbery Omelets
Another issue is overcooking your omelet. This can result in a dry and rubbery texture.
To prevent this, keep a close eye on your omelet and don't cook it for too long.
If you notice that it's starting to dry out, remove it from the heat immediately and add a touch of moisture, like a splash of milk or cream. This will help to soften the omelet and prevent it from becoming too dry.
15. The Flip Fiasco: Mastering the Flip
The flip is a crucial step in making an omelet, but it can be tricky.
If you're having trouble flipping your omelet, try these tips:
Use a thin spatula: A thin spatula will make it easier to slide under the omelet and flip it without breaking it.
Go slow and steady: Don't rush the flip. Gently lift the edge of the omelet and slowly tilt the pan, allowing the omelet to slide over.
Don't worry about perfection: It's okay if the omelet isn't perfectly folded. Just do your best, and it will still be delicious!
(Part 7) Omelet Variations: Expanding Your Omelet Horizons
16. Sweet Treats: Beyond Savoury Delights
Who says omelets have to be savoury? You can also create delicious sweet omelets.
My go-to sweet omelet recipe uses a bit of sugar and cinnamon in the eggs, along with a handful of fresh berries and a drizzle of maple syrup.
Think of it as a breakfast pancake, but in omelet form. It's the perfect way to start your day with a sweet and satisfying treat.
17. The Breakfast Burrito: A Filling and Satisfying Meal
If you're looking for a more substantial meal, consider making an omelet-stuffed breakfast burrito.
Simply cook your omelet as usual, then fill it with your favourite breakfast burrito ingredients, like black beans, salsa, and avocado.
Wrap it all up in a warm tortilla, and you've got a delicious and satisfying meal.
(Part 8) FAQs: Answers to Your Omelet Questions
1. Can I make an omelet in the oven?
Yes, you absolutely can! Just preheat your oven to 350°F (175°C), then pour the whisked eggs into a greased oven-safe pan.
Bake for about 15-20 minutes, or until the eggs are set and slightly puffy.
Oven-baked omelets are a great option if you want to cook multiple omelets at once or if you prefer a more hands-off approach.
2. How do I store leftovers?
Omelets can be stored in the refrigerator for up to 3 days. Wrap them tightly in plastic wrap or aluminum foil to prevent them from drying out.
You can reheat leftovers in a microwave or a skillet on the stovetop.
3. What are some good sides for omelets?
Omelets go well with a variety of sides, like toast, fresh fruit, salad, or roasted vegetables.
Try pairing your omelet with a side salad for a lighter meal or a bowl of fruit for a sweet and refreshing option.
4. Can I freeze omelets?
While you can freeze omelets, they don't reheat as well as freshly cooked ones. If you do freeze them, it's best to cook them from frozen, as they will be a bit soggy if thawed.
5. What's the best way to clean my omelet pan?
After cooking your omelet, wash the pan with warm, soapy water. If there's any stubborn residue left behind, you can use a non-abrasive cleaning pad to scrub it off.
To prevent sticking, you can also oil your pan after each use. Just rub a thin layer of oil over the pan and wipe away any excess.
(Part 9) Omelet Inspiration: Taking Your Omelet Skills to the Next Level
16. The Omelet Challenge: Expanding Your Culinary Horizons
Feeling adventurous? Challenge yourself to create a unique omelet every week! You can experiment with different fillings, toppings, and even cooking techniques.
This is a great way to get creative in the kitchen and discover new flavour combinations.
17. Omelet Party: Sharing Your Omelet Love
Host an omelet party! Invite your friends over and let everyone choose their favourite fillings and toppings. You can even set up a "build your own omelet" station, complete with all the fixings.
This is a fun and social way to enjoy omelets with friends and family.
18. The Omelet Recipe Book: Documenting Your Omelet Journey
Start a collection of your favourite omelet recipes. Write down the ingredients and instructions, and you'll have a handy reference book for future omelet adventures.
This is a great way to keep track of your favourite omelet creations and share them with others.
(Part 10) The Takeaway: Embrace Your Inner Omelet Master
There you have it, folks: your ultimate guide to fluffy, delicious omelets. Remember, it's all about practice and experimenting. Don't be afraid to try new things and create your own signature omelet masterpiece.
So, get those whisks out, get those pans sizzling, and get ready to enjoy some truly magnificent omelets. And remember, if you ever need a little inspiration, just come back to this guide. I've got your omelet-making back!
Everyone is watching

The Ultimate Guide to Cooking Sweet Potatoes: From Roasting to Mashing
RecipesSweet potatoes. Just the name conjures up images of warm, comforting dishes, bursts of vibrant color, and a to...

Caramelized Onions: The Ultimate Guide to Sweet, Savory Perfection
RecipesAh, caramelized onions. Those gloriously sweet, sticky, and utterly addictive little gems. They're the culinar...

Ultimate Turkey Cooking Time Guide: From Raw to Perfectly Roasted
RecipesAh, the turkey. A symbol of festive gatherings, a culinary challenge, and a source of delicious leftovers. But...

Wolf Meat Recipes: A Guide to Cooking Wild Game
RecipesLet's be honest, you don't see wolf meat at your local butcher shop every day. It's a bit of a wild card, but ...

Pigs in a Blanket Cooking Time: How Long to Bake for Perfect Results
RecipesAh, pigs in a blanket. Just the name conjures up images of those delightful little parcels of crispy pastry en...
