There's something undeniably comforting about the aroma of roast chicken filling your home. It's a dish that conjures up images of family gatherings, Sunday dinners, and warm, happy memories. And while the idea of roasting a whole chicken might seem daunting, I'm here to assure you it's actually quite simple. Over the years, I've perfected my own method for achieving that perfect roast chicken – the kind with skin so crispy it shatters with a satisfying snap, and meat so juicy it practically melts in your mouth. Get ready, because this is more than just a recipe; it's a journey into the art of roast chicken perfection.
Part 1: Choosing Your Bird
The Foundation of Flavor: Choosing the Right Chicken
Let's start at the beginning – choosing the right chicken. This is crucial because the flavour of your roast chicken will ultimately depend on the quality of the bird itself. I'm a firm believer in free-range, organic chickens whenever possible. They tend to have a richer flavour and a more tender texture than their conventionally raised counterparts. But, let's be honest, sometimes those options aren't readily available or within budget. If you're going with a non-organic bird, look for one that's plump and well-shaped, with a good amount of breast meat and drumsticks. Avoid any that look dry, have discolouration, or feel limp – that's a sign it might not be the freshest.
Getting to Know Your Bird: The Prep Work
Once you've got your bird home, give it a good rinse under cold water. Pat it dry with paper towels, and then comes the key step – leaving it uncovered in the fridge for a couple of hours. This might seem counterintuitive, but it helps dry out the skin, which is crucial for achieving that glorious crispy texture. While the chicken is chilling, take a moment to get acquainted with its innards. You'll find a little bag of giblets in the cavity – that's the heart, liver, and sometimes neck. You can save these for making a delicious stock later, or discard them if you prefer.
Part 2: Prepping the Bird: A Symphony of Flavors
The Art of Brining: Elevating the Taste
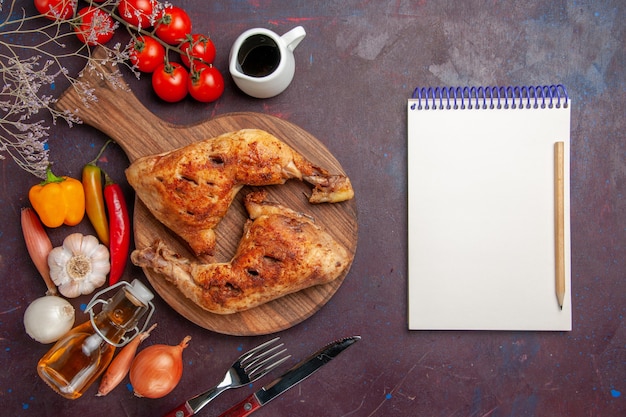
Okay, now for the fun part – seasoning! You can go the classic route with just salt and pepper, but I find that adding a few extra ingredients elevates the flavour profile considerably. I usually start with a good tablespoon of salt, a teaspoon of black pepper, and a sprinkle of paprika for a touch of colour and smokiness. However, the beauty of cooking is in the experimentation. Feel free to add your favourite herbs like rosemary, thyme, or oregano, a sprinkle of garlic powder, or even a zest of lemon.
Now, let's talk about brining. Brining involves soaking the chicken in a salt solution for a few hours, which helps keep the meat incredibly moist and juicy. It's not a necessity, but I highly recommend it. It truly elevates the flavour and texture of your roast chicken. My go-to brine is simple: a cup of salt dissolved in a gallon of cold water. Submerge the chicken in the brine and let it soak in the fridge for at least 4 hours, or even overnight.
Stuffing the Bird: Adding Depth and Aroma
Next up, the stuffing. This is your opportunity to add a delightful burst of flavour to your chicken. You can stuff it with herbs, vegetables, or even a bread-based stuffing. I prefer a simple mix of chopped onion, celery, and rosemary – it adds a lovely aroma and flavour to the meat, and fills the house with the most incredible scent. When stuffing, don't pack it too tightly. You want to leave some room for the chicken to cook evenly.
Trussing the Bird: Ensuring Even Cooking
This is where many cooks get a little apprehensive – trussing. It's simply the process of tying the chicken's legs and wings together to ensure even cooking and prevent the bird from falling apart during the roasting process. Don't worry, it's not as complicated as it sounds. There are different techniques, but I find the easiest method is using kitchen twine. Tie a piece of twine around the chicken's legs, then another around the wings, bringing them close to the body. It's a simple technique that makes a big difference in the final result. There are plenty of helpful tutorials online if you need a visual guide.
Part 3: Roasting the Bird: The Magic Begins
Prepping the Oven and Pan: Setting the Stage
Your bird is prepped and ready to go, so let's heat up the oven. I always preheat it to 400 degrees Fahrenheit (200 degrees Celsius) for at least 30 minutes. This ensures the oven is nice and hot when the chicken goes in, which is crucial for achieving that crispy skin. While the oven is preheating, get your roasting pan ready. I find that a cast iron pan works wonders – it distributes heat evenly and promotes beautiful browning. You can also line it with parchment paper for easier cleanup.
The roasting time: Patience and Attention
Gently place your trussed chicken in the preheated pan, and then it's time to let the magic happen. Roast it for about 1 hour and 15 minutes, or until a meat thermometer inserted into the thickest part of the thigh registers 165 degrees Fahrenheit (74 degrees Celsius). A good rule of thumb is to calculate 20 minutes per pound for a whole chicken. Roast chicken is relatively low-maintenance. You can just leave it in the oven and let it do its thing, but every 30 minutes or so, take a peek and baste the chicken with the pan juices. This helps keep the skin moist and ensures it gets a beautiful, golden-brown colour.
Resting the Bird: Patience is a Virtue
Once the chicken is cooked through, remove it from the oven and let it rest for at least 15 minutes before carving. This allows the juices to redistribute throughout the meat, resulting in a more tender and flavorful chicken. While the chicken is resting, you can create a delicious pan sauce. Pour off any excess fat from the pan, then deglaze it with a bit of white wine or chicken broth. Scrape up any tasty bits stuck to the bottom of the pan, then simmer it for a few minutes until it thickens slightly.
Part 4: Carving the Bird: Unveiling the Masterpiece
The Art of Carving: A Skill Worth Mastering
Now, we arrive at the grand finale – carving the chicken. This is where a sharp carving knife comes in handy. If you're not confident in your carving skills, there are tons of online tutorials to guide you. Basically, you'll start by cutting the chicken down the middle of the breastbone, separating it into two halves. Then, you can slice the breast meat off the bone and cut the legs and thighs off at the joint. Don't forget to save those delicious wing tips – they're perfect for nibbling on while everyone else waits for their share.
Part 5: Serving and Enjoying: A Culinary Symphony
The Feast: A Celebration of Flavors
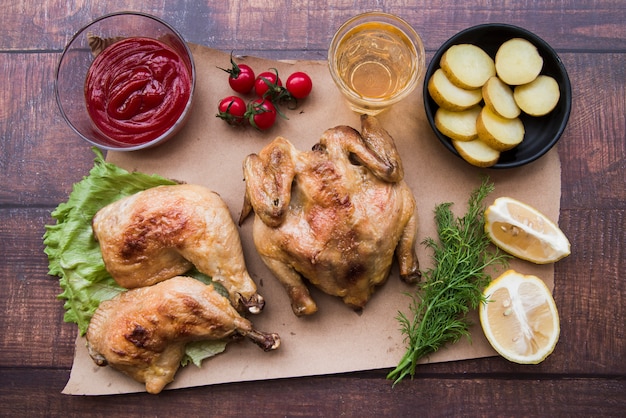
Finally, your masterpiece is ready to be enjoyed! Serve the carved chicken with your favorite side dishes. I adore pairing it with roasted vegetables, creamy mashed potatoes, or a simple green salad. Don't forget that delicious pan sauce – it's perfect for drizzling over the chicken and vegetables. And remember, this is a dish best enjoyed with good company, engaging conversation, and a generous helping of laughter.
Part 6: Variations and Tips: Beyond the Basics
Spice it Up: Embracing Flavor Creativity
You've mastered the basics, but now let's explore some fun variations. Instead of sticking to simple salt and pepper, try rubbing the chicken with a blend of herbs and spices. For a Mediterranean twist, use a mix of oregano, thyme, and rosemary. Want something more exotic? Try a blend of cumin, coriander, and turmeric. Let your imagination be your guide!
The Roasting Pan Advantage: Double Duty
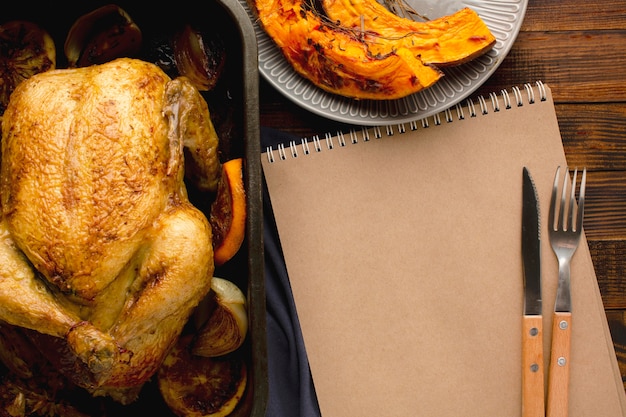
Remember that roasting pan? You can use it to create a delicious side dish as well. While the chicken is roasting, throw in some vegetables like potatoes, carrots, and onions. The chicken fat will render down and flavor the veggies, creating a delightful side dish. It's a simple way to maximize flavour and minimize effort.
Leftovers, Anyone? Culinary Alchemy
Let's face it, roast chicken is so delicious, you might be tempted to devour the entire bird in one sitting. But, inevitably, you'll end up with some leftovers. Don't fret! This is where the real magic happens. You can use leftover roast chicken to make delicious sandwiches, salads, or soups. Get creative! There's a whole world of delicious ways to repurpose those leftovers.
Part 7: FAQs: Addressing Common Concerns
What if the skin isn't crispy enough?
Don't worry, it happens! If the skin isn't as crispy as you'd like, try broiling the chicken for a few minutes at the end of the cooking time. Just watch it closely, as it can burn quickly. You can also try patting the skin dry before roasting to help achieve crispier skin.
How can I tell if the chicken is cooked through?
The best way to know for sure is to use a meat thermometer. It should register 165 degrees Fahrenheit (74 degrees Celsius) in the thickest part of the thigh. If you don't have a thermometer, you can also check the juices. They should run clear, not pink.
Can I freeze leftover roast chicken?
Absolutely! Let the chicken cool completely, then store it in an airtight container in the freezer for up to 3 months. It's a great way to have a delicious meal ready to go when you need it.
What should I do with the pan drippings?
Don't throw those pan drippings away! They're packed with flavor. You can use them to make a delicious pan sauce, or you can store them in the fridge for later use in soups, stews, or gravies.
What's the best way to reheat leftover roast chicken?
I like to reheat leftover chicken in the oven. Place it on a baking sheet and bake it at 350 degrees fahrenheit (175 degrees Celsius) for about 15 minutes, or until heated through.
Part 8: My Final Thoughts: A culinary journey
There you have it, my guide to roast chicken perfection. It's a dish that's deceptively simple to make, yet it always impresses. It's also incredibly versatile, allowing you to customize it to your liking with different herbs, spices, and sides. So, what are you waiting for? Get in the kitchen and give it a go! You won't be disappointed.
Remember, this is more than just a recipe; it's a journey of exploration and culinary creativity. With a little patience and a lot of love, you can create a roast chicken that will leave your taste buds dancing with delight.
Everyone is watching

How to Cook Frozen Lobster Tails Perfectly: A Step-by-Step Guide
RecipesLobster. Just the word conjures up images of lavish meals, special occasions, and a taste of luxury. But let's...

Pigs in a Blanket Cooking Time: How Long to Bake for Perfect Results
RecipesAh, pigs in a blanket. Just the name conjures up images of those delightful little parcels of crispy pastry en...

Pork Fillet Cooking Time: How Long to Cook It Perfectly
RecipesPork fillet, or tenderloin as it's sometimes called, is a real favourite in our house. It's so versatile, and...

The Ultimate Guide to Cooking Delicious Frankfurters
RecipesLet's face it, we all love a good frankfurter. It's a classic, simple, and always satisfying. But let's be rea...

Wolf Meat Recipes: A Guide to Cooking Wild Game
RecipesLet's be honest, you don't see wolf meat at your local butcher shop every day. It's a bit of a wild card, but ...