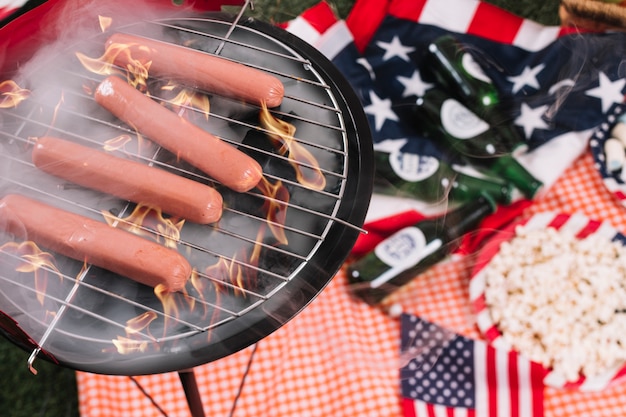
Let's be honest, there's something truly magical about ribs. The way they fall off the bone, the smoky aroma that fills the air, and the pure satisfaction of biting into a perfectly cooked rack—it's a culinary experience that's hard to beat. And when it comes to cooking ribs, I've learned a thing or two over the years. I've tackled those intimidating rubs and mastered the art of the perfect grill temperature. But it wasn't always smooth sailing. I've made my fair share of mistakes, from ribs that were dry as dust to ones that were so tough they resembled chewing gum. But through trial and error, I've discovered the secrets to creating ribs that are tender, juicy, and bursting with flavor. So grab your favorite beverage, settle in, and let me share my ultimate guide to grilling the most mouthwatering ribs on your gas grill.
(Part 1) Setting the Stage for Rib Perfection
Before you fire up the grill, it's crucial to have the right ingredients and equipment on hand. It's like setting the stage for a culinary masterpiece, and you want to make sure you have everything you need to create a showstopper.
Choosing Your Rib Stars
The first step is picking the right ribs. Now, I'm a big fan of baby back ribs. They're smaller and cook quicker, and that marbling—the beautiful streaks of fat—gives them a rich, melt-in-your-mouth texture. However, spare ribs, with their larger size and more robust flavor, have their own loyal following. Ultimately, it comes down to personal preference. When selecting your ribs, look for ones with a good amount of marbling, a fresh, pinkish color, and no signs of discoloration or dryness. A good butcher is a treasure trove for finding top-notch ribs. They'll guide you through the different cuts and help you choose the perfect rack for your needs.
The Art of Rubbing It In (Literally!)
Okay, now it's time to rub those ribs with a dry rub—the magic potion that imparts a symphony of flavor. Think of it as the secret weapon that transforms ordinary ribs into a culinary masterpiece. You can go for a store-bought rub, or get creative and whip up your own. My favorite rub is a simple blend of paprika, brown sugar, garlic powder, onion powder, salt, and black pepper. The brown sugar adds a touch of sweetness, the paprika brings a vibrant color and a hint of smokiness, and the garlic and onion powder add a savory depth. Feel free to experiment with different herbs and spices to create your own signature blend. Whatever you choose, make sure to rub it liberally onto the ribs, getting it into all the nooks and crannies. It's a love affair between the rub and the ribs, and the more they get acquainted, the better the outcome.
(Part 2) Unveiling the Gas Grill Magic: A Step-by-Step Guide
Let's get this show on the road! It's time to unleash the power of your gas grill and transform those rubbed ribs into culinary gold.
Firing Up the Grill: The Perfect Temperature
Before we start, it's crucial to preheat your grill to medium-high heat, around 350°F. I usually light all the burners and let the grill warm up for about 15 minutes. This allows the grill to reach the desired temperature and ensures even cooking. While the grill is heating up, take a moment to make sure the grates are clean and oiled. This prevents sticking and ensures a beautiful sear on your ribs.
Laying Down the Foundation: The Initial Cook
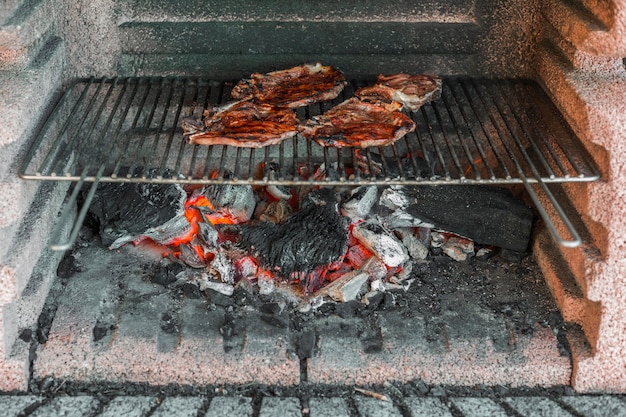
Once the grill is hot, carefully place the ribs bone-side down on the grates. Close the lid and let them cook for about 30 minutes, undisturbed. This initial cooking stage is all about developing a beautiful sear and creating a crisp crust. It's like laying down the foundation for a delicious structure.
The Art of the Wrap: Locking in Moisture and Tenderness
After 30 minutes, it's time for a little magic trick—the wrap. This step is all about locking in moisture and tenderizing those ribs. Grab some aluminum foil and tear off two large sheets. Place the ribs on one sheet, and add a few tablespoons of apple cider vinegar. The vinegar helps break down the connective tissue, making the ribs incredibly tender. Then, sprinkle a bit of brown sugar over the ribs. The sugar adds a touch of sweetness and helps create a beautiful glaze during the final cooking stage. Wrap the ribs tightly in the foil, making sure the edges are sealed well, and place them back on the grill. Cook for another 1-2 hours.
Unwrapping the Treasure: The Final Touch
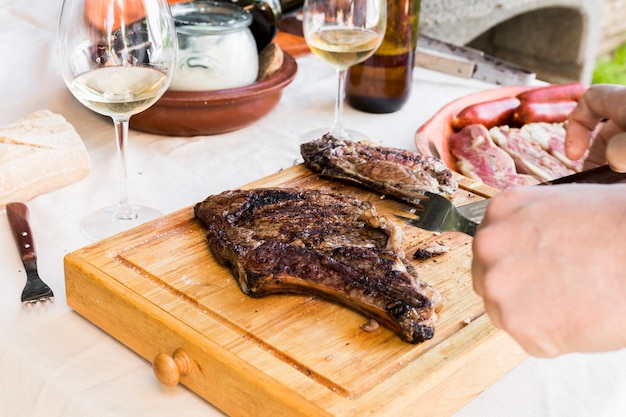
After 1-2 hours, it's time to unveil the juicy treasures! Carefully unwrap the ribs and place them back on the grill, bone-side up. Close the lid and cook for another 30-60 minutes, or until the ribs are tender and the sauce starts to caramelize. This final stage is all about achieving that crispy bark while retaining the juicy, fall-off-the-bone texture.
Adding the Finishing Touches: The Power of Sauce
If you're feeling adventurous, you can brush the ribs with your favorite barbecue sauce during the last 30 minutes of cooking. I love to use a thick, smoky sauce that complements the natural flavor of the ribs. However, the beauty of ribs lies in their simplicity, so if you prefer a more minimalist approach, you can skip the sauce altogether. Just brush the sauce on every 10 minutes or so, turning the ribs to ensure they get evenly coated.
(Part 3) Mastering the Art: Essential Techniques for Rib Perfection
We've covered the basics, but to become a true rib maestro, you need to master a few key techniques. Think of these as the secret ingredients that elevate your ribs from good to extraordinary.
The 3-2-1 Method: A Winning Formula
The 3-2-1 method is a popular technique that combines the best of both worlds: direct heat for searing and indirect heat for tenderness. It's like a culinary symphony, with each phase playing a crucial role in creating a harmonious masterpiece.
- 3 Hours: You start by grilling the ribs directly over medium-high heat for 3 hours, bone-side down, flipping them occasionally. This initial phase is all about building that beautiful sear and developing a crispy crust.
- 2 Hours: Next, wrap the ribs in foil with some apple cider vinegar and brown sugar and cook them indirectly over low heat for 2 hours. This is where the magic happens, as the ribs become incredibly tender and infused with flavor.
- 1 Hour: Finally, unwrap the ribs, place them back on the grill directly, and cook for another hour, basting with your favorite sauce, until they're tender and have that gorgeous crust. This final phase is about achieving that perfect balance between tender and crispy.
The 3-2-1 method is a game-changer, breaking down the connective tissues and ensuring ribs that practically melt in your mouth.
Maintaining the Heat: The Key to Consistent Cooking
One thing that can make or break your ribs is maintaining the heat throughout the cooking process. I've learned the hard way that consistent heat is crucial! If your grill temperature drops too low, the ribs will take longer to cook and might end up dry and tough. So, keep a close eye on your grill thermometer and adjust the burner settings as needed. Remember, the grill is like a furnace, and you need to keep the flames burning at the right intensity.
The "Poke Test": A Simple Way to Gauge Doneness
How do you know when your ribs are done? There's a simple test called the "poke test." Just take a fork and gently poke the meat between the bones. If the ribs feel tender and the meat easily pulls away from the bone, you're good to go. If not, keep cooking them a little longer.
(Part 4) Elevate the Flavor: Ribs on Steroids
Okay, so we've covered the basics, but let's spice things up a bit! It's time to unleash your inner culinary adventurer and take those ribs to the next level.
The Smokin' Hot Ribs: Infusing Smoke and Flavor
Nothing beats the smoky flavor of wood-fired ribs. If you have a smoker, that's your go-to for that incredible smoky aroma. But don't worry, you can still get that smoky goodness on your gas grill. Just soak some wood chips in water for about 30 minutes, then place them in a smoker box and put it on the grill. The wood chips will slowly release their smoky aroma into the air, infusing your ribs with that delicious flavor. I've tried applewood, hickory, and cherry wood chips, and they all add a unique twist to the ribs.
The Spicy Challenge: Adding a Kick
Feeling adventurous? Let's spice things up with a kick! Add some cayenne pepper, chili powder, or chipotle powder to your rub. You can also use a spicy barbecue sauce for an extra burst of heat. Just be careful not to overdo it, though. A little spice goes a long way, and you don't want to overshadow the natural flavor of the ribs.
Sweet and Savory Symphony: A Classic Combination
For a classic sweet and savory combination, add some brown sugar and molasses to your rub. You can also brush the ribs with a honey-based barbecue sauce during the last 30 minutes of cooking. This will give them a beautiful glaze and a rich, sweet flavor that's irresistible.
(Part 5) The Perfect Accompaniments: Creating a Rib Feast
Alright, let's talk sides! You can't have ribs without a killer side dish, right? It's like the supporting cast in a culinary drama, adding depth and complexity to the main event.
Coleslaw: A Cool and Refreshing Counterpoint
Coleslaw is a classic rib companion, and for good reason! It's a cool, refreshing contrast to the rich, smoky ribs. I like to make my coleslaw with shredded cabbage, carrots, and a creamy dressing. You can also add some chopped apples, raisins, or toasted almonds for extra texture and flavor.
potato salad: A Creamy and Comforting Classic
Another popular side is potato salad. It's a comforting and creamy dish that pairs perfectly with the smoky flavor of ribs. I like to make my potato salad with boiled potatoes, mayonnaise, mustard, onion, celery, and hard-boiled eggs. You can also add some fresh herbs like dill or parsley for extra flavor.
Baked Beans: A Sweet, Smoky, and Satisfying Staple
Baked beans are a true barbecue staple. They're sweet, smoky, and satisfying. I like to bake my beans in the oven, but you can also make them on the grill. Just combine canned baked beans with brown sugar, molasses, mustard, and your favorite barbecue sauce, then cook them until they're bubbly and delicious.
(Part 6) Serving Up the Feast: Presentation and Enjoyment
It's finally time to enjoy the fruits of your labor! The moment of truth has arrived, and it's time to present your culinary masterpiece to the world.
The Art of Presentation: Making It Visually Appealing
I like to present my ribs on a platter, surrounded by the side dishes. I usually cut the ribs into individual portions, making them easy to eat. You can also add some fresh herbs, like parsley or chives, for a touch of color and a hint of freshness.
The Perfect Drink Pairing: Enhancing the Experience
What's a barbecue without drinks? I love to pair my ribs with a cold beer or a refreshing lemonade. If you're feeling fancy, you can also try a fruity cocktail, like a margarita or a mojito.
Savoring the Moment: Taking in the Flavor
Okay, now it's time to dig in! Grab a rib, take a bite, and savor every delicious moment. The fall-off-the-bone tenderness, the smoky flavor, the perfect balance of sweet and savory—it's barbecue heaven!
(Part 7) Sharing the Love: hosting a rib feast
I love making ribs, but I also love sharing them with friends and family. They're always a hit at gatherings and parties. Just make sure you have enough to go around!
Tips for Hosting a Rib Feast: Creating a Memorable Experience
Here are a few tips for hosting a rib feast that will leave your guests wanting more:
- Plan Ahead: Ribs take time to cook, so make sure to plan ahead. Start prepping the ribs and side dishes at least a few hours before your guests arrive.
- Set Up a Buffet: A buffet-style setup is perfect for ribs and side dishes. It allows guests to choose their favorite combinations and go back for seconds.
- Keep the Drinks Flowing: Make sure you have plenty of drinks on hand, both alcoholic and non-alcoholic.
- Don't Forget the Napkins: Ribs can get messy, so don't forget to provide plenty of napkins!
- Enjoy the Company: The best part of hosting a barbecue is enjoying the company of friends and family.
(Part 8) Expanding the Horizons: Variations and Substitutes
Alright, we've covered the basics, but what if you want to mix things up? Let's explore some variations and substitutes that will keep your grilling game fresh and exciting.
pork ribs vs. beef ribs: A Tale of Two Cuts
You can definitely use beef ribs instead of pork ribs. Beef ribs are more substantial and have a richer flavor. However, they take longer to cook, so be prepared to spend more time at the grill.
Venturing Beyond Ribs: Grilling Other Delights
You can also grill other meats, like chicken, fish, or sausage. Just adjust the cooking time and temperature accordingly.
Vegetarian Options: Expanding the Barbecue Menu
Don't forget about your vegetarian friends! You can grill vegetables like portobello mushrooms, bell peppers, onions, and corn on the cob. You can also grill tofu or tempeh for a meat-free option.
FAQs: Addressing Your Grilling Questions
Let's wrap this up with some frequently asked questions that will help you conquer your next rib adventure.
1. Can I Grill Ribs in the Rain?
It's not ideal, but you can grill ribs in the rain. Just make sure you have a grill cover to protect your grill from the elements. Also, use a grill thermometer to monitor the temperature, as rain can affect the heat distribution.
2. What if My Ribs Are Too Dry?
If your ribs are too dry, you can add some moisture back in by wrapping them in foil with a little bit of apple cider vinegar or broth. Cook them for another 30-60 minutes, or until they're tender and juicy.
3. How Can I Keep My Ribs Warm While I'm Serving?
To keep your ribs warm, wrap them in foil and place them in a slow cooker or an insulated cooler. You can also keep them warm on the grill, over low heat.
4. How Long Can I Keep Leftover Ribs?
You can store leftover ribs in an airtight container in the refrigerator for up to 3-4 days. Reheat them in the oven, microwave, or on the grill.
5. What's the Best Way to Clean My Grill?
After each use, clean your grill grates with a grill brush. You can also wipe down the exterior with a damp cloth. Once a month, you should give your grill a thorough cleaning with a grill cleaning solution.
And that's it, folks! My ultimate guide to grilling the best ribs. Now go forth and conquer the barbecue world, my friends!
Everyone is watching

How to Cook Frozen Lobster Tails Perfectly: A Step-by-Step Guide
RecipesLobster. Just the word conjures up images of lavish meals, special occasions, and a taste of luxury. But let's...

Pigs in a Blanket Cooking Time: How Long to Bake for Perfect Results
RecipesAh, pigs in a blanket. Just the name conjures up images of those delightful little parcels of crispy pastry en...

Pork Fillet Cooking Time: How Long to Cook It Perfectly
RecipesPork fillet, or tenderloin as it's sometimes called, is a real favourite in our house. It's so versatile, and...

The Ultimate Guide to Cooking Delicious Frankfurters
RecipesLet's face it, we all love a good frankfurter. It's a classic, simple, and always satisfying. But let's be rea...

Wolf Meat Recipes: A Guide to Cooking Wild Game
RecipesLet's be honest, you don't see wolf meat at your local butcher shop every day. It's a bit of a wild card, but ...