There's something undeniably satisfying about sinking your teeth into a perfectly cooked steak. The satisfying sizzle as it hits a hot pan, the beautiful sear marks, the juicy, flavorful bite - it's a culinary experience that always leaves me feeling utterly content. And for me, there's no better tool for achieving that perfect steak than a trusty cast iron skillet.
I've been using cast iron for years, and it's become my go-to for everything from searing steaks to baking crusty bread. There's a certain magic to the way it holds heat, creating that gloriously crispy crust that you simply can't achieve with other pans. The more I use it, the more I appreciate its versatility and durability. It's truly a kitchen workhorse.
Over the years, I've learned a few tricks and secrets to get the most out of my cast iron skillet, especially when it comes to cooking steak. From seasoning the pan to understanding the perfect timing for flipping, I've gathered all the tips and tricks to help you achieve that juicy, flavorful steak you've always dreamed of.
(Part 1) Your Cast Iron Journey Begins
The first step in your cast iron journey is to find the perfect skillet for your needs. You can typically find great options at any kitchen shop or online. When choosing your skillet, look for one that's sturdy and has a nice, flat bottom. Don't be afraid to go for a larger size if you think you'll be cooking for multiple people often. You can always grab a smaller one later if you need it.
Seasoning Your Cast Iron: The Key to Non-Stick Success
Now, the real magic begins: seasoning your cast iron. This is the process where you create a protective layer of oil that not only prevents rust but also gives your pan those incredible non-stick properties. It's a simple process, but it's essential to do it right for optimal results. I've learned that patience and attention to detail are key here.
Here's how I season my cast iron:
- Give it a Gentle Wash: First, give your new cast iron skillet a good wash with hot, soapy water. You don't need to scrub too hard, just remove any residue or dust. Once it's clean, dry it thoroughly with a clean kitchen towel.
- Oiling Up: Now comes the fun part! Apply a thin layer of vegetable oil to the entire surface of the pan, including the sides. Don't be shy with the oil – a little extra is better than not enough. I like to use a paper towel to evenly distribute the oil.
- Oven Time: Place the oiled skillet in an oven preheated to 350°F (175°C) for a full hour. This allows the oil to polymerize, creating that beautiful, non-stick surface. Think of it as baking on a protective layer of flavor.
- Cool Down Slowly: Turn off the oven and let the skillet cool down completely inside the oven. This prevents sudden temperature changes that could potentially crack the seasoning. It's a little extra patience, but it's worth it.
- Repeat for Perfection: For best results, repeat this entire process at least two to three times. It's like building a strong foundation for your cast iron, ensuring its longevity and performance.
Caring for Your Cast Iron: A Love Affair with Longevity
Once your cast iron is seasoned, the key to keeping it in tip-top shape is to treat it with care. This means cleaning it properly and storing it with love. Think of it as a long-term relationship, nurturing its beauty and ensuring its long life.
Here's my cast iron care routine:
- Hand Wash Only: Always hand wash your cast iron. Dishwashers use harsh detergents that can strip away the seasoning, leaving your pan vulnerable to rust. Trust me, you don't want that!
- Avoid Soaking: Soaking your cast iron can also damage the seasoning. If you have stubborn food stuck on, simply use a scrub brush and hot water to remove it.
- Oil for Protection: After cleaning, give your cast iron a thin coating of oil and wipe it with a paper towel. This protects the seasoning and prevents rust. Think of it as a little TLC for your trusty pan.
- Gentle Cleaning: Avoid using steel wool or abrasive scrubbers. These can damage the seasoning, making your pan sticky and frustrating to use.
- Dry Storage: Store your cast iron in a dry place, ideally with a light coating of oil. This prevents rust and keeps your pan in pristine condition.
(Part 2) Choosing the Perfect Steak: The Foundation of Flavor

Now that your cast iron skillet is ready, it's time to choose the perfect steak for your culinary masterpiece. There are so many different cuts of beef out there, but not all of them are ideal for searing in a cast iron pan.
I've learned that the best cuts for cast iron are those that are about 1-inch thick and have good marbling. This means the meat has a nice balance of fat and lean, resulting in a juicy and flavorful steak. The fat renders as it cooks, adding flavor and moisture to your steak.
My Go-To steak cuts: A Guide to Deliciousness
Here are a few of my favorite steak cuts for cast iron, each offering a unique flavor profile:
- Ribeye: A classic choice, ribeye is known for its rich flavor and generous marbling. It's perfect for those who appreciate a decadent steak experience.
- new york strip: This cut is a bit leaner than ribeye but still boasts a nice amount of marbling. It's ideal for those who prefer a slightly lighter steak without sacrificing flavor.
- filet mignon: This cut is famous for its tenderness and buttery flavor. However, it's also very lean, so it's important to cook it to medium-rare for the best results. Overcooking can lead to a dry steak.
- Top Sirloin: This cut is a more budget-friendly option but still offers excellent flavor. It's a great choice for those who want a delicious steak without breaking the bank.
(Part 3) Preparing the Steak: Setting the Stage for Flavor
Once you've chosen your perfect steak, it's time to prepare it for its culinary transformation. This means patting it dry and seasoning it properly. A little attention to detail here goes a long way in creating a memorable steak experience.
Seasoning 101: The Art of Enhancing Flavor
I prefer to keep my steak seasoning simple, using only salt and pepper. I believe it allows the natural flavor of the beef to shine through. But if you want to add a little extra pizzazz, there are plenty of other seasonings you can try.
- Garlic Powder: A touch of garlic powder adds a savory note to your steak, enhancing its depth of flavor.
- Onion Powder: Similar to garlic powder, onion powder adds another layer of savory flavor. It complements the beef beautifully.
- Paprika: Paprika adds a subtle sweetness and a touch of heat, giving your steak a warm, vibrant flavor.
- Dried Herbs: Rosemary, thyme, and oregano are all excellent choices for adding a touch of herbaceous flavor to your steak. They complement the beef beautifully and add a layer of complexity.
Get Your Steak to Room Temperature: A Step Towards Even Cooking
I've found that letting your steak sit at room temperature for about 30 minutes before cooking helps it cook more evenly. It allows the meat to warm up and prevents cold spots from forming. It's a small step that makes a big difference in the final result.
(Part 4) Heating Up the Cast Iron: Creating the Foundation for Searing
Now it's time to heat up your cast iron skillet. I like to get it really hot, but not so hot that it starts to smoke. I typically heat it over medium-high heat for about 5-7 minutes.
Here's a little trick I use to make sure my pan is ready: I place a few drops of water on the surface. If they sizzle and evaporate immediately, the pan is hot enough for searing.
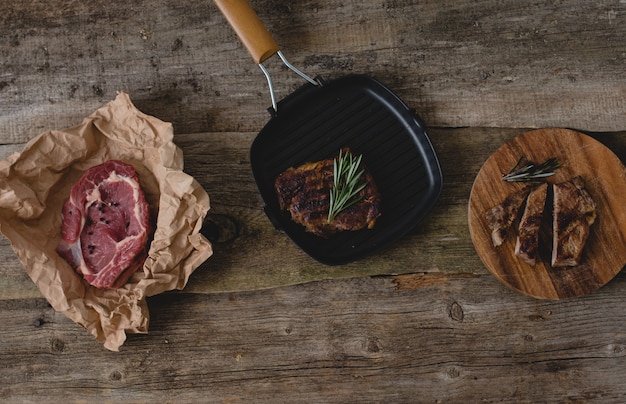
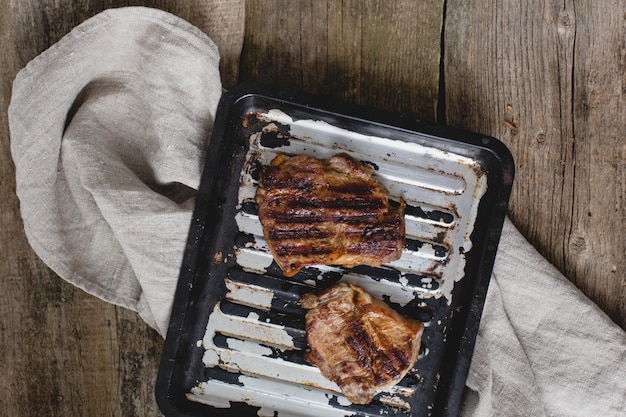
(Part 5) The Sear: A Crispy Crust of Perfection
Now comes the fun part – searing the steak! I always make sure to dry the steak thoroughly with paper towels before putting it in the pan. This helps to create a nice, crispy crust and prevent any steam from forming that could hinder the sear.
Don't Touch It: Let the Steak Sit and Sizzle
Once the steak is in the pan, resist the urge to move it around. Let it sit for about 2-3 minutes per side, or until you see a beautiful, brown crust form. Don't be afraid to hear the sizzle – it's a sign that your pan is hot enough and the steak is forming that perfect crust.
Flip It Like It's Hot: Time for the Other Side
After the first side is seared, use tongs to flip the steak over. Tongs provide more control than a spatula and prevent piercing the steak, which can lead to moisture loss. Sear the other side for another 2-3 minutes.
(Part 6) Time for the Sides: Elevate Your Steak Game
While the steak is searing, take advantage of the heat and start cooking any side dishes you plan to serve with it. I love to pair my steaks with roasted vegetables, creamy mashed potatoes, or a simple salad.
One of my go-to side dish combinations is roasted asparagus and creamy mashed potatoes. The asparagus adds a refreshing contrast to the richness of the steak, while the mashed potatoes provide a comforting and satisfying base.
(Part 7) The Rest: A Crucial Step for juicy steak
Once the steak is seared on both sides, it's time to give it a well-deserved rest. This is a crucial step that many people skip, but it's essential for a juicy and flavorful steak.
The Science Behind Resting: Redistributing Juices for Flavor
When you rest a steak, the juices redistribute throughout the meat. This means when you cut into it, you'll get a more juicy and tender bite. I always rest my steak for at least 5-10 minutes before slicing.
A Warm Haven for Resting: Protecting Your Culinary Creation
I like to rest my steak on a cutting board, covered with a piece of aluminum foil. This helps to keep the steak warm while it rests, preventing it from cooling down too quickly.
(Part 8) The Big Reveal: Time to Slice and Enjoy
After resting, it's finally time to slice your steak and enjoy the fruits of your labor. I like to cut my steaks against the grain, which helps to make them more tender and easier to chew.
Now, sit back, relax, and savor that delicious juicy steak you've created.
(Part 9) Temperature Guide: The Doneness You Crave
Knowing how to judge the doneness of your steak is crucial for achieving your desired level of tenderness and flavor. There are different methods for checking doneness, but a meat thermometer is the most accurate and consistent way to ensure your steak is cooked perfectly.
The Doneness Chart: Finding Your Perfect Match
| Doneness | internal temperature (°F) | Internal Temperature (°C) | Description |
|---|---|---|---|
| Rare | 125-130 | 52-54 | Cool red center with a warm outer ring |
| Medium Rare | 130-135 | 54-57 | Red center with a pink outer ring |
| Medium | 135-140 | 57-60 | Pink center with a brown outer ring |
| Medium Well | 140-150 | 60-65 | Slightly pink center with a brown outer ring |
| Well Done | 150-160 | 65-71 | No pink, fully brown center |
(Part 10) FAQs: Answering Your Burning Questions
Q1: Can I use a cast iron skillet on the stovetop and in the oven?
Absolutely! One of the best things about cast iron is its versatility. You can use it on the stovetop for searing and then transfer it directly to the oven to finish cooking your steak to your desired doneness. It's a seamless transition for perfect results.
Q2: What if I don’t have a meat thermometer?
You can use the touch test to get a general idea of your steak's doneness. Press your finger on the center of the steak. If it feels firm, it's well done. If it feels soft and spongy, it's rare. Remember, this method is less accurate than using a meat thermometer, but it can be helpful in a pinch.
Q3: What’s the best way to clean my cast iron after cooking a steak?
After the steak is cooked, let the cast iron cool down completely before cleaning it. You can then use a scrub brush and hot water to remove any food residue. Avoid using soap as it can strip away the seasoning. Once the pan is clean, dry it thoroughly and apply a thin coating of oil to protect the seasoning.
Q4: Can I cook other things besides steak in my cast iron skillet?
Yes! cast iron skillets are incredibly versatile and can be used for a wide range of cooking tasks. You can sear vegetables, bake bread, fry eggs, and even make delicious desserts like cornbread. It's a truly multi-functional tool for your kitchen.
Q5: What are some other tips for cooking the perfect cast iron steak?
Here are a few more tips to help you master the art of the perfect cast iron steak:
- Use High Heat: For a crispy crust, get the pan really hot before adding the steak.
- Don't Overcrowd the Pan: Make sure there's enough space in the pan so the steak has room to sear properly. Overcrowding the pan can lead to uneven cooking.
- Let the Steak Rest: Resting your steak is crucial for a juicy and flavorful result. Don't skip this step!
- Experiment with Seasonings: Don't be afraid to get creative with your seasonings. Try different combinations to find your favorite flavor profiles.
- Practice Makes Perfect: The more you cook steaks in cast iron, the more comfortable you'll become with the process. Don't be afraid to make mistakes – that's how you learn and improve.
So there you have it, my comprehensive guide to cooking the perfect cast iron steak. I hope you give it a try and experience the deliciousness for yourself. Happy cooking!
Everyone is watching

How to Cook Frozen Lobster Tails Perfectly: A Step-by-Step Guide
RecipesLobster. Just the word conjures up images of lavish meals, special occasions, and a taste of luxury. But let's...

Pigs in a Blanket Cooking Time: How Long to Bake for Perfect Results
RecipesAh, pigs in a blanket. Just the name conjures up images of those delightful little parcels of crispy pastry en...

Pork Fillet Cooking Time: How Long to Cook It Perfectly
RecipesPork fillet, or tenderloin as it's sometimes called, is a real favourite in our house. It's so versatile, and...

The Ultimate Guide to Cooking Delicious Frankfurters
RecipesLet's face it, we all love a good frankfurter. It's a classic, simple, and always satisfying. But let's be rea...

Wolf Meat Recipes: A Guide to Cooking Wild Game
RecipesLet's be honest, you don't see wolf meat at your local butcher shop every day. It's a bit of a wild card, but ...