(Part 1) choosing the right cut
The first step towards that perfect steak is selecting the right cut of meat. Each cut has unique characteristics – tenderness, flavour, fat content – all impacting how it cooks and its final texture. Understanding these differences is essential for choosing the perfect cut for your needs and cooking style.
Understanding steak cuts
Here's a breakdown of some of the most popular steak cuts, their defining characteristics, and how they best shine:
1. Ribeye
Ah, the Ribeye – the undisputed king of steak for many. This cut is renowned for its luxurious marbling, the beautiful swirls of fat that infuse the meat with rich, buttery flavour. It’s a thick cut, perfect for grilling or pan-searing, resulting in that melt-in-your-mouth tenderness that steak dreams are made of.
2. new york strip
Another classic choice, the New York Strip boasts a leaner profile compared to the Ribeye, offering a robust, more pronounced flavour. Its well-defined grain adds a lovely texture to the bite. It's equally adept at grilling or pan-searing, making it a versatile option. However, remember, the marbling is less pronounced, so you might find it slightly less tender than a Ribeye.
3. filet mignon
For a truly luxurious experience, look no further than the Filet Mignon. This tender, lean cut is renowned for its delicate flavour and unparalleled tenderness. Its small size makes it ideal for pan-searing or grilling to a medium-rare finish, allowing the natural flavour to shine through. However, it's quite delicate, so keep a watchful eye to avoid overcooking.
4. Sirloin
The Sirloin is a versatile option, offering a good balance of flavour and tenderness. It's a great choice for both grilling and pan-searing, and its thickness can vary, ranging from thin to thick. The thicker the cut, the better it holds its moisture during cooking, ensuring a juicier result.
5. skirt steak
This long, thin cut is known for its bold, robust flavour and chewy texture. It's best enjoyed sliced thinly against the grain, highlighting the delicious flavour and making it easier to chew. Skirt Steak shines when grilled or stir-fried, making it a great option for fajitas or other flavorful dishes.
6. flank steak
A close relative of Skirt Steak, Flank Steak is another thin cut with a bold, robust flavour. It's often marinated before cooking, as the marinade helps tenderize the meat and infuse it with extra flavour. Flank Steak is also great for grilling or pan-searing and, like Skirt Steak, is best sliced thinly against the grain after cooking.
7. Tenderloin
A more budget-friendly alternative to the Filet Mignon, the Tenderloin offers a similar tenderness and delicate flavour. While it might not be as marbled as the Filet Mignon, it's still a fantastic choice for grilling or pan-searing, especially if you're looking for a leaner option.
(Part 2) Preparing Your Steak for Cooking
Once you've chosen your perfect cut, it's time to get it ready for cooking. This involves a few key steps to ensure even cooking and enhance the natural flavour of the steak.
1. Bringing Your Steak to Room Temperature
A crucial step that many overlook is bringing your steak to room temperature before cooking. This simple act allows the meat to cook evenly, preventing it from being cold in the center while the exterior is cooked. It’s like giving the steak a little warm-up before its star turn. For thicker cuts, aim for 30-45 minutes on the counter, while thinner cuts only need 15-20 minutes.
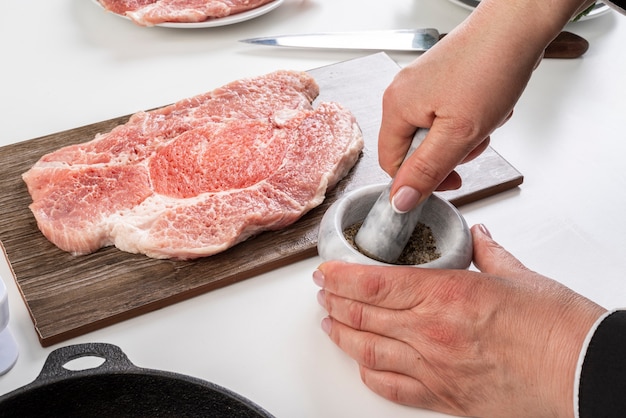
2. Seasoning Your Steak
When it comes to seasoning, less is often more. Salt and freshly ground black pepper are your best friends, enhancing the natural flavour of the steak. A good quality kosher salt will help draw out moisture and season evenly, while freshly ground black pepper adds a burst of intense flavour.
Feel free to experiment with other spices – garlic powder, onion powder, paprika, herbs like rosemary or thyme – but use them sparingly. The goal is to enhance, not overpower, the steak's natural flavour. Remember, apply the seasoning just before cooking, allowing the salt to work its magic and draw out moisture for a more flavorful result.
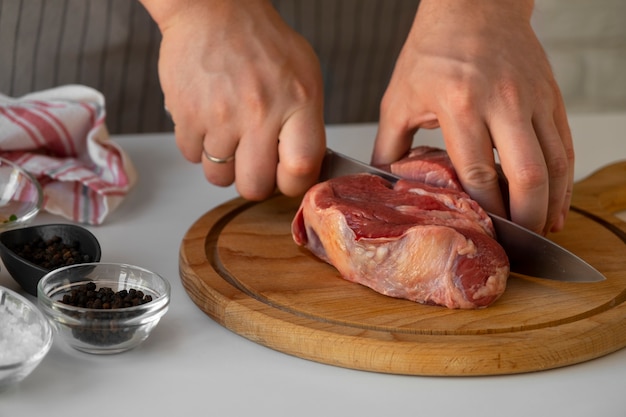
3. Patting the Steak Dry
Before you start cooking, pat your steak dry with paper towels. This seemingly simple step is crucial for achieving a beautiful sear, preventing excess moisture from forming steam and hindering browning. A dry surface helps create a crispier, more flavorful crust, adding depth and texture to your steak.
(Part 3) Understanding Doneness
The most important aspect of cooking steak is understanding the desired level of doneness. From a rare, cool center to a well-done, fully cooked interior, each level of doneness has its own unique temperature range and texture. It's about finding the perfect balance between tenderness and flavour, a sweet spot where the steak is cooked to your personal preference.
The Doneness Chart
The following table outlines the internal temperature and doneness levels, offering a visual guide for achieving your desired level of doneness:
| Doneness | Internal Temperature (°F) | Internal Temperature (°C) | Description |
|---|---|---|---|
| Rare | 125-130 | 52-54 | Cool centre, red, almost raw |
| Medium Rare | 130-135 | 54-57 | Warm centre, red with a hint of brown |
| Medium | 135-140 | 57-60 | Pink centre, evenly cooked |
| Medium Well | 140-145 | 60-63 | Slightly pink centre, cooked through |
| Well Done | 145-150 | 63-66 | No pink, fully cooked |
These are just guidelines. The best way to ensure you achieve your desired level of doneness is to use a meat thermometer. Insert the thermometer into the thickest part of the steak, avoiding bone or fat, and leave it in for 10-15 seconds for an accurate reading.
While many find their steak nirvana in medium-rare, with its juicy, pink center, ultimately, the level of doneness is entirely subjective. Experiment and find what suits your palate best!
(Part 4) Mastering the Grill
There's something magical about grilling a steak – the smoky aroma, the satisfying sizzle, the char marks that tell the story of a perfect cook. But grilling a steak isn't just about throwing it on the grill and calling it a day. It's about creating a symphony of flavour, a dance between heat and meat that results in steak perfection.
1. Preheating Your Grill
The key to a successful grill is a hot, preheated surface. For gas grills, aim for a temperature of 450-500°F (232-260°C), and for charcoal grills, medium-high heat. You want the grill to be screaming hot, ready to sear the steak and create those beautiful char marks.
2. Greasing the Grill Grates
To prevent your steak from sticking to the grates, lightly oil them with a little vegetable or canola oil. You can use a folded paper towel to apply the oil evenly, ensuring an even coating across the grilling surface.
3. Placing Your Steak
Once the grill is hot and ready, carefully place your steak on the grates. Leave some space between each steak, allowing for even cooking and air circulation. Avoid overcrowding the grill, as this will lead to uneven cooking and steam build-up, hindering browning.
4. Avoiding Flipping Too Often
Resist the urge to flip your steak every few seconds. Let it sear for 3-4 minutes on each side, or until a nice crust has formed. This allows for proper browning and the development of that delicious, crispy crust.
5. Checking for Doneness
After the initial searing, use your trusty meat thermometer to check for doneness. If your steak isn't cooked to your liking, move it to a cooler part of the grill or remove it from the heat. You don’t want to overcook it.
6. Resting Your Steak
Once cooked to perfection, allow your steak to rest for 5-10 minutes before slicing and serving. This allows the juices to redistribute evenly, resulting in a more tender and juicy steak. Resting also helps the steak cool slightly, making it easier to cut and enjoy.
(Part 5) Searing in a Pan
For those who prefer indoor cooking or don't have access to a grill, pan-searing is a fantastic alternative. With the right technique, you can achieve a restaurant-quality sear in your own kitchen.
1. Using the Right Pan
A heavy-bottomed cast iron pan or a stainless steel pan is ideal for pan-searing. These pans distribute heat evenly, creating a consistent sear. Ensure the pan is large enough to accommodate the steak without overcrowding it.
2. Heating the Pan
Heat the pan over medium-high heat until it's very hot. You should see a wisp of smoke rising from the pan, indicating it's ready for the steak. This intense heat is crucial for achieving a beautiful sear.
3. Adding Oil
Add a tablespoon or two of oil to the hot pan. Choose a high-heat oil with a high smoke point, such as canola oil, vegetable oil, or grapeseed oil, as they can withstand the high temperatures without burning.
4. Placing the Steak
Carefully place the steak in the hot pan. The steak should sizzle immediately upon contact, a sure sign of a hot pan. Listen for that satisfying sizzle – it's music to a steak lover's ears.
5. Sear the Steak
Let the steak sear for 3-4 minutes per side, or until a beautiful crust has formed. Resist the urge to flip it too often. Let it develop that rich, golden-brown crust before flipping it to the next side.
6. Checking for Doneness
After searing, use your meat thermometer to check for doneness. If needed, reduce the heat and continue cooking to your desired level. Remember, it's better to undercook slightly than overcook, so err on the side of caution.
7. Resting the Steak
Once cooked, remove the steak from the pan and let it rest for 5-10 minutes before slicing and serving. Resting allows the juices to redistribute, resulting in a more tender and juicy steak.
(Part 6) Adding a Burst of Flavour
While salt and pepper are the foundation of a great steak, there are countless ways to elevate its flavour. Experiment with these techniques to add a touch of magic to your steak:
1. Marinades
Marinades are a great way to add moisture and depth of flavour to your steak. They infuse the meat with a symphony of tastes, making it more tender and flavorful. You can use store-bought marinades or create your own using soy sauce, olive oil, garlic, ginger, herbs, and spices. Marinate your steak for at least 30 minutes, or up to overnight, for optimal results.
2. Rubs
dry rubs are a fantastic way to create a flavorful crust on your steak. These blends of spices, herbs, and sometimes even sugar, add a layer of complexity and deliciousness to the finished product. Popular ingredients include paprika, garlic powder, onion powder, black pepper, cumin, and brown sugar. Apply the rub generously, ensuring it coats the entire steak evenly.
3. Sauces
A sauce can elevate your steak to new heights. Whether you prefer a classic Béarnaise, a tangy chimichurri, or a rich peppercorn sauce, sauces add another dimension of flavour and complement the steak's natural goodness. Experiment with different sauces to find your favourite.
4. Toppings
Toppings are a fun way to add a touch of personality to your steak. From blue cheese crumbles to roasted garlic, caramelized onions, mushrooms, and even a fried egg, toppings offer a burst of flavour and texture. Choose toppings that complement the steak's flavour and your personal preferences.
(Part 7) Serving Your Steak
After all your hard work, it's time to enjoy your culinary masterpiece. Serving your steak properly adds the final touch to this delicious experience.
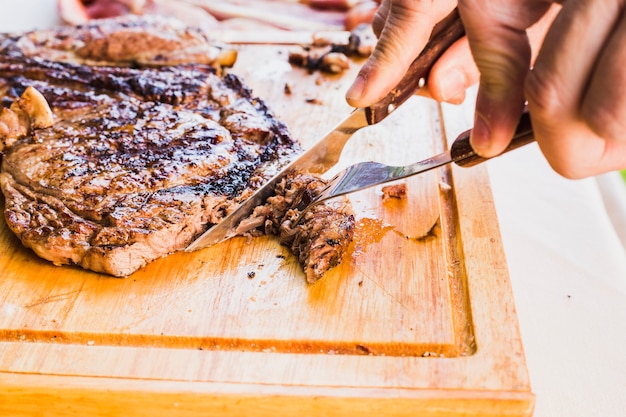
1. Slicing Your Steak
Once your steak has rested, slice it against the grain. This helps to tenderize the meat and makes it easier to chew. Use a sharp knife for clean, even cuts, ensuring every bite is a delight.
2. Choosing the Right Sides
A perfect steak deserves equally delicious accompaniments. Consider classic side dishes that complement the steak’s flavour, such as mashed potatoes, roasted vegetables, asparagus, or a green salad. These side dishes add variety and balance to your meal.
3. Presentation Matters
Don't underestimate the power of presentation. Arrange your steak and sides attractively on a plate, adding a touch of greenery or a sprinkle of herbs for visual appeal. A beautiful presentation enhances the dining experience, making the meal feel more special and enjoyable.
(Part 8) FAQs
You've got questions? I've got answers! Here are some frequently asked questions about cooking the perfect steak:
1. Can I reuse the same pan for vegetables?
Absolutely! You can reuse the same pan to cook vegetables after searing your steak. The pan will have absorbed the delicious steak juices, adding extra flavour to the veggies. Just make sure to wipe the pan clean of any excess fat or debris before adding the vegetables.
2. How long should I rest my steak?
Resting your steak for 5-10 minutes after cooking is essential. It allows the juices to redistribute evenly, resulting in a more tender and juicy steak. Resting also helps the steak cool slightly, making it easier to slice and enjoy.
3. What's the best way to store leftover steak?
Store any leftover steak in an airtight container in the refrigerator for up to 3-4 days. You can reheat it in the oven or microwave, but avoid overcooking. Leftover steak can also be used in salads, sandwiches, or stir-fries, adding a touch of flavour and protein to these dishes.
4. Can I freeze steak?
Yes, you can freeze steak. It's best to freeze it before it's been thawed. Wrap the steak tightly in plastic wrap or freezer paper, and store it in a freezer-safe bag. Frozen steak can last for up to 3-4 months. Thaw it in the refrigerator overnight before cooking.
5. What if my steak is overcooked?
Don’t panic if you’ve overcooked your steak. It happens to the best of us! While it won’t be as tender as a perfectly cooked steak, you can still enjoy it. Slice it thinly and use it in a dish like a stir-fry or pasta, where the texture is less important. You can also use overcooked steak in a stew, where the flavour will still shine through.
Final Thoughts
Cooking the perfect steak is a journey, not a destination. Embrace the process, experiment with different cuts, seasonings, and techniques, and most importantly, enjoy the journey to steak nirvana. Don't be afraid to explore new flavours, find what suits your taste buds, and embrace the joy of cooking a delicious, perfectly cooked steak. So, grab your favourite cut, fire up the grill, and let's get cooking!
Everyone is watching

How to Cook Frozen Lobster Tails Perfectly: A Step-by-Step Guide
RecipesLobster. Just the word conjures up images of lavish meals, special occasions, and a taste of luxury. But let's...

Pigs in a Blanket Cooking Time: How Long to Bake for Perfect Results
RecipesAh, pigs in a blanket. Just the name conjures up images of those delightful little parcels of crispy pastry en...

Pork Fillet Cooking Time: How Long to Cook It Perfectly
RecipesPork fillet, or tenderloin as it's sometimes called, is a real favourite in our house. It's so versatile, and...

The Ultimate Guide to Tender, Juicy Pulled Pork
RecipesRight, let's talk pulled pork. It's one of those dishes that just screams "comfort food," doesn't it? I mean...

The Ultimate Guide to Cooking Sweet Potatoes: From Roasting to Mashing
RecipesSweet potatoes. Just the name conjures up images of warm, comforting dishes, bursts of vibrant color, and a to...