There’s a certain magic to a perfectly cooked soft-boiled egg. The velvety runny yolk, the tender yet firm white, a bite that melts on your tongue – it’s a culinary symphony of textures. I’ve been on a personal quest for the ideal soft-boiled egg for years, trying countless methods and timings. It's been a journey, a bit like an egg-cellent adventure, where each attempt has brought me closer to the perfect bite.
This article is your guide to mastering this simple yet surprisingly nuanced art. We'll explore the stages of doneness, perfect water temperatures, and, of course, the crucial timing. I'll even share my personal tips and tricks, gathered from years of experimentation (and a few egg-streme disasters). So, grab your egg timer, a pan of cold water, and let's get started.
(Part 1) The Anatomy of a Soft-Boiled Egg: A Love Affair with Textures
The Yolk – The Star of the Show
The yolk is the heart of the matter, the reason we're all here, a gloriously runny, vibrant yellow center that makes this dish so special. A well-cooked soft-boiled egg has a yolk that’s luxuriously runny, almost like a custard – creamy and vibrant, but not liquid. It’s the ultimate textural contrast, a delightful combination of creamy richness and delicate firmness.
The White – The Supportive Role
The white plays a crucial supporting role, providing structure and texture. It should be set, not rubbery or hard, offering a gentle resistance as you cut into it. It holds its shape but still has a bit of give, creating that perfect harmony of textures with the runny yolk. It's like a delicate framework for the star of the show.
(Part 2) Getting Started: The Essentials for Soft-Boiled Egg Success
Now, let's talk about the essentials you need to achieve soft-boiled egg perfection. It's a simple process, but like any good recipe, it demands the right ingredients and tools.
- fresh eggs: Fresh eggs are absolutely crucial. The older an egg is, the more likely the white is to become rubbery and tough. Aim for eggs that are no more than a week old for the best results.
- A Saucepan: You'll need a saucepan large enough to comfortably hold your eggs, with enough space for the water to circulate evenly.
- Cold Water: Start with cold water – this ensures the eggs heat up gently and evenly, preventing cracks and a tough white.
- Egg Timer: Your trusty egg timer is your best friend here, as timing is everything. Pick a timer that's easy to use and has a loud enough alarm so you don't miss the perfect moment.
- Ice water bath: This is crucial. An ice bath immediately stops the cooking process, ensuring the white remains tender and prevents the yolk from becoming overcooked.
- Salt: A pinch of salt in the water helps prevent the eggs from cracking, plus it adds a subtle flavor to the eggs.
(Part 3) The Art of Timing: A Guide to Egg Perfection
Now, let's get to the heart of the matter – timing. This is where the magic happens, where you transform a simple egg into a culinary masterpiece. The perfect soft-boiled egg is a matter of precision. Here's a guide based on the level of doneness you're aiming for:
| Doneness | Time | Description |
|---|---|---|
| Very Runny Yolk | 2-3 minutes | The yolk is very runny, almost liquid, while the white is still translucent and very soft. |
| Runny Yolk | 3-4 minutes | The yolk is soft and runny, with a creamy texture, while the white is slightly set but still tender. |
| Slightly Runny Yolk | 4-5 minutes | The yolk is still runny but starting to firm up around the edges, while the white is firm and holds its shape. |
| Creamy Yolk | 5-6 minutes | The yolk is firm around the edges, but still creamy in the center, offering a delightful combination of textures. The white is fully firm, providing a gentle structure. |
| Hard Yolk | 6-7 minutes | The yolk is completely firm, while the white is also fully firm, resulting in a traditional hard-boiled egg. |
Remember, these are just guidelines. Everyone has their own preference, so don't be afraid to experiment and find your perfect timing.
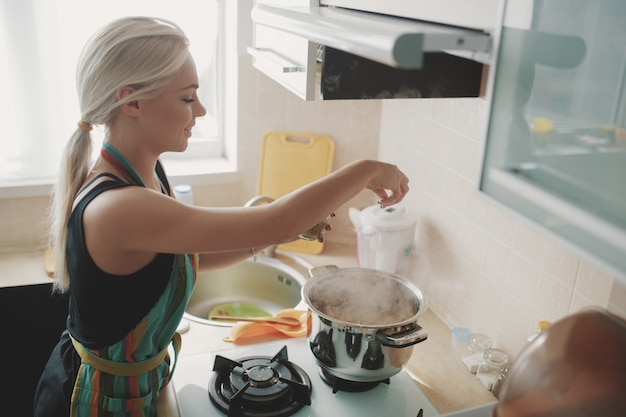
(Part 4) The Boiling Process: The Art of Gentle Cooking
Now, you've got your eggs, your water, your timer – you're ready to start. But remember, gentle cooking is key here. It's not about a rapid boil, but a slow, controlled heat that transforms the egg without hardening the white.
- Start with Cold Water: Fill your saucepan with enough cold water to cover the eggs by an inch or two. You want the eggs to heat up slowly and evenly.
- Add Salt: Add a pinch of salt to the water. This helps prevent cracking and adds a subtle flavor to your eggs.
- Gently Add Eggs: Carefully place your eggs in the pan, ensuring they are submerged in the water. Don't drop them in; gently lower them in to prevent cracking.
- Bring to a Simmer: Bring the water to a simmer, not a full boil. You want gentle heat, not a raging frenzy. If you see any bubbles breaking the surface, turn the heat down a notch.
- Start Your Timer: Once the water reaches a simmer, set your timer according to your desired level of doneness.
(Part 5) The Ice Bath: Quenching the Cooking Process
The timer has gone off – it's time for the next crucial step. The ice bath is like a culinary first-aid, immediately stopping the cooking process. This ensures your white is perfectly set, not rubbery or tough, and prevents the yolk from overcooking.
- Prepare Your Ice Bath: Fill a large bowl with ice water. The colder the water, the better.
- Transfer the Eggs: Carefully transfer the eggs from the hot water to the ice bath using a slotted spoon.
- Cool Them Down: Let the eggs sit in the ice bath for about 5 minutes, or until they are completely cool. This helps create a delicious, soft texture.
(Part 6) The Big Reveal: Peeling and Enjoying Your Soft-Boiled Egg
You've done it – you've followed the steps, waited patiently, and now it's time to reveal your masterpiece. But remember, peeling a soft-boiled egg is an art form. You don't want to end up with a mangled mess.
- Tap it Gently: Tap the base of the egg gently on a hard surface to create a small crack.
- Roll it Around: Roll the egg gently between your hands to loosen the shell. You can also give it a little spin.
- Peel Carefully: Start peeling from the crack you made. Work slowly and gently, peeling away the shell in small pieces. If the shell is stubbornly attached, you can add the egg back to the ice bath for a few minutes to loosen it further.
(Part 7) The Final Touch: Elevating Your Soft-Boiled Egg
Your egg is peeled, it's looking beautiful, but let's add a little something extra to elevate your creation. This is where you can personalize your soft-boiled egg and make it truly shine.
- Salt and Pepper: A sprinkle of salt and pepper adds a classic touch. For a more robust flavor, try a pinch of smoked paprika or a dash of cayenne pepper.
- Butter: A knob of butter, melted over the top, adds richness and creaminess to the yolk, creating a luxurious and decadent experience.
- Toasted Bread Soldiers: Dip your toast soldiers into the runny yolk for a classic and satisfying snack.
- Fresh Herbs: A sprig of fresh parsley or chives adds a touch of freshness, contrasting beautifully with the rich yolk.
- Hot Sauce: For those who like a bit of heat, a dash of hot sauce is a great addition, adding a kick to the creamy texture.
- Other Toppings: Get creative! Experiment with crumbled bacon, chopped avocado, or a sprinkle of sesame seeds for added flavor and texture.
(Part 8) The Soft-Boiled Egg: A culinary adventure
And there you have it – you've cracked the code of the perfect soft-boiled egg. It's not just a simple breakfast or snack, it's a culinary adventure. Now, go forth and experiment! Explore different timings, try new toppings, and find your perfect egg-cellent combination.
(Part 9) FAQs
You've got questions, I've got answers. Here are a few frequently asked questions about soft-boiled eggs:
1. What if my eggs crack during boiling?
Don't panic! Sometimes eggs crack, especially if you're using older eggs or if you add them to the boiling water too quickly. If an egg cracks, gently lower the heat and keep a close eye on it. If the crack seems to be getting bigger, you can scoop the egg out with a slotted spoon. The crack won't significantly affect the taste or texture of the egg.
2. How do I know when the egg is done?
The best way to know when your egg is done is to use a timer. But if you don't have one, you can use the "float test." A cooked egg will float to the surface of the water. However, this test isn't perfect, as the white might set before the yolk reaches your desired doneness. Use a timer for the most accurate results.
3. Can I use room temperature eggs instead of cold eggs?
You can, but cold eggs are generally recommended. Cold eggs are less likely to crack during the boiling process. Room temperature eggs will cook slightly faster, so you may need to adjust your timing.
4. What happens if I overcook my eggs?
If you overcook your eggs, the yolk will become hard and the white will become rubbery. While not ideal, it's not the end of the world. Overcooked eggs can still be used in other dishes like egg salad or deviled eggs.
5. How can I prevent the eggs from sticking to the bottom of the pan?
A pinch of salt in the water helps prevent the eggs from sticking. You can also add a tablespoon of vinegar to the water. The vinegar slightly acidifies the water, making it harder for the egg whites to stick to the pan.
Everyone is watching

How to Cook Frozen Lobster Tails Perfectly: A Step-by-Step Guide
RecipesLobster. Just the word conjures up images of lavish meals, special occasions, and a taste of luxury. But let's...

Pork Fillet Cooking Time: How Long to Cook It Perfectly
RecipesPork fillet, or tenderloin as it's sometimes called, is a real favourite in our house. It's so versatile, and...

Pigs in a Blanket Cooking Time: How Long to Bake for Perfect Results
RecipesAh, pigs in a blanket. Just the name conjures up images of those delightful little parcels of crispy pastry en...

The Ultimate Guide to Cooking Delicious Frankfurters
RecipesLet's face it, we all love a good frankfurter. It's a classic, simple, and always satisfying. But let's be rea...

Wolf Meat Recipes: A Guide to Cooking Wild Game
RecipesLet's be honest, you don't see wolf meat at your local butcher shop every day. It's a bit of a wild card, but ...