Let's talk about BBQ, the kind that involves a roaring charcoal grill, the smell of smoke filling the air, and the promise of a truly delicious meal. I've been grilling for years, and I can tell you, there's a certain magic to it. It's not just about cooking; it's about creating an experience - from the sizzling sounds to the smoky aromas. Who doesn't love the satisfaction of a perfectly cooked steak or juicy burger, knowing you conjured it up yourself? So, grab your tongs, fire up your grill, and let's embark on a journey to become masters of the charcoal grill together! I'll share the tips, tricks, and secrets I've learned over the years to help you create unforgettable BBQ feasts.
(Part 1) Choosing Your Charcoal Grill: The Foundation of Your BBQ Empire
The first step in building your BBQ empire is choosing the right grill. Think of it like picking the perfect canvas for your culinary masterpiece. You wouldn't attempt a grand portrait with a tiny finger-painting set, would you? So, let's get this right.
types of charcoal Grills: Navigating the BBQ Landscape
The world of charcoal grills is vast and exciting, with each type offering unique advantages. Let's break down the most popular choices:
- Kettle Grills: They're the classic, reliable workhorses of the BBQ world, like a trusty old friend. Kettle grills are affordable, easy to use, and come in various sizes. I've got one myself, and it's seen me through countless BBQ gatherings, from intimate family dinners to epic backyard bashes.
- offset smokers: These are the big boys, the serious pitmasters' tools. Designed for slow cooking and smoking, they impart a smoky, tender, and incredibly flavorful quality to your food. Think slow-smoked ribs melting off the bone or perfectly pulled pork.
- Kamado Grills: These egg-shaped wonders are gaining popularity for a reason. They offer incredible temperature control, allowing you to grill, smoke, bake, and even roast. It's like having a multi-talented chef in your backyard!
- Barrel Grills: True to their name, these grills are built from barrels, giving them a rugged, sturdy feel. They're excellent for handling high temperatures, making them ideal for searing steaks and burgers.
I've experimented with each of these grill types, and I can confidently say they all have their unique charms and quirks. It's like finding the right musical instrument - some suit your style better than others.
Choosing the Right Size: Catering to Your BBQ Needs
Now, size does matter. Don't get me wrong, I love a big BBQ, but you need to consider how many people you're typically feeding and the size of the food you'll be cooking. For a family of four, a 22-inch kettle grill will likely be more than enough. But if you're a grilling enthusiast who loves hosting large gatherings, you'll want to go for a larger size. Think of it like choosing the right size pot for your meal - you wouldn't cook a stew in a tiny saucepan, would you?
Features to Consider: Adding Convenience and Control
Beyond the basic grill types, there are additional features that can significantly enhance your grilling experience. Think of them as the extra tools in your BBQ arsenal:
- Ash Catcher: A good ash catcher is a lifesaver, making clean-up a breeze. No more struggling to sweep up ashes, leaving you more time to enjoy your BBQ.
- Temperature Gauge: A temperature gauge is essential for maintaining precise control over the heat inside your grill. It's like having a little thermometer for your culinary world, ensuring your food cooks perfectly.
- Adjustable Vents: Adjustable vents are your secret weapons for fine-tuning the airflow and heat levels. They're like the dials on your grill's control panel, allowing you to create the ideal cooking environment.
- Side Tables: Side tables provide a handy surface for prepping your food and keeping things organized. No more scrambling for counter space, making your grilling experience more efficient and less chaotic.
- Removable Grill Grates: Removable grill grates make cleaning a cinch. Simply lift them out, give them a scrub, and pop them back in. It's like having a dishwasher for your grill!
These features are like the finishing touches on your BBQ masterpiece, making your grilling experience more enjoyable and efficient.
(Part 2) Charcoal and Fire: The Heartbeat of Your BBQ Experience

Now that you have your grill, it's time to get the fire going. This is where the real magic happens, the moment your BBQ adventure truly begins. Think of the charcoal as the fuel for your culinary creativity. Choosing the right type of charcoal is like selecting the right ingredients for your dish - it can make or break your BBQ experience.
Types of Charcoal: Fueling Your BBQ Dreams
There are a few key types of charcoal to choose from, each with its own unique characteristics:
- Lump Charcoal: This charcoal burns hotter and cleaner than briquettes, producing less ash and a more natural flavor. It's my go-to choice for most grilling occasions.
- Briquettes: Briquettes are often cheaper and more consistent in shape, which can be handy for certain cooking methods. However, they sometimes have a slightly artificial flavor.
- Charcoal with Flavorings: Some charcoals come with added flavors like mesquite or hickory. While they can add a smoky taste to your food, I generally prefer using natural charcoal and adding my own wood chips for a more controlled flavor. It's like being the chef and the flavor architect, crafting your perfect smoky aroma.
Think of charcoal as the secret ingredient that elevates your BBQ game. Experiment with different types to find what suits your taste and grilling style.
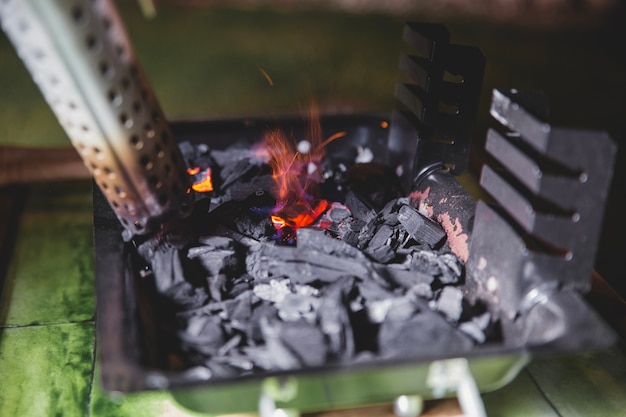
Building the Fire: Unleashing the Power of Heat
Now, let's talk about fire. There are two main methods, each with its own purpose and application:
- Direct Heat: This involves placing your food directly over the flames. It's ideal for searing steaks, burgers, and quick-cooking dishes, creating a delicious crust and locking in juices.
- Indirect Heat: Here, the food is placed away from the direct heat, usually in the indirect zone of your grill. This method is perfect for slow cooking, smoking, and larger cuts of meat, allowing for gentle, even cooking and tender, flavorful results.
I typically start with direct heat, getting the grill good and hot, and then shift to indirect heat for longer cooking. It's a balancing act between intensity and patience, a dance between fire and food.
Using a Chimney Starter: Making Lighting a Breeze
A chimney starter is a BBQ hero, making lighting your charcoal a breeze. Simply fill it with charcoal, place crumpled pieces of newspaper underneath, and light it up. Once the charcoal is glowing red-hot, you're ready to grill! It's a quick and efficient way to get your fire going without any fuss.
Maintaining the Fire: A Constant Watch
Once your charcoal is burning, it's essential to keep an eye on the temperature. Use a grill thermometer, or you can judge it by the color of the coals. A bright red glow means it's hot, while a dull red means it's cooler. Think of it like a campfire – you want to keep the flames dancing, but not raging out of control.
(Part 3) Understanding Temperature Control: The Key to Culinary Mastery
Now that you've got a roaring fire, let's discuss temperature control, the crucial factor that separates good BBQ from amazing BBQ. Controlling the temperature ensures your food cooks evenly and stays juicy and tender. Think of it as the thermostat in your culinary world, keeping everything balanced and perfect.
Using a Grill Thermometer: Your BBQ Compass
A grill thermometer is a must-have. It's like a little guide, telling you what's happening inside your grill. I swear by mine! It allows you to monitor the temperature and make adjustments as needed, ensuring your food cooks perfectly.
Managing Heat Zones: Taming the Flames
One of the key techniques for temperature control is creating heat zones. Essentially, you're controlling the intensity of the fire in different parts of the grill. Think of it like zoning your backyard – you have sunny spots for lounging and shady spots for picnics.
For example, you could have a high heat zone over the direct flames for searing steaks and a cooler zone further away for slow-cooking ribs. It's about harnessing the power of fire, directing its intensity to create the ideal cooking environment for your food.
Adjusting Vents: Controlling the Flow
Remember those adjustable vents I mentioned earlier? Well, they are your secret weapons for fine-tuning the temperature.
By opening and closing the vents, you control the airflow and oxygen feeding the fire, which directly impacts the heat. It's like a dance between air and fire! You're the conductor, orchestrating the flames to achieve the perfect temperature for your culinary masterpiece.
Managing the Charcoal: Feeding the Flame
As the charcoal burns, you'll need to add more to maintain the heat. You can add charcoal to the hot zone or move the coals around to even out the heat distribution. It's like tending to a campfire, keeping the embers alive and glowing.
I usually add a few pieces at a time and monitor the temperature closely. It's a bit of a dance, but once you get the hang of it, it becomes second nature, a seamless flow of fire and food.
(Part 4) Grilling Techniques: Mastering the Basics of BBQ
Now that you have the fundamentals down, it's time to dive into some specific grilling techniques. Get ready to unleash your inner pitmaster!
Preheating the Grill: Setting the Stage
Before you even think about tossing your food on the grill, make sure you preheat it properly. A hot grill is crucial for getting that delicious sear and preventing your food from sticking. Think of it as warming up your stage for a culinary performance.
I typically preheat my grill for about 15 minutes until the charcoal is glowing red-hot and the temperature reaches at least 450°F.
Seasoning Your Grill: Creating a Non-Stick Surface
Think of seasoning your grill as a way to prevent food from sticking and add a nice layer of flavor. There are two main ways to do this:
- Oil-Based Seasoning: I usually brush my grill grates with a thin layer of vegetable oil or canola oil to prevent sticking. It's like creating a non-stick surface for your food, ensuring a smooth cooking experience.
- Water-Based Seasoning: If you're concerned about oil smoke, try soaking a paper towel in water and then wiping down the grill grates. It's a simple, smoke-free alternative.
Once you’ve seasoned your grill, you’re ready to cook!
Using the Right Tools: Your BBQ Toolkit
Having the right tools makes a world of difference. Here are a few essentials:
- Grill Tongs: Good quality tongs are crucial for safely flipping and moving food around the grill. It's like having a pair of hands for your BBQ, allowing you to maneuver your food with precision.
- Grill Brush: A grill brush is your best friend when it comes to cleaning up after your BBQ. It's like a scrub brush for your grill, keeping it clean and ready for the next grilling adventure.
- meat thermometer: It’s essential for ensuring your food is cooked to the perfect temperature, especially for meats like chicken and pork. Think of it as a temperature sensor for your culinary masterpiece.
- Spatula: A spatula is great for lifting burgers or steaks off the grill and serving them without them falling apart. It's like a gentle hand, lifting your food with care and precision.
- Grill Gloves: These protect your hands from the heat while you’re working on the grill. It's like a shield for your hands, allowing you to handle hot food without any discomfort.
(Part 5) The Art of Grilling: Different Techniques to Elevate Your BBQ
Now, let's delve into the art of grilling, exploring different techniques to elevate your BBQ game.
Direct Grilling: Quick and Hot for Deliciously Seared Flavor
Direct grilling is the go-to method for searing steaks, burgers, chicken breasts, and other thin cuts of meat. It involves placing the food directly over the hot coals. The high heat creates a delicious sear and cooks the food quickly. Think of it as a culinary spotlight, highlighting the natural flavors of your food.
To get the best results, heat your grill to high (450°F to 550°F) and cook the food for a shorter period. I usually cook steaks for about 3-5 minutes per side, depending on the thickness and the desired level of doneness.
Indirect Grilling: Low and Slow for Tender and Flavorful Delights
Indirect grilling is perfect for slow cooking larger cuts of meat like ribs, roasts, and whole chickens. It involves placing the food away from the direct heat, either over a drip pan or in a cooler zone of the grill.
This method helps to cook the meat slowly and evenly, rendering the fat and creating a tender and flavorful result. Think of it as a slow, gentle simmer, allowing the flavors to meld and the meat to become incredibly tender. I usually cook ribs for about 4-6 hours at 225°F to 250°F.
Smoking: Infusing Food with Smoky Delights
Smoking is all about infusing food with a delicious smoky flavor. It's a bit more involved than direct or indirect grilling, but the results are truly worth it. Think of it as adding a touch of magic to your BBQ experience.
You can smoke by placing wood chips or chunks directly on the coals or in a smoker box. Popular woods for smoking include hickory, mesquite, applewood, and pecan, each imparting a unique flavor profile.
The key is to use the right type of wood for the type of food you're smoking and to keep an eye on the temperature. It's like a delicate balance, a careful dance between wood, smoke, and heat.
Plank Grilling: A Unique Twist for Flavorful and Aromatic Delights
Plank grilling adds a unique flavor to your food. It’s done by placing the food on a soaked wooden plank, like cedar or oak, and then grilling it.
As the plank heats up, it releases flavorful smoke and moisture that infuse the food. It’s a great way to cook fish, vegetables, or even chicken. Think of it as a culinary hug, the gentle embrace of wood and heat, creating a rich, aromatic flavor.
(Part 6) Grilling Different Types of Food: A BBQ Feast for the Senses
Now, let's talk about the stars of the BBQ show – the food!
Grilling Meats: The Classic Favorites of the BBQ World
From juicy burgers to succulent steaks, grilling meats is a BBQ staple. Let's explore some classic favorites.
Burgers: The Juicy Heart of BBQ
I love a good burger. You want to make sure you’re using high-quality ground beef. Form the patties into even discs, and don’t overwork the meat. Add a bit of salt and pepper, and you’re good to go! It's a simple yet satisfying dish, perfect for any BBQ gathering.
Steaks: A Culinary Masterpiece
Steaks are a bit more delicate, so it’s important to get the temperature right. Make sure your grill is piping hot before placing your steak on it. You want to sear it quickly to lock in the juices and create a delicious crust. It's like a culinary dance, a quick, intense sear followed by a gentle, even cooking.
Chicken: Versatile and Flavorful
Chicken is a fantastic option for grilling. You can grill whole chickens, breasts, legs, or thighs. Just make sure to cook it to a safe internal temperature (165°F). It's a lean and healthy option, perfect for both casual and formal BBQ occasions.
Pork: The Smoky Star of BBQ
Pork is another great choice for grilling. You can grill pork chops, ribs, or even whole pig roasts. Make sure to cook pork to an internal temperature of 145°F. It's a versatile meat that lends itself well to slow cooking and smoking, resulting in incredibly tender and flavorful dishes.
grilling vegetables: A Burst of Flavor for Your BBQ Spread
Don’t forget the vegetables! Grilling vegetables adds a smoky flavor and a bit of char, enhancing their natural sweetness and creating a delicious side dish or accompaniment to your main course.
corn on the cob: A Summer Classic
Corn on the cob is a summer grilling classic. Simply remove the husk and silks, then grill the cob over medium heat for about 10 minutes, turning it occasionally. It's a simple and satisfying dish, perfect for a warm summer evening.
bell peppers and Onions: Sweet and Savory Delights
Bell peppers and onions are great grilled alongside meat or as a side dish. Slice them into thick pieces and grill them until tender. The grilling process brings out their natural sweetness, making them a delightful addition to your BBQ spread.
Asparagus: A Quick and Flavorful Treat
Asparagus is a delicious and quick-grilling vegetable. Trim the ends and grill for about 5-7 minutes, turning them halfway through. The grilling process enhances its earthy flavor, making it a healthy and flavorful choice.
Mushrooms: Earthy and Delicious
Mushrooms grill up beautifully. Brush them with olive oil, salt, and pepper, then grill for about 5-7 minutes, turning them once or twice. The grilling process brings out their earthy flavor, making them a delightful addition to your BBQ feast.
Grilling Fish: A Delicate Treat for Your BBQ Palette
Grilling fish is a great way to enjoy its delicate flavor. Let's explore some popular choices.
Salmon: A Rich and Flavorful Choice
Salmon is a popular choice for grilling. Season it with salt, pepper, and a squeeze of lemon juice, and grill over medium heat for about 8-10 minutes per side. The grilling process creates a delicious crust while keeping the salmon moist and flavorful.
Tuna: A Meaty and Delicious Option
Tuna is a flavorful fish that grills up well. Season it with salt, pepper, and a bit of chili powder, and grill over medium heat for about 4-6 minutes per side. The grilling process brings out its natural flavor, creating a satisfying and delicious dish.
Swordfish: A Robust and Flavorful Choice
Swordfish has a strong, meaty flavor that’s perfect for grilling. Season it with salt, pepper, and garlic powder, and grill over medium heat for about 6-8 minutes per side. The grilling process enhances its bold flavor, making it a memorable addition to your BBQ menu.
(Part 7) Flavor and Seasoning: The Finishing Touches for Delicious BBQ
Now, let's talk about flavor! Grilling is all about adding that extra touch of deliciousness to your food. It's like adding the final touches to a painting, enhancing the colors and textures to create a true masterpiece.
Seasoning: The Key to Great Flavor
Seasoning your food before grilling is essential. It adds depth of flavor and enhances the natural tastes of the meat or vegetables. Think of seasoning as the secret ingredient, adding layers of complexity and depth to your dish.
Salt and Pepper: The Basics of Flavor
Salt and pepper are the foundation of any good seasoning. Start with a generous pinch of salt and a good grind of black pepper. These simple ingredients can transform your dish, bringing out its natural flavors.
Herbs and Spices: Adding Complexity and Depth
Herbs and spices can add a whole new dimension of flavor to your grilling. Some popular options include:
- Rosemary: Great for lamb, chicken, and vegetables, adding a savory and aromatic quality.
- Thyme: Pairs well with pork, chicken, and fish, adding a subtle, earthy flavor.
- Oregano: A classic for Italian dishes, it also works well with chicken and vegetables, adding a distinct Mediterranean flavor.
- Garlic Powder: A versatile seasoning that can enhance the flavor of almost any meat, adding a savory and pungent note.
- Paprika: Adds a sweet and smoky flavor to chicken and pork, adding a touch of warmth and depth.
- Chili Powder: Adds a kick to beef, chicken, and fish, offering a hint of spice and heat.
Experiment with different combinations to discover your own signature BBQ flavor profiles.
Marinades: Infusing Flavor and Tenderness
Marinades are a great way to tenderize meat and add a burst of flavor. They usually contain an acidic component (like vinegar or lemon juice), an oil, and herbs and spices. Think of marinades as a bath for your meat, softening it up and imbuing it with delicious flavor.
Marinate your meat for at least 30 minutes, and up to overnight, for the best results.
Sauces: Adding that Finishing Touch of Deliciousness
Sauces are the perfect way to finish your grilled dishes. They add a final layer of flavor, enhancing the dish's overall taste and presentation.
bbq sauce: A Classic for a Reason
BBQ sauce is a classic grilling staple. There are loads of different flavors to choose from, from sweet and smoky to spicy and tangy. It's a versatile sauce that can be used on a wide variety of meats and vegetables.
steak sauce: Enhancing the Flavor of grilled steaks
Steak sauce is a great way to enhance the flavor of grilled steaks. It’s usually a combination of soy sauce, Worcestershire sauce, and spices. It adds a savory and umami flavor to your steak, complementing its natural richness.
Herb and Garlic Butter: A Simple and Delicious Touch
Herb and garlic butter is a simple and delicious way to finish grilled chicken, fish, or vegetables. It's a rich and flavorful sauce that adds a touch of elegance to your dish.
(Part 8) Cleaning and Maintaining Your Charcoal Grill: Keeping Your BBQ Engine Running Smoothly
Alright, the party’s over, and you’re left with a messy grill. But don't worry, cleaning and maintaining your grill is easier than you think. It's like giving your BBQ engine a tune-up, keeping it running smoothly for years to come.
Cleaning the Grill Grates: A Clean Grill for Delicious Food
Cleaning the grill grates is a must. It prevents food from sticking and ensures your grill is ready for the next time you fire it up. Think of it as giving your grill a fresh start, ready for the next culinary adventure.
Use a grill brush to scrub away any leftover food or grease.
Emptying the Ash Catcher: Keeping the Ashes at Bay
Emptying the ash catcher is another essential part of cleaning. Make sure to let the ashes cool completely before disposing of them. It's like removing the debris from your BBQ world, ensuring a clean and efficient grilling experience.
Storing Your Grill: Protecting Your BBQ Investment
When you’re not using your grill, it’s essential to store it properly. I recommend keeping it covered to protect it from the elements. Think of it as giving your grill a cozy shelter, protecting it from the rain and sun.
Maintaining Your Grill: A Little TLC Goes a Long Way
Just like any other piece of equipment, your grill needs some TLC. Here are a few maintenance tips:
- Inspect the Grill Grates: Check for rust or any damage and replace them if necessary. It's like giving your grill a health checkup, ensuring everything is in good working order.
- Clean the Vents: Make sure the vents are free of any obstructions. It's like clearing the airways for your grill, ensuring proper airflow and optimal performance.
- Lubricate Moving Parts: Apply a thin layer of oil to the hinges, wheels, and other moving parts to prevent rust and ensure they move smoothly. It's like giving your grill a little massage, keeping it moving smoothly and preventing wear and tear.
FAQs
I know you might have a few questions about grilling. Here are some answers to common inquiries.
1. How do I know if my meat is cooked to the right temperature?
A meat thermometer is your best friend. Different meats have different safe internal temperatures. Check out this table for a quick reference:
| Meat | Safe Internal Temperature (°F) |
|---|---|
| Beef (ground) | 160 |
| Chicken (whole and parts) | 165 |
| Pork (chops, roasts) | 145 |
| Fish | 145 |
It’s always better to err on the side of caution and ensure your meat is cooked to the safe internal temperature.
2. What are some tips for preventing flare-ups?
Flare-ups happen when fat drips from the meat onto the hot coals, creating a burst of flames. To prevent flare-ups:
- Trim Excess Fat: Remove any excess fat from your meat before grilling.
- Use a Drip Pan: Place a drip pan underneath the meat to catch any dripping fat.
- Control the Heat: Avoid adding too much charcoal at once, and make sure to control the vents to regulate the heat.
3. How do I know if my charcoal is ready to grill?
You’ll know your charcoal is ready to grill when it’s glowing red-hot and covered in a thin layer of ash. You can also use a chimney starter to light your charcoal.
4. What are some tips for grilling vegetables?
Here are a few tips for grilling vegetables:
- Cut them into even pieces: This will ensure they cook evenly.
- Brush them with oil: This will prevent them from sticking to the grill grates.
- Season them well: Add salt, pepper, and your favorite herbs and spices.
- Grill them over medium heat: This will cook them through without burning them.
5. How do I clean my grill after using it?
Cleaning your grill after using it is essential to prevent food from sticking and to ensure it stays in good condition. Here’s how to do it:
- Let the grill cool down completely: Never try to clean a hot grill.
- Remove the grill grates and ash catcher: Use a grill brush to scrub away any leftover food or grease from the grill grates. Empty the ash catcher and dispose of the ashes safely.
- Wipe down the grill: Use a damp cloth to wipe down the inside and outside of the grill.
- Replace the grill grates and ash catcher: Make sure the grill grates are properly seated and the ash catcher is in place.
- Store the grill: Keep the grill covered when not in use.
Alright, there you have it. A complete guide to mastering the charcoal grill. I hope this has given you the confidence to fire up your grill and create some delicious BBQ feasts. Remember, practice makes perfect. So, keep grilling, keep experimenting, and most importantly, have fun!
Everyone is watching

How to Cook Frozen Lobster Tails Perfectly: A Step-by-Step Guide
RecipesLobster. Just the word conjures up images of lavish meals, special occasions, and a taste of luxury. But let's...

Pigs in a Blanket Cooking Time: How Long to Bake for Perfect Results
RecipesAh, pigs in a blanket. Just the name conjures up images of those delightful little parcels of crispy pastry en...

Pork Fillet Cooking Time: How Long to Cook It Perfectly
RecipesPork fillet, or tenderloin as it's sometimes called, is a real favourite in our house. It's so versatile, and...

The Ultimate Guide to Cooking Delicious Frankfurters
RecipesLet's face it, we all love a good frankfurter. It's a classic, simple, and always satisfying. But let's be rea...

Wolf Meat Recipes: A Guide to Cooking Wild Game
RecipesLet's be honest, you don't see wolf meat at your local butcher shop every day. It's a bit of a wild card, but ...