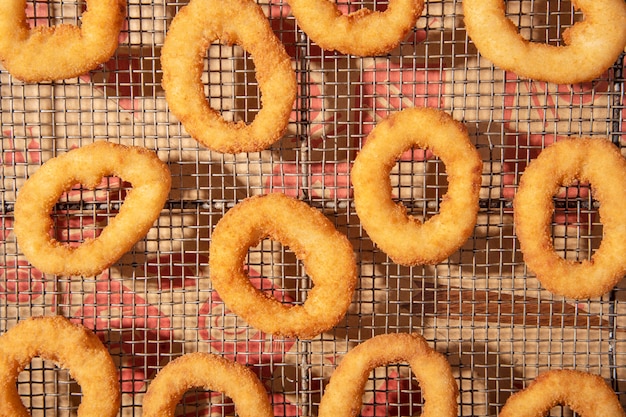
Let's talk onion rings! Oh, the joy of biting into a perfectly crisp, golden-brown ring, its sweet and savory flavor exploding in your mouth. But achieving that perfect onion ring is a culinary quest, a journey of trial and error. Over the years, I’ve been on my own onion ring odyssey, trying every trick in the book – from grandma’s secret batter to fancy gourmet flour blends. And let me tell you, it’s been a wild ride! But through all the crispy triumphs and the occasional soggy failures, I’ve learned a thing or two, and I’m ready to share my wisdom with you in this ultimate guide.
Part 1: The Onion – Choosing Your Base
It all begins with the onion, the foundation of your crispy masterpiece. Just like you wouldn't build a house on shaky ground, you can’t expect perfect onion rings from a substandard onion. It’s a crucial first step. I’ve experimented with all sorts of onions, and here’s what I’ve discovered:
1. The Classic White Onion
The white onion is a tried-and-true favorite. It’s got that sharp bite, a satisfying crunch, and a firm texture that holds up well during frying. And let’s be honest, it’s easy to find – a true classic for a reason. However, the sharpness of the white onion might not be everyone’s cup of tea, so if you find it a bit too intense, consider exploring other options.
2. The Sweet and Mild Yellow Onion
The yellow onion offers a more mellow experience, with a touch of sweetness that balances out the sharpness. A great choice if you’re not a fan of the intense bite of the white onion. But keep in mind that yellow onions tend to be a little softer than their white counterparts, so they might need a bit more TLC during the frying process.
3. The Unique Red Onion
The red onion adds a splash of vibrant color to your plate and a slightly sweeter flavor, making it a delightful contrast to the crispy batter. But like its yellow cousin, the red onion can be a bit delicate, so handle it with care to avoid it falling apart.
4. Beyond the Basics: Experimenting with Other Onions
Don’t be afraid to get adventurous! I’ve even had success with shallots, which offer a bolder, more concentrated flavor. The key is to choose an onion with a firm, solid texture that won’t become mushy during cooking. You want your onion rings to retain their shape and integrity!
Choosing Your Onion: Top Tips
Firm Texture: Choose onions that feel firm and crisp when you press on them. Avoid any that feel soft or spongy.
Freshness: Look for onions that are fresh and free from any bruising or blemishes.
Size: Consider how you want to serve your onion rings. For smaller, more manageable rings, opt for smaller onions. For larger, more impressive rings, choose larger onions.
Part 2: Getting Your Onions Ready
You’ve got your perfect onions – now it’s time to prepare them for their transformation into crispy delights. This might seem like a simple step, but there are a few insider tricks to ensure your onion rings are top-notch.
1. Slicing the Rings
You can slice your onions by hand, or you can use a mandoline for perfectly even slices. A mandoline is fantastic for achieving consistent thickness, especially if you’re making a big batch of onion rings. But personally, I like slicing by hand – it gives me more control, especially when it comes to the thickness of the rings.
2. Separating the Rings
After slicing, gently separate the onion rings. You don’t want them sticking together or breaking apart. I usually just gently pull them apart with my fingers. If you’ve used a mandoline, they might already be separated, but give them a quick check to ensure they are fully separated.
3. Soaking in Cold Water
This is a game-changer, a crucial step that many overlook! Soaking your onion rings in cold water for at least 30 minutes helps to remove any excess bitterness and makes them even crispier. It also prevents them from browning too quickly during frying.
4. Drying the Rings
Once the soaking is done, gently pat the onion rings dry with a clean kitchen towel. You want them completely dry before you start coating them.
Part 3: Creating the Ultimate Batter
Now we’re getting into the heart of the matter, the batter! This is where your onion rings truly come alive. There are countless recipes out there, but here are a few of my favorites, along with tips for batter perfection:
1. The Classic Beer Batter
This is a simple, straightforward batter that produces a wonderfully crisp, golden-brown coating. All you need is flour, beer, a dash of baking powder, and a pinch of salt. The beer creates air pockets in the batter, making it light and airy, resulting in that perfect crunch.
2. The Creamy Buttermilk Batter
Buttermilk adds a delightful tangy flavor to the batter, making it even more tender and moist. This is a great choice if you prefer a thicker, more substantial coating. It creates a fluffy texture while still delivering that satisfyingly crispy exterior.
3. The Secret Ingredient: Adding a Little Spice
Don’t be afraid to get creative with your spices! Experiment with paprika, cayenne pepper, black pepper, or even a hint of chili powder for a little extra kick. You can even add a sprinkle of herbs like thyme or rosemary for an extra dimension of flavor.
4. The Key to a Perfect Batter: Consistency
The batter should be thick enough to coat the onion rings evenly but not so thick that it weighs them down. It should flow smoothly off a spoon and cling to the rings. If the batter is too thin, it won’t stick properly. If it’s too thick, it will be heavy and greasy.
5. Coating the Onion Rings
Once your batter is ready, it’s time to coat the onion rings. Work in batches to ensure each ring is evenly coated. Dip each ring into the batter, making sure it’s completely covered, and then gently shake off any excess batter.
6. The Secret Weapon: Breadcrumbs
For an extra level of crispiness, coat the battered rings in breadcrumbs before frying. This creates a beautiful, crunchy outer layer that simply melts in your mouth. Gently press the breadcrumbs onto the rings, ensuring they are completely covered.
Part 4: The Art of Frying
The final step, frying, is where you need to get it right. This is the moment of truth, the make-or-break stage where your carefully prepared onion rings will either become crispy perfection or a greasy disappointment. Don’t worry, I’ve got your back!
1. Choosing the Right Oil
You need an oil with a high smoke point, such as vegetable oil or peanut oil. The oil should be hot enough to cook the onion rings quickly and evenly without burning them. To test the temperature, drop a small piece of batter into the oil. If it sizzles and bubbles immediately, you’re ready to go.
2. The Perfect Fry: Not Too Crowded
When frying your onion rings, don’t crowd the pan. Give them plenty of space to cook evenly. If you fry too many at once, they won’t cook properly, the oil temperature will drop, and your onion rings will end up greasy and soggy.
3. The Art of Flipping
Flip the onion rings halfway through frying. This ensures they’re cooked evenly on both sides. I usually fry them for about 3-4 minutes on each side, or until they are golden brown and crispy.
4. The Resting Ritual
After frying, remove the onion rings from the oil and place them on a wire rack to drain any excess oil. Let them rest for a few minutes before serving. This helps them cool down and allows the batter to crisp up even further.
Part 5: The Ultimate Dipping Sauce
What's an onion ring without a delectable dipping sauce? It's simply not the same! The options are endless, but here are a few of my favorites:
1. The Classic: Ranch Dressing
This is a timeless favorite for a reason. Creamy, tangy, and a perfect complement to the sweet onion flavor. You can find good ranch dressing in most supermarkets, or you can easily whip up your own version.
2. The Tangy Twist: Blue Cheese Dressing
For those who enjoy a bolder, more intense flavor, blue cheese dressing is a great option. Its sharp, pungent taste cuts through the sweetness of the onion rings beautifully.
3. The Spicy Kick: Chipotle Mayo
For a bit of fire, try chipotle mayo. This creamy, spicy sauce will add a delightful kick to your taste buds.
4. The Sweet and Savoury Combo: Honey Mustard
Honey mustard is another great option, offering a balanced combination of sweet and savory flavors. It’s perfect for those who appreciate a bit of both.
5. Get Creative with Your Dips!
Don’t be afraid to experiment! Create your own unique dipping sauces with different herbs, spices, and ingredients. The possibilities are endless, so have fun with it!
Part 6: Serving Up Your Onion Rings
Your crispy onion rings are ready to shine! How will you present these perfect bites? Here are a few ideas for showcasing your culinary masterpiece:
1. The Classic side dish
Onion rings are a quintessential side dish for burgers, fries, and other comfort food favorites. I love to serve them alongside a juicy burger, a heap of crispy fries, and a cold beer. It's a winning combination, perfect for lazy weekend evenings.
2. A Delicious Appetizer
Onion rings also make a fantastic appetizer, perfect for sharing with friends and family. They're always a hit at parties, a crowd-pleasing starter that everyone loves.
3. A Fun and Flavorful Salad
For a more creative approach, try adding onion rings to a salad. They add a wonderful textural contrast and a sweet and savory flavor that complements the fresh greens and other salad ingredients perfectly.
4. Presentation Matters
Don't forget the importance of presentation! Arrange your onion rings beautifully on a platter or in a basket. Add a few colorful garnishes, like fresh parsley or a sprinkle of paprika, to give them a touch of extra flair.
Part 7: Storing and Reheating Your Onion Rings
What about leftovers? Sometimes we get a little carried away and make a bit more than we can handle. But fear not! Onion rings can be stored and reheated without sacrificing their crispy goodness.
1. Storing for Later
Store your leftover onion rings in an airtight container at room temperature for up to 2 days. For longer storage, refrigerate them.
2. Reheating to Perfection
You can reheat your onion rings in a few different ways. You can bake them in a preheated oven at 350°F for about 10 minutes. You can also reheat them in a toaster oven or in the microwave. However, my favorite method is air frying. It helps them regain their crispy texture and prevents them from becoming soggy.
Part 8: FAQs
You’ve probably got a few lingering questions, haven’t you? Here are answers to some frequently asked questions about making onion rings:
1. Why Are My Onion Rings Soggy?
This is a common problem, often caused by a batter that’s too thin or onion rings that weren’t properly dried before frying. Make sure your batter is thick enough to coat the rings evenly and that they’re completely dry. Also, avoid overcrowding the pan when frying, and ensure the oil is hot enough.
2. Why Are My Onion Rings Not Crispy?
This can happen for a few reasons. The oil might not be hot enough, the rings might be too thick, or the batter might be too heavy. Make sure the oil is sizzling when you drop in a piece of batter. Try slicing your onions a little thinner and using a lighter batter.
3. What Can I Do If My Onion Rings Fall Apart?
This happens when you use onions that are too soft or if you’ve over-handled them. Choose onions with a firm texture and handle them gently. You can also try soaking them in cold water for a little longer to help them firm up.
4. How Long Should I Fry Onion Rings?
The frying time will depend on the thickness of the rings and the heat of the oil. However, as a general guide, fry them for about 3-4 minutes on each side, or until they're golden brown and crispy.
5. How Can I Make My Onion Rings Healthier?
You can use a lighter batter, such as a beer batter or a buttermilk batter, and coat the rings in breadcrumbs before frying. You can also bake the onion rings instead of frying them.
There you have it, my comprehensive guide to creating the ultimate crispy onion rings. I hope you’ve enjoyed this journey into the world of onion rings. Now go forth, experiment, and create your own delicious bites of crispy perfection! Enjoy!
Everyone is watching

How to Cook Frozen Lobster Tails Perfectly: A Step-by-Step Guide
RecipesLobster. Just the word conjures up images of lavish meals, special occasions, and a taste of luxury. But let's...

Pigs in a Blanket Cooking Time: How Long to Bake for Perfect Results
RecipesAh, pigs in a blanket. Just the name conjures up images of those delightful little parcels of crispy pastry en...

Pork Fillet Cooking Time: How Long to Cook It Perfectly
RecipesPork fillet, or tenderloin as it's sometimes called, is a real favourite in our house. It's so versatile, and...

The Ultimate Guide to Cooking Delicious Frankfurters
RecipesLet's face it, we all love a good frankfurter. It's a classic, simple, and always satisfying. But let's be rea...

Wolf Meat Recipes: A Guide to Cooking Wild Game
RecipesLet's be honest, you don't see wolf meat at your local butcher shop every day. It's a bit of a wild card, but ...