The aroma of freshly baked bread, wafting through your kitchen, is a truly comforting experience. There's something almost magical about transforming a simple dough into a golden, crusty loaf. But the magic can feel a bit lost when your bread doesn't turn out quite right. One of the most common culprits? Incorrect baking time.
I've been baking bread for years, and I've learned that mastering the timing is essential for achieving that perfect loaf. Whether you're a seasoned baker or just starting out, understanding the nuances of bread baking time is crucial. So, let's embark on a journey together, exploring the art and science of getting that perfect crust and fluffy interior.
Part 1: Understanding the Fundamentals of Baking Time
The Crucial Role of Oven Temperature
Think of your oven as a stage for your bread to perform its transformation. The hotter the stage, the more dramatic the show. A scorching hot oven, usually around 400°F (200°C), is essential for achieving a beautiful rise and a crisp, golden-brown crust. It also helps prevent your bread from becoming dense and chewy.
I remember the first time I attempted a sourdough loaf. I was so excited to get the baking process underway that I skipped preheating the oven. The result? A pale, flat loaf that resembled a brick more than a delicious bread. Lesson learned: preheating is a must!
The Significance of Loaf Size
Bread loaves, like people, come in all shapes and sizes. And just as a petite child needs less time to finish a meal than a towering teenager, a small loaf of bread will bake faster than a larger one. The bigger the loaf, the longer it takes for the heat to penetrate to the center, ensuring it's fully cooked.
I've often experimented with different loaf sizes, and it's fascinating to see how baking time adapts. A smaller loaf might be ready in 30 minutes, while a larger loaf could require 45 minutes or more. So, keep those size differences in mind when setting your baking timer.
The Impact of Bread Type
Each bread type has its own personality, and that personality dictates its baking time. Dense, yeasted breads, like sourdough, need more time to develop their full flavor and texture. Lighter, quick breads, on the other hand, rely on chemical leaveners and bake much faster.
My go-to recipe for a simple white bread requires about 30 minutes in the oven. But when I bake a sourdough loaf, I know it will need at least 45 minutes, sometimes even an hour, to achieve that signature tangy flavor and chewy texture.
Part 2: Unveiling the Secrets of Baking Time for Different Breads
Now that we've established the fundamental principles of bread baking time, let's delve into some specific baking guidelines for popular bread types.
The All-American Classic: White Bread
White bread, the cornerstone of countless sandwiches and toasts, is a great starting point for any baker. A standard 1-pound loaf of white bread usually takes about 30-35 minutes to bake. But don't just rely on the timer alone. Keep a watchful eye on your loaf. The crust should be golden-brown, and a gentle tap on the bottom should produce a hollow sound.
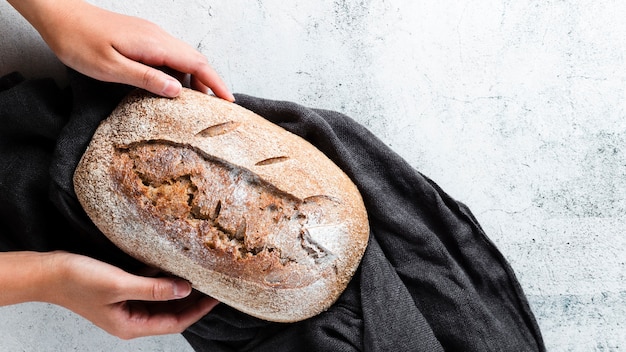
The Delectable Sourdough
sourdough bread, with its complex flavors and satisfying chewiness, is a testament to patience and precision. For a similar 1-pound loaf, expect a baking time of 45 minutes to an hour. The key is to let the heat penetrate the thick, dense crumb, ensuring it's fully cooked.
I remember my first attempt at sourdough. I was so eager to taste the results that I pulled it out of the oven too early. The inside was still doughy, and the crust felt underdone. It took a few tries to master the timing, but the satisfaction of a perfectly baked sourdough is well worth the effort.
The Quick and Convenient: Quick Breads
Quick breads, like banana bread or zucchini bread, are a delightful shortcut for satisfying those sweet cravings. These breads rely on chemical leaveners like baking powder or baking soda, so they don't need the same amount of time to rise. Their baking time typically ranges from 30-40 minutes.
The Bite-Sized Delights: Rolls
Rolls, those delectable companions to any meal, bake much faster than loaves. A batch of rolls might only need 15-20 minutes in the oven. Keep a close eye on them, though, as their small size can make them brown quickly.
Part 3: Mastering the Techniques for Perfect Bread Baking Time
We've covered the basics, but there's more to mastering bread baking time than just following a recipe. Let's explore some valuable techniques that will help you achieve perfect results.
The Thermometer Test: A Reliable Guide
A trusty thermometer is your best friend when it comes to determining if your bread is fully cooked. Insert the thermometer into the thickest part of the loaf, avoiding the crust. The internal temperature should reach 200°F (93°C) for most bread types.
This technique has been a game-changer for me. No more guessing! The thermometer provides a clear and accurate indication of whether the bread is done.
The Tap Test: A Simple Sound Check
The tap test is a simple yet effective technique for checking the doneness of loaves with a crusty exterior. Gently tap the bottom of the loaf. If it sounds hollow, it's likely done. The hollow sound signifies that the air inside the bread has expanded, indicating that it's fully cooked.
This is a great technique for those who prefer to rely on their senses. The sound of the tap is a clear signal that the bread is ready.
The Visual Check: A Guide for the Eye
Don't underestimate the power of observation! A well-baked loaf will have a deep golden-brown crust and a slightly pulled-back crust on the top. The surface will also feel firm to the touch.
I've found that the visual check is particularly helpful when baking loaves with different crust types. A darker crust often signifies a well-baked bread.
Part 4: Tackling Common Bread Baking Time Issues
Even the most seasoned bakers encounter challenges. Let's address some common bread baking time issues and find solutions.
Overbaked Bread: The Signs and Solutions
An overbaked bread will have a dark brown crust and a dry, crumbly interior. It might even have a burnt smell. To prevent overbaking, keep a close eye on your loaf during the last 10 minutes of baking time. You might need to reduce the oven temperature slightly or even tent the bread with foil to prevent further browning.
I've learned that overbaking can happen quickly, so it's best to be proactive. A few minutes can make a big difference!
Underbaked Bread: Recognizing and Correcting It
Underbaked bread will have a pale crust and a doughy texture. It might also feel soft and wet in the centre. To prevent underbaking, ensure your oven is preheated properly and bake your bread for the recommended amount of time. You can also use a thermometer to check the internal temperature.
Sometimes, it's tempting to take bread out early, but patience is key. It's better to err on the side of caution and ensure the bread is fully cooked.
Part 5: Baking Time Adaptations for Different Shapes
The shape of your bread loaf can also affect baking time. Let's explore some specific considerations for different loaf shapes.
Round Loaves: The Importance of Patience
Round loaves, like sourdough, typically bake for a bit longer than rectangular loaves. The thicker centre takes a little longer to cook through. Be patient and ensure the centre is fully baked.
I've learned that round loaves require a bit more attention, especially towards the end of baking. You might need to rotate the loaf halfway through to ensure even browning.
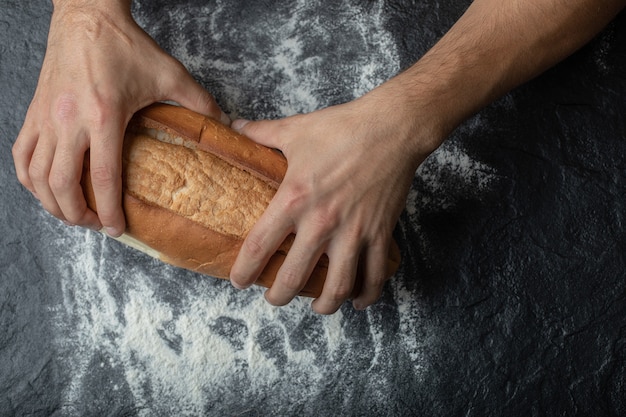
Rectangular Loaves: A Faster Bake
Rectangular loaves, like sandwich bread, usually bake for a shorter time. The thinner edges cook faster, and the centre isn't as thick as a round loaf. Be mindful of the browning and ensure the edges don't get too dark before the centre is fully baked.
I find that rectangular loaves are a bit easier to manage, as the thinner shape allows for quicker heat penetration. However, it's still important to check for doneness.
Part 6: Adjusting Baking Time for Specific Circumstances
Sometimes, standard baking times need to be adjusted based on external factors. Let's look at some common scenarios where adjustments might be necessary.
High Altitude Baking: Adjusting for Lower Air Pressure
If you live at a high altitude, you might need to adjust your baking time. The lower air pressure at higher elevations causes liquids to boil at a lower temperature, which can affect the rising of bread. You may need to add a few minutes to your baking time.
I've found that high-altitude baking can be a bit tricky. Experimenting with adjustments based on your specific altitude is essential.
dutch oven Baking: A Moist and Crusty Experience
Baking bread in a Dutch oven creates a beautiful crust and a moist interior. However, it can also affect baking time. You may need to reduce your baking time by a few minutes. The Dutch oven traps heat and moisture, resulting in faster cooking.
Dutch oven baking is a great technique for achieving a beautiful crust, but it's important to adjust your baking time accordingly.
Part 7: The Importance of Patience and Observation
Baking bread is a journey, not a race. It requires patience, observation, and a little bit of intuition. Don't rush the process, and remember that each loaf is unique. Embrace the imperfections, because they are part of the charm of homemade bread.
I've come to appreciate the beauty of the bread baking process. It's a chance to slow down and enjoy the journey. The imperfections are what make each loaf special.
Part 8: The Joy of Bread Baking
For me, bread baking is more than just a culinary pursuit. It's a meditative process, a chance to slow down and appreciate the simple pleasures of life. The aroma of freshly baked bread fills me with a sense of contentment and joy, and I know that for many others, it holds a special place in their hearts. So, embrace the journey, experiment with different recipes, and enjoy the delicious rewards of your own homemade bread.
Bread baking is a rewarding and fulfilling experience. The sense of accomplishment and the delicious aroma are simply unbeatable.
FAQs
Here are some frequently asked questions about bread baking times.
1. How do I know if my bread is done?
You can use a combination of techniques to determine if your bread is done. A thermometer is the most reliable method, but you can also use the tap test or observe the visual cues.
2. What should I do if my bread is overbaked?
If your bread is overbaked, it might be too dry to salvage. However, you can try to use it in other recipes, like breadcrumbs or croutons.
3. Can I bake bread in a regular oven?
Yes, you can bake bread in a regular oven. Just make sure it is preheated properly to the correct temperature.
4. How long should I bake a loaf of rye bread?
Rye bread typically takes a bit longer to bake than white bread. You can expect to bake a 1-pound loaf for around 45-50 minutes.
5. What happens if I bake my bread for too short a time?
If you bake your bread for too short a time, it will be underbaked. This means the interior will be doughy and raw. You can try to bake it for a few more minutes, but it might not be salvageable.
Remember, these are just general guidelines, and the actual baking time will vary depending on your specific recipe and oven. Always follow your recipe carefully, and don't be afraid to experiment. Happy baking!
Everyone is watching

How to Cook Frozen Lobster Tails Perfectly: A Step-by-Step Guide
RecipesLobster. Just the word conjures up images of lavish meals, special occasions, and a taste of luxury. But let's...

Pigs in a Blanket Cooking Time: How Long to Bake for Perfect Results
RecipesAh, pigs in a blanket. Just the name conjures up images of those delightful little parcels of crispy pastry en...

Pork Fillet Cooking Time: How Long to Cook It Perfectly
RecipesPork fillet, or tenderloin as it's sometimes called, is a real favourite in our house. It's so versatile, and...

The Ultimate Guide to Cooking Delicious Frankfurters
RecipesLet's face it, we all love a good frankfurter. It's a classic, simple, and always satisfying. But let's be rea...

The Ultimate Guide to Tender, Juicy Pulled Pork
RecipesRight, let's talk pulled pork. It's one of those dishes that just screams "comfort food," doesn't it? I mean...