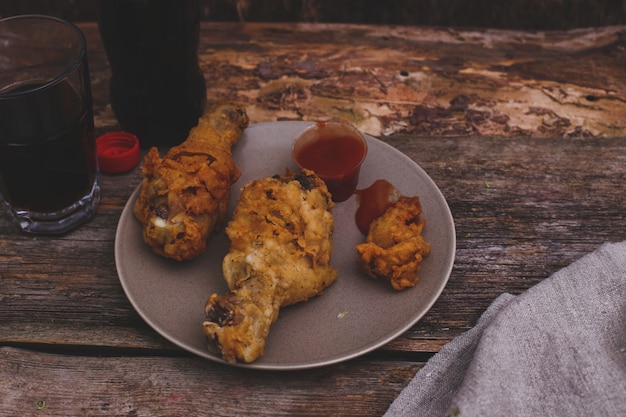
Ah, chicken tenders. Those little strips of juicy, crispy goodness that bring a smile to everyone's face. They're a staple in kitchens across the land, from quick weeknight meals to casual gatherings with friends. And while you can certainly grab a bag of frozen tenders from the supermarket, there's something truly satisfying about making your own. They're surprisingly easy to whip up, and you get to control the ingredients and flavours, which is always a win in my book.
Now, I've been in the kitchen for what feels like forever, and I've learned a thing or two about cooking chicken. Through countless culinary experiments and a few happy accidents along the way, I've developed my own little tricks and techniques for achieving that perfect golden-brown crust and succulent interior. So, grab your apron, get your ingredients ready, and let's embark on this delicious journey together.
(Part 1) Choosing the Right Chicken Tenders: The Foundation of Flavor
First things first, let's talk about the star of the show: the chicken. Now, I'm a bit of a traditionalist, so I always opt for fresh chicken tenders. They have that irresistible, juicy texture that's hard to beat. Frozen tenders can be a lifesaver when you're in a pinch, but fresh chicken just has that extra something special.
Spotting the Perfect Cut: A Guide for the Discerning Cook
When you're picking out your chicken, keep an eye out for tenders that are plump and have a nice, even color. Avoid any that are pale or have a funny smell. A bit of a sniff test never hurts! And if you can, try to find tenders that haven't been injected with a brine solution. While it might seem like a shortcut to juicy chicken, it can sometimes leave the tenders a bit soggy. We want a nice, firm texture, don't we?
(Part 2) Preparing the Chicken Tenders: The Essential Steps
Once you've got your chicken tenders in hand, it's time for a little prep work. This might seem like a chore, but it's crucial for ensuring those crispy, flavorful results we're aiming for.
The Great Washing Debate: To Rinse or Not to Rinse?
Now, let's tackle a hot topic: washing chicken. Some people swear by it, while others say it's a waste of time and can actually spread bacteria. Personally, I give my chicken a quick rinse under cold water, just to get rid of any stray bits and pieces. It's a bit of a personal preference, and ultimately, it's up to you. But whatever you choose, make sure you do it carefully to avoid splashing contaminated water around your kitchen.
Drying the Chicken: A Crucial Step for Crispy Perfection
After rinsing, pat your chicken tenders dry with paper towels. Wet chicken won't brown nicely in the pan, and you'll end up with a soggy mess. So, get rid of all that excess moisture and give those tenders a good pat-down.
(Part 3) Seasoning and Coating: Unleashing the Flavors

Now we're getting to the fun part – seasoning! I like to keep things simple, letting the natural flavor of the chicken shine through. A good quality salt and pepper, maybe a pinch of paprika for a bit of color, and that's usually it. But hey, if you're feeling adventurous, you can add some herbs like thyme or rosemary, or even a bit of garlic powder. Just remember to season generously – a little bit goes a long way.
The Coating Conundrum: From Classic to Creative
Next comes the coating. This is where you can really get creative and tailor your chicken tenders to your personal taste. You can go all out with breadcrumbs, flour, or even a batter. I personally love a classic breadcrumb coating. It creates a beautiful golden-brown crust and adds a bit of satisfying crunch. But if you're feeling adventurous, you can try a panko breadcrumb coating for a crispy, light finish. Or maybe you're a fan of cornflakes? Go for it! There's a whole world of possibilities.
If you're looking for a little extra inspiration, here are some ideas to get your creative juices flowing:
- Spicy Chicken Tenders: Add a touch of heat with cayenne pepper, paprika, or even a dash of chilli flakes. Just remember to adjust the amount to your liking.
- Herbed Chicken Tenders: Infuse your chicken with the aroma of fresh herbs. A combination of thyme, rosemary, parsley, and oregano will add a delightful earthy flavor. You can even try a lemon and herb coating for a zesty twist.
- Parmesan Chicken Tenders: For a cheesy, savory treat, mix grated Parmesan cheese into your breadcrumb coating. Add a bit of garlic powder for extra flavor and a hint of garlic aroma.
(Part 4) Getting Ready for the Stovetop: Setting the Stage
Now that your chicken tenders are prepped and ready to go, it's time to gather your tools and prepare your stovetop battleground.
Choosing the Right Pan: The Perfect Vessel for Crispy Goodness
The pan you use can make a big difference in how your chicken tenders turn out. You'll want something that's big enough to accommodate your tenders without overcrowding them, but not so large that they get lost in the vast expanse of the pan. I usually opt for a cast iron skillet. It distributes heat beautifully and gives the chicken a lovely sear. But any good quality non-stick pan will do the trick.
Heating Up the Oil: The Key to Crispy Perfection
Now, add a good amount of oil to your pan. You want enough to coat the bottom of the pan, but not so much that your chicken is swimming in it. Heat the oil over a medium-high heat. You can check if it's ready by flicking a tiny bit of breadcrumb into the oil. If it sizzles and dances, you're good to go!
(Part 5) Cooking the Chicken Tenders: The Culinary Choreography
Alright, it's time to get cooking! Gently place your chicken tenders into the hot oil, being careful not to overcrowd the pan. If you're cooking a large batch, you may need to work in batches to ensure each tender gets the attention it deserves.
cooking time: A Balancing Act of Heat and Patience
Now, the cooking time will depend on the thickness of your chicken tenders. But as a general rule, you'll want to cook them for about 5-7 minutes per side, or until they're golden brown and cooked through. This is where your patience comes in handy – resist the urge to flip them too soon, as they need time to develop that beautiful crust.
Checking for Doneness: Ensuring Safety and Flavor
You can check if your chicken is cooked through by poking it with a fork. The juices should run clear, and the meat should be firm to the touch. If you're unsure, you can always cut a small piece open to check. But if you're really serious about ensuring safety, invest in a meat thermometer. The internal temperature should reach 165°F (74°C). This will eliminate any guesswork and give you peace of mind.
(Part 6) Resting and Serving: A Moment of Indulgence
Once your chicken tenders are cooked to perfection, remove them from the pan and place them on a plate lined with kitchen paper to drain any excess oil. Allow them to rest for a few minutes before serving. This will help the meat retain its juices and create a wonderfully tender texture.
Serving Up the Goodness: A Culinary Symphony of Flavor
And there you have it! Perfectly cooked chicken tenders, ready to be devoured. Now, what to serve them with? The possibilities are endless! You can pair them with a creamy dipping sauce, a tangy salad, or even some mashed potatoes. Personally, I love a classic combination of chicken tenders with a side of chips and a homemade tartar sauce.
If you're feeling adventurous, try these pairings:
- Honey Mustard and Coleslaw: The sweet and tangy combination of honey mustard sauce and crunchy coleslaw is a classic pairing that never disappoints.
- Spicy Mayo and sweet potato Fries: For a bit of heat and a touch of sweetness, try dipping your chicken tenders in spicy mayo and serving them with sweet potato fries.
- bbq sauce and Mac and Cheese: This pairing is a true comfort food classic. The smoky flavor of BBQ sauce pairs perfectly with the creamy richness of mac and cheese.
(Part 7) Troubleshooting Tips: A Culinary Rescue Guide
We've all been there, haven't we? You're following the recipe, everything seems to be going smoothly, and then… disaster strikes! Your chicken tenders are overcooked, undercooked, or maybe they just don't have that perfect golden-brown colour. Don't worry, it happens to the best of us! Here are a few troubleshooting tips to help you out.
Overcooked Chicken: A Culinary Challenge
If you've accidentally overcooked your chicken, don't panic! It might be a little dry, but it's still edible. You can try adding a bit of sauce to help rehydrate it. Or, if you're feeling adventurous, you can shred it up and use it in a sandwich or a salad.
undercooked chicken: A Culinary No-No
On the other hand, undercooked chicken is a definite no-no. You absolutely must make sure your chicken is cooked through. If you're unsure, pop it back on the pan for a few more minutes, or even finish cooking it in the oven. Just make sure to check the temperature with a meat thermometer to ensure it reaches 165°F (74°C).
Uneven Browning: A Visual Challenge
If your chicken tenders haven't browned evenly, it's probably because they're overcrowded in the pan. Try cooking them in smaller batches to ensure they get a nice golden-brown colour on all sides. You can also try flipping them more frequently to ensure even cooking.
(Part 8) Variations and Experimentation: The Endless Possibilities of Flavor
Now, remember what I said about there being no rules in cooking? Well, that applies to chicken tenders, too! Once you've mastered the basics, you can start experimenting with different flavors and coatings. Here are a few more ideas to get your creative juices flowing:
Asian-Inspired Chicken Tenders: A Fusion of Flavors
For a taste of the East, try a coating with a blend of soy sauce, ginger, and garlic. You can even add a touch of sesame oil for a fragrant aroma. Serve these tenders with a side of steamed rice and a dipping sauce made with sweet chili sauce and sriracha.
Buffalo Chicken Tenders: A Spicy Delight
A classic for a reason, Buffalo chicken tenders are coated in a spicy sauce made with hot sauce and butter. Serve these with a side of blue cheese dressing or ranch dressing for a creamy contrast to the heat.
Lemon-Garlic Chicken Tenders: A Fresh and Zesty Twist
For a bright and tangy twist, try a coating with lemon zest, garlic powder, and herbs. Serve these tenders with a side of roasted vegetables for a healthy and flavorful meal.
(Part 9) FAQs: A Guide to Common Questions
Now, let's address those burning questions you might have. I've been there myself, so I get it!
1. Can I cook chicken tenders in the oven instead?
Absolutely! If you prefer to avoid the stovetop, you can bake your chicken tenders in the oven. Simply preheat your oven to 400°F (200°C), then place your coated chicken tenders on a baking sheet lined with parchment paper. Bake for about 15-20 minutes, or until cooked through and golden brown.
2. How do I know if my chicken tenders are done?
The best way to check if your chicken tenders are cooked through is by using a meat thermometer. The internal temperature should reach 165°F (74°C). You can also check by poking the chicken with a fork. The juices should run clear, and the meat should be firm to the touch.
3. Can I freeze cooked chicken tenders?
Yes, you can freeze cooked chicken tenders for later use. Simply let them cool completely, then place them in an airtight container or freezer bag. They will last in the freezer for up to 3 months.
4. What are some good dipping sauces for chicken tenders?
The possibilities are endless! Some popular dipping sauces for chicken tenders include honey mustard, barbecue sauce, ranch dressing, blue cheese dressing, and sriracha mayo.
5. Can I make chicken tenders ahead of time?
Yes, you can definitely make your chicken tenders ahead of time. Simply coat them and store them in the refrigerator until you're ready to cook. You can also bake them ahead of time and reheat them in the oven or microwave when you're ready to serve.
So there you have it! My comprehensive guide to cooking perfect chicken tenders on the stovetop. Remember, practice makes perfect, so don't be afraid to experiment and find what works best for you. Enjoy the journey, and may your chicken tenders be crispy, juicy, and absolutely delicious!
Everyone is watching

How to Cook Frozen Lobster Tails Perfectly: A Step-by-Step Guide
RecipesLobster. Just the word conjures up images of lavish meals, special occasions, and a taste of luxury. But let's...

Pigs in a Blanket Cooking Time: How Long to Bake for Perfect Results
RecipesAh, pigs in a blanket. Just the name conjures up images of those delightful little parcels of crispy pastry en...

Pork Fillet Cooking Time: How Long to Cook It Perfectly
RecipesPork fillet, or tenderloin as it's sometimes called, is a real favourite in our house. It's so versatile, and...

The Ultimate Guide to Cooking Delicious Frankfurters
RecipesLet's face it, we all love a good frankfurter. It's a classic, simple, and always satisfying. But let's be rea...

The Ultimate Guide to Tender, Juicy Pulled Pork
RecipesRight, let's talk pulled pork. It's one of those dishes that just screams "comfort food," doesn't it? I mean...