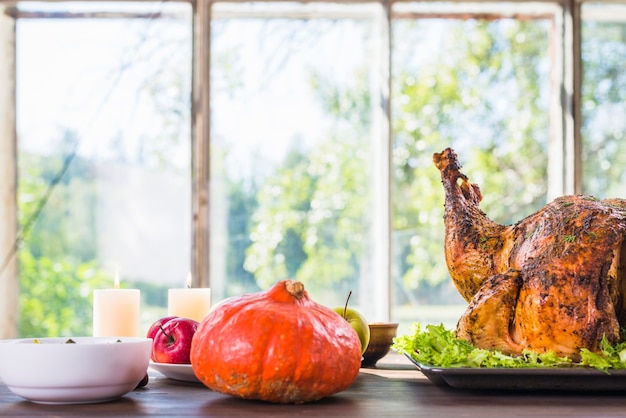
Ah, the Christmas turkey! The centerpiece of a festive feast, it's a dish that conjures up warm memories of family gatherings, hearty laughter, and the tantalizing aroma of roasted bird. But let's be honest, roasting a turkey can feel a bit daunting, especially if you're a novice in the kitchen. The question that always pops up: "How long do I cook this thing?" Well, fear not, my fellow culinary adventurers! I'm here to guide you through the process, sharing my hard-earned wisdom and a sprinkle of festive cheer along the way.
(Part 1) The Turkey Basics: Size Matters!
First things first, you need to assess your turkey – a crucial step that sets the stage for a delicious, perfectly cooked bird. It's like choosing the right ingredients for a recipe; you need the right turkey size for the right outcome.
The Importance of a meat thermometer
Let me tell you, your trusty meat thermometer is your secret weapon when it comes to roasting a turkey. It's not just about timing; it's about ensuring safety and deliciousness. Imagine sticking a meat thermometer into the thickest part of the turkey's thigh, avoiding the bone, and seeing that magic number: 165°F (74°C). This tells you the bird is cooked through and ready to be enjoyed, free from any nasty surprises.
Think of the meat thermometer as your culinary compass, guiding you towards a perfectly roasted turkey. It's a crucial tool, even for experienced cooks, as it eliminates any guesswork and ensures everyone enjoys a safe and delicious meal. Trust me, you'll want to keep this little buddy handy for all your roasting adventures.
Turkey Size and cooking time
Now, let's talk turkey size. A smaller turkey, maybe 8-12 pounds, will take a shorter time than a massive one, around 16-20 pounds. You can find a handy table below with estimated roasting times, but remember, it's just an estimate. The meat thermometer is your true guide.
| Weight (lbs) | Roasting Time (hrs) |
|---|---|
| 8-12 | 3-4 |
| 12-16 | 4-5 |
| 16-20 | 5-6 |
This is where experience comes in handy. I've found that a smaller turkey tends to cook a bit faster than a larger one, even if the weight difference isn't significant. So, if you're dealing with a big bird, it's always better to err on the side of caution and check the temperature a little earlier. It's better to be safe than sorry, especially with something as important as your Christmas dinner!
(Part 2) Getting Started: Prepping Your Turkey
Now that you’ve got a handle on the size of your bird and its cooking time, it’s time to get our hands dirty. Prepping the turkey is like giving it a spa day before it hits the oven. It's all about setting it up for success, ensuring a beautiful, flavorful roast.
Pat It Dry, My Friend
The first step is to pat the turkey dry with some kitchen paper. This might seem like a small detail, but it makes a big difference in achieving that crispy skin. Think of it like getting rid of excess moisture so that the skin can crisp up nicely in the oven. Trust me, you'll appreciate those delicious, golden-brown, crackling bits of skin.
Seasoning, Seasoning, Seasoning
Next, let’s get this bird seasoned! This is where your creativity can really shine. You can go for the classic salt and pepper combo, or get adventurous with herbs, spices, and even a little garlic. The key is to be generous. Don’t be shy with your seasonings!
Personally, I like to use a mix of dried herbs, like thyme, rosemary, and sage. A pinch of garlic powder, paprika, and a good sprinkle of salt and pepper does wonders. But hey, the world’s your oyster. Experiment and find what you love! Just make sure you season the inside of the bird too, don’t forget the cavity! You want those flavors to permeate throughout the bird for a truly delicious outcome.
Stuffing: A Matter of Choice
Ah, the age-old question: to stuff or not to stuff? Well, that’s completely up to you. I prefer to stuff my turkey, mainly because it adds a delicious flavour to the whole bird. I usually use a classic sausage and breadcrumb stuffing with chopped vegetables, like celery and onion. But you can also find great recipes for rice stuffing or even fruit stuffing for a festive touch.
If you’re opting for stuffing, make sure you cook it separately for a bit before putting it in the turkey. This will help ensure it’s cooked through. And if you’re stuffing your bird, don’t overstuff it! It needs room to breathe and cook evenly. A tightly packed stuffing can hinder the heat from reaching the center of the bird, potentially leading to undercooked parts.
(Part 3) The Oven: Time to Get This Bird Roasting

Alright, you’ve prepped your turkey, it’s seasoned to perfection, and now it’s time to get it into the oven. You’ve got this, my friend. I’ve got some tips for you to make this roasting process a breeze.
Roasting Time: A Quick Recap
Remember those roasting times I mentioned earlier? Now, you’ve got to add that turkey to a preheated oven, typically at 325°F (163°C). We’re going for a slow and steady cook, like a good stew simmering on the stove. And remember, those are just estimated times, the meat thermometer is your guide!
The Importance of Basting
Now, here’s a little trick for a juicy, flavorful bird: basting. It’s like a little treat for your turkey, a delicious bath of pan juices. You’ll need to baste your turkey every 30-45 minutes, taking those pan juices and drizzling them over the bird. It keeps the turkey moist and adds that beautiful golden-brown colour we’re all aiming for. Plus, basting infuses the bird with flavor, ensuring that even the skin has a delicious, savory taste.
Resting: A Crucial Step
Right, the turkey is cooked, it’s a gorgeous golden brown, and it smells heavenly. But hold your horses! Don’t carve it right away. We need to let it rest for 15-20 minutes. This gives those juices a chance to redistribute throughout the turkey, resulting in a tender and moist bird. Cover it with foil to keep it warm and let it relax after its little journey in the oven.
This resting period is essential, often overlooked, but makes a big difference in the final product. It allows the juices to distribute evenly, making the turkey incredibly succulent and preventing the dreaded dry turkey breast. So, be patient, let that turkey rest, and you'll be rewarded with a tender, flavorful bird.
(Part 4) Don’t Panic: Fixing Overcooked Turkey
Oh, the horror! You’ve been checking the turkey, you’ve been basting, and you’ve been following all the instructions. But then, it happens. You check the internal temperature, and it’s overcooked. Don’t despair, my friend! There are ways to rescue a slightly overcooked turkey.
Don’t Cut Into It Just Yet!
The first rule of overcooked turkey is: don’t panic! And don’t carve it! Let it rest, covered in foil, like we talked about before. This will allow the internal temperature to even out and help prevent it from drying out further. It's like giving the turkey a chance to catch its breath and recover from the heat.
Moisturize It
Once it’s rested, you can try to rescue that turkey. One trick is to create a delicious sauce. Use the pan juices, add some stock, herbs, and whisk it all together. Now, generously pour this sauce over the turkey. It’s like giving it a little bath of flavor and moisture. The sauce will help to rehydrate the turkey and add a beautiful taste. You can also add a touch of butter or cream for extra richness.
Another way to add some moisture is to try a simple gravy. It doesn’t need to be fancy, just a little flour, butter, and stock whisked together. Drizzle it over the turkey, and it’ll do wonders for adding some flavor and moisture. The gravy will act as a protective layer, keeping the turkey moist and enhancing its flavor.
Remember, the key is to work with what you have. Even if your turkey is slightly overcooked, a little creativity and a splash of sauce can make it a delicious and enjoyable part of your meal. Don't let a minor mishap ruin your festive spirit.
(Part 5) Beyond the Basics: A Touch of Flair
Now, let’s spice things up! We’ve covered the basics of roasting a turkey, but why stop there? There are so many ways to add a little flair to your festive feast. We can talk about different cooking techniques, stuffing variations, and side dishes that’ll make your turkey shine.
The Roasting Bag: A Time-Saving Option
Here’s a handy little secret: the roasting bag. You can pop your turkey into a bag and roast it in the oven. It’s a super easy and efficient way to cook a turkey. The bag seals in the moisture, so you don’t have to worry about basting. Plus, it creates a nice tender and juicy bird. The only downside is that you won’t get that lovely crispy skin. But hey, it’s a trade-off you can live with, right?
If you're looking for a foolproof method and time-saving convenience, the roasting bag is your best friend. It takes the guesswork out of turkey roasting and ensures a moist, flavorful bird every time. Just make sure to use a bag that's designed for roasting and follow the manufacturer's instructions carefully.
Stuffing Variations: Get Creative
We’ve talked about the classic sausage and breadcrumb stuffing, but why not get a little creative? You can find stuffing recipes with different flavours and textures. We’re talking wild rice stuffing, spinach and feta stuffing, even stuffing with dried fruits for a festive twist! It’s all about experimenting and finding what you love.
Stuffing is a great opportunity to express your culinary personality. Think about your favorite flavors and ingredients, and let your imagination run wild. You can create a stuffing that complements your turkey perfectly, adding a unique touch to your holiday meal. Remember to keep food safety in mind when creating stuffing; make sure it's cooked thoroughly to prevent any risks.
Side Dishes: A Feast for the Senses
And let’s not forget the side dishes. They’re the perfect companions for your roasted turkey. Think about classic options like mashed potatoes, gravy, cranberry sauce, and roasted vegetables. You can also get a little fancy with your side dishes. Why not try a butternut squash gratin, a delicious green bean casserole, or even a creamy mushroom soup? The possibilities are endless!
Side dishes are the supporting actors in your turkey feast. They add variety, texture, and flavor, creating a symphony of deliciousness. Experiment with different flavors and textures to create a truly memorable meal. Think about contrasting textures – creamy mashed potatoes against crisp roasted vegetables, or the sweetness of cranberry sauce with the savory flavor of gravy. The possibilities are endless!
(Part 6) Mastering the Oven: Turkey roasting tips and Tricks
Now, you’ve got the basics down, but let’s dive a bit deeper into the art of turkey roasting. There are some tips and tricks that can help you elevate your bird from good to amazing. I’ve learned these over the years, and I’m happy to share them with you.
The Thigh Trick: Avoiding Dryness
You’ve probably heard about breast meat being prone to drying out. Well, here’s a little secret: you can prevent this by tucking the turkey wings under the breast. This creates a little barrier, keeping the breast meat moist and juicy. It’s a simple trick that makes a big difference.
This simple trick is all about heat distribution. Tucking the wings helps protect the breast meat from the direct heat of the oven, allowing it to cook more evenly and retain its moisture. It's a small effort that yields a significant reward.
The Roasting Rack: A Must-Have
When roasting a turkey, using a roasting rack is a must. It allows the hot air to circulate evenly around the bird, which helps it cook more evenly. It also prevents the turkey from sitting in its own juices, which can lead to sogginess. Plus, the roasting rack elevates the turkey, allowing the bottom to crisp up beautifully.
A roasting rack is a must-have for any serious turkey roaster. It provides a platform for the turkey to cook evenly, ensuring that the bottom doesn't become soggy and the top doesn't dry out. It's a simple tool that makes a big difference in the quality of your roasted bird.
The Brine: A Game-Changer
Brining is a little technique that can make a big difference in the texture and flavour of your turkey. It involves soaking the turkey in a salt water solution for several hours before roasting. The salt helps retain moisture, making the turkey incredibly juicy and tender. It’s like giving it a little spa treatment before it goes into the oven. Now, I know brining can sound like a hassle, but trust me, it’s worth it. You won’t regret it.
Brining is a game-changer for turkey roasting. It's a simple technique that yields a juicy, flavorful bird. The salt in the brine draws out moisture and then draws it back in, infusing the turkey with flavor and keeping it moist. While it requires some extra time and planning, the results are well worth the effort. You'll be amazed at the difference it makes.
The Oven Temperature: Be Mindful
We’ve already talked about preheating the oven to 325°F (163°C). But you can also play around with the temperature a bit. If you want a crispier skin, you can start with a higher temperature, like 400°F (204°C), for the first 30 minutes. Then, you can reduce it to the regular 325°F (163°C) for the rest of the roasting time. It’s all about finding the perfect balance to get that beautiful golden-brown colour and crispy skin.
Oven temperature plays a crucial role in the final outcome of your turkey. A higher temperature at the beginning helps to create that delicious crispy skin, while a lower temperature for the rest of the roasting time ensures the bird cooks evenly and stays moist. It's all about finding that sweet spot between crispy skin and juicy meat.
(Part 7) Leftovers: Don’t Waste a Bite!
Okay, the turkey is done, it’s resting, and you’re about to dig in. But remember, there’s always a good chance you’ll end up with leftovers. Don’t throw them away! Leftovers can be transformed into delicious dishes that are just as good as the original.
Sandwiches, Salads, and Soups
Here’s the beauty of turkey leftovers: they’re incredibly versatile. You can use the turkey to make sandwiches, salads, or even a hearty soup. It’s the perfect way to use up those delicious leftovers and create a new meal. There are endless possibilities!
Leftovers are a culinary treasure trove. They offer a chance to be creative and create new dishes. Think about your favorite sandwich fillings, salad combinations, or comforting soup recipes and incorporate those delicious turkey leftovers. The possibilities are endless, and you'll be surprised at how delicious these leftover creations can be.
Turkey Curry: A Twist on Tradition
And if you’re feeling adventurous, try a turkey curry. It’s a delicious and surprising way to use up leftover turkey. You can find countless recipes online, and you can add your own personal touch with your favorite spices and vegetables. It’s a comforting and flavorful meal that’s perfect for a cold winter night.
Don't be afraid to experiment with your leftovers. A turkey curry is a delightful twist on tradition. It's a fusion of flavors that's both unexpected and incredibly satisfying. Try adding your favorite spices and vegetables, and let your creativity run wild. You might discover a new family favorite!
(Part 8) FAQ: Your Turkey Roasting Questions Answered
You’ve got your turkey, you’ve got your recipe, and you’ve got your oven ready. But you might still have some questions about roasting a turkey. No worries, I’ve got you covered. Here are some of the most frequently asked questions about turkey roasting.
FAQs:
- How long do I cook a turkey for?
The roasting time depends on the size of your turkey. Use the table earlier in the article as a guide. But always check the internal temperature with a meat thermometer to ensure it’s cooked through.
- How do I know when the turkey is done?
The turkey is done when the internal temperature reaches 165°F (74°C) in the thickest part of the thigh, avoiding the bone. Use a meat thermometer to check the temperature.
- What if my turkey is overcooked?
Don’t panic! Let it rest, covered in foil, to help it redistribute the juices. You can also add a flavorful sauce or gravy to rehydrate and add moisture. Remember, a little creativity can go a long way in salvaging an overcooked bird.
- Do I need to stuff the turkey?
It’s up to you! You can stuff the turkey with a delicious filling or roast it unstuffed. If you do stuff it, make sure to cook the stuffing separately to ensure it’s cooked through. It's always a good idea to err on the side of caution when it comes to food safety.
- What are some good side dishes for turkey?
The world’s your oyster! Classic sides include mashed potatoes, gravy, cranberry sauce, and roasted vegetables. You can also get creative with dishes like butternut squash gratin, green bean casserole, or creamy mushroom soup. Let your imagination guide you towards a delicious and festive feast!
Remember, turkey roasting is a journey, not a destination. Embrace the process, learn from your experiences, and don't be afraid to experiment. With a little patience and a sprinkle of culinary magic, you'll create a delicious turkey that's sure to impress your family and friends. Happy roasting!
Everyone is watching

How to Cook Frozen Lobster Tails Perfectly: A Step-by-Step Guide
RecipesLobster. Just the word conjures up images of lavish meals, special occasions, and a taste of luxury. But let's...

Pigs in a Blanket Cooking Time: How Long to Bake for Perfect Results
RecipesAh, pigs in a blanket. Just the name conjures up images of those delightful little parcels of crispy pastry en...

Pork Fillet Cooking Time: How Long to Cook It Perfectly
RecipesPork fillet, or tenderloin as it's sometimes called, is a real favourite in our house. It's so versatile, and...

The Ultimate Guide to Cooking Delicious Frankfurters
RecipesLet's face it, we all love a good frankfurter. It's a classic, simple, and always satisfying. But let's be rea...

The Ultimate Guide to Tender, Juicy Pulled Pork
RecipesRight, let's talk pulled pork. It's one of those dishes that just screams "comfort food," doesn't it? I mean...