Right, let's talk turkey, shall we? Christmas is just around the corner, and the thought of a beautifully roasted turkey filling the house with its delicious aroma is enough to get anyone excited. But for many of us, the question always pops up: how long do I need to cook this whopping 20lb bird? Well, my friends, you've come to the right place. I'm here to share my years of experience in the kitchen, from beginner blunders to culinary triumphs, and help you nail that turkey to perfection.
(Part 1) The Big Bird: 20lbs of Turkey
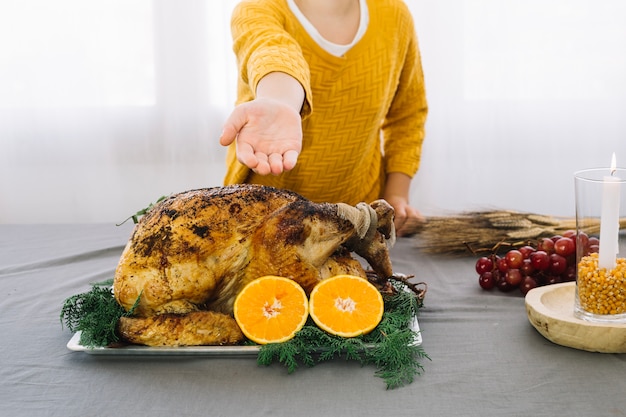
A 20lb turkey is no small feat, folks. That's a serious bird, and it demands respect! It's going to take some planning, some patience, and a good dose of confidence. Let's start with the basics.
Turkey Size Matters
First things first, that 20lb turkey is going to need some serious time in the oven. Don't even think about throwing it in there for a quick roast – it's a marathon, not a sprint. I've learned this the hard way, let me tell you. Back in the day, I once tried to cram a 20lb turkey into my oven for a Christmas dinner. Big mistake. It ended up dry as a bone and barely cooked through. So, yeah, size matters. A 20lb turkey needs a good 3-4 hours of cooking time, depending on your oven and the method you choose.
Turkey Prep: The Foundation for a Delicious Bird
Before you even think about putting that turkey in the oven, there's some prep work to do. We're talking brining, stuffing, and trussing – all essential steps for achieving a juicy and flavourful bird.
Brining the Bird: Unlock Juiciness
Brining is a bit of a culinary magic trick, in my opinion. You basically soak the turkey in a salt and water solution, which helps to keep the meat moist and tender. It's worth the effort, especially with a larger bird like this. I've found that a simple brine of salt, sugar, and herbs works wonders. Just be sure to give the turkey a good rinse afterwards to remove any excess salt.
Here's a basic brine recipe that you can adapt to your liking:
- 1 gallon of cold water
- 1 cup kosher salt
- 1/2 cup granulated sugar
- 1 tablespoon black peppercorns
- 1 tablespoon dried thyme
- 1 tablespoon dried rosemary
Combine all ingredients in a large container and stir until the salt and sugar dissolve. Submerge the turkey in the brine, making sure it's completely covered. Refrigerate for 12-24 hours. Remember, a well-brined turkey will be significantly juicier than one that's not brined.
Stuffing the Bird: A Classic Touch
Stuffing is a classic Christmas tradition, but it can also be a bit of a culinary gamble. You've got to be careful not to overstuff the turkey, or it might not cook through properly. I prefer to stuff the turkey loosely, leaving some room for the stuffing to expand. Also, if you're using a homemade stuffing, make sure to cook it separately for a few minutes before stuffing the turkey. This helps to ensure that the stuffing is cooked through and safe to eat.
Remember, the safe internal temperature for cooked stuffing is 165°F (74°C), just like for the turkey itself. If you're concerned about food safety, you can always cook the stuffing separately in a baking dish. This also allows you to cook the stuffing to a golden brown color, which adds a lovely depth of flavor.
Trussing the Bird: Ensuring Even Cooking
Trussing is the art of tying the turkey's legs and wings together with string, which helps to keep the bird in a nice, compact shape. This ensures even cooking and prevents the wings and legs from burning. It's a bit fiddly at first, but once you get the hang of it, it's pretty straightforward. There are lots of tutorials online if you need a visual guide.
I find that using kitchen twine for trussing is a good choice. It's strong enough to hold the turkey together and doesn't break easily. Just make sure to tie the twine securely, but not too tightly, so that you don't constrict the turkey's meat.
(Part 2) The Oven is Your Canvas: cooking techniques
So, your turkey is prepped and ready to go. Now it's time to talk oven time. There are a few different techniques you can use to cook your turkey, each with its own pros and cons.
Roast It Traditional: The Classic Approach
The traditional roasting method is the classic way to cook a turkey. You simply place the turkey in a roasting pan, breast-side up, and cook it in a preheated oven. It's simple, straightforward, and produces a beautifully browned bird. I love the simplicity of this method, especially when paired with a good basting sauce.
Here's how to roast a turkey traditionally:
- Preheat your oven to 325°F (160°C).
- Place the turkey in a roasting pan, breast-side up. You can use a roasting rack to elevate the turkey and allow air to circulate underneath it.
- Baste the turkey with butter, oil, or a flavorful sauce. This will help to keep the skin moist and prevent it from drying out.
- Cook the turkey for 3-4 hours, or until the internal temperature reaches 165°F (74°C) in the thickest part of the thigh.
- Let the turkey rest for 30 minutes before carving.
reverse searing: A Modern Twist for Juiciness
Now, this is a method I've been experimenting with lately, and I'm pretty impressed. It involves cooking the turkey at a low temperature for a longer period of time, followed by a quick sear at a high temperature to crisp up the skin. The result is a juicy and flavorful turkey with perfectly crispy skin. It's a bit more time-consuming, but it's worth it for the amazing result.
Here's how to reverse sear a turkey:
- Preheat your oven to 275°F (135°C).
- Place the turkey in a roasting pan, breast-side up.
- Cook the turkey for 4-5 hours, or until the internal temperature reaches 155°F (68°C) in the thickest part of the thigh.
- Remove the turkey from the oven and increase the oven temperature to 450°F (232°C).
- Return the turkey to the oven and cook for 15-20 minutes, or until the skin is golden brown and crispy.
- Let the turkey rest for 30 minutes before carving.
Spatchcocked: A Time Saver for Busy Cooks
Spatchcocking is a technique where you remove the backbone of the turkey and flatten it out, essentially turning it into a giant chicken breast. This method reduces cooking time significantly because the turkey cooks more evenly. It's also great for getting crispy skin, as the skin is exposed to the heat from all sides. I've found that spatchcocking a 20lb turkey is a real game-changer for larger gatherings. The bird cooks so much faster, and it's also easier to carve.
Here's how to spatchcock a turkey:
- Remove the backbone of the turkey by cutting along both sides of the backbone. You can save the backbone to make stock later.
- Flatten the turkey by pressing down on the breastbone. You can use a heavy object like a cast-iron skillet or a cutting board.
- Place the turkey in a roasting pan, skin-side up.
- Preheat your oven to 400°F (200°C).
- Cook the turkey for 2-3 hours, or until the internal temperature reaches 165°F (74°C) in the thickest part of the thigh.
- Let the turkey rest for 30 minutes before carving.
(Part 3) Temperature Check: Don't Overcook It!
Okay, so your turkey is in the oven, and the aroma is filling the air. Now, you need to make sure it's cooked through properly. The best way to do this is with a meat thermometer. I always keep one handy in my kitchen, and it's a life-saver for ensuring that my turkey is cooked to perfection. There's nothing worse than biting into a piece of turkey that's still pink in the middle.
safe internal temperature: Ensuring Food Safety
The recommended internal temperature for cooked turkey is 165°F (74°C). This is the temperature that ensures that the turkey is cooked through and safe to eat. You should insert the meat thermometer into the thickest part of the thigh, making sure not to touch the bone. If the temperature reads 165°F, you're good to go.
Resting Time: The Key to juicy turkey
Once your turkey is cooked, don't rush to carve it! Give it a good 30 minutes to rest before carving. This allows the juices to redistribute throughout the meat, resulting in a more tender and juicy turkey. I always tent my turkey with foil during this resting time to keep it warm and prevent the skin from drying out.
(Part 4) Cooking Times: A Guide for a 20lb Turkey
Here's a general guideline for cooking times for a 20lb turkey. Remember, these are just estimates, and the actual cooking time will vary depending on your oven, the size and shape of your turkey, and the method you choose. Always check the internal temperature of the turkey to ensure it's cooked through properly.
| Cooking Method | Cooking Time | Oven Temperature |
|---|---|---|
| Traditional Roast | 3-4 hours | 325°F (160°C) |
| Reverse Searing | 4-5 hours | 275°F (135°C) |
| Spatchcocked | 2-3 hours | 400°F (200°C) |
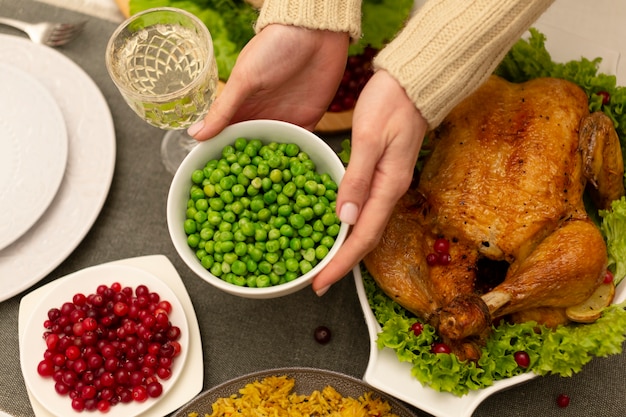
(Part 5) The Finishing Touches: Basting and Gravy
Now, we're talking about the fun part! The finishing touches that make your turkey truly spectacular. Basting and gravy are the key to taking your turkey from good to great.
Basting for a Juicy Bird: Keeping It Moist
Basting is the process of spooning pan juices over the turkey during cooking. This helps to keep the meat moist and prevents the skin from drying out. I usually start basting about halfway through the cooking time. You can use a simple butter and herb mixture, or you can get fancy with a homemade stock or wine sauce. I've found that using a mixture of butter, broth, and herbs is a great all-around basting sauce.
Gravy: The Star of the Show: Making It Rich and Flavorful
And let's not forget the gravy! Gravy is a must-have for any turkey dinner. It's the perfect way to soak up all those delicious turkey juices and add a rich flavor to your meal. The best gravy is made with the pan drippings from the turkey, along with some flour and broth. I've found that using a combination of turkey broth and red wine gives the gravy a beautiful depth of flavor. Just be sure to skim off any excess fat from the pan drippings before making the gravy.
Here's a basic recipe for turkey gravy:
- 2 tablespoons butter
- 2 tablespoons all-purpose flour
- 2 cups turkey broth
- 1/4 cup red wine (optional)
- Salt and pepper to taste
In a saucepan, melt the butter over medium heat. Whisk in the flour and cook for 1 minute, or until the mixture is smooth. Gradually whisk in the turkey broth and red wine, if using. Bring the mixture to a simmer and cook for 5-10 minutes, or until the gravy has thickened. Season with salt and pepper to taste.
(Part 6) Leftovers: Don't Waste a Bite!
The turkey is cooked, the gravy is made, and the meal is complete. But what about those delicious leftovers? Don't let them go to waste! There are countless ways to repurpose leftover turkey.
turkey sandwiches: A Classic: A Simple and Satisfying Option
Turkey sandwiches are a classic for a reason. They're easy, satisfying, and perfect for lunch or a quick dinner. I like to use leftover turkey in sandwiches with a bit of mayo, lettuce, and tomato. You can also use leftover turkey in salads, wraps, or even pasta dishes.
turkey soup: A Comforting Meal: Warming Up With Flavor
Turkey soup is a delicious and comforting way to use up leftover turkey. You can make a simple turkey noodle soup or get creative with a more elaborate soup recipe. I love to add leftover turkey to a pot of chicken broth with vegetables, noodles, and herbs. It's a great way to stretch your leftovers and warm up on a cold day.
turkey pot pie: A Hearty Treat: Indulging in Flavor and Comfort
For a heartier meal, you can use leftover turkey in a pot pie. Simply mix the turkey with some vegetables and gravy, then top it with a flaky crust. It's a satisfying and comforting dish that's perfect for a family dinner or a potluck. I've found that a combination of leftover turkey, carrots, peas, and gravy, topped with a homemade puff pastry crust, makes for a delicious and impressive pot pie.
(Part 7) Tips and Tricks: From an Experienced Cooker
Now, I've learned a few things over the years about cooking turkeys, and I want to share some of my tried-and-true tips with you.
Don't Overcrowd the Oven: Giving Your Turkey Space
When you're cooking a 20lb turkey, it's important to make sure your oven isn't overcrowded. If you have other dishes in the oven, be sure to give them plenty of space to circulate air and cook evenly. If your oven is too crowded, the turkey might not cook properly, and it could also affect the quality of the other dishes.
Avoid Opening the Oven Door: Patience is Key
Try to resist the urge to open the oven door too often while the turkey is cooking. Every time you open the door, you let out heat, which can slow down the cooking process. If you need to check on the turkey, do it quickly and close the door immediately.
Use a Roasting Rack: For Even Cooking
A roasting rack is essential for cooking a turkey. It allows air to circulate around the bird, which helps to cook it evenly and prevents the bottom from burning. I always use a roasting rack, and it makes a big difference in the quality of my turkey.
(Part 8) FAQs: Your Questions Answered
Now, let's address some of the most common questions about turkey cooking time:
Q1: How long does it take to cook a 20lb turkey at 350°F?
A: It typically takes around 3-4 hours to cook a 20lb turkey at 350°F. However, it's crucial to use a meat thermometer to ensure the internal temperature reaches 165°F (74°C) in the thickest part of the thigh. Always err on the side of caution and check the temperature regularly.
Q2: Can I cook a 20lb turkey in a slow cooker?
A: While technically possible, it's not recommended to cook a 20lb turkey in a slow cooker. Slow cookers are typically designed for smaller cuts of meat. A 20lb turkey is too large and may not cook evenly in a slow cooker. Additionally, the slow cooker might not be large enough to accommodate the turkey properly, leading to uneven cooking and potentially unsafe food.
Q3: Is it safe to stuff a turkey?
A: Stuffing a turkey is a tradition, but it can be a food safety risk. The stuffing may not reach a safe internal temperature of 165°F (74°C) if cooked inside the turkey. It's recommended to cook stuffing separately for a safer and more reliable option. This also allows the stuffing to cook more evenly and to develop a crispy texture on the outside. If you do choose to stuff your turkey, ensure it's cooked thoroughly and the internal temperature of the stuffing reaches 165°F (74°C) before serving.
Q4: What should I do if the turkey is browning too quickly?
A: If the turkey is browning too quickly, you can tent it with foil to prevent further browning. This will help to keep the turkey moist and prevent the skin from burning. You can tent the turkey with foil for the last hour of cooking, or even just for the last 30 minutes, depending on how quickly the skin is browning.
Q5: What's the best way to reheat leftover turkey?
A: You can reheat leftover turkey in the oven, on the stovetop, or in the microwave. I prefer to reheat leftover turkey in the oven because it tends to stay more moist. Just place the turkey in a baking dish, cover it with foil, and bake it at 325°F (160°C) for about 30 minutes, or until heated through. You can also reheat leftover turkey in a skillet with a little bit of butter or oil over medium heat, stirring occasionally until heated through. If you're short on time, you can reheat leftover turkey in the microwave, but be aware that it may dry out a bit.
There you have it, my friends! My guide to cooking a 20lb turkey. It's not a quick process, but it's definitely worth the effort for a delicious and impressive meal. Remember, practice makes perfect, so don't be afraid to experiment and find what works best for you. Happy cooking!
Everyone is watching

Corn on the Cob: The Ultimate Guide to Perfectly Cooked Ears
Healthy MealsAh, corn on the cob. Just the name evokes images of sunny days, barbecues, and that sweet, juicy flavour that ...

Perfect Pork Roast Oven Cooking Time: A Guide to Delicious Results
Healthy MealsThere's something truly satisfying about a perfectly roasted pork. The aroma alone is enough to make your mout...

Ham Cooking Time: How Long to Bake, Smoke, or Boil a Delicious Ham
Healthy MealsAh, ham. It's a classic, isn't it? A real crowd-pleaser, especially around holidays. And when done right, it'...

Scallops: The Ultimate Guide to Perfect Cooking
Healthy MealsAh, scallops. Those delicate, sweet, and utterly delicious morsels of the sea. They hold a special place in my...

Spaghetti Squash: The Ultimate Guide to Cooking and Serving
Healthy MealsRemember that time you saw spaghetti squash at the supermarket, looking all bumpy and strange, and thought, "W...