The festive season is upon us, and the aroma of roast turkey is in the air. But before you start prepping your bird and preheating the oven, there's one question that pops up every year: how long do you actually roast this magnificent creature? I remember when I first started cooking, I was determined to impress my in-laws with a perfectly roasted turkey. I ended up with a dry, overcooked bird that looked more like a piece of leather than a delicious festive centerpiece. It wasn't pretty! So, armed with a wealth of experience (and a few burnt turkeys under my belt), I'm here to share my hard-earned wisdom on how to roast a turkey that's juicy, flavorful, and doesn't send your guests into a food coma.
Part 1: Getting Started - The Right Turkey for the Job
Before we even think about the oven, we need to pick the right turkey. This is a crucial step, and it all comes down to choosing a turkey that's the right size for your gathering. You don't want to be left with a mountain of leftovers, nor do you want to be scrambling to find more food when your guests are still hungry.
Choosing the Right Turkey Size
The golden rule here is to aim for about 1 pound of turkey per person. This should give everyone enough to enjoy a good portion without feeling like they've been stuffed to the gills. Of course, if you've got a crowd of big eaters, you might want to bump that up to 1.5 pounds per person.
Take a look at the size of your bird - you'll usually find a weight range on the packaging. If you're unsure, a quick google search will tell you the approximate weight range for different turkey sizes. This will help you choose the right bird for your needs.
Fresh vs. Frozen: Making the Choice
Now, the next big question is: fresh or frozen? Honestly, there's no right or wrong answer here. It's all about personal preference and what works best for you.
- Fresh turkeys: These are usually found in the chiller section of your supermarket. They are ready to go straight into the oven, which can be a real time saver. However, they have a shorter shelf life, so you need to be sure you can cook it within a few days of buying it.
- frozen turkeys: These offer greater flexibility as they can be stored in your freezer for a longer period. You just need to allow enough time to defrost it properly before cooking. This usually takes about 24 hours in the refrigerator for every 4 pounds of turkey.
If you opt for a frozen turkey, it's important to defrost it properly before cooking. A slow and steady thaw in the refrigerator is the safest and most effective method. Never defrost a turkey at room temperature, as this can create a breeding ground for bacteria.
Part 2: Getting Ready - Prepping Your Turkey
Alright, you've got your turkey, now it's time to prep it for the oven. This might seem like a straightforward task, but there are a few crucial steps to make sure your turkey cooks evenly and turns out beautifully.
Spatchcocking for Even Cooking
Here's where things get a bit more interesting. Spatchcocking is a technique that essentially flattens the turkey by removing the backbone and opening it up. This allows the heat to penetrate the bird more evenly, leading to a quicker cooking time and more consistent results.
Don't worry, it's not as intimidating as it sounds. You'll need a sharp knife and a pair of kitchen shears. You can find countless tutorials online that will show you exactly how to do it. Trust me, once you try it, you'll be a spatchcocking convert!
Brining for Juicy Results
Brining is a fantastic way to ensure your turkey stays super moist and flavorful. It involves soaking the bird in a salty water solution for a few hours, which helps to retain moisture and prevent dryness.
There are countless brining recipes out there, from basic salt and water solutions to more complex mixtures with herbs and spices. I personally like to add a touch of lemon juice and garlic to my brining solution for extra flavor.
It's important to note that brining can be a bit messy, so make sure you've got a large enough container for your turkey. Also, if you're using a fresh turkey, you can skip the brining step as it won't have time to dry out.
Patting Dry for a Crisp Skin
Once your turkey is brined (or not), it's important to pat it dry with paper towels. This will help the skin crisp up nicely during roasting.
Seasoning with Flavor
Now it's time to season your turkey! Don't be shy with the spices. I love to use a simple rub of salt, pepper, and paprika, but you can get as creative as you like. You can add herbs like rosemary, thyme, or sage for extra flavor. Don't forget to season the cavity of the turkey as well, as this will add an extra layer of flavor to the meat.
Part 3: roasting time: A Guide for Success
Now, let's talk about the actual cooking time. This is where things can get a bit tricky, as it varies depending on the size and weight of your turkey. As a general rule of thumb, allow about 15 minutes of cooking time per pound for an unstuffed turkey, and 20 minutes per pound for a stuffed one. Remember, these are just guidelines, and it's always best to check the internal temperature of the turkey with a meat thermometer to ensure it's cooked through.
Internal Temperature: Ensuring Safety
Speaking of internal temperatures, this is crucial for food safety. The USDA recommends cooking your turkey to an internal temperature of 165°F (74°C) to ensure it's safe to eat. You can check the temperature by inserting a meat thermometer into the thickest part of the thigh, avoiding bone. Make sure the thermometer stays in the meat for a few seconds to get an accurate reading.
Resting Time: A Crucial Step
Once your turkey is cooked through, let it rest for at least 15 minutes before carving. This allows the juices to redistribute throughout the meat, resulting in a juicier and more flavorful bird. It's also a good time to prepare your sides and gravy.
Part 4: Cooking Time: unstuffed turkey
Let's dive into the specifics of roasting an unstuffed turkey. This is a good option if you want to avoid the extra cooking time and potential for dryness that comes with stuffing.
Calculating Roasting Time
As I mentioned earlier, an unstuffed turkey generally takes about 15 minutes per pound to cook. For example, a 12-pound turkey will need approximately 3 hours of roasting time. This can be adjusted slightly based on your oven temperature, so be sure to consult your oven instructions.
Oven Temperature: Finding the Sweet Spot
Most recipes recommend roasting your turkey at 325°F (160°C). This is a good temperature for achieving a nice golden brown crust while keeping the meat moist.
Tips for perfect roasting
Here are a few tips to ensure a perfect roast:
- Basting: Basting your turkey with pan juices or melted butter during the cooking process helps to keep it moist and adds a beautiful glaze.
- roasting pan: Using a roasting pan with a rack is essential for allowing air to circulate around the turkey and ensure even cooking.
- Covering the Turkey: You can cover the turkey with foil during the first part of the cooking process to help it retain moisture. This is especially useful for larger turkeys. Towards the end of the cooking time, remove the foil to allow the skin to crisp up.
Part 5: Cooking Time: Stuffed Turkey
Stuffing your turkey can be a real treat, but it does add some complexity to the cooking process.
Cooking Time and Temperature
A stuffed turkey takes longer to cook because the stuffing needs to reach a safe internal temperature of 165°F (74°C). You'll need to add about 20 minutes per pound of turkey to your cooking time. This means a 12-pound stuffed turkey will take approximately 4 hours to roast.
Remember to always check the temperature of the stuffing with a meat thermometer.
Safety First: Don't Overstuff
When stuffing your turkey, don't overpack it. This can prevent the stuffing from cooking evenly and can even create a breeding ground for bacteria. Leave some space for the stuffing to expand during cooking.
Tips for a Delicious Stuffed Turkey
- Moist Stuffing: A slightly moist stuffing is best for preventing dryness. You can add extra broth or stock to your stuffing recipe.
- Cooking the Stuffing: You can cook your stuffing separately in a baking dish, which will ensure it's cooked through. This is a safer option than stuffing the turkey, especially if you're using a traditional stuffing that contains eggs and dairy products.
Part 6: FAQs
Here are some of the most frequently asked questions about turkey roasting time and temperature:
1. How do I know if my turkey is done?
The best way to determine if your turkey is done is by checking the internal temperature with a meat thermometer. The safe temperature is 165°F (74°C) in the thickest part of the thigh.
2. My turkey seems dry. What can I do?
A dry turkey can be a result of overcooking or not basting often enough. If your turkey is dry, you can try adding some extra moisture by basting it with melted butter or gravy during the final stages of cooking.
3. Can I roast my turkey at a lower temperature?
Yes, you can certainly roast your turkey at a lower temperature. A lower temperature, such as 300°F (150°C), will result in a more moist and tender turkey. However, it will take longer to cook, so you'll need to adjust your cooking time accordingly.
4. Can I cook my turkey in a slow cooker?
Yes, you can cook your turkey in a slow cooker, but it's not the most conventional method. It's best to use a smaller turkey for this, as a larger turkey may not fit comfortably in the slow cooker. It's also important to note that slow-cooking a turkey will result in a less crispy skin.
5. How do I prevent my turkey from browning too quickly?
If your turkey is browning too quickly, you can try covering it with foil for the first part of the cooking time. This will help to prevent the skin from burning. You can also try lowering the oven temperature slightly.
Part 7: The Great Debate: To Stuff or Not to Stuff?
Now, a question that sparks heated debate among turkey enthusiasts: should you stuff your turkey? It's a question that has divided families and friends for generations.
I'll be honest, I'm a bit of a stuffing purist. I love the classic combination of bread, herbs, and vegetables, and I think stuffing a turkey adds a whole new dimension of flavor to the meal. But I also understand the safety concerns. Stuffing can sometimes take longer to cook through than the turkey itself, which can lead to a risk of food poisoning.
So, what's the verdict? Ultimately, the decision is yours. If you decide to stuff your turkey, make sure you do it safely by following the guidelines I mentioned earlier. You can also consider cooking the stuffing separately in a baking dish. This is a safer option and ensures the stuffing is fully cooked through.
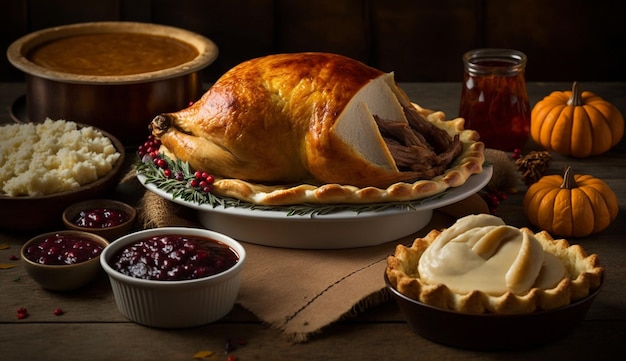
Part 8: Gravy Time: The Essential side dish
No turkey dinner is complete without a rich and flavorful gravy. A good gravy can elevate your meal to new heights.
I love to make my gravy from scratch, using the pan juices from the turkey. You can deglaze the pan with some wine or broth, then whisk in some cornstarch or flour to thicken the gravy. Don't be afraid to experiment with different herbs and spices to create your own unique flavor profile.
If you're short on time, you can always use a store-bought gravy. Just make sure to heat it up thoroughly before serving.
Part 9: The Importance of Resting
After you've taken your turkey out of the oven, it's crucial to let it rest for at least 15 minutes before carving. This allows the juices to redistribute throughout the meat, resulting in a much juicier and more flavorful bird. Think of it as a reward for all your hard work!
Part 10: Serving Up the Feast
The moment of truth has arrived. It's time to carve your turkey and serve up the feast.
Here's a handy table to help you carve your turkey like a pro:
| Section | Carving Technique |
|---|---|
| Breast | Carve across the grain in thin slices. |
| Legs and Thighs | Cut through the joint where the leg meets the thigh. Then, carve the thigh meat off the bone and slice across the grain. |
| Wings | Cut through the joint where the wing meets the body. Remove the wing and serve separately. |
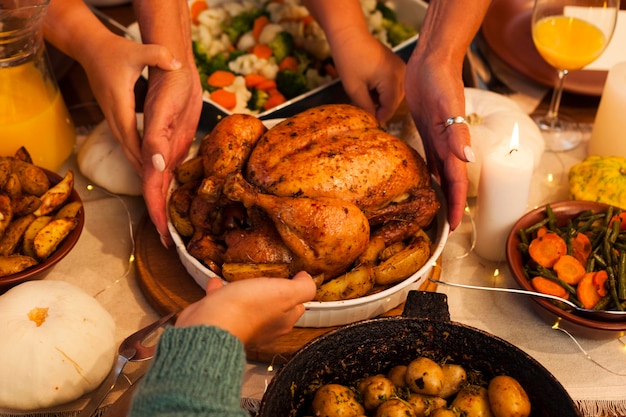
Once your turkey is carved, arrange it on a platter and surround it with your favorite sides. This is where you can get creative. Consider classics like mashed potatoes, cranberry sauce, and green bean casserole. Or, get adventurous with roasted vegetables, stuffing balls, or even a delicious potato gratin.
Part 11: Enjoying the Bounty
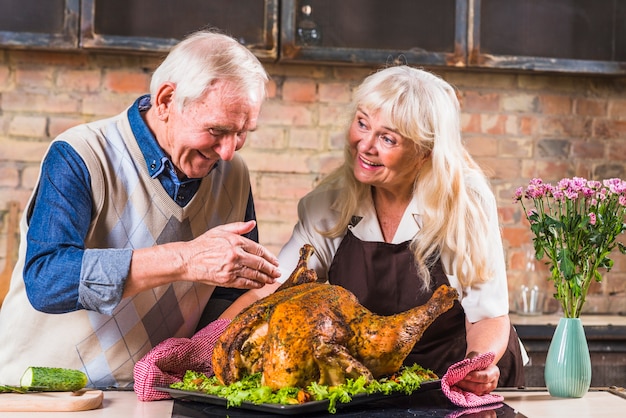
Finally, it's time to relax and enjoy the fruits of your labor. As you gather around the table with friends and family, savor every bite of that juicy, flavorful turkey.
Remember, cooking a perfect turkey takes time and practice. Don't be discouraged if your first attempt isn't a culinary masterpiece. With a little patience and perseverance, you'll soon be mastering the art of roasting a turkey that's sure to impress even the most discerning palate.
Happy holidays!
Everyone is watching

Corn on the Cob: The Ultimate Guide to Perfectly Cooked Ears
Healthy MealsAh, corn on the cob. Just the name evokes images of sunny days, barbecues, and that sweet, juicy flavour that ...

Perfect Pork Roast Oven Cooking Time: A Guide to Delicious Results
Healthy MealsThere's something truly satisfying about a perfectly roasted pork. The aroma alone is enough to make your mout...

Ham Cooking Time: How Long to Bake, Smoke, or Boil a Delicious Ham
Healthy MealsAh, ham. It's a classic, isn't it? A real crowd-pleaser, especially around holidays. And when done right, it'...

Scallops: The Ultimate Guide to Perfect Cooking
Healthy MealsAh, scallops. Those delicate, sweet, and utterly delicious morsels of the sea. They hold a special place in my...

Spaghetti Squash: The Ultimate Guide to Cooking and Serving
Healthy MealsRemember that time you saw spaghetti squash at the supermarket, looking all bumpy and strange, and thought, "W...