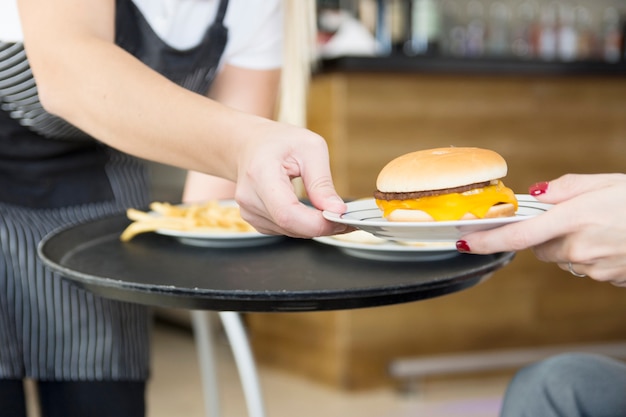
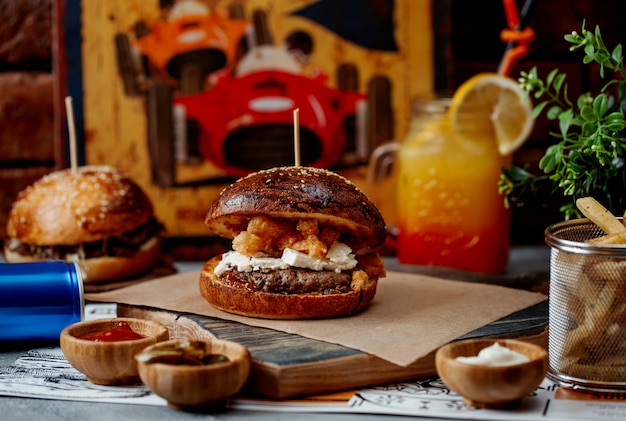
There's a certain magic to grilling a burger. The satisfying sizzle, the intoxicating aroma of smoke and char, the anticipation of that first bite – it's an experience that simply can't be replicated indoors. But achieving that perfect burger, juicy and bursting with flavor, requires more than just tossing a patty on the grill and hoping for the best. It's about understanding the science behind the grilling process, and that's what I'm here to share.
Over the years, I've spent countless hours – and perhaps a few too many burgers – perfecting my grilling technique. From casual backyard barbecues to more elaborate patio setups, I've learned that achieving those juicy, flavorful burgers isn't about fancy equipment or complicated rubs. It's about understanding the basics, paying attention to the details, and most importantly, embracing the joy of the grilling experience.
Part 1: The Science of Heat and Sear

Forget what you've heard about "high heat" being the only way to get a good sear. While a quick sear is crucial for those beautiful grill marks, it's the consistent, even heat that truly cooks the burger through and locks in those delicious juices. It's all about finding the perfect balance.
The Sweet Spot: Medium Heat for Juicy Burgers
My go-to temperature for burgers is between 350°F (175°C) and 400°F (200°C). This range allows for a good sear without scorching the outside and drying out the inside. Think of it as a happy medium - you want the patty to develop a lovely crust while ensuring a juicy, flavorful center.
The Role of a Thermometer
One of my most valuable grilling tools is a good quality thermometer. Don't rely solely on visual cues; a thermometer provides an accurate reading of your grill's temperature, ensuring consistency. For gas grills, it's simply a matter of adjusting the flame settings. For charcoal grills, it involves positioning the coals and managing the airflow.
The Art of the Sear: A Quick Kiss of High Heat
This is where the high heat comes in. Once your grill is preheated and the patty is placed on the grates, a quick sear on each side, about 2-3 minutes each, is crucial. This creates those irresistible grill marks and adds a smoky depth of flavor. Think of it as a quick burst of high heat, a "kiss from the flames," that gives your burger that extra layer of deliciousness.
Part 2: Mastering the Patty

Let's be honest, the patty is the star of the show. A well-formed, perfectly seasoned patty is the foundation for a truly delicious burger experience.
The Patty Formula: Choosing the Right Beef
For the ideal burger patty, I aim for an 80/20 blend of lean ground beef. This balance ensures juiciness while maintaining a satisfying chew. This ratio provides the right amount of fat for flavor and moisture without making the patty too greasy.
Seasoning Simplicity: Let the Beef Shine
I like to keep things simple when it comes to seasoning: just salt and pepper, allowing the natural flavor of the beef to shine through. You can always add additional seasonings to your preference, but for me, a simple approach works best.
The Patty Shape: Thickness and Size
Don't underestimate the power of a well-formed patty. Avoid those flat, thin patties that tend to dry out quickly. Aim for a patty that's about 1/2 inch thick and slightly wider than the bun. This allows for even cooking, ensuring a juicy interior.
Avoiding Patty Shrinkage: Resist the Press
One of the biggest burger blunders is pressing the patty down during grilling. This forces out the juices, resulting in a dry burger. Resist the temptation! Let the patty cook undisturbed, allowing it to rise naturally. Trust me, the outcome will be a juicy, flavorful burger that will impress even the pickiest eaters.
Part 3: The Resting Ritual

Patience is a virtue, especially when it comes to grilling burgers. Just like a good steak, allowing the burger to rest after grilling is crucial for locking in the juices. This might seem like an unnecessary step, but it makes a significant difference in the final product.
The Resting Technique: Letting the Juices Redistribute
Once the patty is cooked to your liking, remove it from the grill and let it rest for 5-7 minutes before assembling the burger. This allows the juices, which have been pushed to the surface during cooking, to redistribute throughout the patty, resulting in a more flavorful and juicy bite. Think of it as a little time for the burger to relax and settle in after its grilling experience.
Resting Tips: Creating a Warm, Steamy Environment
For a simple resting technique, transfer the patty to a cutting board and loosely cover it with foil. This creates a warm, steamy environment that helps the juices redistribute. You can also place the patty on a wire rack over a baking sheet, allowing air to circulate and prevent the patty from becoming soggy.
Part 4: The Bun Factor
A burger is only as good as its bun, and finding the perfect bun is an art form. The bun shouldn't be an afterthought; it should play a crucial role in the overall burger experience.
Bun Selection: Finding the Right Texture and Flavor
For my burgers, I prefer a soft, slightly sweet bun. The ideal bun should have a good texture that can hold its own against the juicy patty and a subtle sweetness that complements the savory flavors.
Toasted Perfection: Adding a Touch of Crunch
Toasting the bun is a must for any good burger. It adds a delightful crunch and a touch of warmth that enhances the overall flavor. There are a few methods for toasting buns. For a classic approach, I like to use a grill pan or a pan over medium heat. Simply place the bun cut-side down and toast until lightly golden brown and slightly crispy. For a more rustic touch, you can also toast the bun directly on the grill, taking care not to burn it.
Part 5: The Art of Toppings
The toppings are where you truly personalize your burger. It's an opportunity to unleash your creativity and experiment with flavors, textures, and combinations.
The Classic Combo: A Refreshing Foundation
Let's start with the classics: lettuce, tomato, onion, and pickles. They offer a refreshing crunch and a burst of flavor that complements the savory patty. These classic toppings provide a balanced and satisfying base for your burger creation.
Beyond the Basics: Adding Bold Flavors and Textures
Once you've mastered the classics, it's time to explore beyond the ordinary. Think about incorporating bold flavors and textures: grilled pineapple, roasted peppers, caramelized onions, spicy jalapenos, and even a touch of avocado or a creamy blue cheese dressing.
The Sauce Factor: Elevating the Flavor
Don't forget the sauce! A good sauce can elevate a burger to new heights. Mayonnaise, ketchup, mustard, and bbq sauce are always crowd-pleasers. For a gourmet touch, try a homemade aioli, a tangy chimichurri sauce, or even a spicy sriracha mayo.
Part 6: grilling tips and Tricks for Success
Now that we've covered the fundamentals, let's dive into some helpful tips and tricks that will elevate your grilling game and ensure you're creating burgers that will impress.
Avoid Overcrowding the Grill: Giving Each Patty Space
One of the biggest mistakes people make is overcrowding the grill. This leads to uneven cooking and makes it difficult to achieve that perfect sear. Give each patty its own space to breathe. If you have a large group, consider grilling in batches.
Master the Flip: Resist the Urge to Flip Too Often
Don't flip the patty too often! Flipping it multiple times can lead to a dry patty. Resist the urge and let it cook undisturbed for a good 2-3 minutes before flipping.
Clean the Grates: Ensuring a Clean Surface
Before grilling, clean the grill grates with a grill brush. This removes any leftover food particles and prevents sticking, ensuring a clean surface for your patties.
Don't Be Afraid to Experiment: Embrace the Journey of Discovery
Grilling is a journey of discovery. Don't be afraid to experiment with different meats, seasonings, and toppings. Find what you like and what works best for your taste buds. Embrace the creativity and enjoy the process.
Part 7: FAQs: Addressing Common burger grilling QuestionsWhat's the Best Way to Tell If a Burger Is Cooked?
Use a meat thermometer to ensure the burger is cooked to a safe internal temperature of 160°F (71°C). This ensures that the burger is cooked through and safe to eat.
What If My Burger Is Too Dry?
This often happens when the patty is overcooked. Try using a slightly fattier meat blend or avoid pressing the patty down during grilling.
What Should I Do If My Patty Falls Apart?
Don't panic! Use a spatula to carefully lift the patty and gently push it back into shape.
How Do I Keep My Bun From Getting Soggy?
Toast the bun lightly before assembling the burger. You can also add a layer of lettuce or a few slices of tomato to create a barrier between the patty and the bun.
What's the Best Way to Clean My Grill After Grilling?
Once the grill has cooled down, use a grill brush to remove any leftover food particles. You can also use a grill cleaning solution to deep clean the grates, ensuring it's ready for your next grilling adventure.
Part 8: My Go-To burger recipe: A Proven Winner
Here's my go-to burger recipe, a proven winner that never fails to impress. It's a simple recipe that focuses on quality ingredients and a few key techniques for creating a truly delicious burger.
Ingredients:
- 1 pound of 80/20 ground beef
- 1 teaspoon salt
- 1/2 teaspoon black pepper
- 4 burger buns
- Lettuce, tomato, onion, pickles, and your favorite toppings
- Mayonnaise, ketchup, mustard, or your favorite sauce
Instructions:
- Preheat your grill to medium-high heat (350°F - 400°F). This ensures that the grill is hot enough to create a good sear without burning the patty.
- In a large bowl, combine the ground beef, salt, and pepper. Mix gently, but don't overwork the meat. Overworking the meat can result in a tough patty.
- Form the mixture into 4 equal-sized patties, about 1/2 inch thick and slightly wider than the bun. This shape allows for even cooking and a juicy interior.
- Place the patties on the grill and cook for 2-3 minutes per side, or until a nice sear develops. This quick sear is crucial for those beautiful grill marks and added flavor.
- Reduce the heat to medium (350°F) and continue cooking for another 3-5 minutes per side, or until cooked to your desired doneness. Use a meat thermometer to ensure the burger is cooked to a safe internal temperature of 160°F (71°C).
- Remove the patties from the grill and let them rest for 5-7 minutes. This allows the juices to redistribute throughout the patty, resulting in a juicier and more flavorful burger.
- Toast the buns lightly on the grill or in a pan. This adds a delightful crunch and warmth to the bun.
- Assemble the burgers with your favorite toppings and enjoy! This is where you can unleash your creativity and personalize your burger creation.
grilling burgers is more than just a meal; it's a shared experience, a gathering of friends and family around a common purpose. So fire up the grill, gather your loved ones, and savor the taste of a truly perfect burger.
Everyone is watching

Corn on the Cob: The Ultimate Guide to Perfectly Cooked Ears
Healthy MealsAh, corn on the cob. Just the name evokes images of sunny days, barbecues, and that sweet, juicy flavour that ...

Perfect Pork Roast Oven Cooking Time: A Guide to Delicious Results
Healthy MealsThere's something truly satisfying about a perfectly roasted pork. The aroma alone is enough to make your mout...

Ham Cooking Time: How Long to Bake, Smoke, or Boil a Delicious Ham
Healthy MealsAh, ham. It's a classic, isn't it? A real crowd-pleaser, especially around holidays. And when done right, it'...

Scallops: The Ultimate Guide to Perfect Cooking
Healthy MealsAh, scallops. Those delicate, sweet, and utterly delicious morsels of the sea. They hold a special place in my...

Spaghetti Squash: The Ultimate Guide to Cooking and Serving
Healthy MealsRemember that time you saw spaghetti squash at the supermarket, looking all bumpy and strange, and thought, "W...
