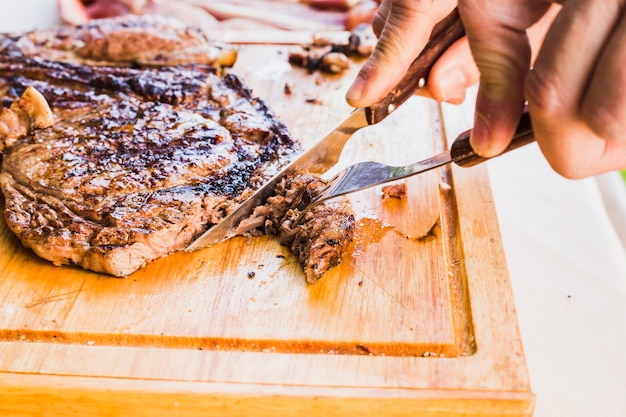
I've always been a bit of a barbecue enthusiast. There's something about the smoky aroma and the juicy, fall-off-the-bone meat that just gets me going. But let's be honest, sometimes firing up the smoker or grill isn't always feasible, especially when you're short on time or the weather's not cooperating. That's when my trusty oven comes in handy. I've perfected a method for oven-baked pork ribs that consistently delivers the same delicious results, without the hassle. It's a tried-and-true recipe that's become a favourite in my household, and I'm thrilled to share it with you.
Part 1: The Magic of Pork Ribs

Before we dive into the recipe, let's take a moment to appreciate the magic that is pork ribs. They're a versatile cut of meat, perfect for grilling, smoking, or, as we'll be doing today, baking in the oven. The key to achieving melt-in-your-mouth tenderness is understanding the anatomy of the rib. Pork ribs are essentially a long strip of meat, usually comprising three types:
1. Baby back ribs:
These are the most popular choice for ribs, known for their delicate meat and a good amount of marbling, which contributes to their flavour and juiciness. They also have a nice curve, making them perfect for the "rack" format, which is what most people are familiar with. I remember the first time I saw a rack of baby back ribs - they looked like a mini-mountain range, and the anticipation was almost unbearable!
2. spare ribs:
Spare ribs come from the lower part of the rib cage and are larger and meatier than baby back ribs. They tend to have a bit more fat content, which can result in a richer flavour. However, they can be tougher than baby backs, so they require longer cooking times. Spare ribs are often used for ribs that are meant to be cut into individual servings rather than staying whole.
3. St. Louis Ribs:
These ribs are essentially spare ribs that have been trimmed and shaped to create a more consistent rectangular form. They're a popular choice for grilling and barbecuing because of their uniform shape, which makes them easier to manage on the grill. St. Louis ribs are a good option if you're looking for a more even cooking experience, and they're also great for parties since they're easy to serve.
I personally prefer baby back ribs for their tenderness and flavour, but feel free to use any type that catches your fancy. As long as you follow the recipe and cook them properly, they'll be a delicious addition to any meal.
Part 2: Gathering Your Ingredients

This recipe isn't about fancy ingredients or complicated techniques. It's all about letting the simple flavours of the pork ribs shine through. Here's what you'll need:
- 2-3 racks of pork ribs (baby back or spare ribs)
- 1 tablespoon of salt
- 1 teaspoon of black pepper
- 1/2 teaspoon of garlic powder
- 1/2 teaspoon of onion powder
- 1/4 cup of apple cider vinegar
- 1/2 cup of barbecue sauce (your favourite kind)
You can easily find all of these ingredients at your local supermarket. The beauty of this recipe is that you don't need to go searching for exotic spices or obscure ingredients. It's all about keeping things simple and letting the flavour of the ribs speak for themselves.
Part 3: Preparing the Ribs

Let's get those ribs prepped for their oven adventure! This part is all about getting them ready for the flavours to soak in. Here’s the breakdown:
1. Removing the Membrane:
You’ll often find a thin, tough membrane on the back side of the ribs. This membrane can prevent the ribs from becoming tender during cooking, so it’s essential to remove it. Think of it like a protective layer, but one that's not doing us any favours in terms of flavour. You can use a paper towel to grip the membrane and peel it off, or use a small, sharp knife to make a small incision and then carefully pull it off.
2. Patting Dry:
Once the membrane is gone, pat the ribs dry with paper towels. This will help the rub adhere better and prevent excess moisture during cooking. We don't want the ribs to steam instead of getting that beautiful caramelized crust, so drying them off is a crucial step.
3. Seasoning the Ribs:
Now, for the fun part - adding flavour. In a small bowl, combine the salt, pepper, garlic powder, and onion powder. Rub the spice mixture liberally all over the ribs, ensuring all surfaces are well coated. I like to rub it in firmly to really get those flavours deep inside the meat. The smell of those spices mingling with the raw pork is pure magic!
Part 4: The Oven-Baked Magic Begins
Now that the ribs are prepped, let's get them into the oven. This is where the real magic happens, with the oven transforming them into tender, juicy masterpieces.
1. The Oven Setup:
Preheat your oven to 300 degrees Fahrenheit (150 degrees Celsius). This low temperature allows the ribs to cook slowly and evenly, creating that melt-in-your-mouth texture. It's like giving them a spa treatment, allowing them to relax and surrender to the warmth. I prefer using a baking dish that's just big enough to hold the ribs in a single layer. This way, the heat can circulate evenly around the ribs, ensuring they cook uniformly. You can also use a roasting pan, but make sure it's not too big, or the ribs might dry out.
2. Placing the Ribs in the Oven:
Place the seasoned ribs in the prepared baking dish. Pour the apple cider vinegar into the bottom of the dish. The vinegar will help to create steam and keep the ribs moist during the long cooking process. Think of it as a secret ingredient, adding a touch of tanginess and helping to break down the tough tissues in the ribs. Now, it's time to let the oven work its magic. Cover the baking dish tightly with aluminum foil. This helps to trap the steam and ensures the ribs stay moist and tender. You'll want to make sure the foil covers the ribs completely so that no heat escapes, like a cozy little blanket.
3. Cooking Time:
Cook the ribs for 3-4 hours, or until they are fork-tender. To check for tenderness, insert a fork into the thickest part of the rib. If it goes in easily, they're ready. Don’t worry, if you're not sure, it's better to err on the side of a little more cooking time. You can always add more time, but you can't take it back. The oven is doing its thing, patiently transforming those ribs into culinary perfection, so relax and enjoy the anticipation.
Part 5: The Finishing Touch: Barbecue Sauce
The ribs are cooked, but we're not done yet. This is the moment for that final burst of flavour, the magic of barbecue sauce.
1. Removing the Ribs from the Oven:
Carefully remove the baking dish from the oven and set it aside. Take off the aluminum foil, and you'll see those ribs are looking beautifully tender and juicy. It's like revealing a hidden treasure, the anticipation building as you see the results of the slow cooking process.
2. Applying the Barbecue Sauce:
Now, here comes the part I love. Generously brush your favourite barbecue sauce over the ribs, making sure to coat all sides. I like to use a slightly thicker sauce for this step because it sticks better to the ribs. You can even use a combination of different sauces to add complexity of flavor, if you're feeling adventurous. Let the sauce cascade over the ribs, enveloping them in a delicious embrace.
3. The Final Oven Baking:
Return the ribs to the oven, uncovered, for another 30 minutes. This gives the sauce a chance to caramelize and create that beautiful, glossy finish. You’ll be able to smell that wonderful smoky, sweet aroma wafting from the oven, making it impossible to resist. The ribs are almost there, just a few more minutes, and then the culinary masterpiece will be ready.
Part 6: The Grand Finale: Serving and Enjoying
Now, for the moment we've all been waiting for. The ribs are done, and it's time to enjoy them!
1. Letting the Ribs Rest:
Once the ribs have spent their 30 minutes in the oven, remove them and let them rest for 10-15 minutes. This is an important step because it allows the juices to redistribute throughout the ribs, ensuring they stay moist and tender. Think of it as giving the ribs a chance to relax and regroup after their oven adventure.
2. The Cutting Ceremony:
It's time for the fun part - cutting the ribs into individual servings. I like to use a sharp knife to cut between the bones, or you can use a pair of kitchen shears if you prefer. You can also leave them whole for a more dramatic presentation, depending on your preference. Cutting the ribs is like opening up a treasure chest, revealing the succulent meat and those beautiful, caramelized bones.
3. The Feast Begins:
Finally, it's time to enjoy your delicious oven-baked ribs. Serve them with your favourite sides, like creamy coleslaw, baked beans, or corn on the cob. You can even add a side of mashed potatoes for a more traditional meal. This is where the real celebration begins, savoring the fruits of your labour. Enjoy the tender meat, the rich sauce, and the satisfying crunch of the bones.
Part 7: Adding Your Own Personal Touch
This recipe is a fantastic starting point, but feel free to experiment and add your own personal touches.
1. Flavour Variations:
Try experimenting with different spices and rubs. Some popular options include paprika, chili powder, cumin, and brown sugar. You can also add a dash of cayenne pepper for a bit of heat. Get creative with your spice blends, let your taste buds be your guide!
2. Barbecue Sauce Options:
Don't be afraid to explore different barbecue sauces. From smoky to sweet and tangy, there's a world of options to discover. You can even try making your own sauce from scratch. There are countless recipes online that can guide you. Don't be afraid to experiment and find a sauce that perfectly complements your ribs.
3. side dishes:
Experiment with different side dishes to create the perfect meal. Some popular choices include cornbread, mac and cheese, potato salad, and roasted vegetables. Think about the flavours and textures you want to balance with the ribs, creating a symphony of taste and texture on your plate.
Part 8: FAQs: Answering Your Burning Questions
You've got questions, and I've got answers! Here are some commonly asked questions about oven-baked pork ribs.
| Question | Answer |
|---|---|
| How long do I need to cook the ribs? | The cooking time will vary depending on the size of the ribs and your oven. However, it typically takes 3-4 hours at 300 degrees Fahrenheit (150 degrees Celsius) for the ribs to become tender. Patience is key here, but the wait is well worth it! |
| How do I know when the ribs are done? | You can tell the ribs are done when they are fork-tender. You should be able to easily insert a fork into the thickest part of the rib. If the fork slides in with minimal resistance, you're good to go! |
| Can I make oven-baked ribs ahead of time? | Absolutely! You can prepare the ribs and cook them up to a day in advance. Simply store them in the refrigerator until you're ready to reheat and serve. To reheat, simply place the ribs in a baking dish and bake them in a preheated oven at 350 degrees fahrenheit (175 degrees Celsius) for about 20 minutes. This is a lifesaver for busy weeknights or when you want to prep ahead for a party or barbecue. |
| Can I use a different type of vinegar? | Yes, you can use white vinegar or apple cider vinegar. I prefer apple cider vinegar because it adds a subtle sweetness to the ribs. But white vinegar works just fine too, depending on your taste preferences. |
| Can I grill the ribs after they've been oven-baked? | Absolutely! If you want to give your ribs a smoky flavour, you can grill them after they've been oven-baked. Simply brush them with barbecue sauce and grill them over medium heat for about 5-10 minutes. This is a great option for those who want a little extra smokiness to their ribs, combining the best of both worlds - the tenderness of oven baking and the smoky flavour of grilling. |
Part 9: A Final Word
And there you have it! Oven-baked pork ribs are a delicious and relatively easy dish to make. With a little patience and some simple ingredients, you can create a meal that will impress your family and friends. So, gather your ingredients, fire up the oven, and get ready for a mouthwatering experience! Happy cooking!
Everyone is watching

Corn on the Cob: The Ultimate Guide to Perfectly Cooked Ears
Healthy MealsAh, corn on the cob. Just the name evokes images of sunny days, barbecues, and that sweet, juicy flavour that ...

Perfect Pork Roast Oven Cooking Time: A Guide to Delicious Results
Healthy MealsThere's something truly satisfying about a perfectly roasted pork. The aroma alone is enough to make your mout...

Ham Cooking Time: How Long to Bake, Smoke, or Boil a Delicious Ham
Healthy MealsAh, ham. It's a classic, isn't it? A real crowd-pleaser, especially around holidays. And when done right, it'...

Scallops: The Ultimate Guide to Perfect Cooking
Healthy MealsAh, scallops. Those delicate, sweet, and utterly delicious morsels of the sea. They hold a special place in my...

Spaghetti Squash: The Ultimate Guide to Cooking and Serving
Healthy MealsRemember that time you saw spaghetti squash at the supermarket, looking all bumpy and strange, and thought, "W...
