There's a reason why the porterhouse steak reigns supreme in the steak kingdom. It's a glorious combination of tenderloin (filet mignon) and strip steak, promising a feast for both the tender and the flavorful palate. But, like any culinary masterpiece, achieving a perfectly cooked porterhouse isn't just about throwing a piece of meat on a hot pan. It takes finesse, precision, and a healthy dose of knowledge.
For years, I've been grilling and pan-searing my way through countless porterhouse steaks. I've learned from my mistakes, celebrating those glorious triumphs where the steak was juicy, tender, and bursting with flavor. And let me tell you, it's a culinary journey worth embarking on.
This guide is your passport to culinary excellence, your ultimate companion to cooking a porterhouse steak that will have everyone around the table swooning with delight. We'll cover every detail, from selecting the perfect cut to mastering the art of searing, resting, and slicing. Get ready to take your steak game to a whole new level!
Part 1: Choosing Your Porterhouse: The Foundation of Flavor
The Anatomy of a Porterhouse: A Dual Delight
Let's break it down. A porterhouse isn't just any old steak. It's a showstopper, a glorious marriage of the tender, melt-in-your-mouth tenderloin (that filet mignon we all adore) and the flavorful, slightly tougher strip steak. It's the perfect answer for those who can't decide which steak they crave!
Size Matters: The Perfect Portion
Porterhouse steaks are known for their generous size, and for good reason. You'll typically find them weighing in around 1.5 pounds, but for a real feast, a 2-pound monster will definitely leave an impression.
But remember, bigger doesn't always equal better. Consider the number of hungry guests you're feeding and your own appetite. You don't want to end up with a mountain of leftovers (unless you're a fan of steak sandwiches, then go for it!).
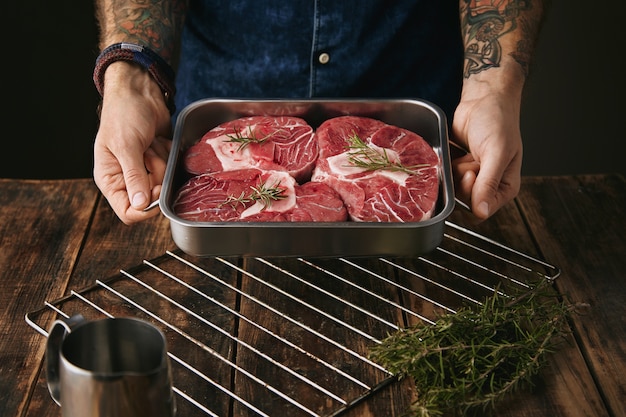
The Cut, the Grade, and the Marbling: A Trifecta of Quality
Now, let's delve into the heart of the matter - the quality of the meat itself.
Look for a porterhouse with beautiful marbling, those delicate streaks of fat that run through the meat, adding richness, juiciness, and incredible flavor. A well-marbled steak will melt in your mouth, leaving you craving for more.
Next, consider the USDA grade, which tells you about the marbling levels.
- Prime: The crème de la crème of beef, boasting abundant marbling for an unbelievably tender and flavorful experience. This is the top-tier choice for a truly luxurious meal.
- Choice: The standard for many restaurants and home cooks, offering a good balance of marbling and flavor. This is a safe bet for a consistently enjoyable steak.
- Select: The leanest option, with less marbling. This results in a leaner, potentially tougher steak, but still a viable choice for those who prefer a less fatty experience.
While Select can still be perfectly delicious, I always aim for at least Choice. If you're feeling adventurous and want to truly impress, go for Prime – it's a culinary adventure you won't regret.
Shopping for Your Porterhouse: Where to Find Your Perfect Cut
Now that we've established the essentials, let's talk about where to score that perfect porterhouse.
My personal recommendation? Head to your local butcher shop. These folks are meat maestros, experts in their craft. They'll gladly guide you towards the perfect cut, trimming excess fat and shaping it beautifully. Plus, you get to chat with the butcher, learn insider tips, and maybe even snag a few free cooking pointers.
But if a butcher shop isn't readily accessible, supermarkets offer a decent selection. Just be sure to check the date, inspect the marbling, and choose a steak with a firm, springy texture.
Part 2: The Pre-Game Ritual: Preparing Your Steak for Success
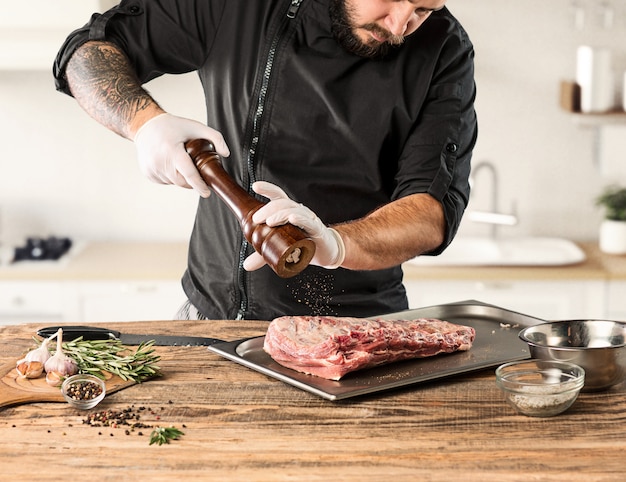
Pat It Dry: The Foundation of a perfect sear
This might sound like a small step, but it's essential. Drying your steak thoroughly before cooking is crucial for achieving that beautiful, crispy sear. Moisture hinders the browning process, so grab some paper towels and pat that porterhouse all over, ensuring it's completely dry.
Once dry, give it a light dusting of salt and pepper – it's time to start seasoning!
The Salt Debate: Before or After?
Now, this is a topic that sparks endless culinary debates – salting before or after cooking?
I'm a firm believer in salting before cooking. It helps to draw out moisture, creating a more flavorful crust.
Some chefs recommend a dry brine, where you salt the steak and let it hang out in the refrigerator for a couple of hours. This allows the salt to penetrate the meat more deeply, resulting in an incredibly flavorful steak.
But hey, if time is of the essence, a simple salt and pepper rub is a fantastic option. It's all about mastering the seasoning game!
The Rest Is Key: A Room Temperature Revelation
Now, here's where the pros separate themselves from the amateurs. Before you even think about touching that hot pan, let your steak rest at room temperature for at least 30 minutes. This allows the steak to come up to room temperature, ensuring even cooking.
Trust me, it's a game-changer, especially for thicker cuts of meat. It makes all the difference in achieving that perfect internal temperature and a juicy, flavorful steak.
Part 3: The Heat is On: Preparing Your Pan for the Perfect Sear
The Right Pan for the Job: Cast Iron or Stainless Steel
Not all pans are created equal, my friend. A good cast-iron pan is the ultimate choice for searing a porterhouse. It retains heat like a champion, distributing it evenly for a beautiful, even sear. The result? A truly mouthwatering, crispy exterior.
If a cast-iron pan isn't in your arsenal, don't despair! A thick-bottomed stainless steel pan will work just fine, ensuring consistent heat distribution.
Heat, Heat, Heat: The Crucial Element
Now, it's time to turn up the heat. We're talking high heat, my friend. You want your pan smoking hot, reaching that sizzle-test level you see on all the cooking shows.
If you're using a gas stove, aim for medium-high heat. If you're working with an electric stove, try a medium-high setting, but keep a close eye on the pan to ensure it's truly hot before adding your steak.
Adding Fat to the Party: Creating a Flavorful Foundation
Before we introduce our steak to the fiery pan, let's add a bit of fat – a good tablespoon of olive oil, butter, or a combination of both will do the trick. This prevents sticking and contributes to that lovely, crispy sear.
Part 4: Searing Your Steak Like a Pro: The Art of the Perfect Crust
The First Side: Time to Sizzle
Now, it's time to bring in the star of the show – your porterhouse steak. It's about to experience the embrace of that smoking hot pan.
Carefully lay the steak down, ensuring the thicker side of the porterhouse is facing the pan. You'll hear that satisfying sizzle – the sound of a perfect sear taking shape.
The Art of the Flip: Resist the Urge
Resist the urge to flip that steak every few seconds. Let it develop that beautiful, dark, crusty sear on the first side.
How long? It depends on the thickness of your steak and the heat of your pan. Aim for about 4-5 minutes per side for medium-rare. You want that golden-brown crust that's almost like a crispy shell.
The Second Side: Finishing Touches
Flip that steak over – it's time to create the same beautiful sear on the other side. That first flip is always a moment of anticipation, a promise of culinary perfection.
Again, allow it to cook for about 4-5 minutes, or until you achieve that perfect golden-brown crust.
Part 5: The Internal Temperature Game: Mastering the Heat
The Thermometer: Your Culinary BFF
You've achieved a magnificent sear, but how do you know if your steak is cooked to your liking? This is where the magic of a meat thermometer comes in.
Use an instant-read thermometer – it provides a quick and accurate reading.
Here's a handy cheat sheet to guide you towards your desired doneness:
| Doneness | Internal Temperature (°F) | Internal Temperature (°C) |
|---|---|---|
| Rare | 125-130°F | 52-54°C |
| Medium-Rare | 130-135°F | 54-57°C |
| Medium | 135-140°F | 57-60°C |
| Medium-Well | 140-145°F | 60-63°C |
| Well-Done | 145-150°F | 63-66°C |
Remember, this is just a guide. Everyone has their own preferences when it comes to steak doneness.
The No-Thermometer Method: The Finger Test
If you're a bit of a culinary rebel and prefer to forgo the thermometer, there's a classic technique – the finger test.
Here's how it works:
Press your index finger and thumb together, forming a little "O" shape. That's how a rare steak feels. Now press your middle finger and thumb together – that's medium-rare. And so on.
This is more art than science, so don't be afraid to experiment until you find what feels right for you.
Part 6: The Art of Resting: Letting Your Steak Relax
Patience is a Virtue: The Secret to Juicy Perfection
We're almost there! Your steak is seared, the internal temperature is spot on, and now it's time for the final act – resting.
Think of this as a spa day for your steak. It's crucial for allowing the juices to redistribute, resulting in a more tender, juicy, and flavorful steak.
Transfer your steak to a cutting board and cover it loosely with aluminum foil. Let it rest for 10-15 minutes, depending on the thickness of the steak.
The Reward: A Time for side dishes and Sauce
While your steak relaxes, use this valuable time to prepare your side dishes. It's also the perfect opportunity to whip up a quick and delicious sauce – a simple pan sauce, a herb butter, or a decadent béarnaise sauce will elevate your culinary creation to new heights.
Part 7: Slicing and Serving: Presenting Your Masterpiece
The Cut: A Precise Operation
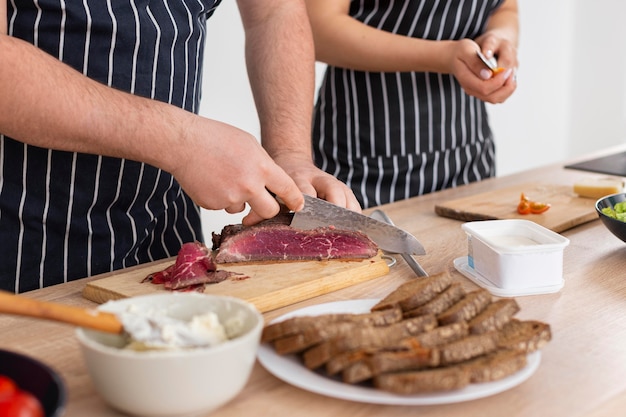
After that well-deserved rest, it's time for the final touch – slicing.
Grab a sharp chef's knife and slice the steak against the grain. This tenderizes the meat, making it easier to chew and savor.
Slice the steak into even pieces, about half an inch thick. For an extra impressive presentation, slice the tenderloin and the strip steak separately, showcasing the two distinct textures and flavors.
The Garnish: A Finishing Touch
Now's your moment to add a bit of culinary flair. Think fresh herbs, a sprinkle of coarse salt, a drizzle of olive oil, or even a squeeze of lemon juice.
The Presentation: Make it Shine
Serve your steak on a plate with your favorite sides. For a rustic look, use a wooden cutting board.
Part 8: The Sidekick: A Perfect Pairing
Elevating the Experience: Choosing the Right Sides
A porterhouse steak deserves the best supporting cast. Choose sides that complement the richness and flavor of the meat.
Here are a few of my personal favorites:
- mashed potatoes: A creamy classic that's perfect for soaking up those delicious juices.
- Roasted Vegetables: Asparagus, Brussels sprouts, and broccoli bring a touch of freshness and sweetness.
- grilled corn on the Cob: Sweet and smoky, a true summer favorite.
- Salad: A refreshing contrast to the richness of the steak. Try a simple green salad with a vinaigrette dressing.
Part 9: The Final Touch: A Perfect Sauce
Adding Depth and Complexity: Elevating the Flavor
Let's face it, a porterhouse steak is a delicious star on its own, but a touch of sauce can take it to another level.
Here are a few ideas to get your creative juices flowing:
- Pan Sauce: This is a quick and easy sauce made with the drippings from your steak and a little bit of butter, wine, and herbs. Add a touch of lemon juice for brightness.
- Mushroom Sauce: A classic combination that adds a rich, earthy flavor. Sauté mushrooms with butter and garlic, then add a little broth and cream for a creamy sauce.
- Béarnaise Sauce: A classic French sauce made with egg yolks, butter, and herbs. This is a truly decadent sauce that will impress your guests.
FAQs
1. What’s the difference between a T-bone and a Porterhouse steak?
Both T-bone and Porterhouse steaks feature the tenderloin and strip steak, but the difference lies in the size of the tenderloin. A Porterhouse steak has a larger tenderloin section, making it a more substantial meal.
2. What’s the best way to store a porterhouse steak?
Store it in the refrigerator wrapped in plastic wrap or placed in an airtight container. Make sure to keep it as cold as possible to maintain freshness.
3. Can I freeze a porterhouse steak?
Yes, but freezing can affect the texture. For the best quality, freeze it for no more than 3-4 months. Before cooking, thaw it in the refrigerator overnight.
4. How can I make sure my porterhouse steak is cooked evenly?
Make sure the pan is scorching hot before adding the steak. Cook it undisturbed for the recommended time, then flip it and continue cooking until it reaches the desired internal temperature.
5. Can I cook a porterhouse steak in the oven?
Absolutely! Preheat your oven to 400°F (200°C). Sear the steak in a hot pan for a few minutes on each side, then transfer it to the oven to finish cooking. Just keep an eye on the internal temperature.
I hope this guide has equipped you with all the tools you need to cook a porterhouse steak that will have your family and friends raving. Don't be afraid to experiment and find what works best for you. Enjoy the journey, and savor the delicious results!
Everyone is watching

Corn on the Cob: The Ultimate Guide to Perfectly Cooked Ears
Healthy MealsAh, corn on the cob. Just the name evokes images of sunny days, barbecues, and that sweet, juicy flavour that ...

Perfect Pork Roast Oven Cooking Time: A Guide to Delicious Results
Healthy MealsThere's something truly satisfying about a perfectly roasted pork. The aroma alone is enough to make your mout...

Scallops: The Ultimate Guide to Perfect Cooking
Healthy MealsAh, scallops. Those delicate, sweet, and utterly delicious morsels of the sea. They hold a special place in my...

Spaghetti Squash: The Ultimate Guide to Cooking and Serving
Healthy MealsRemember that time you saw spaghetti squash at the supermarket, looking all bumpy and strange, and thought, "W...

Ham Cooking Time: How Long to Bake, Smoke, or Boil a Delicious Ham
Healthy MealsAh, ham. It's a classic, isn't it? A real crowd-pleaser, especially around holidays. And when done right, it'...