Let’s talk about charcoal grilling, folks. It’s not just about throwing some burgers on the barbie, is it? It's a journey, a passion, a way of life! And I'm here to take you on that journey, guiding you from the basics of fire-starting to crafting those perfect grill marks. So, grab your tongs, settle in, and let's get this barbecue fiesta started!
(Part 1) The Gear: Your BBQ Arsenal
You can't conquer the grill without the right tools, can you? We'll start by diving into the essential gear that will transform your backyard into a barbecue haven.
Choosing the Right Grill
First things first, you need a grill that's a perfect fit for your needs and space. I've got a good ol' fashioned kettle grill, and it's been my faithful companion for years. But, there's a whole world of grilling options out there:
- Kettle Grills: These are the workhorses of the BBQ world, known for their versatility, affordability, and ease of use. They're perfect for beginners and seasoned grill masters alike.
- offset smokers: These are the bad boys of barbecue, built for low and slow cooking, ideal for creating tender, smoky ribs, brisket, and pulled pork. Be prepared to invest some time (and a bit of patience) when using these beauties.
- Gas Grills: For those who prefer convenience and speed, gas grills are excellent for weeknight grilling. They heat up quickly and are easy to control. Just be careful not to overcook your food!
- Kamado Grills: These ceramic beauties are known for their exceptional heat retention, allowing for both high-heat searing and low-and-slow smoking. They're a serious investment, but they deliver incredible results.
The Charcoal Conundrum: Choosing the Fuel
Now, let's talk charcoal, the heart and soul of any barbecue. It's the fuel that creates those smoky flavors and gives your grill its power. Here's the lowdown on the different types of charcoal:
- Lump Charcoal: This all-natural charcoal burns hotter and cleaner than briquettes, producing less ash and fewer chemicals. It's the purist's choice, but it can be a bit more expensive and a tad trickier to get going.
- Briquettes: The tried and true, these charcoal briquettes offer consistent burning and are more affordable. They're a great option for starting out.
- Charcoal with Flavor: Want to add a smoky kick to your food? Charcoal infused with wood chips like hickory, mesquite, or applewood adds a fantastic flavor dimension.
Essential Tools of the Trade
Besides the grill itself, you'll need some essential tools to master the art of grilling:
- Tongs: Your trusty companions for flipping, arranging, and serving your food. Choose a pair with a good grip and sturdy construction.
- Spatula: Essential for lifting and maneuvering your meat, especially those delicate burgers. Look for one with a flexible blade to prevent tearing.
- meat thermometer: This little gadget is your best friend, ensuring your food is cooked to perfection. No more guesswork!
- Grill Brush: Keeping your grill clean is crucial for optimal performance. A good brush makes the job easier and helps prevent food from sticking.
- Grill Gloves: These will protect your hands from the heat, especially when handling hot grates. Opt for heat-resistant gloves made from materials like leather or silicone.
- Chimney Starter: Say goodbye to lighter fluid and hello to fast, even charcoal ignition. This simple device will change the way you start your grill!
(Part 2) Prepping the Pit: The Fire Within
Now, let's talk about bringing the fire to life. It's not about just tossing a match on the charcoal and hoping for the best. It’s about creating a fire that gives you control over the heat and flavors you impart.
Building the Perfect Fire: A Two-Zone System
The secret to successful grilling lies in creating a balanced fire with different heat zones. Here's how I do it:
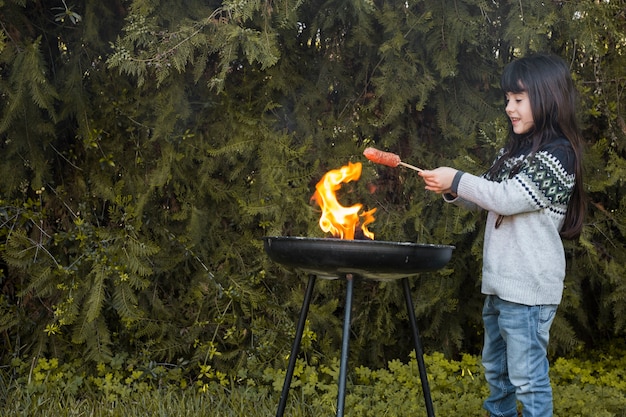
- Get the Grill Hot: Fill your chimney starter with charcoal, light it up, and let it go. Once those coals are glowing white-hot, dump them into your grill, leaving some space in the center for cooking.
- Establish the Heat Zones: Think of your grill like a map with two zones. Spread the hot coals to one side, creating a direct heat zone for searing and high-heat grilling. Leave the other side with minimal coals for indirect heat, ideal for slow cooking and keeping things warm.
- Pre-heat the Grill: Let the grill heat up for about 10 minutes to ensure even heat distribution and a scorching hot surface. This ensures your food cooks consistently and doesn't stick to the grates.
Fueling the Flames: Wood Chips and Flavor
Adding wood chips to your fire is an art form that elevates your barbecue game to the next level. It's the secret to infusing your food with that delicious, smoky goodness:
- Choose Your Chips: Experiment with different woods like hickory, mesquite, oak, or applewood for varying flavor profiles. Hickory gives a classic smoky flavor, mesquite adds a bit of a kick, oak provides a robust flavor, and applewood brings a sweet touch.
- Soak the Chips: Soak your chosen wood chips in water for at least 30 minutes. This prevents them from burning too quickly and ensures a slow, steady release of smoke.
- Add to the Fire: Place a handful of soaked wood chips directly onto the hot coals or use a smoker box. This will infuse your food with that tantalizing smoke and create those amazing flavors.
(Part 3) Meat Mastery: The Art of Grilling
Alright, you've got your fire going strong, and now it’s time to tackle the star of the show: the meat. Let’s delve into the techniques that will elevate your barbecue from good to glorious!
Mastering the Grill Marks: A Sign of Excellence
Those beautiful grill marks are more than just decoration, they’re a sign of expertly seared flavor. Here's the secret to achieving those coveted stripes:
- Pre-heat the Grill: Ensure your grill is scorching hot before placing your meat on the grates. This guarantees a proper sear and prevents sticking.
- Oil the Grates: Lightly oil the grates with a high-heat oil like canola or grapeseed. This helps prevent sticking and creates a better sear.
- Don’t Move It: Resist the urge to fiddle with the meat for the first few minutes. Let it sear and develop a crust on one side before flipping. This creates those irresistible grill marks and helps seal in the juices.
- Flip Once: For even cooking, flip your meat only once. This creates those iconic grill marks and locks in the juices.
Understanding Meat Temperatures: The Key to Perfect Cooking
Every piece of meat has a perfect temperature range for optimal cooking. Overcook it, and it becomes dry and tough. Undercook it, and you risk foodborne illness. Here’s a handy table for reference:
| Meat | internal temperature (Fahrenheit) |
|---|---|
| Beef (rare) | 120-125 |
| Beef (medium-rare) | 130-135 |
| Beef (medium) | 140-145 |
| Beef (medium-well) | 150-155 |
| Beef (well-done) | 160+ |
| Chicken (breast) | 165 |
| Pork (chop) | 145 |
| Fish (fillets) | 145 |
cooking techniques: Direct vs. Indirect
Choosing the right cooking technique depends on the cut of meat and your desired results. Here’s the breakdown:
- Direct Heat: Perfect for searing, grilling steaks, burgers, and smaller cuts. This method delivers intense heat and creates those lovely grill marks.
- Indirect Heat: Ideal for larger cuts like roasts, brisket, and ribs. The gentler heat allows the meat to cook slowly and evenly, resulting in juicy and tender results. This method is often used in smoking.
(Part 4) The Sides: Beyond the Meat
No barbecue is complete without a delightful array of sides to complement your grilled masterpiece. Let's spice things up with some tasty accompaniments!
Classic Barbecue Sides: The Must-Haves
These sides are barbecue staples, bringing a burst of flavor and texture to the table:
- potato salad: Creamy, tangy, and satisfying, potato salad is a classic side for any barbecue. It’s a great way to showcase your creativity – from classic creamy potato salad to German potato salad with bacon and onions.
- Coleslaw: Fresh, crunchy, and refreshing, coleslaw is the perfect counterpoint to rich grilled meats. Try a classic vinegar-based coleslaw or experiment with a creamy dressing for a different flavor.
- Macaroni Salad: A creamy and cheesy delight that’s always a hit at barbecue gatherings. Add a bit of flair by incorporating different cheeses, herbs, and vegetables.
- Baked Beans: Sweet and savory, baked beans are a barbecue essential, offering a comforting warmth. Enhance the flavor by adding bacon, onions, or a touch of brown sugar.
- corn on the cob: grilled corn on the cob is a simple but delicious side that adds a touch of sweetness. Don’t forget the butter and salt!
Beyond the Basics: Experiment with Flavors
Don’t be afraid to get creative with your side dishes. Here are some ideas that add a touch of flair:
- grilled vegetables: Zucchini, bell peppers, onions, and asparagus all benefit from a smoky char on the grill. Season them with herbs and spices for an extra flavor boost.
- fruit salad: A refreshing and vibrant addition to your barbecue spread. Try a mix of seasonal fruits like watermelon, berries, pineapple, and mango.
- Pasta Salad: A twist on the classic macaroni salad with different pasta shapes and vibrant vegetables. Use a light vinaigrette dressing for a refreshing taste.
- Green Salad: A lighter option to balance out the richness of the barbecue feast. Add a variety of greens, vegetables, and a simple vinaigrette dressing.
(Part 5) The Sauces: A Symphony of Flavors
No barbecue is complete without a generous slathering of sauce. Let’s explore the world of barbecue sauces and find your perfect match.
The Barbecue Sauce Spectrum: A Journey of Taste
Barbecue sauce comes in a vast array of flavors, each with its own unique personality. Here’s a guide to some popular styles:
- Kansas City Style: Sweet and tangy, with a balance of molasses, brown sugar, and vinegar. This is the classic barbecue sauce for a reason. It's versatile and works well with a variety of meats.
- Carolina Style: Vinegar-based and tangy, with a hint of spice. This sauce is perfect for pork and ribs, adding a sharp bite. It's often made with a base of vinegar, mustard, and spices.
- Memphis Style: A sweeter sauce with a hint of spice and often includes mustard. It’s a good all-around sauce for various meats, adding a touch of sweetness and a hint of heat.
- Texas Style: Often a simple sauce made with just a few ingredients like tomato paste, black pepper, and vinegar. This sauce is perfect for letting the natural flavors of the meat shine through.
- Alabama White Sauce: A creamy and tangy sauce made with mayonnaise, vinegar, and often includes horseradish. This sauce is unique and delicious, especially for chicken and pork, adding a creamy texture and tangy flavor.
Making Your Own: A culinary adventure
Creating your own barbecue sauce is a fun culinary adventure. Experiment with different ingredients and create a sauce that perfectly reflects your taste. Here’s a simple recipe to get you started:
Ingredients:
- 1 cup ketchup
- 1/2 cup apple cider vinegar
- 1/4 cup brown sugar
- 1 tablespoon Worcestershire sauce
- 1 teaspoon smoked paprika
- 1/2 teaspoon garlic powder
- 1/4 teaspoon onion powder
- Salt and pepper to taste
Instructions:
- Combine all ingredients in a saucepan.
- Bring to a simmer over medium heat and cook for 5 minutes, stirring occasionally, until the sauce thickens slightly.
- Remove from heat and let cool slightly.
- Enjoy on your favorite grilled meats. You can adjust the sweetness and spice to your liking.
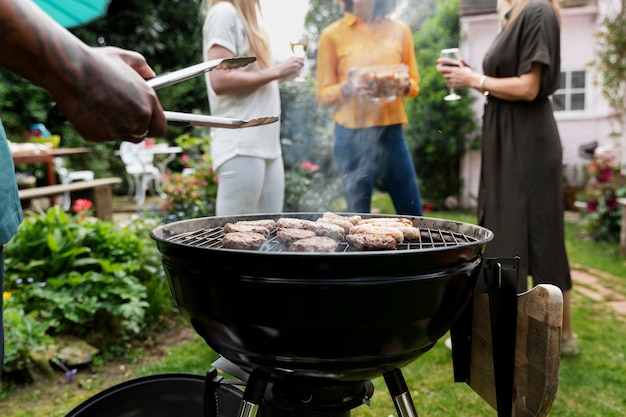
(Part 6) BBQ Etiquette: Keeping the Peace
We’ve all been there: A barbecue gone wrong, with everyone fighting over the last hotdog. Let’s avoid any drama and ensure a harmonious grilling experience.
The Golden Rule: Share the Grill
Grilling is a communal activity, and it’s essential to be mindful of others. Here’s how to keep things running smoothly:
- Don’t Hog the Grill: Allow everyone to have their turn on the grill. Be considerate of the time needed for different foods to cook.
- Clean Up After Yourself: Keep the grill clean and tidy. Nothing is worse than having to deal with a messy grill after everyone has left. A little cleanup goes a long way.
- Be Patient: Grilling takes time, so relax and enjoy the process. Don’t rush things.
Navigating the Crowd: A Guide to Success
When there’s a crowd, it’s important to have a system. Here’s how to keep everyone happy:
- Plan Ahead: Plan your menu and make sure you have enough food for everyone. It’s a good idea to have some backup options in case someone has dietary restrictions or preferences.
- Delegate Tasks: Don’t try to do everything yourself. Enlist the help of friends and family to prepare food, set up the table, or keep the drinks flowing. A little teamwork makes the whole barbecue a lot more enjoyable.
- Don’t Forget the Sides: Remember that barbecue is about more than just the meat. Have a variety of sides to complement the main course and offer different flavors and textures.
(Part 7) The Aftermath: Cleaning Up the Battlefield
The food is devoured, the laughs have faded, and now it’s time to face the inevitable: the cleanup. But fear not, with a little planning, the post-barbecue aftermath can be a breeze.
Cleaning the Grill: A Quick and Easy Guide
Keeping your grill clean is crucial for maintaining its longevity and ensuring delicious results. Here’s my go-to cleaning routine:
- Scrape and Brush: Use a grill brush to scrape off any remaining food debris. You can also use a wire brush to get rid of stubborn bits. Be careful not to scratch the grates too harshly.
- Soak the Grates: Soak the grates in soapy water for a few minutes to loosen any remaining food. You can also use a grill cleaning solution. If you have a gas grill, make sure the gas is off and the grill has cooled completely before cleaning.
- Rinse and Dry: Rinse the grates thoroughly with water and dry them completely with a clean cloth. This helps prevent rust.
- Oil the Grates: Lightly oil the grates to prevent rust and make your next barbecue easier. This will also help prevent food from sticking.
Managing the Mess: A Tactical Approach
The aftermath of a barbecue can be a bit overwhelming, but it doesn’t have to be a battle. Here are some strategies for conquering the cleanup:
- Get Started Early: Don’t wait until the end of the party to start cleaning. Start clearing dishes and putting things away as people are finishing their food.
- Disposable Dishes: Use disposable plates, cups, and cutlery to reduce the amount of dishes you need to wash. This is a great option for large gatherings.
- Create a Cleaning Station: Set up a designated area for cleaning with trash bags, recycling bins, and soap and water. This makes cleanup more organized and efficient.
- Enlist Help: Ask your guests to help with the cleanup. A little teamwork makes light work. It also shows appreciation for their help with the barbecue.
(Part 8) BBQ Beyond the Basics: The Next Level
You’ve mastered the basics of charcoal grilling, but there’s always more to discover. Let’s venture beyond the ordinary and explore the world of advanced grilling techniques.
Smoking: The Art of Low and Slow
Smoking is a method of cooking food at low temperatures for long periods, resulting in tender, flavorful, and smoky meats. Here are some tips for mastering the smoke:
- Choose the Right Meat: Smoking is best suited for tougher cuts of meat like brisket, ribs, and pork shoulder. These cuts benefit from the long, slow cooking process.
- Use a Smoker: Invest in a smoker to control the temperature and infuse your meat with delicious smoke. There are many types of smokers available, from offset smokers to pellet grills.
- Be Patient: Smoking can take hours, sometimes even days, so be prepared to commit to the process. The reward is worth the wait!
reverse searing: A Game-Changer for Tender Meat
Reverse searing is a technique where you cook your meat indirectly at a low temperature until it’s almost done, then finish it off with a quick sear over direct heat. This method creates tender and flavorful meat with perfect grill marks. It’s a great technique for steaks and other cuts of meat that you want to be juicy and flavorful.
Grilling Pizza: A Culinary Adventure
Why stop at meat? You can also grill pizza! The high heat of the grill cooks the pizza crust to perfection, creating a crispy and delicious pizza. Use a pizza stone or a grill-safe pizza pan for optimal results. You can even make your own dough or buy pre-made dough at the grocery store.
FAQs: Your Burning Questions Answered
You’ve got questions, and I’ve got answers. Here are some common questions and their solutions.
1. How Do I Know When My Charcoal is Ready?
The charcoal is ready when it’s covered in a thin layer of white ash and is glowing bright red. You should be able to hold your hand about 6 inches above the coals for 5 seconds before it gets too hot. If you see any flames, it means the charcoal is too hot.
2. What’s the Best Way to Light Charcoal?
The best way to light charcoal is using a chimney starter. Fill the chimney starter with charcoal, light it from the bottom, and wait for the coals to turn white-hot. This method ensures even heat distribution and prevents lighter fluid flavors from contaminating your food.
3. How Do I Prevent My Meat From Sticking to the Grill?
Lightly oil the grill grates before placing your meat on them. You can also use a nonstick grilling mat or spray. Be sure to preheat your grill before oiling the grates. This ensures that the oil doesn't burn off too quickly.
4. Why Is My Meat Not Cooking Evenly?
Ensure that your grill is preheated to the correct temperature. Also, make sure that the coals are evenly distributed in the grill. You can use a grill thermometer to check the temperature. You can also rotate your meat during cooking to ensure even cooking.
5. What Should I Do if My Meat Is Overcooked?
There’s not much you can do if your meat is overcooked, but you can try to salvage it by slicing it thinly and using it in a dish like a stew or chili. You can also try shredding the meat and using it in tacos or sandwiches.
And there you have it: a comprehensive guide to mastering charcoal grilling. So fire up the grill, gather your loved ones, and get ready to create culinary magic.
Everyone is watching

Corn on the Cob: The Ultimate Guide to Perfectly Cooked Ears
Healthy MealsAh, corn on the cob. Just the name evokes images of sunny days, barbecues, and that sweet, juicy flavour that ...

Perfect Pork Roast Oven Cooking Time: A Guide to Delicious Results
Healthy MealsThere's something truly satisfying about a perfectly roasted pork. The aroma alone is enough to make your mout...

Ham Cooking Time: How Long to Bake, Smoke, or Boil a Delicious Ham
Healthy MealsAh, ham. It's a classic, isn't it? A real crowd-pleaser, especially around holidays. And when done right, it'...

Scallops: The Ultimate Guide to Perfect Cooking
Healthy MealsAh, scallops. Those delicate, sweet, and utterly delicious morsels of the sea. They hold a special place in my...

Spaghetti Squash: The Ultimate Guide to Cooking and Serving
Healthy MealsRemember that time you saw spaghetti squash at the supermarket, looking all bumpy and strange, and thought, "W...