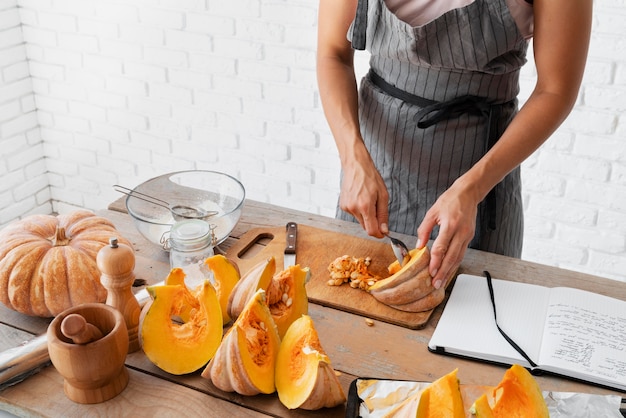
The mere mention of challah evokes warm, golden-brown bread, its strands glistening with a delicate sheen, its aroma filling the air with a comforting sweetness. It's a bread deeply entwined with Jewish tradition, a staple at Shabbat meals and a symbol of celebration. For me, personally, it's a reminder of my grandmother's kitchen, filled with the sounds of her laughter and the intoxicating scent of baking bread.
For years, I watched her make challah, mesmerized by the way she kneaded the dough with such effortless grace, her hands moving with a rhythm that seemed to be a part of the very soul of the bread. I longed to learn her secret, to capture that magic in my own kitchen. But honestly, I always felt a little intimidated. Baking bread, especially something as intricate as challah, seemed like a daunting task, something reserved for seasoned bakers.
But you know what? It isn't. And that's what I want to share with you today. This isn't just a recipe; it's a journey, a chance to rediscover the joy of making something beautiful and delicious from scratch. It's a chance to connect with tradition, to create something meaningful, and to experience the satisfaction of baking your own perfect challah.
(Part 1) Gathering Your Ingredients: The Foundation of Flavor
Let's start at the beginning, with the ingredients. You'll need the basics: flour, yeast, sugar, salt, and eggs. But then there's the magic ingredient, the one that truly makes challah special: olive oil. It's not just about flavour; it's about the texture, adding a rich, velvety quality to the bread. The combination of these ingredients, used in the correct proportions, creates a symphony of flavors and textures that make challah truly unique.
Essential Ingredients: Unveiling the Secrets
- 4 cups (500g) all-purpose flour – This is the backbone of our challah, providing structure and a soft, slightly chewy texture. You can use bread flour if you like, but all-purpose works perfectly well. The flour is the canvas upon which the other ingredients paint their flavors and textures.
- 1 package (2 1/4 teaspoons) active dry yeast – This is the magic that makes the bread rise, resulting in a light and airy texture. Make sure your yeast is fresh for the best results. You can also use instant yeast, just follow the instructions on the package. The yeast is the secret ingredient, the tiny powerhouse that transforms simple flour into something magical.
- 1/2 cup (115g) granulated sugar – Sugar helps to feed the yeast, encouraging it to thrive and create those delightful airy bubbles within the dough. It also adds a subtle sweetness to the bread. Sugar is the fuel that keeps the yeast happy and busy, creating the airy and light texture we love.
- 1 teaspoon salt – Salt is a key ingredient in any bread recipe. It enhances the flavour of the other ingredients and helps to control the yeast's activity, preventing it from rising too quickly. Salt is the counterpoint, adding a subtle depth of flavor and preventing the yeast from going overboard.
- 3 large eggs – Eggs add richness and colour to the challah, giving it a beautiful golden hue. They also contribute to the texture, making it soft and moist. Eggs are the secret to challah's rich color and luscious texture, adding both flavor and a beautiful sheen to the final product.
- 1/4 cup (60ml) olive oil – Olive oil is the key to the perfect challah. It adds a rich, velvety texture, a delicious flavour, and helps the bread stay moist. Olive oil is the secret weapon, adding a luxurious touch of flavor and helping the bread stay soft and moist for days.
- 1 egg yolk mixed with 1 tablespoon water – This will be used for the egg wash, giving the challah that beautiful glossy finish. The egg wash is the final touch, creating a beautiful golden sheen that screams "delicious!"
(Part 2) The Magic of Yeast: A Tiny Powerhouse
Now, let's talk about the yeast. It's the secret ingredient, the tiny powerhouse that transforms simple flour into something magical. Yeast is a single-celled organism that thrives on sugar and warmth. When you mix it with warm water, it wakes up, starts to munch on the sugar, and produces carbon dioxide. These tiny bubbles get trapped within the dough, making it rise and become light and airy.
Activating the Yeast: A Crucial First Step
For the best results, ensure the water you use to activate the yeast is warm, not hot. The ideal temperature is between 105°F and 115°F (40°C to 46°C). If the water is too hot, it will kill the yeast, and if it's too cold, it will simply take longer to activate.
To activate the yeast, simply dissolve a teaspoon of sugar in 1/2 cup of warm water and add the yeast. Stir gently and let it sit for 5-10 minutes. If the yeast is active, you’ll see foam forming on the surface. If the yeast doesn't foam, it's likely dead, and you'll need to start again with fresh yeast.
(Part 3) Kneading the Dough: A Labour of Love, a Symphony of Textures
This is where the real fun begins! Kneading is a fundamental part of baking bread, and it's crucial for developing the gluten in the flour. Gluten is a protein that gives bread its structure and texture. The more you knead the dough, the stronger the gluten strands become, resulting in a chewier and more flavorful bread.
Kneading Techniques: Mastering the Art of Gluten Development
There are different methods for kneading, but the most common and effective is the “folding and stretching” technique. Here's how it works:
- Place the dough on a lightly floured surface.
- Press down on the dough with your palm, pushing it away from you. Fold the dough over itself. This is like giving the dough a hug, helping to develop the gluten strands.
- Turn the dough 90 degrees and repeat the process. Continue this process, rotating the dough every 90 degrees, until it becomes smooth and elastic.
- Continue kneading for about 10-15 minutes, or until the dough becomes smooth and elastic, feeling slightly tacky but not sticky. The dough should start to resist your pressure, feeling firmer and more elastic.
Don't worry if it feels a bit overwhelming at first. It's all about rhythm and feel. Just keep folding and stretching, and you'll notice the dough gradually becoming smoother and more elastic. You can also use a stand mixer with a dough hook attachment to do the kneading for you. Just make sure the dough is kneaded until it’s smooth and elastic. This will ensure a light and airy texture in the final product.
(Part 4) First Rise: A Moment of Patience, a Transformation Begins
After kneading, the dough needs time to relax and rise. This is where patience comes in. The yeast, now happily munching on the sugar and creating those little carbon dioxide bubbles, needs time to work its magic. The dough will double in size during this process, a testament to the power of the yeast.
Creating the Perfect Rise: A Warm and Humid Haven
To create the perfect rise, place the dough in a lightly oiled bowl, turning it to coat all sides. Cover the bowl with a clean kitchen towel or plastic wrap, creating a warm and humid environment for the yeast to thrive.
Let the dough rise in a warm place, like on top of your oven or in a slightly warmed oven. The ideal temperature for rising is around 80°F (27°C). It will typically take about 1-1.5 hours for the dough to double in size. You can check if it's risen enough by lightly poking it with a finger. If the indentation remains, it's ready for the next step.
(Part 5) Braiding the Challah: A Work of Art, a Symphony of Strands
This is where the artistry comes in, the moment you transform a simple lump of dough into a beautiful braid. It's a meditative process, a chance to connect with the tradition and to create something truly special. The braid is more than just a decorative element; it's a symbol of unity and interconnectedness.
Braiding Techniques: Mastering the Art of Intertwining
There are endless ways to braid challah, from simple three-strand braids to more elaborate designs. For a classic challah, follow these steps:
- Divide the dough into three equal portions.
- Roll each portion into a long rope, about 12 inches in length.
- Lay the three ropes side-by-side, parallel to each other.
- Take the left rope and cross it over the center rope.
- Take the right rope and cross it over the center rope.
- Continue braiding in this pattern, alternating the ropes.
- Once you reach the end, pinch the ends of the braid together to secure it.
For a more complex braid, you can try a four-strand or even a six-strand braid. Don't be afraid to experiment and find your own style. It's all about having fun and creating something unique.
If you're feeling really adventurous, you can even try a more elaborate braid, like a crown braid or a basket braid. There are plenty of tutorials online to help you learn these more complex braiding techniques.
(Part 6) Second Rise: The Final Flourish, a Promise of Perfection
Once you've braided your challah, it needs a second rise to puff up and become even more beautiful. Place the braided loaf on a baking sheet lined with parchment paper. Cover it with a clean kitchen towel and let it rise again in a warm place for 30-45 minutes.
As the challah rises, it will become more plump and the braid will become more defined. You'll see how the individual strands relax and settle into each other, creating a smooth and beautiful shape. This final rise is a chance for the challah to showcase its true beauty, its intricate braid becoming more defined and elegant.
(Part 7) Baking to Perfection: A Golden Glow, a Celebration of Flavors
Now comes the moment of truth: baking the challah. Preheat your oven to 350°F (175°C) and give the challah one final brush with the egg wash. This will create a beautiful, golden-brown crust and add a lovely sheen to the finished loaf.
Bake the challah for 30-35 minutes, or until it's golden brown and sounds hollow when you tap the bottom. This is the moment where the challah's potential is finally realized, transforming from a braided dough into a warm, golden-brown loaf, ready to be enjoyed.
baking tips: A Few Tricks of the Trade
Here are a few tips for baking the perfect challah:
- Make sure the oven is preheated before you put the challah in. This will ensure even baking and a beautifully golden crust.
- Don't overcrowd the baking sheet. Give the challah plenty of space to bake evenly.
- If the top of the challah starts to brown too quickly, you can cover it with aluminum foil. This will prevent the top from burning while the inside bakes.
- Once the challah is baked, let it cool on a wire rack before slicing and serving. This will allow the bread to cool evenly and prevent it from becoming soggy.
(Part 8) The Art of Serving: A Celebration of Flavour, a Symphony of Taste
Now, the moment you've been waiting for: serving your beautiful, freshly baked challah. This is a bread meant to be savored, enjoyed with family and friends. Challah is a versatile bread that can be enjoyed in many ways, making it a perfect addition to any meal.
Serving Ideas: A Feast for the Senses
Here are a few ideas for how to enjoy your challah:
- Classic: Simply serve it with butter, honey, or jam for a traditional and comforting treat. The classic combination of challah, butter, and honey is a timeless favorite.
- Savoury: Use it to make French toast, challah bread pudding, or even a savoury bread salad. Challah's rich flavor and texture make it a perfect base for both sweet and savory dishes.
- Sweet: Serve it with a dollop of whipped cream and fresh berries for a delicious and decadent dessert. For a special occasion, try topping it with a scoop of ice cream and a drizzle of chocolate sauce.
Remember, challah is a versatile bread that can be enjoyed in many ways. Don't be afraid to get creative and experiment with different toppings and flavour combinations.
(Part 9) The Legacy of Challah: A Taste of Tradition, A Link to the Past
Baking challah is more than just a recipe; it's a connection to history, a way to carry on traditions that have been passed down for generations. It's a chance to share a piece of your culture, to create something beautiful and meaningful with your own hands.
For me, every time I bake challah, I think of my grandmother and the memories we shared in her kitchen. It's a reminder of the joy of baking, of the satisfaction of creating something delicious from scratch, and of the power of food to connect us to our past and to our loved ones. Challah is a reminder that the simple act of baking can be a powerful way to connect with our heritage, our families, and our own creativity.
(Part 10) FAQs: Unlocking the Secrets of Challah
1. Can I use a bread machine to make challah?
Absolutely! Most bread machines have a dough setting that you can use to knead and rise the dough. Just follow the instructions for your specific model. Bread machines can be a great tool for making challah, especially if you're looking for a hands-off approach.
2. What if my challah doesn’t rise as much as it should?
If the dough doesn't rise enough, it could be due to a few factors. The yeast might be old, the water might not have been warm enough, or the dough might have been over-kneaded. Try using fresh yeast, ensure the water is at the correct temperature, and be careful not to over-knead the dough. A little troubleshooting can often fix the problem and result in a beautifully risen challah.
3. Can I freeze challah?
Yes, you can freeze challah. Wrap it tightly in plastic wrap and then in aluminum foil. It can be stored in the freezer for up to 3 months. To thaw, remove it from the freezer and let it thaw at room temperature overnight. Freezing challah is a great way to enjoy it later, and it thaws beautifully, retaining its delicious flavor and texture.
4. What are some other variations of challah?
There are many variations of challah, each with its own unique flavour and texture. Some popular variations include challah with raisins, challah with cinnamon, and challah with chocolate chips. You can also find challah recipes using different types of flour, such as rye flour or spelt flour. Experimenting with different flavors and flours can open up a whole new world of challah possibilities.
5. Is challah a kosher food?
Yes, challah is considered a kosher food. To make it kosher, it's important to use kosher ingredients and to avoid mixing dairy and meat products in the same kitchen.
So there you have it! Now you have all the tools and knowledge you need to bake your own perfect challah. Don't be afraid to experiment, to let your creativity flow, and to create your own unique masterpiece. And remember, the most important ingredient of all is love. Happy baking!
Everyone is watching

Perfect Rice Every Time: The Ultimate Guide to Cooking Rice
Cooking TipsAs a self-proclaimed foodie, I've always been a bit obsessed with rice. It's the foundation of countless cuisi...

Prime Rib Roast Cooking Time Chart: Per Pound Guide
Cooking TipsPrime rib roast. Just the name conjures images of lavish dinners, crackling fires, and hearty laughter. It’s ...

The Ultimate Guide to Cooking Asparagus: Tips, Techniques, and Recipes
Cooking TipsAsparagus. The mere mention of this spring delicacy conjures up images of vibrant green spears, crisp and burs...

Ultimate Guide to Cooking the Perfect Thanksgiving Turkey
Cooking TipsThanksgiving. Just the word conjures up images of overflowing tables laden with delicious food, the scent of r...

How Long to Bake Potatoes in the Oven (Perfect Every Time)
Cooking TipsBaked potatoes are a staple in my kitchen. They're incredibly versatile, delicious, and surprisingly easy to m...