You know that feeling, right? The craving for crispy chicken, that golden-brown skin that crackles with every bite, revealing juicy, tender meat beneath. It's a classic comfort food, a crowd-pleaser, and something I've been obsessed with for years. I've spent countless hours in the kitchen, experimenting with different techniques, recipes, and even frying methods. Let me tell you, the journey to perfect crispy chicken is a worthwhile one, full of delicious discoveries and a few inevitable mishaps (think: soggy, greasy messes that made me want to chuck the whole thing in the bin). But through trial and error, I've finally cracked the code, and I'm ready to share my secrets with you.
This isn't just a recipe; it's a journey. It's about understanding the science behind that irresistible crisp, the art of the brine, and the love that goes into every step. So, grab a cuppa, settle in, and let's get this crispy chicken crusade started!
(Part 1) The Foundations of Crispy Chicken: Setting the Stage
Before we even think about frying, let's lay the groundwork for the ultimate crispy chicken experience. It all starts with the right ingredients, and I'm talking about quality, not just any bird will do.
The perfect chicken: Choosing Your Bird
When it comes to chicken, I'm a firm believer in going for bone-in pieces, especially for frying. They hold their shape beautifully during cooking, and the bone acts like a little heat conductor, ensuring even cooking. But hey, if you're looking for a quicker option, boneless, skin-on chicken breasts or thighs will work just fine.
Here's what to look for in a good chicken:
- Color: A nice, bright color, not pale or discolored.
- Plumpness: A good plumpness, indicating a healthy bird.
- No Smell: No off-putting odors, a fresh, clean smell is what you want.
Brining: The Secret Weapon for Juicy, tender chicken
Now, here's where the magic begins: the brine. It's not just a fancy word; it's the key to super juicy, tender chicken, and it's a game-changer, believe me. Brining involves soaking your chicken in a saltwater solution, which basically rehydrates the meat, making it more flavorful and preventing it from drying out during cooking. It's like giving your chicken a little spa treatment, but with salt and sugar.
I've got a foolproof brine recipe that I swear by. You'll need:
- 1 gallon of cold water
- 1 cup of kosher salt
- 1/2 cup of granulated sugar
Just mix it all together in a large container, add your chicken pieces, and let them chill in the fridge for at least 4 hours, preferably overnight. The longer, the better, trust me.
(Part 2) The Art of Drying: Achieving that Perfect Crisp
Alright, so your chicken has been brined and is ready to rock. Now, we're going to give it the star treatment – the drying process. This is crucial for achieving that irresistible crispy skin. Imagine it as getting your chicken ready for its big moment on the frying stage.
Pat It Down, People: Removing Excess Moisture
First things first, pat your chicken dry with paper towels. We want to get rid of any excess moisture that could steam the skin and make it soggy. This is like giving your chicken a good towel-down after a shower, ensuring a dry and crisp finish.
The Fridge Factor: Letting the Skin Dry Out
Next, let's let the fridge do its thing. Put your chicken on a wire rack over a baking sheet, uncovered, and let it hang out in the fridge for at least 30 minutes, or even up to a few hours. This will allow the skin to dry out even further, creating the perfect canvas for that crispy golden finish. It's like a pre-show warm-up for your chicken, getting it ready for its starring role in the frying pan.
Don't Forget the Flour: Creating a Crispy Barrier
Just before frying, dredge your chicken pieces in a light coating of flour. This will help to create a barrier between the chicken and the hot oil, preventing the skin from sticking and ensuring even browning. It's like giving your chicken a light dusting of makeup, ensuring a flawless, crispy finish.
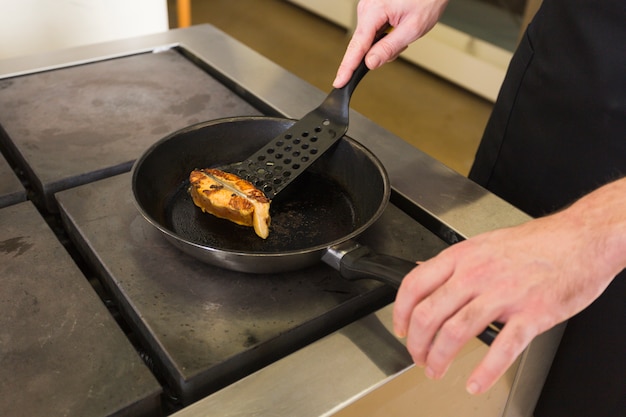
(Part 3) The Frying Frenzy: Mastering the Heat

Alright, we're down to the wire. The frying part! This is where your patience and precision come in. It's time to get those oil temperatures just right. Imagine this as setting the stage for a spectacular frying performance.
The Oil You Choose Matters: high smoke point oils
Choose your oil wisely, my friend. I recommend using a high smoke point oil like peanut oil, vegetable oil, or canola oil. These oils can withstand high temperatures without breaking down and creating an unpleasant taste. It's like choosing the right fuel for a roaring fire, ensuring a clean, consistent burn.
The Right Temperature is Key: Finding the Sweet Spot
Now, here's the real secret: you need to fry your chicken at the perfect temperature. Aim for around 350°F (175°C). You can use a thermometer to check the temperature of your oil, or if you're a seasoned pro, you can use the “breadcrumb test.” Drop a breadcrumb into the oil. If it sizzles and browns quickly, you're ready to go! It's like finding the perfect temperature for a warm bath, ensuring a comfortable and enjoyable experience for your chicken.
(Part 4) The Frying Process: Patience is a Virtue
Now that your oil is hot and your chicken is prepped, it's time to get frying. Take it slow, friend. It's like a slow, deliberate dance, where every move counts.
Don't Overcrowd: Giving Your Chicken Space
The most important thing is to avoid overcrowding the pan. If you throw too many pieces in at once, it will lower the temperature of the oil and your chicken won't get crispy. It's like giving your chicken its own personal space in the frying pan, allowing it to reach its full potential.
Watch the Colour: Signs of Crispy Perfection
Keep a watchful eye on your chicken. It should start to turn a beautiful golden brown, and you'll hear a gentle crackling sound as the skin crisps up. It's like witnessing a masterpiece unfold, a beautiful transformation from pale to golden.
Flip It, Don't Forget It: Ensuring Even Cooking
Once the first side is nicely browned, gently flip your chicken pieces. Now, continue to fry until the other side reaches that golden perfection. You'll know it's done when the internal temperature reaches 165°F (74°C) for chicken breasts or 175°F (80°C) for chicken thighs. It's like a graceful waltz, ensuring both sides of your chicken reach their peak flavor and texture.
Give it a Rest: Allowing the Skin to Crisp Up
Once your chicken is golden and cooked through, remove it from the pan and place it on a wire rack over a baking sheet lined with paper towels. This will help to drain any excess oil and allow the skin to continue to crisp up. Let it rest for at least 5 minutes before digging in. It's like giving your chicken a little break after its performance, allowing it to shine even brighter.
(Part 5) Beyond the Basics: Level Up Your Crispy Chicken Game
Okay, so you've got the fundamentals down pat. Now, let's talk about taking your crispy chicken to the next level. It's time to unleash your creativity and experiment with different flavors and techniques.
Flavorful Coating: Adding Spices and Texture
Instead of just plain flour, get creative with your coating. Try adding some spices like paprika, garlic powder, onion powder, or even a little cayenne pepper. You can also mix in some breadcrumbs or cornmeal for extra texture. Imagine it as adding a touch of artistry to your chicken, creating a symphony of flavors and textures.
The Power of the Pan: Cast Iron or dutch oven
cast iron skillets are legendary for frying. They retain heat beautifully, ensuring even cooking and a crispy crust. If you don't have one, a heavy-bottomed Dutch oven will do the trick. It's like using the right tools for the job, ensuring a smooth and successful frying experience.
Double-Frying: The Secret Weapon for Ultra-Crispy Skin
For that extra-crispy, almost-crackling skin, try double-frying. This involves frying the chicken once for a short time to set the skin, then allowing it to cool, and then frying it again for a longer period to achieve ultimate crispiness. It's like giving your chicken a second chance to reach its peak performance, resulting in an extra-crispy, satisfying crunch.
Crispy Chicken: Beyond the Fry
Who says crispy chicken has to be fried? You can achieve delicious crispy skin in the oven, too!
Preheat your oven to 400°F (200°C) and place your chicken pieces on a wire rack over a baking sheet. Roast for about 30-40 minutes, or until the skin is golden brown and the chicken is cooked through. It's like a different stage for your chicken, showcasing its crispy potential in a new way.
(Part 6) Serving Up Perfection: Elevate Your Chicken Experience
You've got your crispy chicken, it's golden and glistening. Now, let's make sure the rest of your meal is worthy of this masterpiece. It's like creating a symphony of flavors and textures, where each element plays a vital role in the overall experience.
The Sidekick: The Perfect Pairing
Crispy chicken is incredibly versatile. It begs for a symphony of flavors and textures.
I love serving it with creamy mashed potatoes, tangy coleslaw, and a simple green salad. But you can also get creative with your sides. Try a spicy slaw, sweet potato fries, or even a fresh fruit salad for a bit of contrast. It's like choosing the perfect supporting cast for your starring chicken, ensuring a balanced and satisfying meal.
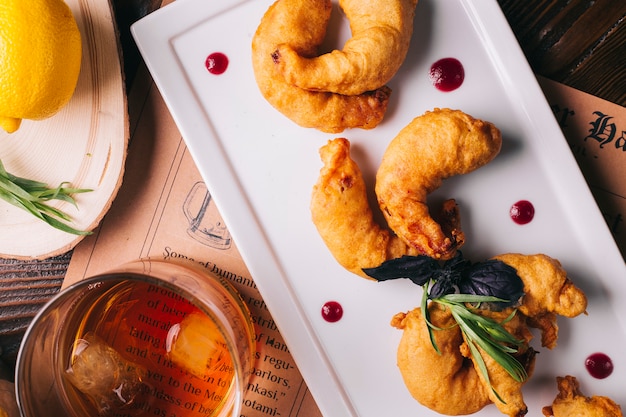
Dipping Delight: The Ultimate Sauce
No crispy chicken experience is complete without a dipping sauce.
A classic honey mustard is always a winner, but don't be afraid to explore other options. Spicy mayo, ranch dressing, barbecue sauce, or even a simple homemade garlic aioli will take your chicken to the next level. It's like adding a final touch of brilliance, a finishing flourish to an already amazing dish.
(Part 7) Crispy Chicken: A culinary journey
You've made it to the end of our crispy chicken odyssey.
You've learned about the science behind the crisp, the secrets of brining, and the art of the fry. You've been equipped with the knowledge and techniques to create your own masterpiece. It's like a journey of discovery, where you've learned new skills and gained valuable insights along the way.
So go forth, my friend, and embrace the joy of crispy chicken. Let your culinary creativity soar!
(Part 8) FAQs: Your Crispy Chicken Questions Answered
Now, let's address some of the common questions that come up when it comes to crispy chicken. It's like having a Q&A session with your favorite crispy chicken expert, clearing up any doubts and uncertainties.
1. Can I use frozen chicken?
It's not ideal, but if you're in a pinch, you can use frozen chicken. Just make sure to thaw it completely before brining and drying it. It's like a last-minute substitution, but it can still work with a little extra care.
2. How long can I brine chicken for?
You can brine chicken for anywhere between 4 hours and 24 hours. The longer you brine it, the more flavorful and tender it will be. It's like a beauty sleep for your chicken, allowing it to soak up the flavors and become even more delicious.
3. How do I know when the oil is hot enough?
You can use a thermometer to check the oil temperature, or you can use the “breadcrumb test.” Drop a breadcrumb into the oil. If it sizzles and browns quickly, you're ready to go! It's like a quick and easy way to check the temperature, ensuring your chicken gets the perfect crispy finish.
4. What if my chicken isn't crispy enough?
If your chicken isn't as crispy as you'd like, you can try double-frying it. This involves frying it once for a short time to set the skin, then allowing it to cool, and then frying it again for a longer period to achieve ultimate crispiness. It's like giving your chicken a second chance to reach its peak crispiness, ensuring a satisfyingly crunchy bite.
5. Can I make crispy chicken in the oven?
Absolutely! Preheat your oven to 400°F (200°C) and place your chicken pieces on a wire rack over a baking sheet. Roast for about 30-40 minutes, or until the skin is golden brown and the chicken is cooked through. It's like a different stage for your chicken, showcasing its crispy potential in a new way.
And there you have it, folks! The ultimate guide to crispy chicken. Go forth and conquer the kitchen with this newfound knowledge!
Everyone is watching

Perfect Rice Every Time: The Ultimate Guide to Cooking Rice
Cooking TipsAs a self-proclaimed foodie, I've always been a bit obsessed with rice. It's the foundation of countless cuisi...

Prime Rib Roast Cooking Time Chart: Per Pound Guide
Cooking TipsPrime rib roast. Just the name conjures images of lavish dinners, crackling fires, and hearty laughter. It’s ...

The Ultimate Guide to Cooking Asparagus: Tips, Techniques, and Recipes
Cooking TipsAsparagus. The mere mention of this spring delicacy conjures up images of vibrant green spears, crisp and burs...

Ultimate Guide to Cooking the Perfect Thanksgiving Turkey
Cooking TipsThanksgiving. Just the word conjures up images of overflowing tables laden with delicious food, the scent of r...

How Long to Bake Potatoes in the Oven (Perfect Every Time)
Cooking TipsBaked potatoes are a staple in my kitchen. They're incredibly versatile, delicious, and surprisingly easy to m...