Part 1: A Love Story with Brussels Sprouts
It was a revelation. I remember the first time I tasted a pan-seared Brussels sprout. It was crisp, caramelized, and bursting with flavor. The bitterness I used to associate with them was gone, replaced by a delightful sweetness and a satisfying crunch. I was hooked.
Now, I'm a Brussels sprout enthusiast, and I'm on a mission to spread the love. I want you to experience the magic of pan-seared Brussels sprouts and become a convert yourself.
Part 2: Picking the perfect brussels sprouts
The first step to mastering pan-seared Brussels sprouts is choosing the right ones. You want to find sprouts that are fresh, firm, and free from any blemishes.
What to Look For:
- Firmness: Think of it like choosing a good avocado – you want a Brussels sprout that feels solid, not mushy. Avoid any that feel soft or squishy.
- Colour: A bright green color indicates freshness. Stay away from sprouts that have brown spots or discoloration, which are signs of aging.
- Size: Size matters! For pan-searing, I generally prefer medium-sized sprouts, about 1 inch in diameter. They cook more evenly, giving you that perfect balance of crispy exterior and tender interior. Of course, if you prefer a smaller, bite-sized sprout, go for it!
What to Avoid:
- Wilting: If the leaves look droopy or withered, those sprouts have seen better days. Pass on them.
- Browning: Avoid sprouts with brown spots or discoloration, as they may be past their prime.
- Damaged: Inspect the sprouts for any cracks, cuts, or signs of damage.
Part 3: Prepping the Sprouts
Once you've selected your perfect sprouts, it's time to get them ready for their starring role.
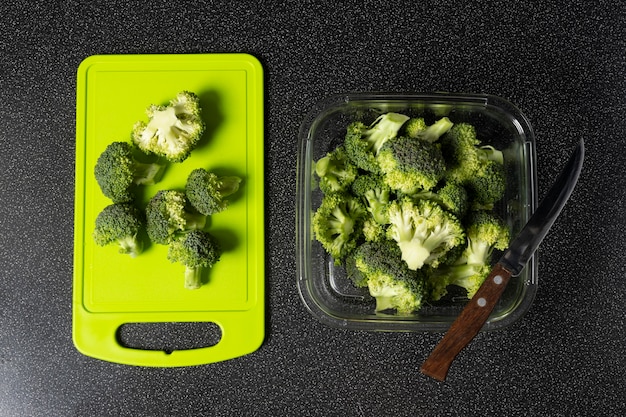
Trimming the Sprouts
Start by trimming the tough, outer layer of leaves. This might seem intimidating, but don't be afraid to give them a good trim! Just remove enough leaves to reveal the tender, inner leaves. You can also trim the base of the sprout, but I often leave it on for a bit of extra flavor.
Halving or Quartering
Now, let's talk about sizing. If you're working with smaller sprouts, you can pan-sear them whole. However, larger sprouts will benefit from being halved or quartered for even cooking. Remember, the goal is to ensure that every bit of that sprout gets a chance to become crispy and caramelized.
Part 4: The Secret Sauce - Getting the Pan Hot
The key to perfectly pan-seared Brussels sprouts is a screaming hot pan. Think of it as the secret ingredient to unlocking the best flavor and texture.
Choosing the Right Pan
I prefer a cast iron pan, as it holds heat exceptionally well and distributes it evenly. But don't worry if you don't have one, a heavy-bottomed stainless steel pan will do the trick. Just make sure you choose a pan that can handle high heat.
The Heat is On
Turn up the heat! I'm talking medium-high heat for gas, or about 400°F (200°C) for an electric stove. Want to check if your pan is hot enough? Drop a few drops of water onto the pan – they should sizzle and evaporate instantly.
Part 5: Adding the Fat
We're not cooking the Brussels sprouts dry, folks. We need a good amount of fat to help them crisp up and develop that irresistible golden-brown color.
The Right Kind of Fat
My go-to is extra virgin olive oil, because it adds a beautiful fruity flavor that complements the Brussels sprouts perfectly. However, you can use other fats, like butter or even coconut oil, depending on your preference.
Swirling the Fat
Once the pan is scorching hot and the fat is shimmering, swirl it around to ensure it coats the entire surface. This will ensure even browning and help prevent the sprouts from sticking.
Part 6: The Star of the Show - The Brussels Sprouts
Now, it's time for the moment of truth.
Layering the Sprouts
Gently add the prepped Brussels sprouts to the hot pan, making sure they're evenly distributed and not overcrowded. If you're working with a large batch, you might need to do this in batches.
Resist the Urge
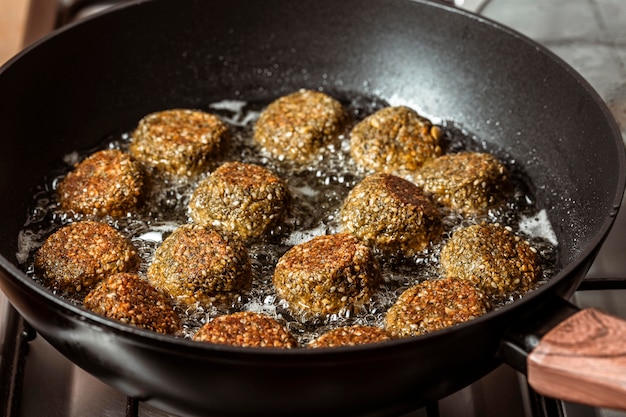
Here's where patience comes in. Resist the urge to stir or touch the sprouts too much. Let them cook undisturbed for 3-4 minutes per side. This will allow them to develop that irresistible crispy exterior and beautifully caramelized texture.
Flipping the Sprouts
After a few minutes, use tongs to give those sprouts a good flip. You'll know they're ready when the bottoms are golden brown and slightly charred.
The Finishing Touches
Now, we're about to take those pan-seared Brussels sprouts from amazing to legendary. Here's where you get to add your personal touch.
Seasoning
Salt and pepper are my staples, but don't be afraid to experiment. Garlic powder, onion powder, or even a pinch of chili flakes can add a burst of flavor.
Lemon Juice
A squeeze of fresh lemon juice adds a bright and tangy touch, cutting through any residual bitterness.
Vinegar
A drizzle of balsamic vinegar introduces a touch of sweetness and acidity, creating a harmonious balance of flavors.
Garlic
Adding a clove of garlic, smashed and peeled, at the end of cooking adds a lovely aroma and flavor. Just imagine that beautiful garlic aroma wafting through your kitchen!
Part 7: Taking it to the Next Level
Let's push the boundaries of pan-seared Brussels sprouts, shall we? Here are some ideas to make them even more incredible.
A Touch of Sweetness
Add a sprinkle of brown sugar, maple syrup, or even a dollop of honey towards the end of cooking. The sweetness balances out the natural bitterness of the Brussels sprouts, creating a truly irresistible flavor.
Herbs
Fresh herbs are a game changer! Try adding a sprig of thyme, rosemary, or sage to the pan in the last minute. It adds a burst of freshness and aroma that complements the sprouts beautifully.
Cheese
For a cheesy twist, add a sprinkle of Parmesan or Pecorino Romano cheese towards the end of cooking. The salty, nutty flavor of the cheese complements the sprouts perfectly.
Part 8: Serving Suggestions
The beauty of pan-seared Brussels sprouts is their versatility. They can be enjoyed as a side dish, a main course, or even added to salads.
Side Dish
Pan-seared Brussels sprouts make an excellent side dish for a variety of meals. They pair perfectly with roasted meats, fish, chicken, and even vegetarian dishes.
Main Course
They can even take center stage! Toss them with pasta, quinoa, or rice for a hearty and satisfying main course.
Salad
Add them to a salad for a crunchy and flavorful touch. They pair well with other roasted vegetables, nuts, and cheese.
Table
Serve them hot, fresh from the pan, for the most satisfying crunch. If you prefer, let them cool slightly before serving.
Part 9: Keeping the Brussels Sprouts Crisp
No one likes mushy Brussels sprouts. The key to keeping them crisp is to avoid overcooking.
The Secret
You want them tender on the inside and slightly charred on the outside. It's all about achieving that perfect balance.
Don't Overcrowd
Overcrowding the pan will cause the sprouts to steam instead of sear, resulting in a mushy texture. Cook them in batches if necessary.
Don't Overcook
Once the sprouts are cooked to your liking, remove them from the pan immediately to prevent overcooking.
Part 10: FAQs
Here are some frequently asked questions about pan-seared Brussels sprouts.
Q: Can I make pan-seared Brussels sprouts ahead of time?
A: Absolutely! You can make them ahead of time and reheat them. For the best results, reheat them in a skillet over medium heat until they're warmed through and crispy.
Q: How long can I store pan-seared Brussels sprouts in the refrigerator?
A: You can store them in an airtight container in the refrigerator for up to 3 days.
Q: Can I freeze pan-seared Brussels sprouts?
A: You can freeze them, but they may lose some of their crispness. It's best to freeze them uncooked and then pan-sear them fresh when you're ready to eat them.
Q: What if my Brussels sprouts are too bitter?
A: If your sprouts are too bitter, try adding a touch of sweetness, like brown sugar, maple syrup, or honey. You can also try adding a squeeze of lemon juice or a drizzle of balsamic vinegar to balance out the bitterness.
Q: What are some other ways to cook Brussels sprouts?
A: Besides pan-searing, Brussels sprouts can also be roasted, steamed, boiled, or grilled. Each method produces a slightly different texture and flavor.
Part 11: The Final Word
There you have it, your guide to pan-seared Brussels sprout perfection. With a little practice and these tips, you'll be a Brussel sprout master in no time. Get creative, experiment with different flavors, and most importantly, enjoy!
Everyone is watching

Perfect Rice Every Time: The Ultimate Guide to Cooking Rice
Cooking TipsAs a self-proclaimed foodie, I've always been a bit obsessed with rice. It's the foundation of countless cuisi...

Prime Rib Roast Cooking Time Chart: Per Pound Guide
Cooking TipsPrime rib roast. Just the name conjures images of lavish dinners, crackling fires, and hearty laughter. It’s ...

The Ultimate Guide to Cooking Asparagus: Tips, Techniques, and Recipes
Cooking TipsAsparagus. The mere mention of this spring delicacy conjures up images of vibrant green spears, crisp and burs...

Ultimate Guide to Cooking the Perfect Thanksgiving Turkey
Cooking TipsThanksgiving. Just the word conjures up images of overflowing tables laden with delicious food, the scent of r...

How Long to Bake Potatoes in the Oven (Perfect Every Time)
Cooking TipsBaked potatoes are a staple in my kitchen. They're incredibly versatile, delicious, and surprisingly easy to m...