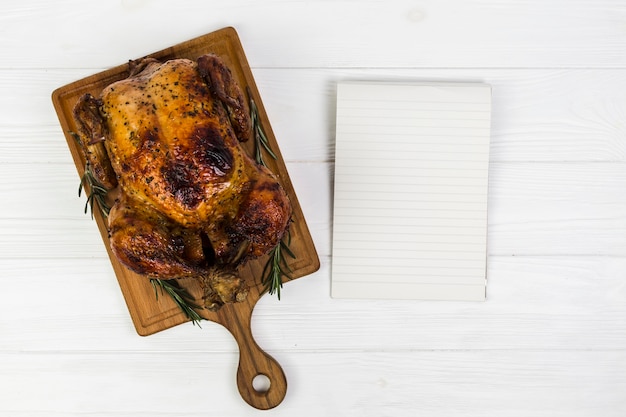
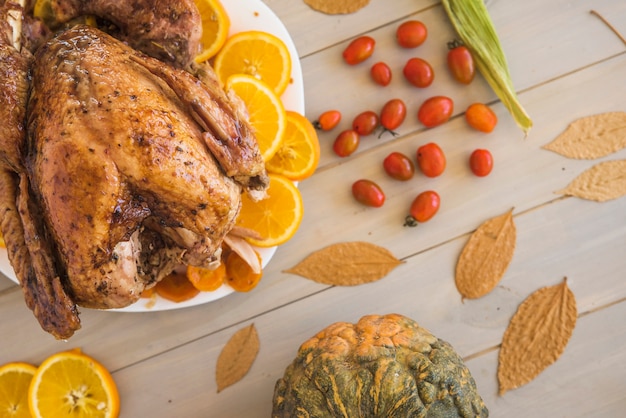
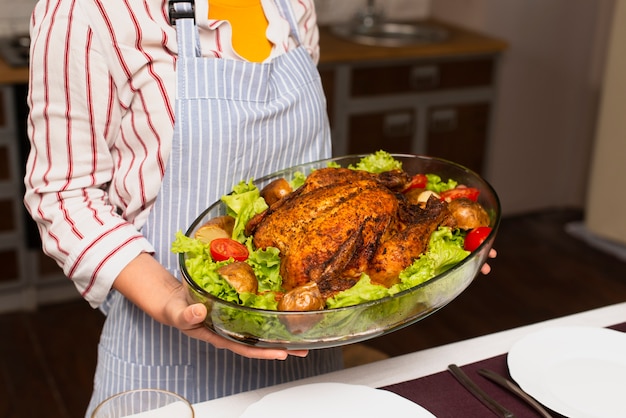
Let's face it, there's something undeniably special about the aroma of a beautifully roasted turkey filling your home. It's a scent that instantly evokes warmth, comfort, and the promise of a delicious feast. But let's also be honest, roasting a turkey can feel a bit like navigating a culinary minefield, especially if you're not a seasoned chef. I've been there, standing before that majestic bird, wondering if I'd end up with a succulent masterpiece or a dry, overcooked disappointment. Over the years, however, I've learned a few tricks and tips that have transformed my turkey-roasting experience, turning it from a source of anxiety into a source of pride. And I'm thrilled to share these secrets with you, my fellow food enthusiasts.
So, grab a cup of tea, settle into your favourite armchair, and get ready to embark on a journey to mastering the art of roasting a perfect turkey, all within the cozy confines of your trusted roaster oven.
Part 1: The Roaster Oven - Your Secret Weapon

For years, I've been a devoted fan of roaster ovens. They're the silent heroes of the kitchen, especially when it comes to tackling those big, beautiful turkeys. They consistently deliver a moist, evenly cooked bird every time, without the stress and fuss of a conventional oven. Here's why I consider roaster ovens the unsung heroes of the culinary world:
Why Roaster Ovens are the Real MVPs
- Consistent and Even Cooking: The magic of a roaster oven lies in its ability to create a perfectly controlled, even cooking environment. The enclosed design traps heat and moisture, ensuring that every inch of your turkey cooks to a delicious, juicy perfection. Goodbye, dry, overcooked turkey breasts and hello, flavourful, succulent meat!
- Less Stress, More Fun: Forget about constantly checking and basting your turkey in a conventional oven. Roaster ovens take the pressure off, allowing you to focus on other aspects of your festive feast without a care in the world. Enjoy your holiday!
- Space-Saving Superstar: Perfect for those with limited counter space or smaller ovens, roaster ovens are surprisingly compact yet still manage to deliver that big-oven flavour. They're a culinary powerhouse in a smaller package.
- Effortless Cleanup: No more scrubbing away at burnt turkey drippings in your oven. Roaster ovens come with removable parts that are dishwasher-safe, making cleanup a breeze. Less time cleaning, more time enjoying your delicious turkey!
Part 2: Choosing the Right Turkey - It's All About the Size

The first step towards a spectacular roast turkey is choosing the right bird. It's all about finding the perfect size to match your roaster oven and the number of hungry mouths you're feeding. Don't feel intimidated by the vast selection at the butcher's counter. I'm here to guide you through the process, one step at a time.
Size Matters: Matching Turkey to Roaster
The key is to select a turkey that comfortably fits into your roaster oven without feeling cramped. A crowded turkey won't cook evenly and could even take longer to reach the desired temperature, potentially leading to an unevenly cooked bird.
Here's a simple guide to help you choose the right turkey size based on your roaster oven's capacity:
| Roaster Oven Capacity (quarts) | Recommended Turkey Size (pounds) |
|---|---|
| 10-12 quarts | 8-12 pounds |
| 14-16 quarts | 12-16 pounds |
| 18-20 quarts | 16-20 pounds |
Remember, it's always better to err on the side of a slightly smaller turkey than one that's too large. And if you're ever unsure, don't hesitate to ask your friendly butcher for their expert advice. They're the turkey whisperers, after all!
Part 3: Thaw Time - Be Patient, It's Worth It

Now that you've got your perfect turkey in hand, it's time to thaw it properly. This step is crucial for ensuring a juicy, safe, and delicious bird. Don't even think about skipping this step, my friends. It's all about patience and following a few simple guidelines.
Thawing Tips: From Fridge to Roaster
Here's the safest and most reliable way to thaw your turkey:
- Refrigerator Thaw: This is the golden standard of turkey thawing. Transfer your frozen turkey to the refrigerator and allow it to thaw slowly, at a consistent temperature. Plan on about 24 hours for every 5 pounds of turkey. For example, a 12-pound turkey will need about 2 days to thaw completely. It might seem like a long time, but it's worth it for a perfectly thawed bird.
- Cold Water Thaw: This method is faster but requires careful attention. Place the turkey in a large container filled with cold water, ensuring the water completely covers it. Change the water every 30 minutes to keep it consistently cold. A 12-pound turkey can thaw in this method in about 3 to 4 hours. However, remember, this method requires careful monitoring to ensure the water stays cold and the turkey doesn't become unsafe.
- Never: Do not thaw a turkey at room temperature or in warm water. This can create a breeding ground for bacteria, putting your family's health at risk. Safety first, always!
Part 4: Preparing the Turkey - Brining for That Extra Juiciness
Now, let's get to the exciting part – prepping your turkey for its roaster oven journey. One of my favourite tricks for achieving a truly extraordinary turkey is brining. It's a little bit of culinary magic that transforms a good turkey into a truly exceptional one.
The Art of Brining: Unlocking the Secrets of Flavor
Brining is essentially soaking your turkey in a salt-water solution, which helps to retain moisture and enhance the natural flavour. It's a simple yet effective technique that takes your turkey to the next level. Here's how I do it:
- Dry Brine: This is my go-to method. Simply rub the turkey, both inside and out, with a generous amount of salt. The salt draws out moisture, then reabsorbs it back into the meat, creating a juicy and flavorful turkey. It's a simple technique with incredible results.
- Wet Brine: Combine water, salt, sugar, and your favourite herbs and spices in a large container. Submerge the turkey in the brine, making sure it's completely covered. Refrigerate for 12-24 hours. The wet brine adds a touch of extra moisture and allows you to infuse the turkey with a delightful flavour profile.
- Brine Alternatives: If you're short on time or prefer a simpler approach, consider using a dry rub or even a store-bought brine solution. These offer a convenient way to achieve similar results without the full brining process.
Remember, brining isn't a necessity, but it can truly elevate the flavor and juiciness of your turkey. It's a little bit of kitchen magic that transforms a good turkey into a truly exceptional one.
Part 5: Stuffing the Turkey - A Culinary Delight
Ah, stuffing! It's one of the things that makes Thanksgiving or Christmas truly special. It's that comforting, flavourful side dish that complements the turkey beautifully. But let's be honest, stuffing can be a bit of a culinary challenge, especially when it comes to ensuring it's cooked properly.
Stuffing Secrets: Don't Overstuff and Cook Separately
My personal rule is to never stuff the turkey. Instead, I cook the stuffing separately. It's simply safer and ensures that the stuffing is cooked through, reducing the risk of undercooked ingredients.
However, if you're a traditionalist and prefer to stuff your turkey, here are a few essential tips to keep in mind:
- Don't Overstuff: Leave some space for the stuffing to expand as it cooks. A tightly packed stuffing can prevent the turkey from cooking evenly, leading to potential issues with doneness.
- Cook to a Safe Temperature: Ensure your stuffing reaches an internal temperature of 165°F (74°C) for safe consumption. This is crucial for preventing any foodborne illness and ensuring everyone enjoys their meal.
- Cook Separately: If you are stuffing your turkey, cook it separately to ensure it reaches the proper temperature. This guarantees that both the turkey and the stuffing are cooked to perfection, eliminating any worry about undercooked ingredients.
Whether you choose to stuff your turkey or cook it separately, remember to savour the deliciousness of the stuffing! It's a festive tradition that adds a wonderful touch of flavour and warmth to any holiday meal.
Part 6: Roasting the Turkey - Time for the Roaster Oven to Shine
The moment has arrived, my friends! It's time to unleash the magic of your roaster oven and let it work its culinary wonders on your prepared turkey.
Roasting Essentials: Setting Up for Success
Before we get started, gather your essential tools and ingredients:
- Roaster Oven: Your trusty roaster oven, the star of this culinary show!
- Turkey Baster: A turkey baster is invaluable for ensuring your bird stays juicy and flavorful. It helps to redistribute the pan juices, keeping the turkey moist and delicious.
- meat thermometer: This is a must-have for guaranteeing your turkey is cooked to perfection. It's the key to achieving that perfect balance of doneness and juiciness.
- Olive Oil: A good quality olive oil is essential for a crispy skin and added flavour. It adds a touch of richness and depth to your turkey.
- Salt and Pepper: Don't forget the basics! Salt and pepper are essential for seasoning your turkey, bringing out its natural flavours.
- Herbs and Spices: Get creative with your seasonings! Thyme, rosemary, sage, garlic powder, and onion powder are all excellent choices for enhancing the flavour of your turkey.
Roasting Instructions: From Start to Finish
Now, let's get this turkey roasting! Follow these simple steps to achieve that perfect golden-brown turkey:
- Preheat: Preheat your roaster oven according to the manufacturer's instructions. This ensures that the oven is at the right temperature for your turkey to cook evenly and efficiently.
- Season: Generously rub your turkey with olive oil, salt, pepper, and any desired herbs and spices. Make sure to season both inside and out, creating a symphony of flavours.
- Place the Turkey: Place the turkey in the roaster oven, breast side up. This allows the breast to cook evenly and prevents it from becoming dry.
- Basting: During the roasting process, periodically baste the turkey with the pan juices using your turkey baster. This keeps the turkey moist and prevents it from drying out, ensuring a succulent and juicy result.
- cooking time: Follow the suggested roasting times for your turkey size, but remember that cooking times can vary. It's always best to use a meat thermometer to ensure the turkey is cooked through.
- Rest: Once the turkey is cooked, let it rest for at least 15-20 minutes before carving. This allows the juices to redistribute, resulting in a more tender and flavorful turkey. Let the turkey rest and relax, so you can enjoy its deliciousness to the fullest.
Part 7: Checking for Doneness - Using a Meat Thermometer
You've followed all the steps, but how do you know if your turkey is truly done? This is where a meat thermometer comes in. It's the ultimate tool for ensuring a safe and perfectly cooked turkey.
Temperature Matters: Achieving Perfect Doneness
The turkey is fully cooked when it reaches an internal temperature of 165°F (74°C) in the thickest part of the thigh, not touching the bone.
Insert your meat thermometer into the thickest part of the thigh, being careful not to touch the bone. If the temperature reads 165°F (74°C) or higher, your turkey is ready to be carved. It's a simple test, but it's the key to ensuring a safe and delicious turkey.
Part 8: Carving the Turkey - A Culinary Masterpiece
The moment of truth has arrived! Your turkey is perfectly cooked, and it's time to carve it up and enjoy the fruits of your culinary labour.
Carving Tips: A Symphony of Meat and Flavor
Follow these tips for a flawless turkey carving experience:
- Let it Rest: Before you start carving, allow your turkey to rest for at least 15-20 minutes. This allows the juices to redistribute, making the meat more tender and flavorful. Let the turkey relax, and it will reward you with its deliciousness.
- Sharp Knife: A sharp carving knife is essential for a clean and efficient cut. It makes carving a breeze and ensures that you don't end up with a shredded turkey.
- Start with the Breast: Begin by carving the breast meat, cutting along the bone to remove the entire breast. This allows for even portioning and makes it easier to slice the breast meat.
- Slice the Thighs and Legs: Carefully slice the thigh and leg meat, removing it from the bone. Enjoy the succulent flavour of the dark meat, which is always a crowd-pleaser.
- Arrange Beautifully: Arrange the carved turkey meat on a serving platter, creating a beautiful and appetizing display. It's not just about the flavour, it's about the visual appeal too!
Part 9: Serving the Turkey - A Culinary Triumph
The moment of truth is here, friends! Your turkey is beautifully carved, the stuffing is steaming, and the table is set. It's time to celebrate with your loved ones and enjoy your culinary triumph.
Serving Suggestions: A Feast for the Senses
Here are a few serving ideas to complement your delicious roasted turkey, creating a symphony of flavours and textures:
- Cranberry Sauce: A classic pairing, cranberry sauce adds a tangy and festive touch to your turkey. It's a simple yet effective way to elevate the flavour profile of your turkey.
- Gravy: Nothing beats a warm, flavorful gravy poured over a slice of turkey. It adds richness and depth to every bite, making it truly irresistible.
- mashed potatoes: A comforting side dish that pairs perfectly with turkey. It's a classic combination that everyone loves.
- Stuffing: A must-have for any turkey feast, stuffing adds a savory and satisfying element to the meal. It's the perfect accompaniment to the turkey, providing a delightful balance of flavours and textures.
- green bean casserole: A classic Thanksgiving side dish that adds a touch of creaminess and crunch. It's a festive favourite that adds a touch of nostalgia to your meal.
- Dinner Rolls: Soft and fluffy dinner rolls are the perfect accompaniment to your turkey feast. They're a comforting and satisfying addition to any holiday meal.
FAQs: Your Burning Questions Answered
I know you might have a few questions about roasting a turkey. Here are some frequently asked questions and their answers, providing you with the information you need to confidently tackle your next turkey roasting adventure:
1. What if my turkey is overcooked?
Don't panic! Even if your turkey is slightly overcooked, it can still be delicious. The key is to keep it moist. If you find that your turkey is a bit dry, try adding some gravy or broth to the serving platter to keep it moist. You can also use a meat thermometer to ensure the turkey is cooked through.
2. How do I know if my turkey is done?
The best way to know if your turkey is done is to use a meat thermometer. The turkey is fully cooked when it reaches an internal temperature of 165°F (74°C) in the thickest part of the thigh, not touching the bone.
3. What should I do if my turkey is undercooked?
If your turkey is undercooked, it's important to cook it further. Return the turkey to the roaster oven and continue cooking until it reaches an internal temperature of 165°F (74°C) in the thickest part of the thigh, not touching the bone.
4. How do I prevent my turkey from drying out?
There are a few things you can do to prevent your turkey from drying out. First, make sure you're using a roaster oven with a lid. This helps to trap in the moisture and prevent the turkey from drying out. You can also try brining the turkey or basting it frequently with the pan juices.
5. How long should I let my turkey rest before carving?
It's important to let your turkey rest for at least 15-20 minutes before carving. This allows the juices to redistribute, making the meat more tender and flavorful.
Now, my friends, you're ready to conquer the world of turkey roasting. Remember, practice makes perfect. Don't be afraid to experiment and find what works best for you. Most importantly, have fun and enjoy the process! Happy roasting!
Everyone is watching

How to Cook Frozen Lobster Tails Perfectly: A Step-by-Step Guide
RecipesLobster. Just the word conjures up images of lavish meals, special occasions, and a taste of luxury. But let's...

Pigs in a Blanket Cooking Time: How Long to Bake for Perfect Results
RecipesAh, pigs in a blanket. Just the name conjures up images of those delightful little parcels of crispy pastry en...

Pork Fillet Cooking Time: How Long to Cook It Perfectly
RecipesPork fillet, or tenderloin as it's sometimes called, is a real favourite in our house. It's so versatile, and...

The Ultimate Guide to Tender, Juicy Pulled Pork
RecipesRight, let's talk pulled pork. It's one of those dishes that just screams "comfort food," doesn't it? I mean...

The Ultimate Guide to Cooking Delicious Frankfurters
RecipesLet's face it, we all love a good frankfurter. It's a classic, simple, and always satisfying. But let's be rea...
