There’s something undeniably grand about a whole roasted duck. The glistening, golden skin, the succulent meat, the rich aroma that fills the kitchen - it's a culinary experience that's both impressive and utterly satisfying. But for many, the thought of tackling a whole duck can seem daunting. Let me assure you, it's not as intimidating as you might think! With a little guidance and a touch of confidence, you can create a duck dinner that will have everyone around the table singing your praises.
This guide is not just about the mechanics of roasting a duck; it's about embracing the journey. We'll navigate the process from choosing the perfect bird to crafting sides that complement its rich flavour. We'll explore the art of carving a whole duck, transforming you from hesitant cook to confident carver. And, of course, I'll share my own experiences and tips along the way, both the successes and the, well, less successful moments.
(Part 1) The Duck: Choosing Your Weapon

Every culinary adventure starts with a key ingredient, and for our duck dinner, that ingredient is the duck itself. This is where the fun truly begins. Think of it like selecting your weapon for a culinary battle - you want one that’s reliable and will deliver the desired results.
Choosing the Right Breed: Understanding Your Options
The world of ducks might seem like a pond of possibilities, but for roasting, we're aiming for a specific type - one that's plump, juicy, and boasts a flavour that's both delicate and rich. Two breeds stand out as the quintessential roasting ducks:
- Aylesbury Duck: This breed is renowned for its delicate flavour and tender flesh. Aylesbury ducks are often considered the "gold standard" for roasting, offering a balance of richness and delicacy.
- Pekin Duck: If you're looking for a duck with a slightly bolder flavour and a propensity for crisp skin, the Pekin duck is your champion. These ducks are known for their robustness and often make a grand statement on the dinner table.
Ultimately, the choice is yours. Consider your personal preference, and don't be afraid to venture beyond these two classics. Experimenting with different breeds can lead to exciting culinary discoveries.
Weight and Size: Getting the Right Proportions
The next decision is about size. A good rule of thumb is to aim for a duck weighing between 4-5 pounds. This will provide enough meat for a satisfying meal, with leftovers for a delicious lunch the next day. For a smaller gathering, a 3-pound duck will suffice. Don't worry about the exact weight; you can adjust the roasting time accordingly. Just remember, you can always adapt your recipe to suit the size of your bird.
Fresh or Frozen: Making the Right Call
Finally, the age-old question: fresh or frozen? Fresh ducks generally offer the best flavour, but they can be more expensive and might require a bit more hunting to find. Frozen ducks are a budget-friendly option, readily available in most supermarkets. If you choose frozen, remember to defrost it completely in the refrigerator before roasting. This usually takes about 24 hours, so plan ahead!
(Part 2) The Prep Work: Setting the Stage for Roasting

Now that you have your duck, it's time to get it ready for the oven. This stage is all about preparing your bird for its culinary transformation, and it's where a little bit of attention to detail makes a big difference. Trust me, it's worth the effort.
Pat It Dry: Achieving the Ultimate crispy skin
The first step is essential for achieving that gloriously crispy skin we crave: pat the duck dry with paper towels. A wet duck will steam rather than roast, resulting in a soggy, disappointing skin. Take the time to pat the entire duck, both inside and out, ensuring it’s completely dry. This step lays the foundation for the crispy masterpiece we’re aiming for.
Seasoning the Duck: Unleashing Your Flavour Creativity
Now comes the fun part - seasoning! This is where your culinary creativity truly shines. I often opt for a simple blend of salt, pepper, and a hint of garlic powder. The combination is classic, highlighting the natural flavour of the duck without overpowering it. But feel free to experiment! Paprika, cumin, rosemary, thyme, or a blend of herbs - the options are endless.
Remember to rub the seasoning all over the duck, both inside and out. Don't be shy! Embrace the opportunity to create a flavour profile that reflects your personal taste. This is your chance to make the duck your own.
Stuffing the Duck: A Matter of Taste and Preference
Stuffing a duck is a matter of personal preference, and there's no right or wrong answer. For some, it's a traditional part of the roasting process, adding a delightful depth of flavour and texture. For others, it's simply an unnecessary addition.
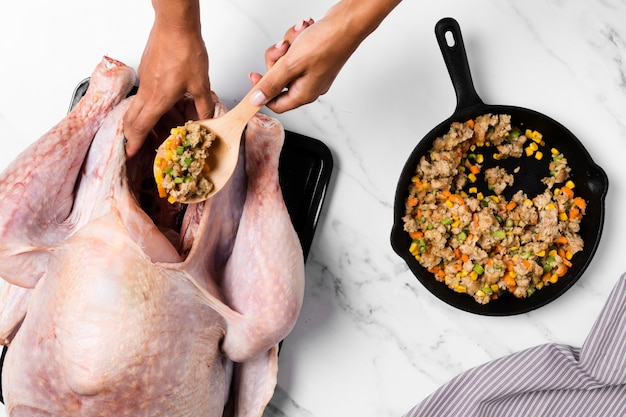
If you're feeling adventurous, a classic stuffing combination includes bread, herbs, and sausage meat. For a sweeter, more festive touch, you can opt for a fruit-based stuffing using apples or oranges. If you decide to stuff the duck, ensure the stuffing is cooked separately to guarantee it’s thoroughly cooked. Also, don't overstuff the duck; it can affect the roasting process and prevent the duck from cooking evenly.
Tie It Up: Maintaining Shape and Ensuring Even Cooking
The final step in prepping your duck is to tie its legs together using string or a skewer. This helps to keep the legs from splaying out during roasting, ensuring the duck cooks evenly and maintains a beautiful shape. You can also use a trussing needle to secure the wings to the body, but this step is optional. Now, your duck is ready for its grand entrance into the oven!
(Part 3) Roasting Time: The Culinary Grand Finale

The moment has arrived - time to roast your duck! This is where the magic happens, where the simple ingredients transform into a symphony of flavour and aroma. But before we turn up the heat, there are a few essential steps to ensure a successful roast.
Choosing the Right Pan: Setting the Stage for a perfect roast
First, select the right roasting pan. A standard roasting pan is ideal, but you can also use a large dutch oven. Just make sure the pan is big enough to accommodate the duck comfortably without overcrowding it. For even cooking and a crispy skin, it's a good idea to use a rack. This allows hot air to circulate around the duck, promoting even browning and helping the fat render properly.
The Roasting Process: A Step-by-Step Guide
Preheat your oven to 375°F (190°C). Place the duck in the roasting pan, breast side up. This might seem counterintuitive, but roasting the duck fat side up for the first half of the cooking time is crucial. This allows the fat to render out and naturally baste the duck, creating a beautifully golden skin. It's like a built-in self-basting system, ensuring that crispness we all crave.
Now for the timing. The roasting time depends on the size of the duck. A good rule of thumb is to roast it for about 15 minutes per pound for the first hour. After the first hour, reduce the oven temperature to 350°F (175°C) and roast for another 30 minutes, or until the internal temperature reaches 165°F (74°C) in the thickest part of the thigh.
Basting for Extra Crispiness: A Touch of Culinary Love
While the duck is roasting, periodically baste it with its own rendered fat. This is like giving your duck a luxurious massage with melted gold. Basting helps to keep the skin moist and adds extra flavour, intensifying the crispy, golden-brown finish. Using a ladle or spoon, carefully scoop out some of the fat from the roasting pan and pour it over the duck every 30 minutes or so. Don't be afraid to be generous - this step is all about achieving that perfect crispy skin.
(Part 4) Checking for Doneness: Knowing When It's Ready
Patience is key when it comes to roasting a duck. You want to ensure it’s cooked through but avoid overcooking, which can result in dry meat. There are a few methods to check for doneness, each offering a different perspective on your duck's progress.
Internal Temperature: A Precise Indicator of Doneness
The most reliable way to determine if your duck is cooked through is using a meat thermometer. Insert the thermometer into the thickest part of the thigh, avoiding the bone. The duck is done when the internal temperature reaches 165°F (74°C). If you don't have a thermometer, there’s a good old-fashioned trick: press the thigh with a finger. If the meat is firm and gives back a little, it’s cooked.
Check the Skin: A Visual Cue for Success
Another visual cue is the skin. It should be a beautiful golden brown and deliciously crispy. You can also check the colour of the fat. It should be rendered and clear, not cloudy. If it's still cloudy, the duck needs a bit more time in the oven.
(Part 5) Resting the Duck: A Culinary Pause
Once the duck is roasted to perfection, let it rest for 10-15 minutes before carving. This crucial step allows the juices to redistribute, resulting in a more tender, flavorful duck. Think of it as a well-deserved rest for your bird after its culinary adventure.
(Part 6) Carving the Duck: A Culinary Triumph
Now for the grand finale – carving the duck! Don't be intimidated; it's simpler than it seems. A sharp carving knife is essential, and for beginners, a carving fork can be a helpful tool to keep the duck steady.
The Steps to Carving: A Simple Guide to Mastery
Here's a step-by-step guide to carving a whole duck, turning you from hesitant cook to confident carver:
- Remove the wings. Cut through the joint where the wing meets the body. You can save these for later, perhaps for a soup or stew.
- Carve the breasts. Cut along the breastbone, following its curve. You should be able to remove both breasts in one piece.
- Carve the legs. Cut through the joint where the leg meets the body. Then separate the thigh and drumstick by cutting through the joint.
- Serve the duck. Arrange the carved duck on a serving platter, and you're ready to impress your guests!
Remember, there's no need to be perfect. The most important thing is to enjoy the process and the delicious results.
(Part 7) Sides for Your Duck Feast: Complementary Flavours
No duck dinner is complete without the perfect sides. Choose dishes that complement the rich flavour of the duck, creating a symphony of taste that satisfies both palate and soul. Here are some of my favourites.
Classic Sides: A Time-Tested Harmony
- Roasted Root Vegetables: sweet potatoes, carrots, and parsnips roasted with a bit of olive oil, salt, and pepper. The sweetness of the vegetables balances the richness of the duck, creating a harmonious balance.
- green beans with Almonds: fresh green beans sauteed with toasted almonds and a touch of lemon juice. A light and refreshing side that adds a nice crunch, complementing the richness of the duck.
- Wild rice pilaf: A nutty and hearty pilaf that's perfect for soaking up the duck juices. The earthy flavour of the wild rice complements the richness of the duck, creating a comforting and satisfying experience.
Creative Sides: A Culinary Adventure
For those who like to explore beyond the traditional, here are a few more adventurous side dish ideas:
- Glazed Brussels Sprouts: Brussels sprouts glazed with balsamic vinegar and honey. The sweet and tangy glaze creates a delightful contrast to the richness of the duck.
- Polenta with Parmesan: Creamy polenta topped with grated Parmesan cheese. A simple but satisfying side, the creamy polenta provides a comforting contrast to the crispy duck.
- Applesauce: A classic pairing for duck, applesauce adds a touch of sweetness and freshness, balancing the richness of the duck.
Remember, the key is to choose sides that complement the duck's flavour and create a satisfying, well-rounded dining experience.
(Part 8) Duck Fat: The Culinary Treasure
Don't discard the rendered duck fat! This liquid gold is a culinary treasure, adding depth of flavour and richness to countless dishes. Use it to roast potatoes, sauté vegetables, or even create delicious duck fat fries. The crispness and flavour it imparts are truly remarkable. Store the rendered duck fat in an airtight container in the refrigerator for up to a month. You'll be surprised how many ways you can incorporate this culinary gem into your cooking.
(Part 9) Leftover Duck: Second Dinner Delight
Got leftover duck? Don't despair! Those leftovers are a culinary treasure waiting to be transformed into a delicious second dinner. Here are a few ideas to turn your leftover duck into a new culinary adventure.
Duck Salad: A Fresh and Flavorful Transformation
Combine leftover duck with mixed greens, sliced oranges, toasted almonds, and a simple vinaigrette. A fresh and flavourful salad that's perfect for lunch or dinner. The combination of sweet oranges, crunchy almonds, and the lingering richness of the duck creates a satisfying and balanced meal.
Duck Soup: A Hearty and Comforting Dish
Use leftover duck bones and carcass to make a rich and flavorful duck soup. Add vegetables like carrots, celery, and potatoes, and season with salt, pepper, and herbs. The long simmering process extracts the essence of the duck bones, creating a rich and aromatic broth that will warm your soul.
Duck Quesadillas: A Quick and Easy Weeknight Treat
Slice leftover duck and add it to quesadillas with cheese, onions, and peppers. A quick and easy dinner that's perfect for a weeknight. The combination of cheesy goodness and the flavorful duck creates a satisfying meal.
Remember, there's no need to throw away those leftovers. Get creative, experiment, and transform them into a delicious new dish.
(Part 10) FAQs
Here are a few frequently asked questions about roasting a whole duck, offering insights to address any doubts or lingering questions you may have.
1. What's the Best Way to Get Crispy Skin on a Duck?
The key to achieving that gloriously crispy duck skin is a combination of high heat and rendering the fat. Roast the duck fat side up for the first half of the cooking time, basting it with its own rendered fat. This allows the fat to render out and creates a crispy, golden-brown skin. Don't be afraid to turn up the heat and give your duck a bit of a "sun tan." It's all about achieving that perfect crispy finish.
2. How Can I Avoid a Dry Duck?
To prevent your duck from drying out, don't overcook it. Check the internal temperature of the thigh with a meat thermometer, and aim for 165°F (74°C). Also, let the duck rest for 10-15 minutes after roasting, allowing the juices to redistribute throughout the meat. These simple steps ensure a succulent and moist duck that will melt in your mouth.
3. What Can I Serve with Roasted Duck?
As mentioned earlier, roasted root vegetables, green beans, and wild rice are classic sides for duck. They complement the richness of the duck, creating a satisfying culinary symphony. But don't be afraid to get creative. Glazed Brussels sprouts, polenta with Parmesan, or applesauce are all delightful options that will add a unique dimension to your duck dinner.
4. Can I Roast a Duck in a slow cooker?
While not the traditional method, you can actually roast a duck in a slow cooker. Just be aware that the skin will not be as crispy as if you roasted it in the oven. To achieve a more crispy skin, you can sear the duck in a pan before adding it to the slow cooker. This gives you the best of both worlds - tender, juicy meat and a slightly crispy skin.
5. Can I Freeze Roasted Duck?
Yes, you can freeze leftover roasted duck. Wrap it tightly in plastic wrap and then foil, and freeze for up to 3 months. To reheat, thaw in the refrigerator overnight and reheat in the oven or microwave. This way, you can enjoy the delicious flavours of your duck dinner for days to come.
And there you have it! My guide to roasting a whole duck, complete with all the tips and tricks you need to make your next duck dinner a resounding success. So grab a duck, gather your ingredients, and get ready to impress your guests with a culinary masterpiece. Happy roasting!
Everyone is watching

How to Cook Frozen Lobster Tails Perfectly: A Step-by-Step Guide
RecipesLobster. Just the word conjures up images of lavish meals, special occasions, and a taste of luxury. But let's...

Pigs in a Blanket Cooking Time: How Long to Bake for Perfect Results
RecipesAh, pigs in a blanket. Just the name conjures up images of those delightful little parcels of crispy pastry en...

Pork Fillet Cooking Time: How Long to Cook It Perfectly
RecipesPork fillet, or tenderloin as it's sometimes called, is a real favourite in our house. It's so versatile, and...

The Ultimate Guide to Tender, Juicy Pulled Pork
RecipesRight, let's talk pulled pork. It's one of those dishes that just screams "comfort food," doesn't it? I mean...

The Ultimate Guide to Cooking Delicious Frankfurters
RecipesLet's face it, we all love a good frankfurter. It's a classic, simple, and always satisfying. But let's be rea...
