Part 1: Choosing Your perfect turkey
1.1 Size Matters: The Turkey Tango
Think about the number of guests you're expecting. A good rule of thumb is to calculate about 1 pound of turkey per person. Now, you might be thinking, “What if I have leftovers?” Fear not, leftover turkey is a culinary treasure! You can freeze it and enjoy it later. But, if you’re aiming for a feast with no leftovers, you can adjust the size accordingly.1.2 Fresh or Frozen: The Great Debate
This is a matter of personal preference, really. Fresh turkeys are great because they're ready to cook, but you might need to find a specific butcher. frozen turkeys, on the other hand, are readily available in most supermarkets and have a longer shelf life. The key is to thaw them properly before cooking.1.3 Organic or Conventional: The Ethical Choice
Organic turkeys are raised without antibiotics or hormones, and they often boast a more complex flavour. They can be a bit pricier, but many folks find the difference in taste and ethics worth the extra cost. Conventional turkeys, on the other hand, are generally more affordable.1.4 Finding the Perfect Bird: A Tip from the Trenches
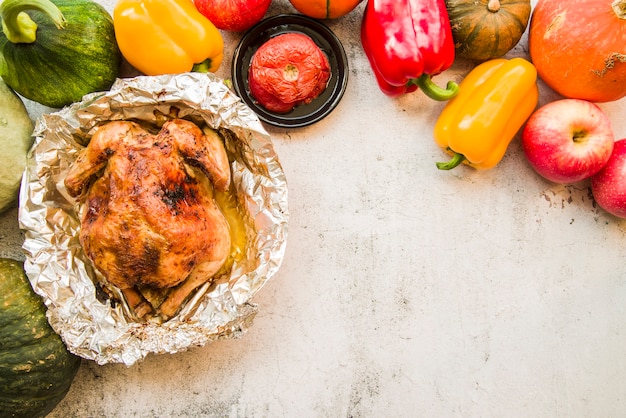
When you’re picking out your turkey, check for a plump bird with a nice, even colour. Avoid any turkeys with bruises or cuts. And remember, a good butcher can be a lifesaver! They can often give you excellent advice on choosing the right turkey and even help you prepare it.Part 2: Prepping Your Turkey for the Big Day
2.1 The Art of Thawing: Don’t Rush the Process
If you've chosen a frozen turkey, thawing it properly is crucial. Never thaw a turkey at room temperature – that's a recipe for bacterial disaster! Instead, move it to the refrigerator and allow it to thaw for about 24 hours per 5 pounds. For smaller turkeys, the cold water method is a good option. Remove the turkey from its packaging, place it in a large bowl or sink, and submerge it in cold water. Change the water every 30 minutes to ensure it stays cold. This method takes about 30 minutes per pound to thaw.2.2 Cleaning Up: A Spick-and-Span Bird
Once your turkey is thawed, give it a good scrub! Rinse the inside and outside under cold running water. Use your hands or a clean sponge to get rid of any leftover giblets or packaging. I personally like to pat the turkey dry with paper towels after rinsing. It helps to get rid of excess moisture, which can lead to a soggy skin.2.3 Brining Your Turkey: The Secret to Juicy Meat
This is where things get really exciting! Brining is a game-changer for turkey. It involves soaking the bird in a salt-water solution for a few hours or overnight, adding moisture and flavour. This process breaks down the proteins in the turkey, resulting in a juicy and tender bird. Here’s a simple brine recipe to get you started: 1 gallon of cold water 1 cup of kosher salt 1 cup of brown sugar 1 tablespoon of black peppercorns 2 bay leaves Combine the ingredients in a large container, ensuring the turkey is fully submerged. Leave it in the fridge for 4-6 hours, or up to 12 hours for a larger turkey.2.4 Stuffing the Bird: A Touch of Tradition
Stuffing is a classic part of a roast turkey, but it’s important to be aware of food safety. If the stuffing isn’t cooked through, it can harbour harmful bacteria. The safest option is to cook the stuffing separately, ensuring it reaches an internal temperature of 165°F (74°C). However, if you’re set on stuffing the turkey, make sure to cook it to the same internal temperature.Part 3: Roasting Your Turkey to Perfection
3.1 Oven Prep: Setting the Stage for Success
Preheat your oven to 325°F (160°C) – this is the ideal temperature for a juicy and flavorful roast. Grab a roasting pan that’s large enough for your turkey. A metal or ceramic pan will work just fine, but make sure it has a rack so that the turkey doesn't sit in its own juices. This will help achieve that crispy skin we all crave.3.2 Golden Glaze: Enhancing the Bird’s Beauty
To give your turkey a beautiful golden-brown colour, rub it with butter, olive oil, or a mixture of both. You can also add herbs and spices to enhance the flavor. I personally use a combination of dried herbs like rosemary, thyme, and sage, and a touch of garlic powder and onion powder.3.3 Turkey Time: The Moment of Truth
Place the turkey in the roasting pan, breast side up. Now, here’s a general rule of thumb for cooking time: about 15 minutes per pound. However, this is just a starting point. The size and shape of your turkey, as well as your oven, can affect the cooking time.Part 4: Monitoring Your Turkey: The Key to Success
Don’t panic – you’re almost there! But monitoring the turkey is vital to ensure it’s perfectly cooked.4.1 Checking for Doneness: The meat thermometer’s Role
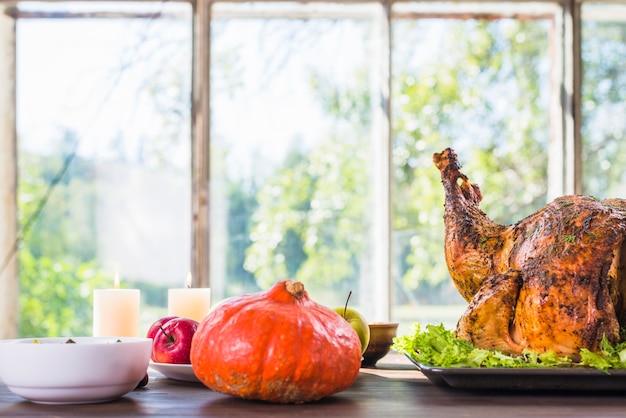
The most reliable way to determine if your turkey is done is to use a meat thermometer. Insert it into the thickest part of the thigh, ensuring it doesn't touch any bone. The turkey is cooked through when the internal temperature reaches 165°F (74°C).4.2 The Importance of Resting: Allowing the Juices to Redistribute
Once the turkey is cooked, let it rest for at least 20 minutes before carving. This is essential! It allows the juices to redistribute throughout the meat, resulting in a more succulent and tender bird. Cover the turkey loosely with foil to keep it warm.Part 5: Carving Your Turkey: The Grand FinaleThis is the moment we’ve all been waiting for! Get ready to carve your masterpiece.
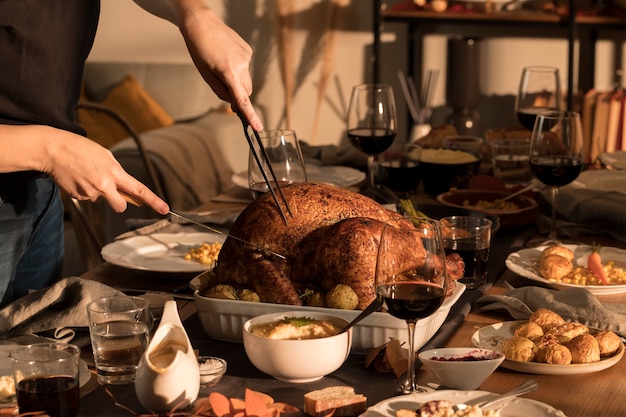
5.1 A Sharp Knife is Essential: The Tools of the Trade
You’ll need a sharp carving knife for this job. Transfer the turkey to a cutting board, and start by removing the legs and thighs. Then, carve the breast into slices. Be careful not to overwork the meat, as this can make it dry.5.2 Serving Up the Feast: A Celebration of Flavors
Serve the carved turkey with all your favorite side dishes, like stuffing, gravy, mashed potatoes, and cranberry sauce. Don't forget to save some of the turkey juices to make a delicious gravy.Part 6: Leftover Turkey: A Culinary TreasureLeftover turkey is a culinary delight! It’s a versatile ingredient that can be used in so many different ways.
6.1 A World of Possibilities: From Sandwiches to Soups
You can use leftover turkey to make sandwiches, salads, soups, or even turkey pot pie. Get creative and experiment with different recipes.6.2 Storage Tips: Keep Your Turkey Fresh
Store leftover turkey in an airtight container in the refrigerator for up to 4 days. You can also freeze turkey for up to 3 months. Just make sure to wrap it tightly in plastic wrap or aluminum foil.Part 7: Turkey Cooking Times: A Quick Guide
Here’s a quick cheat sheet to help you calculate the cooking time for your turkey:| turkey weight | Cooking Time (at 325°F) |
|---|---|
| 8-12 pounds | 2.5 - 3 hours |
| 12-16 pounds | 3 - 3.5 hours |
| 16-20 pounds | 3.5 - 4 hours |
| 20-24 pounds | 4 - 4.5 hours |
Part 8: FAQs: Your Turkey Questions Answered
Here are some frequently asked questions about cooking a turkey, and my expert answers:8.1 How do I know when my turkey is cooked?
The most reliable way to check for doneness is to use a meat thermometer. Insert it into the thickest part of the thigh, making sure it doesn't touch any bone. The turkey is cooked through when the internal temperature reaches 165°F (74°C).8.2 What if my turkey is dry?
If your turkey is dry, it was likely overcooked. To prevent this, use a meat thermometer to check for doneness, and don’t cook it for longer than necessary. Brining can also help add moisture. If the turkey is already dry, there’s not much you can do, but you can try adding some gravy or stuffing to make it more moist.8.3 Can I cook my turkey in a slow cooker?
You can cook your turkey in a slow cooker, but it will take much longer than in a conventional oven. It’s not the ideal method, but if you’re looking for a hands-off approach, it’s an option. Cook it on low heat for about 8-10 hours, or until it reaches an internal temperature of 165°F (74°C).8.4 How do I prevent my turkey skin from getting soggy?
Pat the turkey dry with paper towels before roasting. Use a roasting rack to elevate the turkey so that it doesn't sit in its own juices.8.5 Can I freeze cooked turkey?
Yes, you can freeze cooked turkey for up to 3 months. Wrap it tightly in plastic wrap or aluminum foil. To reheat frozen turkey, thaw it in the refrigerator overnight and then reheat it in the oven or microwave until heated through.And there you have it – your complete guide to roasting a turkey! Now go forth and create a culinary masterpiece that will impress your guests and leave them wanting more!Everyone is watching

How to Cook Frozen Lobster Tails Perfectly: A Step-by-Step Guide
RecipesLobster. Just the word conjures up images of lavish meals, special occasions, and a taste of luxury. But let's...

Pigs in a Blanket Cooking Time: How Long to Bake for Perfect Results
RecipesAh, pigs in a blanket. Just the name conjures up images of those delightful little parcels of crispy pastry en...

Pork Fillet Cooking Time: How Long to Cook It Perfectly
RecipesPork fillet, or tenderloin as it's sometimes called, is a real favourite in our house. It's so versatile, and...

The Ultimate Guide to Cooking Delicious Frankfurters
RecipesLet's face it, we all love a good frankfurter. It's a classic, simple, and always satisfying. But let's be rea...

Wolf Meat Recipes: A Guide to Cooking Wild Game
RecipesLet's be honest, you don't see wolf meat at your local butcher shop every day. It's a bit of a wild card, but ...