Let's be honest, the smell of a perfectly seared steak sizzling in a hot pan is enough to make anyone's mouth water. That beautiful crust, that juicy pink center, the melt-in-your-mouth tenderness… it's pure culinary bliss. But for a long time, I felt intimidated by the whole steak-cooking process. I’d watch cooking shows and think, “There’s no way I could do that!”
Well, guess what? You can! And I'm going to show you how. This guide is specifically for those of us who are just starting out on our steak-cooking journey. No fancy techniques or equipment needed, just a simple understanding of the basics and a bit of practice.
This guide will walk you through every step, from choosing the perfect cut of steak to achieving the perfect level of doneness. I’ll share my own experiences, what’s worked (and what hasn’t), and hopefully, you’ll feel a lot more confident in your steak-cooking abilities by the end of it.
So grab your favourite pan, a good quality piece of steak, and get ready to embark on this delicious culinary adventure!
(Part 1) The Steak: Your Starting Point
choosing the right cut: A Beginner's Guide to steak cuts
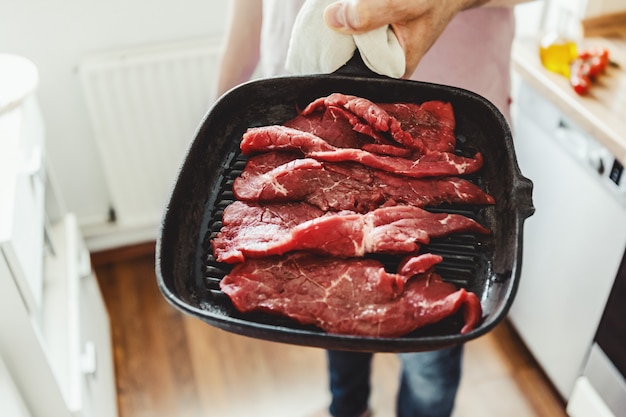
First things first, you need to pick your steak. Now, I know there are tons of different cuts out there, but for a beginner, it's best to stick with a few classics:
- Sirloin: This is a popular choice because it’s a good all-rounder with a nice balance of flavour and tenderness. It's a relatively lean cut, making it a good option for those who prefer a less fatty steak.
- Rib-Eye: Now, this is a real treat – it’s known for its rich marbling and incredible flavour. This means it has more fat running through the meat, resulting in a richer, more buttery taste. Be warned, it can be a bit on the pricier side.
- new york strip: This cut has a nice, long strip of tender meat with a delicious flavour. It’s a good option if you’re looking for something a bit more substantial than a sirloin. It's also a good choice for those who prefer a more pronounced "steak" flavour.
Avoid the tougher cuts like chuck or flank steak for now. They require a bit more expertise, and you don’t want to get discouraged early on.
Thickness Matters!
The thickness of your steak is important. For a pan-fried steak, you want something that’s about 1 inch thick. This will give you a nice sear and allow the inside to cook evenly without drying out. If you're using a thinner steak, it might be better to use a different cooking method like grilling or broiling.
steak quality: A Word of Advice
It’s really worth splurging on a good quality steak. You’ll taste the difference. Look for meat that’s well marbled (the fat that runs through the meat), and avoid any steaks that have a dull colour or smell off.
A good butcher can be a valuable resource. They can help you choose the right cut for your needs and provide advice on how to cook it.
(Part 2) Prepping for Success: Setting the Stage for a Delicious Steak
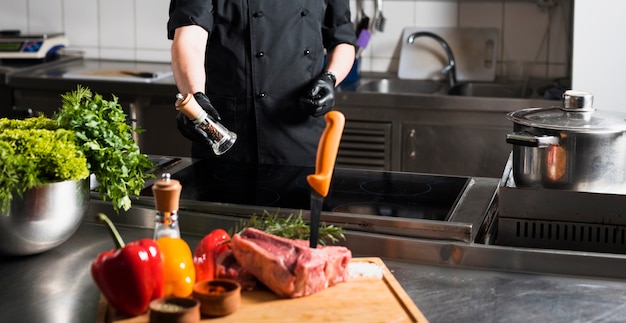
Once you’ve got your steak, it’s time to prep it for cooking. This might sound simple, but there are a few little tricks that will make a big difference in your final result.
Getting Your Steak to Room Temperature: Why It Matters
You might have heard this one before: take your steak out of the fridge about 30 minutes before you plan to cook it. This helps ensure the steak cooks more evenly. Here's why: When you cook a cold steak, the outside might get overcooked before the inside has a chance to reach the desired temperature. By bringing the steak to room temperature, you allow the heat to penetrate the meat more evenly, resulting in a more consistent level of doneness.
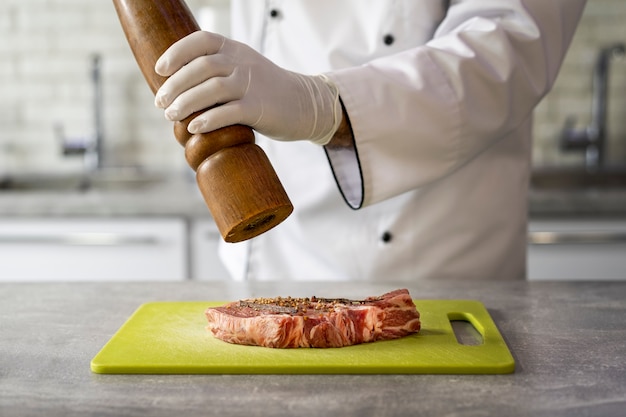
Seasoning: The Key to Flavour
A little salt and pepper go a long way. Don’t be shy with the salt! It will actually help draw out moisture from the steak and create a beautiful crust. I like to use coarse salt and freshly ground black pepper. The salt acts as a seasoning agent and also helps to retain moisture within the steak.
If you’re feeling adventurous, you can also add other spices like garlic powder, onion powder, or paprika. Just remember to be mindful of the flavour profile you’re going for and to not overdo it.
Don’t Be Afraid of a Little Oil
A good quality olive oil or canola oil is your friend here. It will help create a crispy sear on your steak and prevent it from sticking to the pan. Don’t go overboard though; a thin coating is all you need. You can brush the oil onto the steak or add a small amount to the pan before cooking.
(Part 3) cooking time: Mastering the Heat
Now, the moment of truth: cooking the steak. This is where you'll want to pay close attention.
Getting the Pan Hot: The Importance of a Hot Pan
You want your pan piping hot. I'm talking about "smoking hot"! This is key to getting that beautiful sear. A cast iron pan is ideal, but a good quality stainless steel pan will do the trick. Heat your pan over medium-high heat for about 5 minutes. Test it by dropping a few drops of water onto the pan; they should sizzle and evaporate instantly.
Don't Overcrowd the Pan: Giving Your Steak Space
Give your steak some space to breathe. If you crowd the pan, it will cool down the temperature and prevent the steak from getting a nice sear. If you're cooking more than one steak, cook them in batches.
Time for the Sear: The First Step to a perfect steak
This is where the magic happens. Place the steak in the hot pan and let it cook undisturbed for about 2-3 minutes per side. This is where you’ll get that gorgeous crispy crust. Don’t be tempted to move it around or poke it! This is a crucial step in developing the flavour and texture of the steak.
Flip It: The Next Stage of Cooking
After you’ve seared both sides, it’s time to flip the steak. Now, you want to reduce the heat to medium-low. This will allow the inside of the steak to cook through without overcooking the outside.
Cook to Your Desired Doneness: Understanding internal temperature
The amount of time you cook the steak will depend on how you like it. Here’s a quick guide to different levels of doneness:
| Doneness | Internal Temperature | Cooking Time (Minutes) |
|---|---|---|
| Rare | 125°F (52°C) | 3-4 minutes per side |
| Medium-Rare | 130°F (54°C) | 4-5 minutes per side |
| Medium | 140°F (60°C) | 5-6 minutes per side |
| Medium-Well | 150°F (65°C) | 6-7 minutes per side |
| Well Done | 160°F (71°C) | 7-8 minutes per side |
It's a good idea to use a meat thermometer to check the internal temperature of your steak. This is the most accurate way to ensure it's cooked to your liking.
(Part 4) Resting is Key: Letting the Steak Relax
Once your steak is cooked to your liking, it’s time to let it rest. I know, you’re probably itching to dig in, but resisting that urge is essential for a juicy, tender steak.
Why Resting Matters: Redistributing the Juices
When you rest a steak, the juices redistribute throughout the meat. This ensures that when you slice into it, the juices don’t run out, leaving you with a dry, disappointing steak. Resting allows the muscle fibers to relax, which in turn helps to retain moisture and improve tenderness.
How Long to Rest: Giving the Steak a Break
Rest your steak for at least 5-10 minutes before slicing and serving. Cover it loosely with foil to keep it warm.
(Part 5) The Finishing Touches: Elevate Your Steak
Now that your steak is resting, it’s time to get creative and add those finishing touches that will make it truly stand out.
Butter Basted: Adding Richness and Flavor
This is a classic technique that adds a rich, buttery flavour to your steak. While your steak is resting, melt some butter in a pan and add fresh herbs like thyme, rosemary, or sage. Once the butter is melted and the herbs are fragrant, spoon the mixture over the steak. This adds a beautiful shine and aroma to your steak.
Pan Sauce: The Perfect Accompaniment
Don’t discard the delicious pan juices! They’re full of flavour. Deglaze your pan with a splash of red wine, broth, or even water. Scrape up any browned bits from the bottom of the pan. Simmer for a few minutes, and you’ll have a simple, yet delicious sauce to drizzle over your steak.
Sides to Complement: Choosing the Perfect Accompaniments
No steak is complete without some delicious sides. Choose your favourites, whether it’s mashed potatoes, roasted vegetables, or a crisp salad.
(Part 6) The Art of Slicing: Presenting Your Masterpiece
Finally, it’s time to slice and serve your masterpiece. I recommend slicing the steak against the grain. This means cutting across the muscle fibers, which makes it easier to chew and creates a more tender texture.
Serving with Style: Adding a Touch of Elegance
You’ve put in the effort, so present your steak with pride. Use a nice serving platter, and add a touch of elegance with a sprig of fresh parsley or a drizzle of pan sauce.
(Part 7) Mistakes You Might Make (And How to Fix Them): Common Steak-Cooking Challenges
We’ve all been there. Sometimes our steak-cooking adventures don’t go exactly as planned. But don’t worry, there’s always a solution. Here are a few common mistakes and how to avoid them:
1. Overcooking: The Dry Steak
If your steak is overcooked, it’s going to be dry. The key is to keep a close eye on the cooking time and use a meat thermometer to check the internal temperature.
2. Undercooked: A Safety Concern
It’s important to cook your steak to a safe internal temperature to avoid foodborne illness. Use a meat thermometer to ensure your steak is cooked to at least 145°F (63°C) for medium-rare.
3. Uneven Cooking: Not All Sides Are Equal
This is a common mistake, especially if you’re using a thick steak. The key here is to be patient and cook the steak slowly over medium-low heat. Flip it only when it’s nicely seared on one side. This allows the heat to penetrate the steak more evenly.
4. A Stuck Steak: The Fear of Pan-Sticking
If your steak is sticking to the pan, it’s probably because the pan isn’t hot enough. Heat it up a bit more before putting the steak in. You can also try using a good quality pan with a non-stick coating.
5. Not Resting: A Major Miscalculation
We’ve already talked about this, but it’s worth repeating: rest your steak! It will make all the difference in terms of tenderness and juiciness.
(Part 8) The Joy of Experimentation: Taking Your steak cooking to the Next Level
Now that you've got the basics down, it’s time to get creative! There are so many different ways to cook and season your steak. Experiment with different cuts, seasonings, and cooking methods. You might discover your new favourite way to cook a steak!
Tips for Trying New Things: Exploring New Flavors and Techniques
- Get adventurous with spices. Try adding things like garlic powder, onion powder, smoked paprika, or even a pinch of chili flakes.
- Experiment with different sauces. A simple pan sauce is delicious, but you can also try adding things like Dijon mustard, Worcestershire sauce, or even a touch of balsamic vinegar.
- Try a different cooking method. Once you’re confident with stovetop cooking, you can experiment with grilling, broiling, or even reverse searing.
(Part 9) FAQs: Your Steak-Cooking Questions Answered
1. Can I use a meat thermometer for every steak?
Absolutely! A meat thermometer is a valuable tool for any steak cook. It’s the most accurate way to ensure your steak is cooked to your liking. It takes the guesswork out of cooking and ensures you get the perfect level of doneness every time.
2. What if I don’t have a meat thermometer?
If you don’t have a meat thermometer, you can use the "touch test" as a guide. Gently poke the center of the steak. If it feels firm, it’s well done. If it feels slightly firm, it’s medium-well. If it feels soft and springs back, it’s medium. If it feels very soft and springs back quickly, it’s medium-rare. But remember, this method is less accurate than using a meat thermometer.
3. Can I cook steak on the stovetop without a pan?
Not really. You need a pan to provide the heat and surface for cooking the steak. If you don’t have a pan, you can try grilling or broiling your steak instead.
4. How can I tell if my steak is overcooked?
Overcooked steak will be dry, tough, and might have a grey or brown color. It's best to cook your steak to the desired doneness and avoid overcooking it.
5. How do I clean my pan after cooking steak?
Wash your pan with hot soapy water. You can also use a scrub brush to remove any stubborn bits of food. It’s important to clean your pan immediately after cooking to prevent food from sticking.
I hope this guide has given you the confidence to cook the perfect stovetop steak. Remember, practice makes perfect! Don’t be afraid to experiment and try new things. Most importantly, enjoy the process and the delicious results!
Everyone is watching

How to Cook Frozen Lobster Tails Perfectly: A Step-by-Step Guide
RecipesLobster. Just the word conjures up images of lavish meals, special occasions, and a taste of luxury. But let's...

Pigs in a Blanket Cooking Time: How Long to Bake for Perfect Results
RecipesAh, pigs in a blanket. Just the name conjures up images of those delightful little parcels of crispy pastry en...

Pork Fillet Cooking Time: How Long to Cook It Perfectly
RecipesPork fillet, or tenderloin as it's sometimes called, is a real favourite in our house. It's so versatile, and...

The Ultimate Guide to Cooking Delicious Frankfurters
RecipesLet's face it, we all love a good frankfurter. It's a classic, simple, and always satisfying. But let's be rea...

Wolf Meat Recipes: A Guide to Cooking Wild Game
RecipesLet's be honest, you don't see wolf meat at your local butcher shop every day. It's a bit of a wild card, but ...