Let's be honest, folks. Brisket is a commitment. It’s not a quick throw-it-on-the-grill kind of meal. It’s a slow, deliberate process that takes time, patience, and a decent amount of know-how. But trust me, the end result, that melt-in-your-mouth, smoky, juicy, flavour-packed brisket? It’s worth every single minute.
This guide, my friend, is your one-stop shop for mastering the art of brisket grilling. We'll walk you through everything from choosing the right cut to setting up your grill, from nailing the smoke to the crucial resting phase. We'll even delve into some of my favourite brisket recipes and tips, because let's face it, a little shortcut never hurt anyone.
So, grab a cuppa, settle in, and let's get this brisket party started!
(Part 1) Choosing the Right Cut
First things first, you’ve got to choose the right cut. I’m talking about the real deal here, the beef brisket. This bad boy is a cut of meat that comes from the chest of a cow. It’s a tough muscle, packed with flavour and collagen, which is why it needs slow cooking to break down and become tender. Think of it like a culinary transformation.
Types of Brisket
There are two main types of brisket:
- Point: This is the thicker, fattier part of the brisket. It’s known for being more flavourful and melting in your mouth. This is the go-to for smoking. Think of it as the rich, indulgent cousin of the brisket world.
- Flat: This is the leaner part of the brisket. It’s known for being more tender and less fatty. It’s great for grilling and slicing. Imagine this as the more refined, delicate sibling.
Now, some folks like to get both the point and the flat for a truly comprehensive brisket experience. But for a newbie, I’d recommend starting with just the point. It’s got more forgiving fat and the flavour is more pronounced. It’s a good place to start your brisket journey.
Choosing the Right Brisket
When choosing a brisket, look for one that has a good fat cap. This is the layer of fat that runs along the top of the meat. It’s essential for keeping the meat moist and tender during cooking. It’s like a natural moisture barrier, keeping everything juicy and delicious. Aim for a brisket that’s about 10-12 pounds. Don't be afraid to ask your butcher for advice! They’re the experts, after all. Remember, you can always trim any excess fat before you cook it. It's not a crime to go for a smaller cut either, don't feel intimidated by size! You can always adjust your cooking time accordingly.
(Part 2) Preparing the Brisket
Right, you’ve got your brisket, now it’s time to get it ready for the grill. This is where the magic starts, so get ready to unleash your inner barbecue wizard.
Trimming the Fat
First, give that brisket a good visual inspection. You’ll want to trim off any excess fat. Don’t go overboard, you need some of that fat for flavour and moisture. Just trim away any thick chunks or bits that look like they’re going to burn. Imagine it like sculpting your masterpiece.
Seasoning the Brisket
Now comes the fun part – seasoning. This is your chance to add some personality to your brisket. Here’s what I like to do, but feel free to get creative.
For a basic brisket rub, I use a simple blend of:
- Salt: This is the foundation of any good seasoning. It enhances the natural flavour of the meat and helps to create a crispy crust.
- Black pepper: This adds a bit of heat and complexity to the rub. You can use freshly ground pepper for even more flavour.
- Garlic powder: This brings a touch of earthy, pungent flavour to the mix. A little goes a long way, you don't want to overpower the meat.
- Onion powder: This adds a sweet and savoury note to the rub. It complements the garlic powder beautifully.
- Paprika: This adds a touch of sweetness and a vibrant colour to the rub. Choose smoked paprika for an even deeper flavour.
I apply it generously all over the brisket, making sure to rub it in well. Imagine you're giving the brisket a warm massage, making sure every inch is coated.
Now, you can get fancy with your seasoning, folks. Go wild with different spices, herbs, even a bit of chili powder if you fancy. Remember, there’s no right or wrong answer here. It’s your brisket, so make it your own. Don’t be afraid to experiment!
Injecting the Brisket (Optional)
Now, injecting your brisket is not mandatory, but I do like to add a little extra flavour. This is a step I like to do, especially if I’m using a leaner brisket. I use a simple injection of beef broth and a little bit of Worcestershire sauce. It adds moisture and a depth of flavour that’s hard to beat. It’s like giving your brisket a little extra love and attention.
(Part 3) Setting Up Your Grill
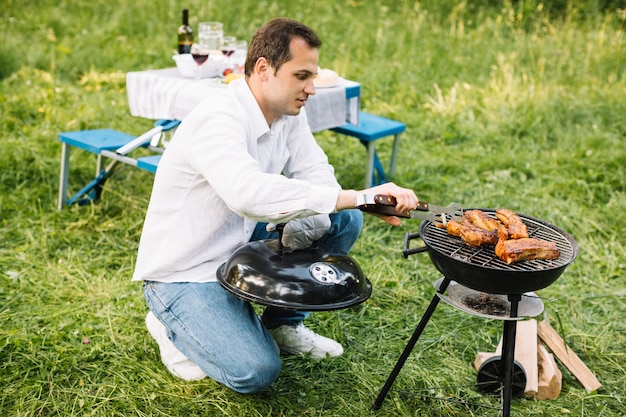
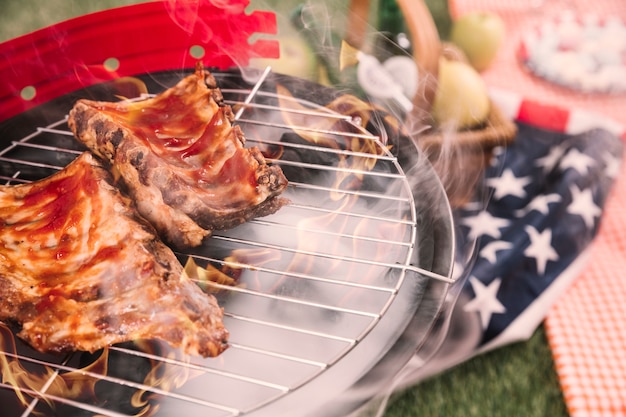
Right, you’re ready to start grilling. Now, you can do this with a gas grill, a charcoal grill, or even a smoker. But I prefer using a charcoal grill for that classic smoky flavour. It’s just a more traditional method and the flavour is unbeatable.
Preparing the Grill
First, you need to create a good bed of coals. You want a nice even heat, so I use the ‘snake method’. This involves arranging the charcoal in a snake-like pattern around the edge of the grill, leaving the middle open for the brisket. Just make sure you leave enough space for air to circulate and the coals to burn evenly. This way, you create a gentle, consistent heat that wraps around the brisket, ensuring a slow and even cook.
Getting the Temperature Right
Brisket grilling is all about low and slow. You want the grill temperature to be between 225-250°F (107-121°C). It’s important to keep the temperature steady, so I recommend using a grill thermometer. Trust me, the last thing you want is a sudden temperature spike, which can dry out your brisket. The key is to maintain a steady, consistent heat, allowing the brisket to cook slowly and evenly.
(Part 4) Cooking the Brisket
Now, we’re finally getting to the good part – cooking. Take a deep breath, relax, and let’s do this!
Placing the Brisket on the Grill
With your grill nice and hot, carefully place the brisket on the grill grate. Make sure it’s positioned over the indirect heat, away from the hottest part of the coals. We want that gentle, indirect heat to slowly cook the brisket, avoiding any direct flames or scorching.
The First Smoke
For the first couple of hours, it’s crucial to maintain a steady temperature. You’re aiming for a nice, slow smoke. This is what gives the brisket its incredible flavour. Think of it as a love letter from the grill, whispering sweet smoky nothings to the brisket.
Maintaining the Temperature
As the brisket cooks, you’ll need to keep an eye on the temperature. You’ll want to adjust the vents on your grill to maintain that steady 225-250°F (107-121°C) heat. I like to use a probe thermometer to monitor the internal temperature of the brisket. It’s like a little detective keeping an eye on the progress, letting you know when the brisket is getting closer to perfection.
(Part 5) The Stall
Now, here’s where things get interesting. At some point during the cook, you’ll hit a plateau, a dreaded ‘stall’. This is when the internal temperature of the brisket stops rising. Don’t panic! It’s a natural part of the process.
Understanding the Stall
The stall occurs because the brisket is trying to retain its moisture. The surface temperature starts to rise, causing the internal temperature to plateau. It’s like a little game of tug-of-war between the heat and the moisture.
How to Tackle the Stall
The best way to get through the stall is to be patient. You can also try these tips:
- Add more coals to your grill to maintain a steady heat: This will help to keep the temperature consistent and prevent the stall from lasting too long.
- Wrap the brisket in foil: This creates a moist environment that helps the brisket to cook more evenly. It's like giving the brisket a warm hug, helping it to relax and cook through.
- Add a water pan to the grill: This will add moisture to the air and help prevent the brisket from drying out. Think of it as a mini-steam bath, keeping things moist and tender.
(Part 6) Checking for Doneness
How do you know when your brisket is done? Well, it's a bit of a dance with the temperature probe.
The Temperature Method
You’re looking for an internal temperature of 203°F (95°C) for a medium-rare brisket. This can take anywhere from 8-12 hours, depending on the size of your brisket. I find that the stall usually happens around 160°F (71°C), and it's a good time to wrap the brisket in foil.
The ‘Poke Test’
Once the brisket has reached the desired internal temperature, you can use the ‘poke test’ to check for doneness. This involves gently poking the brisket with a fork. If the meat feels tender and easily pulls apart, it’s ready. It should be so tender that it practically melts in your mouth.
(Part 7) Resting and Slicing
Your brisket is cooked, you’ve achieved victory! But don’t get ahead of yourself, we’re not done yet. We need to give it a good rest.
The Importance of Resting
Resting the brisket allows the juices to redistribute, which makes for a more tender and juicy finished product. The best way to rest is to wrap the brisket tightly in foil and let it sit for at least 2 hours. This gives the brisket a chance to relax and reabsorb those delicious juices.
Slicing the Brisket
After resting, it’s time to slice the brisket. Now, you’ll want to slice it against the grain, meaning across the direction of the muscle fibers. This will make the brisket easier to chew and more tender. It’s like a little culinary magic trick, transforming the brisket into a symphony of tenderness.
(Part 8) Serving and Storing
Right, your brisket is finally ready to be enjoyed. Time for the grand finale!
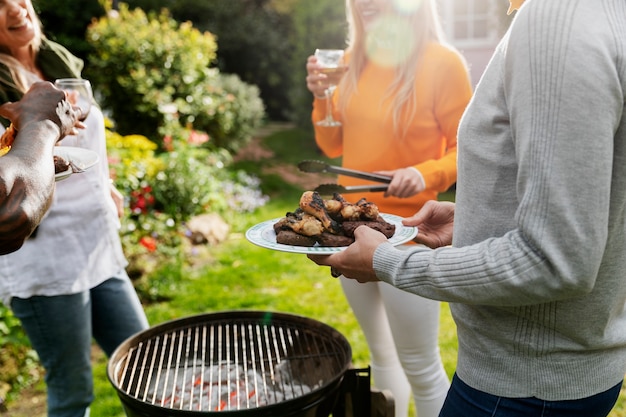
Serving
You can serve the brisket on its own, or you can go for the full Texan BBQ experience with sides like coleslaw, baked beans, and potato salad. Just imagine the aromas, the flavours, the sheer satisfaction of a perfectly cooked brisket.
Storing
Any leftover brisket can be stored in the fridge for up to 3 days, but it’s even better if you freeze it. Wrap it tightly in foil or plastic wrap and freeze it for up to 3 months. That way, you can enjoy those brisket flavours again and again.
FAQs
What if my brisket is too fatty?
Don’t worry! You can always trim off any excess fat before cooking. Just be sure to leave some fat on the brisket for flavour and moisture. You can also render the extra fat and use it for other dishes. It's a great way to get a head start on your next culinary adventure.
What if my brisket is too lean?
If your brisket is too lean, you can inject it with a little bit of broth and Worcestershire sauce for added moisture. You can also add a water pan to the grill to help prevent the meat from drying out. These little tricks can make a big difference in keeping your brisket juicy and tender.
What’s the best wood for smoking brisket?
There are many different types of wood that can be used for smoking brisket. Some popular choices include hickory, mesquite, oak, and pecan. It really comes down to personal preference. Experiment with different woods to find your favourite combination of flavours.
How can I prevent the brisket from drying out?
You can prevent your brisket from drying out by using a good fat cap, wrapping the brisket in foil during the stall, and adding a water pan to the grill. You can also try spritzing the brisket with apple juice or beef broth during the cooking process. These techniques will help keep your brisket moist and delicious.
What are some good brisket recipes?
Here are a couple of my favourite brisket recipes, but remember, the world is your oyster, so feel free to experiment and find your own signature style:
- Texas-style brisket: This recipe uses a simple salt and pepper rub and is cooked low and slow over hickory wood. Think of it as the classic, no-frills approach to brisket.
- Kansas City-style brisket: This recipe uses a sweet and smoky rub and is cooked over oak wood. It’s a little sweeter and more complex than the Texas style.
- Memphis-style brisket: This recipe uses a dry rub and a vinegar-based sauce. The brisket is cooked over hickory wood. It's a tangy and smoky delight.
Remember, this is just a starting point. Experiment with different rubs, sauces, and woods to find your perfect brisket recipe. You’ve got this, mate! Happy grilling!
Everyone is watching

How to Cook Frozen Lobster Tails Perfectly: A Step-by-Step Guide
RecipesLobster. Just the word conjures up images of lavish meals, special occasions, and a taste of luxury. But let's...

Pigs in a Blanket Cooking Time: How Long to Bake for Perfect Results
RecipesAh, pigs in a blanket. Just the name conjures up images of those delightful little parcels of crispy pastry en...

Pork Fillet Cooking Time: How Long to Cook It Perfectly
RecipesPork fillet, or tenderloin as it's sometimes called, is a real favourite in our house. It's so versatile, and...

The Ultimate Guide to Tender, Juicy Pulled Pork
RecipesRight, let's talk pulled pork. It's one of those dishes that just screams "comfort food," doesn't it? I mean...

The Ultimate Guide to Cooking Delicious Frankfurters
RecipesLet's face it, we all love a good frankfurter. It's a classic, simple, and always satisfying. But let's be rea...