Let's face it, there's nothing quite like a juicy, perfectly grilled burger. The sizzle of the patty on the hot grill, the aroma of smoky char, and that first delicious bite… it's pure bliss! But getting that perfect burger isn't always easy. It takes a little know-how and practice, but I'm here to guide you through the process, sharing my years of experience and a few insider tips along the way.
This guide will cover everything from choosing the right meat to mastering the perfect sear. We'll even explore some creative variations and discuss how to create the ultimate burger bar experience. So, grab your tongs, fire up the barbie (that's the barbecue for those not in the know!), and let's get grilling!
(Part 1) The Meat – The Foundation of a Great Burger
Choosing the Beef
First things first, let's talk about the meat. Now, I'm a purist when it comes to burgers. For me, it's all about good quality ground beef. Forget those pre-made patties, we're going for the real deal here!
My go-to is 80/20 ground beef, which is a perfect balance of fat to lean. The fat renders down during cooking, adding flavour and keeping the burger juicy. You want that mouthwatering, succulent texture, not a dry, rubbery patty!
Handling the Meat with Care
Once you've got your meat, it's important to handle it gently. Overworking the meat by kneading it too much can toughen it up. We want a nice, loose texture. Just form the meat into patties, gently pressing them together. Don't worry about making them perfectly round, a little rustic charm is fine!
Seasoning with Simplicity
I believe in keeping things simple when it comes to seasoning. Salt and freshly ground black pepper are all you really need. The meat is the star of the show, and you want its natural flavour to shine through. But, if you're feeling adventurous, you can add a pinch of paprika, garlic powder, or onion powder for a little extra zing. Just be mindful of not overwhelming the flavour of the beef.
Shaping Your Patty
Now, there are two main approaches to shaping your patties:
- The Traditional Round Patty: This is the classic burger shape, perfect for any grill and ideal if you're looking for a consistent, uniform burger. It's also great for beginners, as it's easy to handle and cook evenly.
- The Thicker, "Smash" Patty: This method is becoming increasingly popular, and it's my personal favourite. To create a smash patty, form the meat into a slightly thicker disc than usual and then use the palm of your hand to press it down firmly onto the grill. This creates a larger surface area for charring, resulting in a crispy exterior and a juicy, flavorful interior. You might hear people call this a "smash burger," and for good reason!
Ultimately, the shape of your patty is up to you. Experiment and see what you like best.
The "Dimple" Trick
Here's a little trick I've learned over the years: make a small dimple in the centre of each patty. This helps to prevent the burger from puffing up in the middle during cooking, ensuring even cooking and a more visually appealing burger. It's a simple trick, but it really makes a difference!
(Part 2) The Grill – Your Burger's Stage
Gas vs Charcoal: The Eternal Debate
Now, the big question: gas or charcoal? This is a debate that has raged for generations. I'm a charcoal guy at heart. There's just something about that smoky flavour that can't be replicated with gas. However, if you're looking for a more controlled grilling experience, gas is a great option. It offers consistent heat and is easier to manage for beginners.
Preparing Your Grill: The Canvas
No matter which type of grill you choose, make sure it's clean and preheated before you start cooking. A good rule of thumb is to heat the grill to medium-high heat, about 400-450°F (200-230°C). For charcoal, aim for a bed of hot coals with a layer of white ash. For gas, make sure all burners are lit and running at a consistent temperature.
The Grill Brush: Your Cleaning Crew
Always use a grill brush to clean the grill grates before and after each use. This prevents food from sticking and ensures that your burgers get a nice sear. You don't want to be scraping away burnt bits of burger every time you grill!
The Art of the Sear: Bringing Out the Flavour
Now, here comes the fun part: the sear. The sear is what gives your burger that delicious char and crispy texture. It's the moment when the magic happens, when the Maillard reaction takes hold and creates those beautiful, caramelized flavours.
Avoiding Flare-Ups: Keeping Your Grill Under Control
If you're using charcoal, watch out for flare-ups. Flare-ups happen when fat drips onto the hot coals, creating a burst of flames. They can scorch your burgers and make them taste smoky, not in a good way! If you see a flare-up, quickly move the burgers to a cooler part of the grill or close the lid briefly to smother the flames.
(Part 3) The Cooking Process – Timing is Key
Don't Overcrowd the Grill: Give Them Space to Breathe
When you're ready to cook, don't overcrowd the grill. If you cram too many burgers onto the grill, they won't cook evenly. Give each patty enough space to breathe, about an inch between each. You want those beautiful sear marks to form without the patties steaming each other, creating a soggy texture.
Timing is Everything: Finding the Perfect Doneness
The cooking time will vary depending on the thickness of your patties and the heat of your grill. However, you should aim to cook the burgers for 3-4 minutes per side for medium-rare, which is my personal preference for maximum juiciness. If you want your burgers cooked to a more well-done level, you can cook them for a longer time. Remember, you can always cook a burger a bit more, but you can't uncook it!
Flip Only Once: Locking in the Juices
When it comes to flipping, I'm a one-time flipper. Flip your burgers once, and once only. This helps to lock in the juices and keep the burger nice and juicy. You can tell if your burgers are ready to flip when they develop a nice, crusty sear and the fat starts to render out.
The meat thermometer: Your Burger's Guardian Angel
If you're really serious about getting the perfect burger, use a meat thermometer to check the internal temperature. The USDA recommends a minimum internal temperature of 160°F (71°C) for burgers. However, I prefer my burgers a bit more on the rare side, around 130-135°F (54-57°C).
Just remember, your preference is what matters! Use the thermometer to find the level of doneness that suits your taste buds.
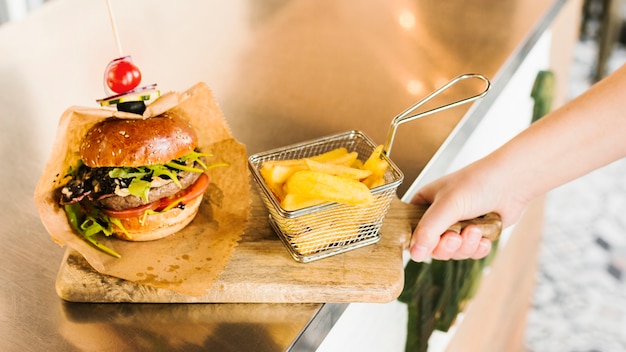
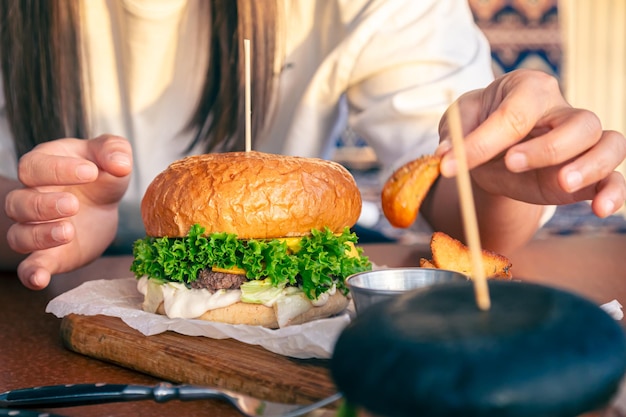
(Part 4) Toppings and Sides: Building the Perfect Burger
Toppings, Toppings, Toppings: A World of Flavour
Now, this is where things get really fun! The topping options are endless, so get creative and let your imagination run wild! Here are a few of my favourites:
- Cheese: Classic cheddar, sharp American, or even a creamy brie. You can't go wrong with cheese!
- Vegetables: Lettuce, tomato, onion, pickles, and avocado are always good choices. Add some freshness and crunch to your burger.
- Condiments: Ketchup, mustard, mayonnaise, hot sauce, and bbq sauce are all great options. Find the perfect sauce combination to complement your burger.
- Bacon: Need I say more? Bacon makes everything better, especially burgers!
- caramelized onions: These add a sweet and savory note to your burger, providing a delightful contrast to the richness of the meat.
- Pickled Red Onions: A tangy and crunchy topping that adds a refreshing element to your burger.
- Grilled Pineapple: A sweet and smoky topping that adds a tropical twist to your burger.
Don't Forget the Sides: Complements to Your Burger
You've got your perfect burgers, now what about the sides? potato salad, coleslaw, potato chips, mac and cheese, the possibilities are endless! Make sure to choose sides that complement your burgers, for an overall harmonious culinary experience. Consider a creamy coleslaw to cut through the richness of the burger, or a tangy potato salad to add a bright flavour contrast.
(Part 5) The Perfect Bun: A Worthy Throne for Your Burger
Choosing the Right Bun: A Matter of Support
Now, I'm not talking about any old bun here. I'm talking about a bun that's soft and fluffy, but sturdy enough to hold up to a juicy burger. Choose a bun that's slightly larger than your burger patty. This will ensure that the bun doesn't get overwhelmed by the patty and gives you room for all those delicious toppings.
Toasting the Bun: Adding a Crunch
A little bit of toast adds a nice crunch and flavour to the bun. You can toast the bun in the oven, on the grill, or even in a pan. I prefer to toast the buns on the grill, as it gives them a nice smoky flavour. Just make sure you toast them gently, you don't want to burn them!
(Part 6) FAQs: Answering Your Burger Queries
What should I do if my burger is sticking to the grill?
First, try using a grill brush to clean the grates before you start cooking. If your burger is still sticking, you can try using a spatula to carefully lift it off the grill. If it's really stuck, you might need to use a little bit of cooking spray or oil to help release it.
What if my burger puffs up during cooking?
If your burger puffs up during cooking, it's likely because you didn't make a dimple in the centre of the patty. Don't worry, it's not the end of the world. You can gently press down on the patty with a spatula to flatten it out. Next time, remember to make that dimple!
How long should I grill my burger for?
The cooking time will vary depending on the thickness of your patties and the heat of your grill. However, you should aim to cook the burgers for 3-4 minutes per side for medium-rare. If you want your burgers cooked to a more well-done level, you can cook them for a longer time.
What's the best way to keep my burgers juicy?
The key to keeping your burgers juicy is to avoid overcooking them. Don't cook them beyond medium-rare, and make sure to flip them only once. Also, make sure you don't overcrowd the grill, giving them space to cook evenly.
What are some good alternatives to beef for burgers?
There are plenty of great alternatives to beef for burgers, including chicken, turkey, lamb, and even vegetarian options like black bean burgers. Get creative and explore different flavours!
(Part 7) Beyond the Burger: Expanding Your Horizons
burger variations: The Limitless Possibilities
Now, we've covered the basics of grilling the perfect burger. But, don't be afraid to experiment and get creative! Try adding different toppings, cheeses, and even different types of meat.
- The Cheeseburger: A classic for a reason, the cheeseburger is a simple yet satisfying combination of beef, cheese, and your favourite toppings.
- The Bacon Cheeseburger: For those who love a little extra indulgence, the bacon cheeseburger is the ultimate guilty pleasure.
- The Mushroom Swiss Burger: A sophisticated take on the classic cheeseburger, featuring a creamy Swiss cheese and earthy mushrooms.
- The BBQ Burger: For a smoky and sweet flavour, try a BBQ burger with a tangy BBQ sauce and a crispy onion ring.
- The Hawaiian Burger: A fusion of flavours, the Hawaiian burger features grilled pineapple, ham, and a tangy sauce.
Burger Bar: The Interactive Feast
Why not host a burger bar for your next get-together? Set up a spread of different toppings, sauces, and buns, and let your guests create their own custom burgers. It's a fun and interactive way to enjoy a delicious meal.
Burger Night: A Regular Ritual
Turn burger night into a regular event. Gather your friends and family, fire up the grill, and enjoy some good conversation and even better food. It's a simple, yet satisfying way to bring people together.
(Part 8) Conclusion: Master the Art of the Perfect Burger
Grilling the perfect burger is an art form, but it's a skill that anyone can master. It's all about using good quality ingredients, handling the meat gently, and paying attention to the details. With a little practice, you'll be grilling burgers like a pro in no time!
So, what are you waiting for? Grab your tongs, fire up the grill, and get grilling! You'll be amazed at how delicious your homemade burgers can be!
Everyone is watching

How to Cook Frozen Lobster Tails Perfectly: A Step-by-Step Guide
RecipesLobster. Just the word conjures up images of lavish meals, special occasions, and a taste of luxury. But let's...

Pigs in a Blanket Cooking Time: How Long to Bake for Perfect Results
RecipesAh, pigs in a blanket. Just the name conjures up images of those delightful little parcels of crispy pastry en...

Pork Fillet Cooking Time: How Long to Cook It Perfectly
RecipesPork fillet, or tenderloin as it's sometimes called, is a real favourite in our house. It's so versatile, and...

The Ultimate Guide to Cooking Delicious Frankfurters
RecipesLet's face it, we all love a good frankfurter. It's a classic, simple, and always satisfying. But let's be rea...

Wolf Meat Recipes: A Guide to Cooking Wild Game
RecipesLet's be honest, you don't see wolf meat at your local butcher shop every day. It's a bit of a wild card, but ...