(Part 1) Choosing the Right Turkey
The first step is choosing the right turkey. You don't want to be stuck with a dry, tough bird because you went for the cheapest option, do you? I'm all for a good bargain, but when it comes to Thanksgiving turkey, it's worth splurging a little. If you can, try to find a fresh turkey from a local butcher. They're often more expensive, but the quality is simply outstanding. Plus, the butchers are a wealth of knowledge, always happy to offer tips and advice to help you choose the perfect bird.
Types of Turkeys
Now, you've got the choice of fresh or frozen. I'm a fresh turkey kind of guy, but if you're short on time or don't have a butcher nearby, a frozen turkey will do the trick. Just make sure you give it enough time to defrost properly. We'll talk more about thawing later on.
Then there's the matter of size. You'll need to consider how many people you're feeding. A general rule of thumb is to allow about 1lb of turkey per person. But, to be on the safe side, I always err on the side of a bigger bird. You know, just in case there are leftovers. After all, who doesn't love leftover turkey sandwiches?
Choosing the Right Size
| turkey weight (lb) | Serving Size (people) |
|---|---|
| 8-10 | 4-6 |
| 10-12 | 6-8 |
| 12-14 | 8-10 |
| 14-16 | 10-12 |
| 16-18 | 12-14 |
When you're selecting your turkey, take a moment to inspect it for any imperfections. Make sure the skin is intact, there are no bruises or cuts, and the bird has a nice, even colour.
(Part 2) Prepping Your Turkey
Alright, you've got your beautiful bird home. Now it's time to get prepped. Don't worry, it's not as complicated as it sounds. The first thing you'll need to do is thaw the turkey if you've bought a frozen one.
Thawing a Frozen Turkey
Thawing a frozen turkey is a crucial step. It needs to be done properly to ensure the turkey cooks evenly. The safest and most recommended method is to thaw it in the refrigerator. It's a slow process, but it's worth it. A general rule is to allow about 24 hours for every 5 pounds of turkey. So, if your bird is 10 pounds, you'll need to defrost it for about 48 hours. No rush, right?
Never, ever thaw a turkey at room temperature. This can create a breeding ground for bacteria and can lead to food poisoning. And for goodness sake, don't try to thaw it in the sink with cold water. It's a recipe for disaster. Just trust me on this one.
Brining, Butterflying, and Stuffing
Now, you have a few options for prepping your turkey. You can brine it, butterfly it, or stuff it. I'll be honest, I'm not a huge fan of stuffing. It's a bit of a faff, and there's the whole food safety thing to consider. Stuffing inside the turkey can create a breeding ground for bacteria and it can also be difficult to cook all the way through. If you're set on stuffing, make sure you cook it separately. I've got a delicious stuffing recipe later on in this guide.
Brining, on the other hand, is a game-changer. It involves soaking the turkey in a salty solution, which helps to keep it moist and flavorful. You can make your own brine or buy a pre-mixed one. There are lots of recipes online, but I tend to keep it simple with just salt, sugar, and water. A good brine will make a noticeable difference in the tenderness and juiciness of your turkey.
Butterflying is another popular technique. Basically, you cut the turkey down the breastbone, flattening it out so it cooks faster and more evenly. It's a good option if you're short on time or have a smaller oven. I'll show you how to butterfly a turkey in the next part.
Patting Dry and Seasoning
Once you've prepped your turkey, it's time to pat it dry. This is important because wet skin doesn't brown as well. Give it a good pat with some kitchen paper, then it's time to season. You can go simple with salt and pepper, or get fancy with a herb rub. I like to use a mixture of dried herbs, garlic powder, onion powder, and a bit of paprika. But, again, feel free to experiment and find what works best for you. The key is to create a flavorful crust that will seal in the juiciness.
(Part 3) Cooking Your Turkey
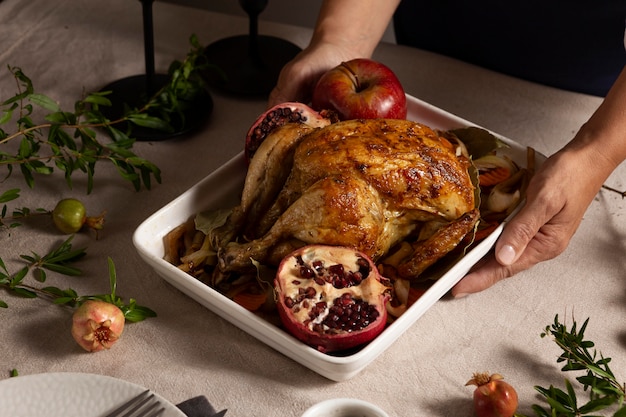
Alright, so you've got your turkey all prepped and ready to go. Now for the big moment, cooking it. It's all about timing and temperature here. First things first, you need to make sure your oven is preheated to 325 degrees F (165 degrees C). Now, some people prefer to cook their turkey at a lower temperature, like 300 degrees F, for a longer period of time. But, I find that 325 degrees F is the sweet spot for a juicy, evenly cooked bird.
Roasting Your Turkey
Place your turkey on a roasting rack in a roasting pan. This allows the heat to circulate all around the bird, ensuring it cooks evenly. You'll want to keep an eye on the turkey while it's cooking. It usually takes about 15 minutes per pound of turkey. But, it's best to check the internal temperature with a meat thermometer. You want to make sure the thickest part of the thigh reaches 165 degrees F (74 degrees C). This is the magic number for ensuring the turkey is fully cooked and safe to eat.
Basting
While the turkey is cooking, don't forget to baste it! This helps to keep the skin moist and crispy. You can baste it with pan juices, broth, or even a butter mixture. I like to use a mix of butter, herbs, and garlic. Just brush it over the turkey every 30-45 minutes.
Resting
Once the turkey is cooked, it's important to let it rest for at least 15 minutes before carving. This allows the juices to redistribute, making the meat even more tender and flavorful. Just cover it with a sheet of aluminum foil and let it rest on the counter.
(Part 4) Butterflying Your Turkey
Right, let's talk about butterflying your turkey. As I said, this can be a great option for smaller ovens or if you're in a rush. It also makes carving easier. Here's how to do it:
Step-by-Step Instructions
1. Place your turkey breast-side down on a cutting board. Grab a sharp knife and cut along the backbone of the turkey. You're essentially separating the breast from the backbone.
2. Flip the turkey over, breast-side up. Now, open the turkey up like a book, so the breast is facing you. You might need to cut a few more slices to separate the breasts fully.
3. Flatten the turkey out as much as you can. You can use a meat mallet to help you flatten it, if you've got one.
4. Season the turkey with your favorite herbs and spices.
5. Now, you can cook it just like you would a whole turkey. But, remember, cooking time will be reduced significantly. It's always best to check the internal temperature with a thermometer.
Butterflying can be a little daunting at first, but with a little practice, you'll be a pro in no time. Just remember to be patient and use a sharp knife. And don't worry if it's not perfect. The most important thing is that it cooks evenly and tastes delicious.
(Part 5) Thanksgiving Sides
Alright, so the turkey is sorted. But what about the rest of the feast? Thanksgiving wouldn't be the same without a delicious spread of side dishes. Here are some of my favorites.
Classic Sides
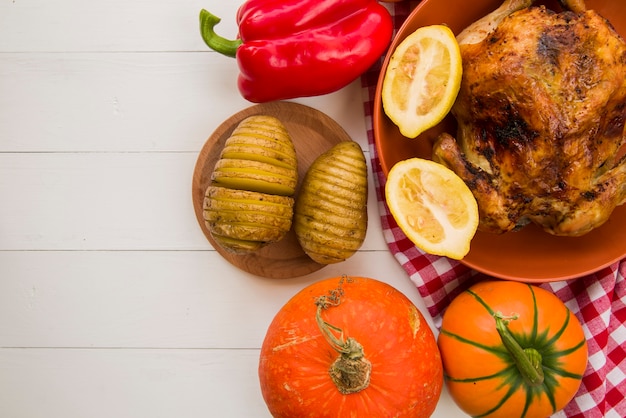
- mashed potatoes: A Thanksgiving staple. They're creamy, comforting, and perfect for soaking up all those turkey juices. I like to make mine with a bit of butter, milk, and garlic. You can get creative with your mashed potatoes, adding different herbs, cheeses, or even a dollop of sour cream.
- Stuffing: As I mentioned earlier, I prefer to cook my stuffing separately. You can use bread cubes, herbs, vegetables, and sausage for a hearty stuffing. Feel free to experiment with different types of bread, add some dried fruit or nuts, or even make a vegetarian stuffing.
- Cranberry Sauce: A tangy and sweet contrast to the savory dishes. You can make it from scratch with fresh cranberries, sugar, and orange zest. Or, grab a jar from the store, if you're feeling lazy. A homemade cranberry sauce with a hint of orange or ginger is always a crowd-pleaser.
- green bean casserole: A classic, cheesy, and creamy dish. You can make it with fresh green beans, cream of mushroom soup, and crispy fried onions. If you're feeling adventurous, try adding some toasted almonds or a sprinkle of parmesan cheese for extra flavor.
- sweet potatoes: Roasted, mashed, or even turned into a pie, sweet potatoes are another Thanksgiving favorite. I like to roast them with a little bit of butter and brown sugar. Add a pinch of cinnamon, nutmeg, or a sprinkle of cayenne pepper for a touch of warmth.
Other Side Dish Ideas
Beyond the classics, there are endless possibilities for thanksgiving side dishes. Here are a few ideas to get your creative juices flowing:
- roasted brussels sprouts with Bacon: A smoky and delicious side dish. Roasted Brussels sprouts with a drizzle of balsamic vinegar or a sprinkle of maple syrup are a delicious alternative to the classic.
- butternut squash Soup: A hearty and comforting soup. You can make it with roasted butternut squash, apples, and ginger for a sweet and savory flavor.
- Cornbread: A sweet and crumbly bread that's perfect for dipping in gravy. You can make it from scratch, or grab a mix from the store. A cornbread muffin with a dollop of butter or a pat of honey is always a welcome addition to the Thanksgiving table.
- Mac and Cheese: A cheesy and comforting side dish that everyone loves. You can make it with a creamy béchamel sauce and your favorite cheeses. For a Thanksgiving twist, try adding some roasted butternut squash or caramelized onions.
(Part 6) Making Gravy
Of course, no thanksgiving feast is complete without gravy. And the best part? You can make it from the pan drippings! I'll show you how to make the most delicious gravy.
Making Gravy from Pan Drippings
1. Once the turkey is out of the oven, pour the pan drippings into a fat separator. You want to separate the fat from the juices, which you'll use for the gravy.
2. Add the turkey juices to a saucepan. You can add about 2 tablespoons of butter for extra flavor.
3. Gradually whisk in about 2 tablespoons of flour. This will thicken the gravy. The amount of flour you use will determine the thickness of your gravy.
4. Slowly whisk in 1-2 cups of broth or water. Start with a small amount and add more as needed. chicken broth or turkey broth will give your gravy a richer flavor.
5. Bring the gravy to a simmer and cook for about 5 minutes, stirring constantly. This will help the flavors meld and the gravy to thicken.
6. Season with salt and pepper to taste. Don't be afraid to experiment with other seasonings, like herbs, garlic powder, or even a pinch of nutmeg.
7. Strain the gravy through a fine-mesh sieve to remove any lumps.
8. Serve hot over your turkey, mashed potatoes, or any other favorite side dish.
A good gravy can make or break a thanksgiving dinner. So, take your time, and don't be afraid to experiment until you find the perfect recipe for you.
(Part 7) Leftovers and Storage
Okay, so you've cooked up a storm and now you've got a mountain of delicious leftovers. Don't worry, this is a good problem to have. You can enjoy your turkey and sides for days to come. But, it's important to store them properly to avoid food poisoning.
Storing Leftovers
1. Let the turkey and side dishes cool down to room temperature before putting them in the fridge.
2. Store the turkey in airtight containers. You can also wrap it tightly with aluminum foil.
3. Leftover turkey should be stored in the fridge for no more than 3-4 days.
4. For longer storage, you can freeze the leftover turkey. Make sure you wrap it tightly with freezer-safe paper or plastic wrap. Frozen turkey can last for several months.
Repurposing Leftovers
Now, you've got plenty of options for repurposing those leftovers. Here are a few ideas:
- Turkey Sandwiches: A classic leftover choice. Add some cranberry sauce or mayo for a tangy twist.
- turkey soup: A hearty and comforting soup. Add leftover vegetables, broth, and noodles for a satisfying meal.
- turkey pot pie: A delicious and easy way to use up leftover turkey and vegetables. Combine the turkey, vegetables, and gravy in a pie crust and bake until golden brown.
- Turkey Shepherd's Pie: A twist on the traditional shepherd's pie. Top a layer of mashed potatoes with leftover turkey and gravy.
- Turkey and Cranberry Salad: A refreshing salad for a light lunch. Combine shredded turkey, cranberry sauce, chopped celery, and mayonnaise.
(Part 8) Tips and Tricks for Thanksgiving Turkey
Okay, we've covered a lot of ground. But, before we wrap up, I want to share a few extra tips and tricks that'll help you cook a perfect Thanksgiving turkey:
Tips
- Don't overcook the turkey: Overcooking can lead to a dry and tough bird. Always check the internal temperature with a meat thermometer.
- Baste the turkey regularly: This helps to keep the skin moist and crispy.
- Let the turkey rest before carving: This allows the juices to redistribute, making the meat more tender.
- Use a turkey roasting bag: This can help to keep the turkey moist and reduce the cooking time.
- Make sure the turkey is thawed completely: Frozen turkey needs to be thawed properly to ensure it cooks evenly.
- Don't stuff the turkey: Stuffing inside the turkey can create a breeding ground for bacteria. It's better to cook it separately.
- Use a meat thermometer: This is the most reliable way to ensure the turkey is fully cooked.
- Don't overcrowd the oven: If you have other dishes cooking, make sure the oven isn't too crowded. This can affect the cooking time and temperature.
- Plan ahead: Thanksgiving is a busy day, so plan your menu and cooking schedule ahead of time. This will help to reduce stress and ensure everything is ready on time.
(Part 9) FAQs
Now, I know you might have some questions. So, let's go through some common ones:
How do I know if my turkey is cooked?
The best way to tell if your turkey is cooked is to check the internal temperature with a meat thermometer. Insert the thermometer into the thickest part of the thigh, making sure it doesn't touch the bone. The turkey is fully cooked when the internal temperature reaches 165 degrees F (74 degrees C). Don't rely on the turkey's juices running clear, as this is not a reliable indicator of doneness.
What if my turkey is overcooked?
If your turkey is overcooked, it's likely to be dry and tough. There's not much you can do to fix it, but you can try to salvage it by carving the meat off the bone and shredding it. You can then use it in other dishes, like sandwiches or soup.
What should I do if my turkey is undercooked?
If your turkey is undercooked, you need to cook it further. Return it to the oven and cook it for another 15-20 minutes, or until the internal temperature reaches 165 degrees F (74 degrees C). It's important to cook the turkey to a safe internal temperature to avoid food poisoning.
How long should I let my turkey rest?
It's important to let your turkey rest for at least 15 minutes before carving. This allows the juices to redistribute, making the meat even more tender and flavorful. Cover the turkey with aluminum foil to keep it warm while it rests.
What if my turkey is dry?
If your turkey is dry, you can try to add some moisture back in by using gravy or pan juices. You can also try shredding the turkey and using it in other dishes, like soup or sandwiches. If you're concerned about your turkey drying out, you can try cooking it in a turkey roasting bag, which helps to trap moisture.
(Part 10) Final Thoughts
There you have it. The ultimate guide to cooking a perfect Thanksgiving turkey. I hope this has given you the confidence and tips you need to create a truly memorable Thanksgiving feast. Remember, it's all about enjoying the process, having fun in the kitchen, and creating lasting memories with your loved ones. Happy Thanksgiving!
Everyone is watching

How to Cook Frozen Lobster Tails Perfectly: A Step-by-Step Guide
RecipesLobster. Just the word conjures up images of lavish meals, special occasions, and a taste of luxury. But let's...

Pigs in a Blanket Cooking Time: How Long to Bake for Perfect Results
RecipesAh, pigs in a blanket. Just the name conjures up images of those delightful little parcels of crispy pastry en...

Pork Fillet Cooking Time: How Long to Cook It Perfectly
RecipesPork fillet, or tenderloin as it's sometimes called, is a real favourite in our house. It's so versatile, and...

The Ultimate Guide to Cooking Delicious Frankfurters
RecipesLet's face it, we all love a good frankfurter. It's a classic, simple, and always satisfying. But let's be rea...

Wolf Meat Recipes: A Guide to Cooking Wild Game
RecipesLet's be honest, you don't see wolf meat at your local butcher shop every day. It's a bit of a wild card, but ...