Alright, folks, let’s talk ribs! You know those melt-in-your-mouth ribs that you drool over in restaurants, the ones that leave you craving more? Well, I’m here to tell you, achieving that kind of rib perfection at home isn’t rocket science. It just takes a little know-how, a dash of patience, and a willingness to embrace the delicious journey.
I’ve been a rib-roasting enthusiast for years, and I’ve learned a thing or two along the way. From picking the perfect cut to mastering the art of dry rubs and sauces, I’ve got all the tips and tricks you need to transform those humble slabs of meat into a truly unforgettable feast.
So, grab a glass of your favourite tipple, put on your apron, and let’s embark on a delicious journey into the world of oven-baked ribs!
(Part 1) The Essential Ingredients: Choosing the Right Ribs

The Cut of the Matter: Baby Backs vs. spare ribs
Now, before we dive into the nitty-gritty, we need to tackle the age-old question: baby back ribs or spare ribs? This is a debate that has raged on for generations, but I’m here to give you the lowdown.
baby back ribs, as the name suggests, are smaller and come from the upper portion of the pig’s ribcage. These little fellas are known for their tenderness, boasting a higher meat-to-bone ratio and often delivering a more intense flavour.
Spare ribs, on the other hand, are bigger and come from the lower portion of the rib cage. While they might be a tad tougher than baby backs, they offer a more substantial eating experience and are typically more budget-friendly.
Personally, I’m a baby back ribs kinda guy, but don’t write off spare ribs just yet. They’ve got their own charm and can be just as delicious when cooked right.
The Meat: Going for Quality
Let’s face it, you can’t expect to create a culinary masterpiece without the right ingredients. And that includes selecting top-notch ribs. When you’re at the butcher counter, look for ribs that are well-marbled, with a nice layer of fat running along the surface. This fat will melt away during cooking, adding moisture and flavour to the meat, making it super juicy and tender.
While pre-packaged, pre-seasoned ribs from the supermarket might be tempting, trust me, they simply don’t compare to the flavour and texture of fresh, butcher-quality ribs. It’s worth the extra effort to source quality meat for an unforgettable rib experience.
The Membrane: A Hidden Enemy
There's a little secret you might not know about ribs: they have a thin, tough membrane on the underside, right where all the good stuff is. It's not the fat, but a white, translucent film that can make your ribs tough and prevent all the delicious flavours from penetrating.
Luckily, removing this membrane is a breeze. You can use a sharp knife to carefully peel it off, or if you're feeling adventurous, grab a paper towel, grip the membrane, and pull it off in one swift motion. Trust me, it’s worth the effort. You'll be rewarded with tender, flavour-packed ribs.
(Part 2) The Dry Rub: Setting the Flavour Stage

Dry rubs are the heart and soul of any good rib recipe. They're a blend of spices, herbs, and sometimes a bit of sugar that create a delicious, flavour-packed crust on the meat as it cooks.
Building Your Blend: A Recipe for Success
The beauty of dry rubs is the endless possibilities. You can play around with different combinations of spices and herbs to find your perfect flavour profile. Here are a few ideas to get you started:
A Classic Combo: My go-to dry rub is a blend of paprika, brown sugar, garlic powder, onion powder, salt, black pepper, and a dash of cayenne pepper for a little kick. It’s simple, but oh-so-delicious.
Smoky Vibes: For a smoky flavour that will transport your taste buds to barbecue heaven, add smoked paprika or a touch of chipotle powder to your rub.
Herbal Delights: Spice things up with fresh or dried herbs like thyme, rosemary, or oregano.
Remember, there are no hard and fast rules when it comes to dry rubs. Let your creativity run wild! Experiment with different flavour combinations and see what works best for you.
Applying the Rub: A Gentle Touch
Once you’ve got your dry rub ready, it’s time to coat those ribs. Use a generous amount and rub it all over the surface of the meat, making sure to get it into all the nooks and crannies. Be gentle, though. You don't want to tear the meat.
Prepping for the Oven: Letting the Rub Set
After applying the rub, it’s essential to let the ribs sit in the fridge for at least 2-3 hours, or even overnight if you have time. This gives the rub time to penetrate the meat, creating deeper flavours and a more robust crust.
(Part 3) The Oven Bake: The Heart of the Recipe

Choosing the Right Temperature: Finding the Sweet Spot
Now, we’re getting to the heart of the matter - the oven bake. The temperature you bake your ribs at is key to achieving that perfect balance of tenderness and crispy exterior. Most rib recipes recommend a temperature between 250°F and 300°F (120°C and 150°C).
Low and Slow: Baking at a lower temperature (around 250°F) ensures tender, juicy ribs. However, it will take longer to cook. This method is ideal for achieving that melt-in-your-mouth texture.
Medium Heat: A slightly higher temperature (around 300°F) will result in a crispier exterior, but you need to watch the ribs carefully to prevent them from drying out. This method is perfect if you want a nice balance between tenderness and a bit of crunch.
Timing is Everything: Knowing When They're Done
The cooking time for ribs depends on the size of the rack and the temperature you choose. As a general rule of thumb, you can expect to cook them for 2-3 hours at 250°F (120°C) or 1-1.5 hours at 300°F (150°C).
The Telltale Signs: Checking for Doneness
The best way to know if your ribs are cooked to perfection is by using a meat thermometer. They should reach an internal temperature of 190°F (88°C). You should also be able to easily pull the meat from the bone. It should practically fall apart!
Foiling for Moisture: A Trick of the Trade
Here’s a little secret that I’ve picked up over the years: foil. About halfway through the cooking time, wrap your ribs tightly in aluminium foil. This creates a steamy environment that helps to tenderize the meat and prevent it from drying out. It’s a game-changer!
Unveiling the Magic: The Finishing Touch
After wrapping those ribs in foil, let them cook for another 30-45 minutes. Then, carefully remove the foil and continue cooking for another 30 minutes or so. This will allow the ribs to develop a nice, crispy crust.
(Part 4) The Sauce: A Finishing Flourish
Now, let’s talk sauce! There’s a world of barbecue sauce out there, from sweet and tangy to smoky and spicy. It’s all about finding the sauce that complements your dry rub and your personal taste preferences.
Choosing the Right Sauce: Finding Your Flavour
I’m a big fan of sauces that offer a balance of sweetness, smokiness, and tanginess. There are so many great options available, both homemade and store-bought.
My Favourite Sauce: A Blend of Sweet and Smoky
My favourite homemade sauce is a blend of ketchup, brown sugar, Worcestershire sauce, apple cider vinegar, and a touch of smoked paprika for that smoky kick. It’s a classic combination that never fails to impress.
Store-Bought Sauce: A Convenient Option
If you’re short on time or don’t feel like making your own sauce, there are plenty of delicious store-bought options available. Experiment with a few different brands to find one that suits your palate.
Applying the Sauce: A Gentle Glaze
When it comes to applying sauce, less is more. You don’t want to drown your ribs, as that can make them soggy. Just brush on a thin coat towards the end of the cooking time, allowing it to caramelize and create a delicious glaze.
The Final Touch: The Perfect Finish
After removing the ribs from the oven, let them rest for a few minutes before slicing and serving. This gives the juices time to redistribute, resulting in a juicier, more flavorful bite.
(Part 5) Serving Perfection: The Art of Presentation
The Cutting Edge: Ensuring Even Portions
So, your ribs are cooked to perfection, glistening with sauce and ready to be devoured. But before you dive in, let’s talk about how to cut them properly.
The Rack Attack: If you’re dealing with a whole rack of ribs, it’s best to cut them into individual ribs.
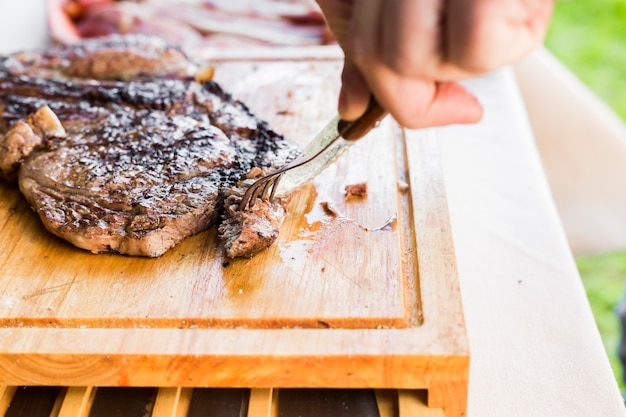
Between the Bones: Use a sharp knife to cut the ribs between the bones, ensuring even portions for everyone at the table.
Garnishing with Style: Adding a Touch of Flair
Ribs are already visually appealing, but a little extra flair can elevate your presentation to the next level.
Fresh Herbs: A sprinkle of chopped fresh parsley or cilantro adds a burst of freshness and colour.
Sesame Seeds: A sprinkle of sesame seeds adds a nutty flavour and textural contrast.
The Sidekick: Completing the Meal
Ribs are always best enjoyed with a selection of tasty sides. Here are a few classic pairings:
Coleslaw: A refreshing and crunchy accompaniment that balances the richness of the ribs.
Macaroni and Cheese: A comforting and creamy side that complements the smoky flavour of the ribs.
Baked Beans: A classic barbecue side that offers a sweet and smoky flavour.
(Part 6) The Rib-Roasting Arsenal: Tools of the Trade
Now, let’s talk about the tools that will help you conquer the world of oven-baked ribs.
The Oven: Your Cooking Companion
A good oven is essential for baking ribs. Look for one with even heating capabilities and a large enough capacity to accommodate a full rack of ribs.
The roasting pan: A Stable Foundation
A roasting pan with a rack is ideal for cooking ribs. The rack helps to elevate the ribs, allowing for even cooking and preventing them from steaming in their own juices.
The Meat Thermometer: Ensuring Accuracy
A meat thermometer is a must-have for any serious rib-roaster. It's the only way to ensure that your ribs are cooked to perfection and safe to eat.
The Foil: A Moisture Shield
Aluminium foil is a handy tool for rib-roasting. It helps to create a moist environment for the ribs, ensuring they stay tender and juicy.
The Basting Brush: A Sauce-Smoothing Tool
A basting brush is helpful for applying sauce to the ribs towards the end of the cooking time. It ensures an even and consistent glaze.
(Part 7) FAQs: Answering Your Rib-Related Questions
1. Can I bake ribs ahead of time?
Absolutely! You can bake your ribs up to 2 days in advance and reheat them before serving. Just reheat them in a low oven (250°F / 120°C) until heated through.
2. How long can I keep cooked ribs?
Cooked ribs can be stored in the fridge for up to 3 days.
3. Can I freeze cooked ribs?
Yes, cooked ribs can be frozen for up to 3 months. Just make sure to wrap them tightly in freezer-safe wrap or aluminium foil. When ready to eat, thaw the ribs in the fridge overnight and then reheat them in a low oven.
4. What can I do with leftover ribs?
Leftover ribs can be used in various dishes, such as sandwiches, salads, or even tacos. They also make a delicious addition to your favourite chili or soup.
5. Can I bake ribs in a slow cooker?
You can definitely bake ribs in a slow cooker, but it’s not recommended for the same results as an oven. The ribs tend to get mushy and fall apart too easily.
(Part 8) Rib-Roasting Wisdom: Lessons Learned
Patience is Key: The Art of slow cooking
The key to tender, flavorful ribs is patience. They need time to cook, allowing the meat to break down and the flavours to meld.
Experimentation is Encouraged: Finding Your Perfect Recipe
Don't be afraid to experiment with different dry rubs, sauces, and cooking times to find your own perfect rib-roasting recipe. There's no one-size-fits-all approach to ribs!
Embrace the Process: The Journey is Part of the Fun
Rib-roasting is a journey. Enjoy the process of selecting the ribs, preparing them, and watching them transform in the oven. It's a culinary adventure that rewards your efforts with a delicious and satisfying meal.
So there you have it, my friends. The ultimate guide to oven-baked ribs, full of tips, tricks, and personal anecdotes. Now, go forth and conquer those ribs! And don't forget to share your creations and any rib-roasting adventures you have along the way. Happy cooking!
Everyone is watching

How to Cook Frozen Lobster Tails Perfectly: A Step-by-Step Guide
RecipesLobster. Just the word conjures up images of lavish meals, special occasions, and a taste of luxury. But let's...

Pork Fillet Cooking Time: How Long to Cook It Perfectly
RecipesPork fillet, or tenderloin as it's sometimes called, is a real favourite in our house. It's so versatile, and...

Pigs in a Blanket Cooking Time: How Long to Bake for Perfect Results
RecipesAh, pigs in a blanket. Just the name conjures up images of those delightful little parcels of crispy pastry en...

The Ultimate Guide to Cooking Delicious Frankfurters
RecipesLet's face it, we all love a good frankfurter. It's a classic, simple, and always satisfying. But let's be rea...

Wolf Meat Recipes: A Guide to Cooking Wild Game
RecipesLet's be honest, you don't see wolf meat at your local butcher shop every day. It's a bit of a wild card, but ...
