Let's talk steak. You know, those beautiful cuts of meat that can make your mouth water just thinking about them. I've been cooking for years, and I've learned a thing or two about how to get that perfect sear, that juicy pink center, and that melt-in-your-mouth tenderness. It's not just about throwing a piece of meat on the grill and calling it a day. It's about understanding the science behind cooking steak, the different cuts, and the best techniques for getting that perfect result. And that's what we're going to dive into today.
This guide isn't just for the seasoned steak connoisseurs, though. Whether you're a complete beginner who's terrified of undercooked meat or a seasoned pro looking to refine your skills, there's something here for you. We'll cover everything from choosing the right cut and seasoning to mastering the art of grilling, pan-frying, and reverse searing. We'll also explore the different levels of doneness, address common mistakes, and even offer some tips on how to make the most of your leftovers. So, grab a glass of your favourite beverage, get comfortable, and let's get started!
(Part 1) Choosing the Right Cut
Understanding the Different Cuts and Their Characteristics
choosing the right cut of steak can be a bit overwhelming. There's ribeye, sirloin, tenderloin, and so many more. But don't worry, I'll break it down for you. Each cut has its own unique flavor and texture, making it ideal for different cooking methods and preferences.
For instance, ribeye, with its rich marbling and buttery flavor, is a classic choice for grilling or pan-frying. It's known for its tenderness and full, rich flavor. Sirloin, on the other hand, is leaner and has a more pronounced beefy taste, making it perfect for those who prefer a less-fatty option. Then there's the tenderloin, known as filet mignon, which is incredibly tender and perfect for those who prefer a more delicate cut. It's often considered the most luxurious cut, with a melt-in-your-mouth texture.
Popular Cuts and Their Characteristics
Here's a quick rundown of some of the most popular cuts and their characteristics, along with my personal recommendations for cooking methods:
- Ribeye: The king of steaks, known for its rich marbling and buttery flavor. It's incredibly versatile and can be grilled, pan-fried, or roasted. Personally, I love it grilled over a hot fire for that smoky flavor.
- Sirloin: A leaner cut with a more pronounced beefy taste. It's also good for grilling or pan-frying, but can also be broiled or roasted for a different flavor profile.
- Tenderloin (Filet Mignon): The most tender cut, known for its delicate flavor. It's perfect for grilling, pan-frying, or even roasting. I often choose filet mignon for special occasions, as it's elegant and luxurious.
- new york strip: Another lean cut with a good balance of flavor and tenderness. It's a great all-around steak that can be grilled, pan-fried, or broiled. It's perfect for when you want a steak that's both flavorful and tender.
- flank steak: A tougher cut that benefits from marinating and grilling. It's great for slicing thin and serving as a steak sandwich or in salads. It's a good option for those who are looking for a more budget-friendly cut, but it requires a bit more effort in terms of preparation.
- skirt steak: Another tough cut that's best marinated and grilled. It's known for its strong flavor and can be sliced thin and served as fajitas or grilled skewers. It's perfect for a quick and easy meal that's full of flavor.
Choosing the Right Thickness
The thickness of your steak is important too. If you want a quick cook, opt for a thinner cut. But for a juicy and tender steak, you'll want to go with a thicker cut, especially if you're grilling or pan-frying. A thicker cut allows for a more even cooking process, ensuring that the inside is cooked properly without overcooking the outside.
For grilling, I usually go for a steak that's at least 1.5 inches thick. This allows for a beautiful sear on the outside and a perfectly cooked, juicy interior. However, you can also get great results with thinner cuts, especially if you're using a pan-frying method.
(Part 2) Preparing the Steak
Seasoning: The Foundation of Flavor
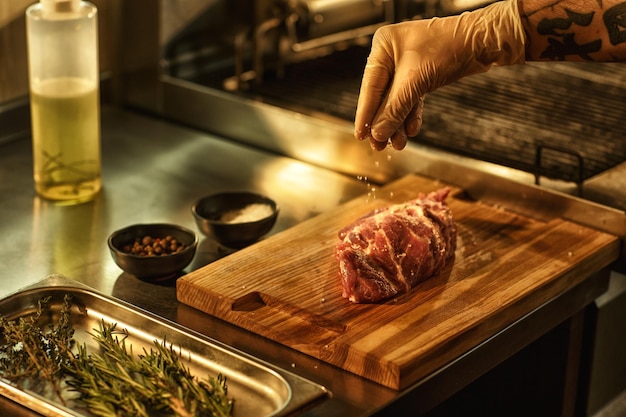
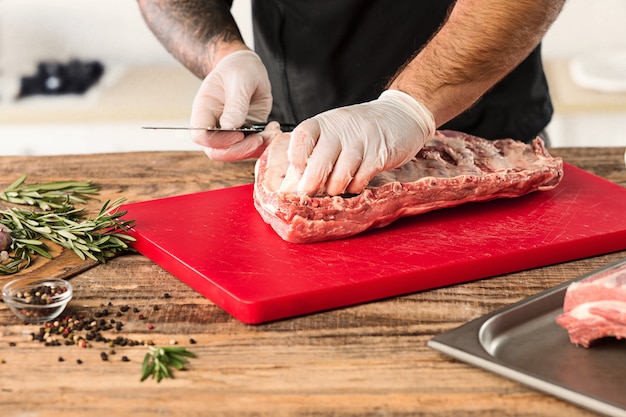
Don't underestimate the power of seasoning. It's what takes a good steak and turns it into a truly delicious one. Salt is essential, and I always season liberally, even with kosher salt which doesn't clump. I use a generous amount of fresh black pepper and sometimes add a little garlic powder or onion powder for extra depth of flavor.
For something a bit more adventurous, I like to use a dry rub. This usually includes salt, pepper, paprika, garlic powder, onion powder, and sometimes other herbs and spices like thyme, rosemary, or oregano. The key is to apply the dry rub liberally and evenly to the steak, making sure to get it into all the nooks and crannies. This ensures that the flavor is evenly distributed throughout the steak.
Marinating (Optional): Adding Flavor and Tenderness
Now, marinating isn't strictly necessary, but it can add a lot of flavor and moisture to your steak. If you're using a tougher cut, marinating is a good idea. It helps to tenderize the meat and infuse it with flavor. Additionally, marinating can add a layer of complexity to the overall taste of the steak, making it more interesting and enjoyable.
For a simple marinade, you can mix olive oil, lemon juice, garlic, and herbs. I love using rosemary and thyme, but you can experiment with your own favorite flavors. You can also add a touch of honey or soy sauce for a sweet and savory flavor profile.
Don't forget to let your steak marinate in the fridge for at least 30 minutes, and up to overnight for maximum flavor. The longer the steak marinates, the more flavor it will absorb.
(Part 3) Grilling: The Classic Way
Getting Ready: Setting the Stage for a Great Steak
First things first, make sure your grill is nice and hot. We're aiming for high heat, which is about 450°F - 550°F. Let me tell you, I've been there with a cold grill - it's not pretty! It's a big reason for uneven cooking. A hot grill creates a beautiful sear on the outside and cooks the steak quickly and evenly.
The Sear: Creating a Delicious Crust
Once your grill is hot, place your steak on the grate. You'll hear that satisfying sizzle. Let it cook for about 3-4 minutes per side, without moving it, to create a beautiful crust. This step is crucial for creating a flavorful and visually appealing steak. The high heat creates a caramelized exterior that locks in the juices and adds a delicious smoky flavor.
Cooking to the Right Doneness: Finding Your Perfect Temperature
After the initial sear, you're going to move your steak to a cooler part of the grill to continue cooking. This is where you control the doneness. The goal is to cook the steak evenly throughout, without overcooking the outside. If you keep the steak on the hottest part of the grill, you risk burning the outside before the inside is cooked through.
Use a meat thermometer to check the internal temperature. Here's a guide to the different doneness levels:
| Doneness | Internal Temperature (°F) | Internal Temperature (°C) | Texture | Appearance |
|---|---|---|---|---|
| Rare | 125-130 | 52-54 | Very soft and springy | Red center with a thin brown crust |
| Medium Rare | 130-135 | 54-57 | Slightly firmer, springs back slightly when pressed | Pink center with a thicker brown crust |
| Medium | 140-145 | 60-63 | Firm, springs back significantly when pressed | Slightly pink center with a well-developed brown crust |
| Medium Well | 150-155 | 66-68 | Very firm, slight bounce when pressed | Very little pink in the center, thick brown crust |
| Well Done | 160 | 71 | Very hard, no give when pressed | No pink in the center, very thick brown crust |
I usually aim for medium rare, which is my favorite, but it all comes down to preference. Experiment with different doneness levels to find what you enjoy most.
Resting: The Final Touch for Juicy Perfection
The final step is resting. Once your steak is cooked to your liking, remove it from the grill and let it rest for at least 5-10 minutes before slicing and serving. This allows the juices to redistribute throughout the steak, resulting in a juicier and more tender bite. Think of it as a final step in the cooking process that ensures maximum flavor and tenderness.
(Part 4) Pan-Frying: A Quick and Easy Option
Pan-frying offers a convenient and delicious way to cook a steak, especially when you don't have a grill. It's a great option for weeknights or when you're short on time. With just a few simple steps, you can create a perfectly cooked steak that's full of flavor.
Heating the Pan: The Key to a Beautiful Sear
Start by heating a heavy-bottomed skillet or cast iron pan over medium-high heat. You're looking for a pan that will distribute heat evenly and retain it well. I like to use a cast iron pan, because it gets super hot and creates a beautiful sear. A hot pan is essential for creating that delicious crust that we discussed earlier.
Don't forget to add a bit of oil to your pan. You don't need much, just enough to coat the bottom of the pan. I usually go with olive oil or avocado oil, but you can use any oil with a high smoke point. These oils can withstand high temperatures without burning and smoking, ensuring that your steak is cooked evenly and doesn't taste burnt.
Searing and Cooking: Creating Flavor and Tenderness
Once your pan is hot, add your steak. Let it cook for about 3-4 minutes per side without moving it, just like with grilling. You'll see those beautiful sear marks start to form. These marks are not just aesthetically pleasing, they also add a rich, caramelized flavor to the steak.
After the initial sear, you can reduce the heat to medium and continue cooking your steak to your desired doneness. Remember, use a meat thermometer to check the internal temperature. This ensures that your steak is cooked evenly throughout.
Resting: Resting for a Juicy and Tender Bite
Once your steak is cooked, remove it from the pan and let it rest for 5-10 minutes before slicing and serving. It's crucial for that same reason as grilling: to allow the juices to redistribute. This final step is essential for creating a juicy and tender steak that will impress your guests.
(Part 5) Reverse Searing: For the Ultimate Tenderness
Reverse searing is a technique that involves cooking the steak in a low oven first, followed by a quick sear on the stovetop or grill. This method is perfect for those who want a perfectly tender and juicy steak with a delicious crust. It's a bit more time-consuming than other methods, but the results are worth it.
Low and Slow: Cooking the Steak Evenly
Preheat your oven to 250°F (120°C). Place your steak on a baking sheet and cook for 1-2 hours, depending on the thickness of your steak. You're aiming for an internal temperature of 110°F-120°F (43°C-49°C). This low and slow cooking method ensures that the steak is cooked evenly throughout, preventing it from drying out. I often find that this takes less time with a thinner cut and more time with a thicker cut.
While the steak is cooking, you can prepare your sides or even have a glass of wine. It's a great way to relax and let the steak cook slowly. Reverse searing is a great way to unwind and enjoy the cooking process.
Searing: Creating the Perfect Crust
Once the steak has reached the desired internal temperature, remove it from the oven and let it rest for a few minutes. Then, it's time for the sear. You can use a hot skillet or grill. This final step is crucial for creating that beautiful crust that we discussed earlier.
Heat your pan or grill over high heat, and add a little oil. Sear the steak for about 1-2 minutes per side, to create a beautiful crust and a little bit of char. You want a nice, even sear that is slightly charred but not burnt. This will give the steak a delicious smoky flavor and a crispy texture.
Resting: Letting the Juices Redistribute
Finally, remove the steak from the heat and let it rest for 5-10 minutes before slicing and serving. Remember, that resting is critical for a juicy and tender steak. Allowing the steak to rest will ensure that the juices are evenly distributed throughout the meat, resulting in a flavorful and tender bite.
(Part 6) Doneness and How to Judge It
Getting your steak to the perfect doneness is crucial. But it's not just about using a meat thermometer. You can actually learn to judge the doneness by pressing on the steak. This is a helpful skill to have, especially when you're cooking for a crowd and don't have time to check the temperature of each steak individually.
Here's a breakdown of the different doneness levels and how to judge them by pressing:
- Rare: The steak will feel very soft and springy to the touch. It will have a red center and a thin brown crust. This is the least cooked level of doneness, with a very soft and tender texture.
- Medium Rare: The steak will feel slightly firmer and spring back a little when pressed. It will have a pink center and a thicker brown crust. This is a popular choice for steak lovers who enjoy a juicy and flavorful steak.
- Medium: The steak will feel firm and spring back significantly when pressed. It will have a slightly pink center and a well-developed brown crust. This level of doneness is a good choice for those who prefer a more cooked steak, but still want it to be juicy.
- Medium Well: The steak will feel very firm and have a slight bounce when pressed. It will have very little pink in the center and a thick brown crust. This is a good choice for those who prefer a well-cooked steak but still want some tenderness.
- Well Done: The steak will feel very hard and have no give when pressed. It will have no pink in the center and a very thick brown crust. This is the most cooked level of doneness, with a very firm texture.
It takes a little practice, but with time you'll be able to tell the doneness of your steak just by feel. Once you've mastered this skill, you'll be able to cook steak like a pro.
(Part 7) Serving and Enjoying Your Steak
side dishes: Complements to a Great Steak
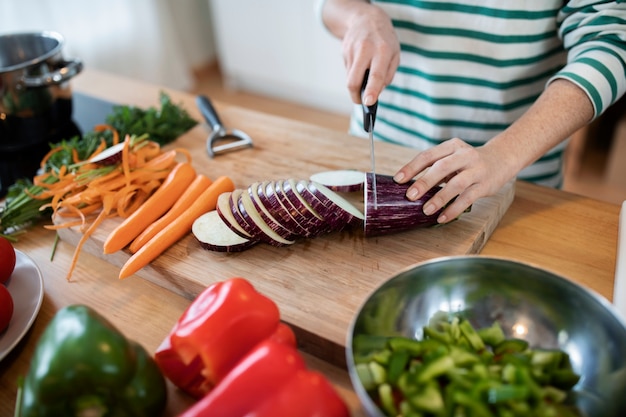
A great steak deserves equally delicious sides. I like to keep it simple with a classic green salad, roasted vegetables, or mashed potatoes. These sides complement the steak without overpowering the flavor.
If you're feeling more adventurous, you can try a creamy polenta, a flavorful risotto, or a medley of grilled vegetables. These options offer a more complex flavor profile that pairs well with the steak.
Sauce: Enhancing the Flavor of Your Steak
A good steak doesn't need much, but a simple sauce can elevate the flavor and make it even more delicious. I love a classic Béarnaise sauce or a garlic butter sauce. These sauces are simple to make and add a rich and flavorful touch to the steak.
If you're feeling adventurous, you can try a chimichurri sauce or a spicy chimichurri sauce. These sauces add a bright and tangy flavor to the steak, perfect for those who prefer a bolder flavor profile.
(Part 8) Tips and Tricks
Here are some tips and tricks I've learned over the years to help you cook the perfect steak:
- Always let your steak come to room temperature before cooking. This helps ensure even cooking and prevents the center from being cold. When a cold steak is placed on a hot surface, the outside cooks too quickly, while the inside remains cold. This can lead to an unevenly cooked steak.
- Use a meat thermometer to check the internal temperature of your steak. This is the only way to ensure that your steak is cooked to your liking. Meat thermometers are inexpensive and easy to use, making them an essential tool for any steak lover.
- Don't overcook your steak. Overcooked steak is tough and dry. Overcooked steak loses its tenderness and flavor, making it less enjoyable. Aim for the desired doneness level and avoid overcooking.
- Rest your steak after cooking. This allows the juices to redistribute throughout the steak, resulting in a juicier and more tender bite. Resting is a crucial step that you should never skip. It allows the juices to settle back into the meat, resulting in a more flavorful and juicy steak.
- Don't be afraid to experiment with different cuts and seasonings. There's no one right way to cook a steak, so find what you enjoy the most. Experiment with different cuts and seasonings to discover your favorites. You may be surprised at what you find!
FAQs
1. What is the best type of steak for grilling?
For grilling, I recommend going with a ribeye, sirloin, or New York strip. These cuts have a good balance of fat and leanness, resulting in a juicy and flavorful steak. They're also thick enough to hold up to the high heat of the grill, creating a beautiful sear and a flavorful interior.
2. How do I know when my steak is done?
The best way to know when your steak is done is to use a meat thermometer. You can also judge the doneness by pressing on the steak, as described in Part 6. However, using a meat thermometer is the most accurate way to ensure that your steak is cooked to your liking.
3. What should I do if my steak is overcooked?
If your steak is overcooked, don't worry, it's not the end of the world! While it won't be as juicy as a perfectly cooked steak, you can still salvage it. Cut the steak into thin slices and add a little sauce or gravy to help moisten it. You can also use the overcooked steak in a stir-fry or other dish where it won't be the main attraction.
4. What are some good side dishes to serve with steak?
Classic steak sides include green salads, roasted vegetables, mashed potatoes, and fries. You can also get creative with different sauces and flavor combinations. For instance, a creamy polenta pairs well with a grilled steak, while a flavorful risotto complements a pan-fried steak. Experiment with different side dishes to find what you enjoy most.
5. How do I store steak?
Steak should be stored in the refrigerator on a plate or in an airtight container. If you're not cooking it right away, it's best to freeze it. Just remember to thaw it in the refrigerator before cooking. Do not thaw steak at room temperature, as this can create a breeding ground for bacteria.
Now, go forth and conquer the world of steak cooking. It's a journey, but you'll learn a lot and taste the difference! You've got this! Have fun, experiment, and enjoy delicious, perfectly cooked steak every time.
Everyone is watching

How to Cook Frozen Lobster Tails Perfectly: A Step-by-Step Guide
RecipesLobster. Just the word conjures up images of lavish meals, special occasions, and a taste of luxury. But let's...

Pigs in a Blanket Cooking Time: How Long to Bake for Perfect Results
RecipesAh, pigs in a blanket. Just the name conjures up images of those delightful little parcels of crispy pastry en...

Pork Fillet Cooking Time: How Long to Cook It Perfectly
RecipesPork fillet, or tenderloin as it's sometimes called, is a real favourite in our house. It's so versatile, and...

The Ultimate Guide to Cooking Delicious Frankfurters
RecipesLet's face it, we all love a good frankfurter. It's a classic, simple, and always satisfying. But let's be rea...

Wolf Meat Recipes: A Guide to Cooking Wild Game
RecipesLet's be honest, you don't see wolf meat at your local butcher shop every day. It's a bit of a wild card, but ...