There’s a certain magic in grilling up a juicy, flavourful burger. The sizzle of the meat, the aroma of char, the satisfying bite – it’s an experience that's hard to beat. But what happens when the weather’s not cooperating, or you simply don't have a grill at your disposal? No need to despair, my fellow burger enthusiasts! You can achieve that same deliciousness right on your stovetop, and I'm here to guide you through the process, sharing my own tips, tricks, and even a few of those "aha!" moments that made all the difference.
This guide is your one-stop shop for everything you need to know, from choosing the right meat to mastering the art of the perfect sear. We'll explore the science behind a good burger, discover how to create those delicious crispy edges, and learn how to ensure your patty is cooked to your perfect level of doneness. So grab your spatula, get your hands a little messy, and let's cook up some amazing burgers!
Part 1: The Meat Matters
You can't expect to create a truly great burger without starting with quality meat. This is where your journey to burger perfection truly begins.
choosing the right cut
Over the years, I’ve experimented with different cuts of meat, and here’s what I’ve learned:
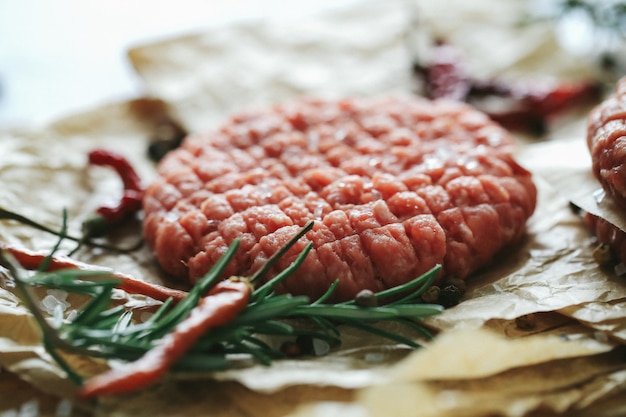
- ground beef: The classic choice for a reason! Opt for 80/20 ground beef (80% lean, 20% fat) for a juicy and flavourful patty. The fat content is what helps keep things moist, adds richness, and creates those delicious drippings that make a burger truly irresistible.
- Chuck: If you're feeling adventurous, try chuck roast ground into burger meat. It's known for its rich flavour and ability to hold its shape well, making it ideal for those hearty burgers that won't fall apart.
- Sirloin: This leaner option results in a slightly drier patty, but it’s still a good choice if you’re looking for a lower-fat option. Just be sure to keep it moist by using a good amount of toppings or by adding a little bit of extra fat to the meat mixture.
- Brisket: This cut is great for hearty burgers with an intense, meaty flavour. It can be a bit tough, so be sure to grind it fine and consider adding a bit of fat back into the mix to ensure a juicy result.
Remember, you can always mix and match different cuts to create a blend that suits your taste! I like to combine chuck and sirloin for a balanced flavour and texture. It’s a great way to achieve a burger that’s both juicy and flavorful.
The Importance of Freshness
Freshness is key! Look for ground beef that’s brightly coloured and has a firm texture. Avoid any packages that are leaking or have a strong odour. Fresh meat makes a world of difference in the final flavour and texture of your burger.
Getting the Right Grind
The way your meat is ground can significantly impact the final result. You want a grind that's fine enough to hold together well but coarse enough to create a juicy texture. A medium grind is usually ideal for a classic burger.
If you're grinding your own meat, aim for a consistency that's similar to breadcrumbs. You can always adjust the grind based on your preferences. A coarser grind can create a heartier, more rustic burger, while a finer grind will result in a smoother, more tender patty.
Part 2: Prepping Your Patties
Now that you've got your meat sorted, it's time to get those patties ready. This might seem simple, but a few key steps make all the difference in achieving the perfect burger.
Forming the Patties
Here's where you get hands-on! Divide your ground meat into equal portions, then gently form them into patties. Don't overwork the meat, as this can lead to tough patties. Just press them together firmly, making sure the edges are slightly thicker than the center. This helps them cook evenly and prevents them from puffing up too much.
Indentation Time
This is a trick I learned from my dad: create a small indentation in the center of each patty using your thumb. This helps to prevent the center from bulging up as the patty cooks. Think of it as a little "air pocket" that allows the center of the patty to cook evenly and prevents it from becoming too dense or undercooked.
Seasoning Perfection
Now comes the fun part: seasoning! Salt and pepper are essential, but don't be afraid to get creative. Here are a few of my favourite additions:
- Garlic Powder: A touch of garlic powder adds a subtle depth of flavour, enhancing the meat’s natural savory notes.
- Onion Powder: This adds a sweet and savoury note that complements the meat perfectly. It's a great way to add a subtle onion flavour without having to actually cook onions.
- Paprika: A sprinkle of paprika provides a hint of smokiness and a touch of colour. It also adds a subtle sweetness that balances the savory notes of the meat.
- Dried Herbs: Try a mix of thyme, rosemary, or oregano for a classic burger flavour. These herbs add a complexity of aromas and tastes that elevate the burger experience.
Experiment with different seasonings to discover your perfect burger profile! You can even create signature spice blends tailored to your preferences.
Chill Out
Once your patties are seasoned, cover them and refrigerate them for at least 30 minutes. This allows the flavours to meld and helps the meat hold its shape better during cooking. The chilling process also helps the fat solidify, which will make the patties easier to handle and prevent them from falling apart.
Part 3: The Stovetop Showdown
You've prepped your patties, now it's time to hit the stovetop! Remember, it's about the heat, the sear, and creating a delicious burger that's cooked to your liking.
Heat is Key
The best way to get that signature sear is with a hot pan. cast iron pans are ideal for this task, but any heavy-bottomed pan will do. Heat your pan over medium-high heat until it's piping hot. This will ensure that the patty gets a beautiful, crispy crust, while also helping to lock in the juices.
Oil Up
Add a thin layer of oil to the pan, just enough to coat the surface. I usually use a neutral oil like canola or vegetable oil. You want to use an oil with a high smoke point, so it doesn't start to break down and give off unpleasant flavours.
Time to Sear
Carefully place your patties in the hot pan, making sure not to overcrowd them. Let them cook undisturbed for about 3-4 minutes per side. The goal is to achieve a beautiful, crispy crust, and this takes time. Avoid touching or flipping the patties during this initial cooking period.
Flip It
Once the first side is nicely browned, flip those patties over! Use a spatula to gently lift them, ensuring you don't break them apart. Cook the second side for another 3-4 minutes, or until the patty reaches your desired level of doneness.
Part 4: Internal Thermometer Magic
Want to ensure your burgers are cooked to perfection? A meat thermometer is your best friend! It eliminates the guesswork and ensures that your burger is cooked to your exact preference.
Temperature Matters
Here's a breakdown of safe internal temperatures for hamburger patties:
| Doneness Level | Internal Temperature |
|---|---|
| Rare | 120°F - 125°F (49°C - 52°C) |
| Medium-Rare | 130°F - 135°F (54°C - 57°C) |
| Medium | 140°F - 145°F (60°C - 63°C) |
| Medium-Well | 150°F - 155°F (66°C - 68°C) |
| Well-Done | 160°F or higher (71°C or higher) |
Insert the thermometer into the thickest part of the patty, making sure it doesn't touch the pan. Don't worry about poking holes in the patty; it won't significantly affect the cooking process.
Part 5: The Finishing Touches
Your burgers are almost ready to be devoured! Let's add those final touches that will take them from good to absolutely amazing.
Cheese, Please!
If you're a cheese lover, now's the time to melt it over your patties. I prefer to add the cheese in the last minute of cooking, allowing it to soften and become gooey without burning. You can add slices or shredded cheese, depending on your preference.
Rest and Recover
Once your burgers are cooked to perfection, let them rest for a few minutes before assembling your burgers. This allows the juices to redistribute, resulting in a more tender and juicy patty. Think of it as a little "relaxation" time for the burger. The juices will settle back into the meat, creating a more succulent and flavourful bite.
Don't Forget the Sides
No burger is complete without some delicious sides! Here are a few of my go-to options:
- Potato Wedges: Crispy and satisfying, they're the perfect complement to a juicy burger. You can bake them, roast them, or even fry them for an extra crispy bite.
- Coleslaw: A refreshing and crunchy side that adds a touch of acidity. Coleslaw provides a nice contrast to the richness of the burger.
- Onion Rings: Fried to golden perfection, these are a classic burger companion. There's something about the combination of a juicy burger and a crispy onion ring that's simply irresistible.
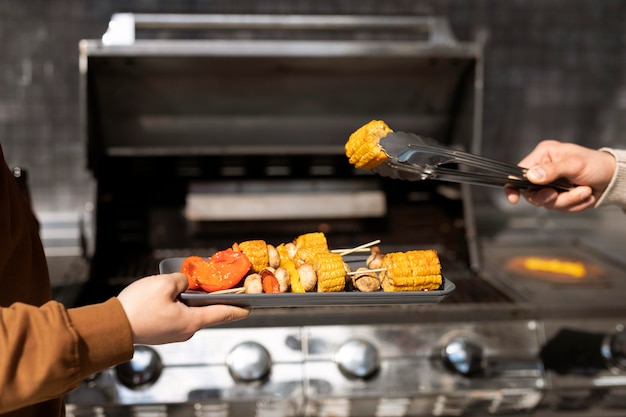
- grilled corn on the Cob: A summery side that adds a touch of sweetness and smokiness. Grilled corn is a great way to add a little bit of sweetness and freshness to your burger meal.
Part 6: Assembly Time
It's time to assemble your masterpiece! Choose your favourite burger buns and get ready to layer on the goodness.
Bun Selection
The bun is just as important as the patty! Choose a bun that can hold up to the juices and toppings without becoming soggy. I prefer brioche buns for their soft texture and buttery flavour. They provide the perfect balance of softness and structure for a satisfying burger experience.
Toasting the buns before assembling the burger is a great way to add a little extra flavour and texture, making them even more irresistible.
Top It Off
Now comes the fun part: adding your favourite toppings! Here are a few ideas to get you started, but feel free to experiment and create your own unique combinations:
- Lettuce and Tomato: Classic, refreshing, and always a good choice. The crispness of the lettuce and the juicy sweetness of the tomato provide a perfect counterpoint to the richness of the burger.
- Pickles: Add a tangy kick to your burger. Pickles provide a nice contrast in both texture and flavour, adding a little zip to your bite.
- Red Onion: Provides a sharp, sweet flavour. Thinly sliced red onion adds a burst of freshness and a little bit of bite to your burger.
- Bacon: crispy bacon adds a smoky, salty flavour. What’s a burger without a little bacon?
- Guacamole: A creamy, avocado-based topping that adds a touch of richness. Guacamole provides a creamy, subtly spicy kick that elevates your burger to another level.
- caramelized onions: Sweet and savoury, these add a touch of elegance. Caramelized onions are a beautiful way to add sweetness and depth to your burger, providing a flavor that's both sophisticated and comforting.
Don't be afraid to experiment and create your own signature burger combinations!
Part 7: Mastering the Burger Flip
We've talked about the "how" of burger cooking, but there's an art to flipping those patties! Here are some tips to ensure a smooth and successful flip every time.
Patience is Key
Resist the urge to flip your patty too early. Let it cook undisturbed for at least 3-4 minutes per side, allowing it to develop a beautiful sear. A good sear will lock in the juices and add a delightful flavour. If you flip it too soon, you'll end up with a patty that's mushy and doesn't have that delicious char that we're all looking for.
The Right Tool
A sturdy spatula is essential for flipping burgers. Choose one that's wide enough to get under the patty without breaking it apart. I prefer a metal spatula for its durability and ability to handle high heat. Make sure the spatula is not too thin, as it might not be strong enough to lift the patty without bending.
Gentle, Yet Firm
When you're ready to flip, lift the spatula under the patty, gently lifting it from the pan. Use a slight rocking motion to ensure the patty releases easily. Don't press down on the patty too hard, as this can cause it to crumble. Flip it over confidently, and let it cook on the other side.
Part 8: Troubleshooting Tips
Even the most seasoned burger chef can encounter a few challenges. Here are some common problems and how to avoid them:
Patties Sticking to the Pan
If your patties are sticking to the pan, it's likely because the pan isn't hot enough or the oil hasn't reached a high enough temperature. Make sure your pan is piping hot before adding the patties. You can also use a little more oil if needed.
Patties Puffing Up
If your patties are puffing up in the center, it's likely because you haven't created a deep enough indentation. Use your thumb to create a small depression in the center of each patty before cooking. This allows the meat to cook evenly and prevents it from bulging up.
Patties Cooking Unevenly
If your patties are cooking unevenly, it's likely because you're overcrowding the pan. Make sure to leave enough space between each patty to allow them to cook evenly. If you're making a large batch of burgers, cook them in batches to ensure they all get a proper sear.
Overcooked Burgers
If your burgers are overcooked, it's likely because you've cooked them for too long. Use a meat thermometer to check the internal temperature of the patties and remove them from the heat once they reach your desired doneness level. Overcooked burgers can be dry and tough, so it's important to cook them to your preferred level of doneness.
FAQs
1. How do I make sure my burger patties don't fall apart when I flip them?
The key is to not overwork the meat when forming the patties. Gently press the meat together, making sure the edges are slightly thicker than the center. Refrigerating the patties for at least 30 minutes before cooking will also help them hold their shape. The cold temperature will help the fat solidify, making the patties more stable.
2. What if I don't have a meat thermometer?
While a meat thermometer is the most accurate way to check the doneness of your burgers, you can still get a good sense of their doneness by pressing on the patty. A rare burger will feel soft and squishy, a medium-rare burger will feel slightly springy, a medium burger will feel firm, and a well-done burger will feel very firm. However, remember that this method is not as accurate as using a thermometer, so use it with caution.
3. Can I cook burgers in a non-stick pan?
Yes, you can cook burgers in a non-stick pan. Just make sure the pan is hot enough and that you use a small amount of oil to prevent sticking. You might need to adjust the cooking time slightly, as non-stick pans tend to cook food a little faster than cast iron pans.
4. How do I get that perfect "grilled" flavour without using a grill?
You can achieve a similar flavour on the stovetop by using a cast iron pan and searing the patties over high heat. The hot pan will create a crispy crust and a delicious char. You can also try adding a few drops of smoked paprika or liquid smoke to the pan for a more pronounced smoky flavour.
5. Can I cook frozen burger patties on the stovetop?
It's generally not recommended to cook frozen burger patties directly on the stovetop. They're more likely to stick to the pan and cook unevenly. It's best to thaw them in the refrigerator overnight before cooking. This will ensure that the patties cook evenly and prevent them from sticking to the pan.
There you have it, my friends! The ultimate guide to cooking perfect hamburger patties on the stovetop. With a little practice and the right techniques, you'll be turning out juicy, flavorful burgers that will impress your friends and family. Enjoy!
Everyone is watching

How to Cook Frozen Lobster Tails Perfectly: A Step-by-Step Guide
RecipesLobster. Just the word conjures up images of lavish meals, special occasions, and a taste of luxury. But let's...

Pigs in a Blanket Cooking Time: How Long to Bake for Perfect Results
RecipesAh, pigs in a blanket. Just the name conjures up images of those delightful little parcels of crispy pastry en...

Pork Fillet Cooking Time: How Long to Cook It Perfectly
RecipesPork fillet, or tenderloin as it's sometimes called, is a real favourite in our house. It's so versatile, and...

The Ultimate Guide to Cooking Delicious Frankfurters
RecipesLet's face it, we all love a good frankfurter. It's a classic, simple, and always satisfying. But let's be rea...

Wolf Meat Recipes: A Guide to Cooking Wild Game
RecipesLet's be honest, you don't see wolf meat at your local butcher shop every day. It's a bit of a wild card, but ...