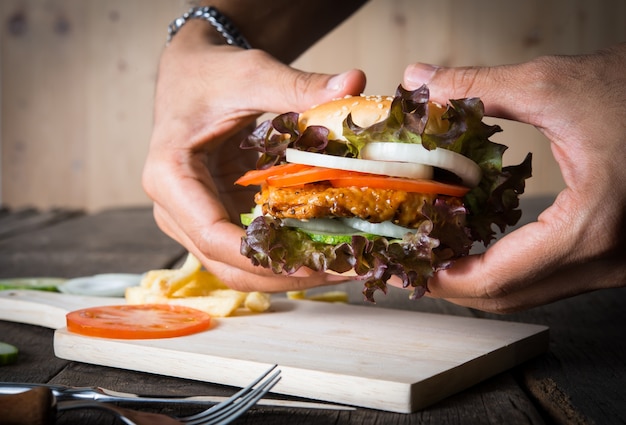
Ah, the burger. A culinary masterpiece, a symbol of summer barbecues, and a source of endless debate amongst food enthusiasts. Whether you prefer it topped with cheese, bacon, or a simple dollop of ketchup, there's no denying the allure of a perfectly cooked burger. And for me, nothing beats the satisfaction of grilling up a juicy, flavorful patty on the stovetop. But as any seasoned burger aficionado knows, achieving that perfect level of doneness can be a bit of a balancing act. Too long, and you risk a dry, overcooked disaster. Too short, and you might be left with a raw, pink center. So, let's delve into the art of stovetop burger cooking, sharing my personal experiences, tips, and tricks to help you achieve that burger nirvana we all crave.
(Part 1) The Stovetop: A Culinary Canvas

I've always been a big fan of stovetop cooking. It's a more intimate way of preparing food, allowing you to control the heat and monitor the progress closely. It's also a great option when you don't have the space for a grill or simply don't fancy the hassle of lighting up the charcoal. But when it comes to burgers, the stovetop presents some unique challenges. The heat can be more intense, and the lack of a grill grate can make it trickier to achieve that signature char.
The Tools of the Trade
Before we dive into the cooking process, let's talk about the essential tools. You'll need:
- A heavy-bottomed skillet or cast iron pan: This will distribute the heat evenly and prevent hot spots that can lead to uneven cooking. Cast iron is particularly excellent for stovetop burgers, as it retains heat well, creating a beautiful sear.
- A meat thermometer: A must-have for ensuring your burgers are cooked to your desired level of doneness. It takes the guesswork out of cooking and helps you achieve consistent results.
- A spatula: For flipping the patties with ease and without breaking them. A thin spatula is ideal, allowing you to slide it easily under the burger without disturbing the sear.
- A burger press: Optional, but a great tool for creating perfectly shaped patties. It ensures even thickness, which contributes to consistent cooking.
- Tongs: These are helpful for handling the hot patties and for transferring them from the skillet to a plate after cooking.
(Part 2) Mastering the Patty

Choosing the Right Meat
The foundation of any good burger is the meat. I personally prefer a blend of 80% lean ground beef and 20% fat. This combination ensures a juicy patty without being overly greasy. The fat content helps render during cooking, adding flavor and moisture to the patty. If you want a leaner burger, you can opt for a blend with a higher lean percentage, but keep in mind that it might be a bit drier. Experiment with different blends and find what you enjoy most.
Beyond beef, there are many delicious alternatives you can explore:
- Ground Turkey: A leaner option, offering a lighter taste and a slightly lower fat content.
- Ground Chicken: Another lean choice, with a mild flavor that pairs well with various toppings.
- Ground Lamb: A richer, more flavorful option with a distinctive taste.
- Veggie Burgers: A delicious option for vegetarians and vegans, offering a variety of flavors and textures. Popular options include black bean, lentil, and portobello mushroom burgers.
Forming the Perfect Patty
Once you have your ground beef, it's time to form the patties. Gently shape the meat into even-sized patties, about 1 inch thick. Don't overwork the meat, as this can make the patties tough. A good technique is to use your hands to lightly press the meat together, creating a smooth, even surface. You can use a burger press for a perfectly uniform shape, but I find that hand-formed patties have a more rustic, homemade feel.
Here's a tip: When forming the patties, make a slight indentation in the center. This helps prevent the patties from puffing up too much during cooking, ensuring a more even cooking surface.
Seasoning Your Patty
Now for the fun part: seasoning. I prefer to keep things simple with salt and pepper, but feel free to get creative. A pinch of garlic powder, onion powder, or paprika can add extra flavor. Remember, less is more. You don't want to overwhelm the natural flavor of the beef.
Here are some additional seasoning ideas to experiment with:
- Smoked Paprika: Adds a smoky depth of flavor to the patty.
- Dried Herbs: A blend of thyme, rosemary, and oregano adds a savory complexity.
- Worcestershire Sauce: Adds a savory umami depth and a hint of sweetness.
- Cayenne Pepper: Provides a subtle kick of heat.
(Part 3) The Stovetop Showdown

With your patties ready, it's time to heat up the skillet. I prefer to use medium-high heat for a good sear, but you can adjust the temperature based on your preference and the thickness of your patties. Once the skillet is hot, add a drizzle of oil. This will prevent the patties from sticking and create a crispy crust.
To check if your skillet is hot enough, place a drop of water on the surface. If it sizzles and evaporates immediately, your skillet is ready for the patties.
The Art of Searing
Carefully place your patties in the hot skillet. Don't overcrowd the pan; cook them in batches if necessary. Resist the urge to poke or prod at them, as this can release the juices. Let the patties cook undisturbed for about 3-4 minutes per side, until they develop a nice sear and the edges start to brown. The sear adds a delicious crust and helps lock in the juices.
Flipping the Patty: A Delicate Dance
Once the first side is seared, it's time to flip. This is a critical moment. Use a spatula to carefully lift the patty and check for doneness. If the bottom is nicely browned and the edges are starting to crisp, it's ready to be flipped. Flip the patty over and cook for another 3-4 minutes, or until it reaches your desired level of doneness.
To prevent sticking, gently loosen the burger from the pan with your spatula before flipping. If it seems stuck, resist the urge to force it, as this can break the patty. Simply add a bit more oil to the pan and let it loosen up for a few seconds before flipping.
(Part 4) Reaching the Perfect Doneness
Now, let's talk about doneness. I know, it can be a bit intimidating, but trust me, it's not as complicated as it seems. Here's a general guide to achieving different levels of doneness:
Doneness Chart
| Level of Doneness | internal temperature | Visual Cue | Description |
|---|---|---|---|
| Rare | 125-130°F (52-54°C) | Center is red, with a bit of pink around the edges | The center will be very soft and cool to the touch. |
| Medium-Rare | 130-135°F (54-57°C) | Center is mostly red, with a touch of pink around the edges | The center will be slightly firmer than rare, with a warmer temperature. |
| Medium | 135-140°F (57-60°C) | Center is pink with a bit of brown around the edges | The center will be firm and warm to the touch. |
| Medium-Well | 140-150°F (60-65°C) | Center is mostly brown, with a slight hint of pink | The center will be mostly firm, with very little pink. |
| Well-Done | 150-160°F (65-71°C) | Center is entirely brown | The entire patty will be firm and fully cooked. |
To ensure accuracy, use a meat thermometer to check the internal temperature of the patty. Insert the thermometer into the thickest part of the patty and avoid touching the bone or pan. Once the patty reaches your desired temperature, remove it from the skillet and let it rest for a few minutes before serving. This will allow the juices to redistribute, resulting in a more tender and flavorful burger.
(Part 5) Elevate Your Burger Experience
So, you've got your perfectly cooked patty, but what about the rest of the experience? Let's take it to the next level with some exciting additions.
Toppings: A Symphony of Flavors
When it comes to toppings, the possibilities are endless. I'm a big fan of classic combinations like cheddar cheese, lettuce, tomato, onion, and pickles, but don't be afraid to get creative. Try adding some caramelized onions, sautéed mushrooms, bacon, or a dollop of your favorite sauce. For a truly unique touch, try adding a fried egg, a slice of avocado, or even some roasted peppers.
Toppings can be added directly to the patty after it's cooked, or arranged on the bun before adding the patty.
Here are some fun topping ideas to inspire your creativity:
- Sweet and Savory: A slice of grilled pineapple, a dollop of fig jam, and a sprinkle of goat cheese.
- Spicy and Tangy: Sliced jalapenos, a dollop of spicy mayo, and a sprinkle of fresh cilantro.
- Hearty and Savory: Sautéed mushrooms and onions, a slice of melted blue cheese, and a drizzle of balsamic glaze.
The Perfect Bun
No burger is complete without a good bun. Choose a bun that's soft and fluffy, but sturdy enough to hold up to the juicy patty and toppings. You can toast the bun for added texture and flavor. I like to brush the buns with a little butter and toast them in the skillet for a few minutes until they're golden brown and slightly crispy. Toasting the bun helps prevent it from becoming soggy from the juicy patty and toppings.
For a special touch, try using brioche buns, which are soft, buttery, and slightly sweet. These buns pair beautifully with the savory flavors of the burger.
Sauce It Up: A Burst of Flavor
While ketchup and mustard are classic burger staples, there's a whole world of sauces to explore. Try a creamy blue cheese dressing, a tangy barbecue sauce, or a spicy sriracha mayo. Experiment with different flavors and find your perfect sauce match. You can also create your own sauces with a few simple ingredients, like mayonnaise, Dijon mustard, and herbs.
Here are a few sauce ideas to get you started:
- Garlic Aioli: A creamy, garlicky sauce that adds a punch of flavor.
- Chipotle Mayo: A smoky, spicy sauce that adds a kick to your burger.
- Honey Mustard: A sweet and tangy sauce that complements a variety of burgers.
(Part 6) Beyond the Basics: Exploring Variations
Now that you've mastered the art of the basic stovetop burger, let's explore some exciting variations. From different meats to unique toppings, the possibilities are endless.
Beyond Beef: Embracing Alternative Meats
While ground beef is the traditional choice for burgers, there are plenty of other delicious options available. Try using ground turkey, chicken, or lamb for a leaner, more flavorful burger. You can also explore plant-based options like veggie burgers, black bean burgers, or even lentil burgers.
When using alternative meats, adjust your cooking times accordingly. Turkey and chicken cook faster than beef, so keep a close eye on them to avoid overcooking.
The burger bar Experience at Home
Why not transform your kitchen into a burger bar? Prepare a selection of patties, toppings, sauces, and buns, and let your guests create their own custom burgers. This is a fun and interactive way to enjoy a delicious meal with friends and family. You can even set up a buffet-style station with all the fixings, allowing guests to personalize their burgers to their heart's content.
Burger Inspirations Around the World
Take your burger game global! Explore the culinary world and get inspired by different burger variations from around the globe. From the classic American cheeseburger to the spicy Korean bulgogi burger, there's a world of flavor to discover.
Some ideas for internationally inspired burgers:
- Greek Burger: Ground lamb seasoned with oregano, lemon, and garlic, topped with feta cheese, sliced tomatoes, red onions, and a drizzle of olive oil.
- Indian-Spiced Burger: Ground beef seasoned with garam masala, ginger, and garlic, topped with raita (yogurt sauce), sliced onions, and a sprinkle of cilantro.
- Japanese Burger: Ground pork seasoned with soy sauce, mirin, and ginger, topped with a fried egg, shredded cabbage, and a dollop of kewpie mayonnaise.
(Part 7) Burgers for Every Occasion
Burgers are a versatile dish, suitable for any occasion. From casual weeknight dinners to fancy parties, they always hit the spot.
Weeknight Wonders: Easy and Delicious
On busy weeknights, a simple stovetop burger is a lifesaver. Prepare a batch of patties in advance and keep them in the freezer for quick and easy meals. You can even pair them with a side of salad or roasted vegetables for a complete and satisfying meal.
Weekend Feasts: Impress Your Guests
For a special occasion, elevate your burger game with gourmet toppings, fancy buns, and creative sauces. You can also prepare a variety of side dishes like potato wedges, onion rings, or coleslaw to complement your burgers.
Outdoor Adventures: Burgers on the Go
Burgers are perfect for outdoor adventures. Pack a picnic basket with your favorite burgers, buns, and toppings for a delicious meal in the park or at the beach. You can even use a portable grill for a truly authentic barbecue experience. Burgers are also a great option for camping trips, as they can be cooked over a campfire or on a portable stove.
(Part 8) FAQs: Your Burger Questions Answered
Let's address some common questions about stovetop burger cooking.
Q1: How do I prevent my burgers from sticking to the skillet?
A: Use a heavy-bottomed skillet or cast iron pan, preheat the pan properly, and add a drizzle of oil before cooking the patties. If you're using cast iron, be sure to season it properly to create a non-stick surface.
Q2: How long should I cook my burgers for?
A: The cooking time depends on the thickness of your patties and your desired level of doneness. Generally, cook them for 3-4 minutes per side for medium-rare to medium-well. Use a meat thermometer to check the internal temperature for accuracy. For thicker patties, you may need to cook them for an additional minute or two per side.
Q3: Can I add cheese to my burgers while they're cooking?
A: Yes, you can add cheese to your burgers while they're cooking. Place a slice of cheese on top of the patty during the last minute or two of cooking. The heat from the skillet will melt the cheese and create a delicious gooey topping. You can also melt cheese on a separate pan and then add it to the burger after cooking, if you prefer.
Q4: How do I keep my burgers juicy?
A: Avoid overcooking the patties, as this can dry them out. Use a meat thermometer to ensure they reach your desired level of doneness. Allow the burgers to rest for a few minutes after cooking to allow the juices to redistribute. You can also try adding a tablespoon of water to the skillet after searing the first side of the patties. This helps create steam, which keeps the burgers moist.
Q5: What are some creative toppings for burgers?
A: The possibilities are endless! Get creative with your toppings by adding caramelized onions, sautéed mushrooms, bacon, fried eggs, avocado, roasted peppers, or even a dollop of your favorite sauce.
There you have it, folks! My comprehensive guide to cooking the perfect stovetop burger. Remember, the key is to experiment, have fun, and embrace the journey of culinary discovery. So, fire up your skillet, gather your ingredients, and let's create some burger magic together!
Everyone is watching

How to Cook Frozen Lobster Tails Perfectly: A Step-by-Step Guide
RecipesLobster. Just the word conjures up images of lavish meals, special occasions, and a taste of luxury. But let's...

Pigs in a Blanket Cooking Time: How Long to Bake for Perfect Results
RecipesAh, pigs in a blanket. Just the name conjures up images of those delightful little parcels of crispy pastry en...

Pork Fillet Cooking Time: How Long to Cook It Perfectly
RecipesPork fillet, or tenderloin as it's sometimes called, is a real favourite in our house. It's so versatile, and...

The Ultimate Guide to Cooking Delicious Frankfurters
RecipesLet's face it, we all love a good frankfurter. It's a classic, simple, and always satisfying. But let's be rea...

Wolf Meat Recipes: A Guide to Cooking Wild Game
RecipesLet's be honest, you don't see wolf meat at your local butcher shop every day. It's a bit of a wild card, but ...
