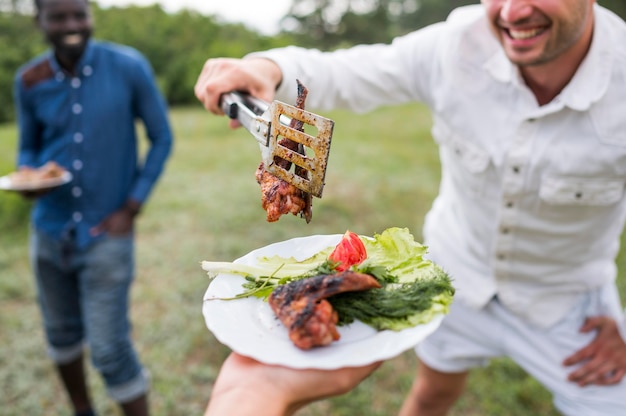
As a seasoned grill enthusiast, I've spent countless hours experimenting to achieve that perfect steak – the kind that boasts a beautiful sear on the outside, juicy and pink on the inside, with a melt-in-your-mouth tenderness. It’s a quest I’m still on, but I’ve learned a thing or two along the way. And I’m here to share my wisdom, and maybe a few grilling war stories, to help you become a steak-slaying champion.
This guide goes beyond just grilling times; it's about understanding the science behind the perfect steak. We'll delve into the different cuts of beef, the role of internal temperature, and how to avoid overcooking that beautiful piece of meat. We’ll also explore the essential tools and techniques that will elevate your grilling game.
(Part 1) Understanding the Anatomy of a Steak

Before we even think about firing up the grill, it’s crucial to understand the different cuts of steak. Each cut has its own unique characteristics, including tenderness, marbling, and flavour. Knowing these differences will help you choose the right cut for your grilling needs.
The Prime Cuts
Let's start with the big guns, the cuts that are generally considered the best for grilling:
- Ribeye: This cut, often referred to as the “King of Steaks”, boasts rich marbling and excellent flavour. It's perfect for those who want a juicy and flavorful steak. Just be mindful of the fat content, which can lead to some flare-ups on the grill.
- new york strip: A leaner cut than the ribeye, but still full of flavour, the New York Strip has a good balance of tenderness and texture. It's a great choice for those who prefer a less fatty steak.
- filet mignon: This tender and delicate cut is renowned for its buttery flavour and melt-in-your-mouth texture. It's best cooked to rare or medium-rare, as overcooking can make it tough and dry.
Beyond the Prime
While the prime cuts are certainly delicious, other cuts offer fantastic grilling experiences, especially if you're on a budget:
- Sirloin: A more affordable alternative to the ribeye, sirloin offers good flavour and tenderness. It's a great option for grilling thick steaks.
- flank steak: A less tender cut, flank steak is often grilled for its intense flavour. It benefits from being marinated and sliced thin after cooking.
- skirt steak: Similar to flank steak in flavour and texture, skirt steak is a popular choice for fajitas. It can be grilled to medium-rare and thinly sliced against the grain for optimal tenderness.
Remember, choosing the right cut depends on your personal preferences and the occasion. If you're unsure, ask your butcher for recommendations. They're usually happy to point you in the right direction.
(Part 2) Understanding the Science of Grilling: Temperature and Doneness

Now that we've chosen our perfect cut, let's talk about the heart of the grilling process: temperature and doneness. This is where the science meets the art of grilling, and it's the key to achieving that juicy, tender steak you crave.
The Importance of Internal Temperature
The most reliable way to ensure a perfectly cooked steak is to use a meat thermometer. It takes the guesswork out of grilling, allowing you to cook to your desired doneness with precision. Here’s a quick guide to internal temperatures for different levels of doneness:
| Doneness | Internal Temperature (°F) |
|---|---|
| Rare | 125-130 |
| Medium-Rare | 130-135 |
| Medium | 140-145 |
| Medium-Well | 150-155 |
| Well-Done | 160 |
Remember, these are just guidelines, and personal preference plays a big role in how you like your steak.
The Grill: Hot and Ready
To achieve that perfect sear, your grill needs to be hot, ideally around 450-500°F. If you're using a gas grill, preheat the burners on high for about 10-15 minutes. For charcoal grills, let the coals burn until they are covered in white ash.
The grill temperature will affect how quickly the steak cooks. A hotter grill will create a more intense sear and faster cooking time, but also requires more attention to avoid overcooking.
(Part 3) The Art of the Sear: Mastering the First Impression

The sear is the first impression of your steak, and it's crucial for both flavour and aesthetics. A good sear creates a crispy crust that locks in the juices and enhances the flavour of the meat.
Seasoning Before Grilling
Don’t underestimate the power of seasoning! A simple salt and pepper blend is often all you need, but feel free to get creative with your spices. My personal favourite is a blend of garlic powder, onion powder, smoked paprika, and a touch of cayenne pepper.
Season your steak generously on all sides, making sure to rub the spices into the meat. This helps create a flavourful crust during the searing process.
The Sear: Hot and Fast
Place your seasoned steak on the hot grill, and let it sizzle! Don't move it around too much - let it sit for about 2-3 minutes per side to develop a beautiful crust. The ideal sear should be a deep brown, almost black.
If you’re using a gas grill, be mindful of flare-ups, especially if you're grilling a fatty cut like ribeye. You might need to move the steak to a cooler part of the grill if the flames get too intense.
(Part 4) The Flip: Turning the Tide
After the initial sear, it’s time to flip your steak. This is where things get interesting, as you need to balance the desire for a juicy interior with the need to create a perfect crust on both sides.
The Rule of 90 Degrees
Some grilling gurus swear by the “90-degree rule”. After searing one side, rotate the steak 90 degrees before flipping it. This creates those beautiful grill marks that we all love. It's a nice touch, but ultimately, it's more about personal preference.
Don't Overcook It!
After flipping, continue cooking your steak for another 2-3 minutes per side, or until it reaches your desired internal temperature. The key here is to avoid overcooking. Once the steak reaches your target temperature, it’s time to take it off the grill and rest.
(Part 5) The Rest: Letting the Juices Settle In
This is a crucial step that many people overlook. Resting the steak allows the juices to redistribute throughout the meat, resulting in a more tender and juicy steak.
Ten Minutes of Peace
Transfer your cooked steak to a cutting board and cover it loosely with foil. Let it rest for at least 10 minutes before slicing and serving.
Resist the temptation to cut into the steak right away! The juices will run out, leaving you with a dry and unappetizing steak.
(Part 6) Tools of the Trade: Essential Grilling Gear
A well-equipped griller is a happy griller. Here are a few tools that will help you achieve steak grilling success:
- Meat Thermometer: As mentioned before, this is a must-have for grilling steaks to your desired doneness. A digital thermometer is highly recommended for its quick and accurate readings.
- Grill Brush: Keeping your grill clean is essential for both hygiene and even grilling. Choose a grill brush with stiff bristles to remove stubborn food residue.
- Tongs: These are essential for flipping and moving steaks around the grill safely. Look for tongs with a locking mechanism for secure grip.
- Grill Gloves: These are handy for protecting your hands from the heat of the grill. Opt for heat-resistant gloves that extend to your forearms for optimal protection.
- Cutting Board: A sturdy cutting board is a must-have for slicing your cooked steak. Choose a cutting board that's large enough to accommodate your steak and has a non-slip surface.
There are also a few optional but helpful tools, such as a grill cover to protect your grill from the elements and a grill light for grilling in the evening.
(Part 7) Troubleshooting: When Things Go Wrong
Even the most seasoned griller can have a mishap or two. Here are some common problems and how to solve them:
Overcooked Steak
This is a common problem, especially for those new to grilling. The best way to avoid overcooking is to use a meat thermometer and cook your steak to the desired internal temperature. If you do overcook your steak, there's not much you can do to fix it, but you can try to salvage it by slicing it thinly and using it in a dish like tacos or stir-fry.
Unevenly Cooked Steak
This is often caused by uneven heat distribution on the grill. If you notice your steak is cooking unevenly, rotate it 90 degrees halfway through grilling. You can also try to create a more consistent heat source by adjusting the burners on your gas grill or using more coals on your charcoal grill. For charcoal grills, ensure the coals are evenly distributed and burning consistently.
Sticking Steak
This can be a frustrating problem, especially if you're using a cast-iron grill. To prevent sticking, make sure your grill is clean and oiled. If you do find your steak is sticking, try to loosen it gently with a spatula. If it's stuck firmly, try to pry it loose with a fork or knife, but be careful not to tear the meat. You can also use a grill mat to prevent sticking.
(Part 8) Beyond the Basics: Exploring Flavour Combinations
Once you've mastered the basics of grilling, it's time to get creative! There are countless flavour combinations that you can explore. Here are a few ideas to get you started:
Marinade Magic
A marinade can add a burst of flavour to your steak and tenderise the meat. Popular marinades include soy sauce, honey, garlic, and ginger. You can experiment with different combinations and even add a touch of citrus for extra zing. Just make sure to marinate the steak for at least 30 minutes before grilling, allowing the flavours to penetrate the meat.
Herb Infusions
Fresh herbs like rosemary, thyme, and oregano can add a wonderful aroma and flavour to your steak. You can rub them directly on the steak or create a herb butter to spread on top. For a more intense flavour, try using a combination of herbs, such as a blend of rosemary, garlic, and thyme.
Smoky Sensations
If you're using a charcoal grill, try adding some wood chips to the coals for a smoky flavour. Popular choices include hickory, mesquite, and applewood. Soaking the wood chips in water for 30 minutes before adding them to the coals will help create a more consistent smoke. Experiment with different wood chips to discover your favorite smoky flavour profile.
(Part 9) FAQs: Your Grilling Questions Answered
What's the best way to prevent flare-ups on the grill?
Flare-ups are caused by fat dripping onto the hot coals or burners. To prevent flare-ups, trim any excess fat from your steak before grilling. You can also use a grill pan or a grilling basket to catch the dripping fat. If you're using a gas grill, try to avoid using the highest setting as it can create intense flames.
Can I use a meat thermometer to check the temperature of a burger?
Absolutely! Meat thermometers are a valuable tool for grilling burgers, as well as any other type of meat. They help ensure that your burger is cooked to the desired temperature and safe to eat. Place the thermometer in the thickest part of the burger, avoiding the bone or fat, for an accurate reading.
What’s the difference between a gas grill and a charcoal grill?
Gas grills are more convenient and offer more precise temperature control. Charcoal grills, on the other hand, provide a smoky flavour that many people enjoy. Ultimately, the best type of grill for you depends on your personal preferences and your grilling needs. If you're looking for convenience and precise temperature control, a gas grill is a good option. If you prefer the smoky flavour of charcoal and don't mind a little more work, then a charcoal grill is the way to go.
What's the best way to clean a grill?
To clean a gas grill, brush the grates with a grill brush after each use. For a charcoal grill, remove the ashes after each use. Once a month, clean the grill thoroughly by scrubbing the grates with soapy water and rinsing them with a hose. For a gas grill, you can also use a grill cleaning spray.
What are some tips for grilling a perfect steak?
Here are some additional tips for grilling a perfect steak:
- Start with a high-quality cut of beef. Look for cuts with good marbling, which will add flavour and juiciness.
- Season generously with salt and pepper. Salt helps draw out moisture, creating a flavorful crust. Pepper adds a nice bite.
- Preheat your grill to high heat. This is essential for creating a beautiful sear.
- Sear the steak for 2-3 minutes per side. This will create a crispy crust and lock in the juices.
- Cook to your desired internal temperature. Use a meat thermometer to ensure accuracy.
- Let the steak rest for 10 minutes before slicing and serving. This allows the juices to redistribute throughout the meat, resulting in a more tender and juicy steak.
Grilling the perfect steak is a journey, not a destination. Embrace the process, experiment with different techniques, and most importantly, have fun!
Everyone is watching

How to Cook Frozen Lobster Tails Perfectly: A Step-by-Step Guide
RecipesLobster. Just the word conjures up images of lavish meals, special occasions, and a taste of luxury. But let's...

Pigs in a Blanket Cooking Time: How Long to Bake for Perfect Results
RecipesAh, pigs in a blanket. Just the name conjures up images of those delightful little parcels of crispy pastry en...

Pork Fillet Cooking Time: How Long to Cook It Perfectly
RecipesPork fillet, or tenderloin as it's sometimes called, is a real favourite in our house. It's so versatile, and...

The Ultimate Guide to Cooking Delicious Frankfurters
RecipesLet's face it, we all love a good frankfurter. It's a classic, simple, and always satisfying. But let's be rea...

Wolf Meat Recipes: A Guide to Cooking Wild Game
RecipesLet's be honest, you don't see wolf meat at your local butcher shop every day. It's a bit of a wild card, but ...
