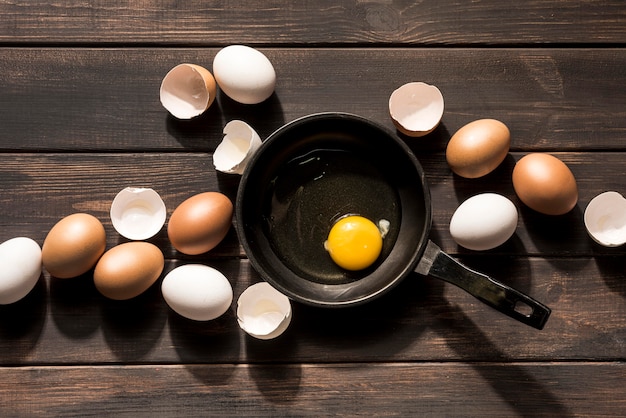
Ah, the humble hard-boiled egg. It seems like such a simple thing, right? But believe me, there’s more to it than meets the eye. You want that creamy, perfectly set yolk, not a rubbery, overcooked mess. And trust me, I’ve been there! I’ve had my fair share of egg-boiling disasters, from those green-ringed yolks to those stubbornly stuck shells. But through trial and error (and a lot of egg-eating), I’ve finally cracked the code.
So, whether you're a seasoned egg connoisseur or a kitchen newbie, I’m here to guide you on this egg-cellent adventure. We'll dive into the science behind the boil, master the art of timing, explore different cooking methods, and even unveil some secret peeling techniques. Get ready to elevate your egg game, my friend!
(Part 1) The Science Behind the Boil: Understanding Eggs
The Inside Scoop: egg whites and Yolks
First things first, let's get familiar with the egg's anatomy. Those two distinct parts, the white and the yolk, are made up of different proteins that react differently to heat. The egg white is mostly protein called albumin, which firms up as it cooks. Think of it like a gel that sets. The yolk, on the other hand, is richer in fat and a protein called livetin, giving it that creamy, liquidy texture. As it cooks, the yolk gradually solidifies.
The secret to a perfect hard-boiled egg is all about understanding how these proteins cook at different rates. You want the white firm enough to hold its shape but not tough and rubbery. And you want the yolk to be set but still creamy, a beautiful balance.
The Temperature Factor: Boiling vs. Simmering
Now, the temperature at which you cook your eggs plays a significant role in the final texture. A high temperature, like a full rolling boil, will cook your eggs quickly. But simmering at a lower temperature will give you a gentler cook. This is crucial for those who prefer a softer, creamier yolk, as it reduces the chances of overcooking.
Think of it this way: a high temperature is like a hot oven that cooks everything quickly, while a lower temperature is like a slow cooker, allowing flavors and textures to develop gently.
(Part 2) Mastering the Timing Game: A Guide for Every Egg Lover
The Perfect Hard-Boiled Egg: Timing Guide
Alright, now for the moment of truth – the timing guide! This is where your personal preference takes center stage. Do you like your yolk runny, slightly runny, or firmly set?
Here’s a breakdown of cooking times for different levels of doneness, keeping in mind that these are just starting points, and you might need to adjust based on your egg size, altitude, and stove type:
| Doneness | Cooking Time |
|---|---|
| Soft Boiled (runny yolk) | 3-4 minutes |
| Medium Boiled (Slightly Runny Yolk) | 5-6 minutes |
| Hard Boiled (Set Yolk) | 8-10 minutes |
The best way to check for doneness is to crack open an egg. You’ll know you’ve hit the perfect level when the yolk is cooked to your liking and the white is firm and set.
Tips for Perfect Timing
Here are some tips to help you nail the timing and avoid those dreaded overcooked eggs:
- Start with cold eggs: This ensures even cooking, preventing the whites from setting too quickly.
- Add a tablespoon of salt to the water: This helps to keep the eggs from cracking, as the salt adds stability.
- Use a timer: You don't want to forget about your eggs and end up with a rubbery mess.
- Start the timer when the water starts to boil: This is the most accurate way to ensure proper cooking.
(Part 3) Beyond Boiling: Other Methods for hard-boiled eggs
While boiling is the classic method, it’s not the only way to cook a hard-boiled egg. Let’s explore some other options, each with its unique benefits and drawbacks.
Pressure Cooking: For Super Fast Results
If you're short on time, pressure cooking is your new best friend. It delivers perfectly cooked eggs in a fraction of the time. Simply place the eggs in the pressure cooker basket, add water to the base, and cook for 2-3 minutes. Then, do a natural pressure release for about 10 minutes.
The pressure cooker method is not only quick but also minimizes the green ring around the yolk. Why? The green ring is caused by a reaction between iron in the egg white and hydrogen sulfide in the yolk. Pressure cooking reduces the amount of hydrogen sulfide, resulting in a more visually appealing egg.
instant pot: Effortless Convenience
The Instant Pot is another time-saving hero. It works similarly to pressure cooking but offers even more convenience. Place the eggs in the Instant Pot, add a cup of water, and cook for 5 minutes. Then, do a quick release and let the eggs cool in the pot for about 10 minutes.
The Instant Pot method is a fantastic option for those who prefer a hands-off approach. It also helps prevent overcooked yolks thanks to the gentle steam cooking process.
Slow Cooker: Gentle and Patient
For a more gentle approach, the slow cooker is ideal. It's perfect for those who crave a softer, more velvety yolk. Simply place the eggs in the slow cooker, add enough water to cover them, and cook on low for 2-3 hours.
The slow cooker method is ideal for those who don't want to worry about timing. It's also gentler on the eggs, reducing the risk of cracking.
(Part 4) Cooling Down: How to Stop the Cooking Process
Once your eggs are cooked, it’s crucial to stop the cooking process. The goal is to cool them down quickly to prevent the yolks from continuing to cook and turning tough.
ice bath: The Quickest Way to Cool Eggs
The most effective method is to plunge the eggs into an ice bath. This rapid cooling prevents overcooking. Add a few ice cubes to a bowl of cold water and carefully transfer the eggs from the boiling water to the ice bath. Let them sit for about 10 minutes, or until they're completely cool.
Running Cold Water: A Gentle Alternative
If you don't have ice on hand, you can use cold running water to cool the eggs. Place the eggs in a colander and run cold water over them for about 5-10 minutes.
Important Tip:
Always handle the eggs gently after they've been cooked. The shells can be more fragile, and you don't want them to crack.
(Part 5) Peeling Time: Tips and Tricks for Easy Peeling
Alright, your eggs are cooked to perfection, cooled down, and now comes the exciting (and sometimes frustrating) part: peeling. We’ve all been there, struggling to get those stubborn shells off, ending up with a mangled egg. But fear not! I’ve got some tricks up my sleeve to make peeling a breeze.
The Secret to Easy Peeling: Adding Salt
Adding a sprinkle of salt to the boiling water can make a world of difference. It creates a barrier between the egg white and the shell, making peeling much easier.
The Age-Old Trick: Adding Baking Soda
Another tried-and-true trick is to add a tablespoon of baking soda to the boiling water. Baking soda helps loosen the shell from the egg white, making it easier to remove.
The Gentle Approach: Tapping the Eggs
Before peeling, gently tap the eggs on a countertop to crack the shell slightly. This creates tiny air pockets that make the shell easier to remove.
The Roll and Peel Method
Here's a technique that works wonders: Roll the egg firmly on a flat surface to crack the shell. Then, start peeling from the bottom, gently working your way up.
The Right Tools: Use a Peeler or Spoon
Using a peeler or a spoon can be helpful for removing stubborn shell pieces.
And remember, patience is key. Take your time and you'll be rewarded with a beautifully peeled egg.
(Part 6) Beyond the Basic: Creative Ways to Enjoy Hard-Boiled Eggs
Now that you’ve mastered the art of the perfect hard-boiled egg, let's get creative! There’s a world of delicious possibilities beyond the classic egg salad.
The Classic Egg Salad: Elevated and Delicious
Let's start with the classic: Egg Salad. But this time, let's elevate it. Think creamy avocado, a hint of Dijon mustard, a sprinkle of fresh herbs, and a touch of lemon juice. Serve it on toasted bread or crackers for a satisfying lunch or snack.
deviled eggs: A Party Favorite
Deviled eggs are always a hit at any gathering. The secret to amazing deviled eggs is to use fresh, high-quality ingredients. Add a touch of paprika for a pop of color and garnish with chopped chives for extra flavor.
Eggy Breakfast Bowls: A Complete and Satisfying Meal
Hard-boiled eggs make a perfect addition to breakfast bowls. Combine them with leafy greens, roasted vegetables, and a drizzle of tahini or a sprinkle of toasted nuts. It's a quick and easy meal that's packed with protein and flavor.
Hard-Boiled Egg Sandwiches: A Quick and Easy Lunch
For a quick and easy lunch, try a hard-boiled egg sandwich. Layer sliced eggs with crunchy greens, a dollop of mustard, and a sprinkle of salt and pepper on toasted bread. You can even add a bit of cheese for extra flavor.
Egg-cellent Salad Toppings: A Burst of Flavor and Texture
Hard-boiled eggs add a satisfying crunch and a boost of protein to salads. Simply slice or dice the eggs and add them to your favorite salad. They pair beautifully with leafy greens, avocado, and grilled chicken or fish.
Snack Time: Perfect for On-the-Go
Hard-boiled eggs make a perfect on-the-go snack. They're portable, protein-packed, and satisfying.
(Part 7) Troubleshooting: Common Problems and Solutions
Even the most seasoned egg chef can face some challenges. Here are some common problems you might encounter and how to overcome them:
Problem: The Yolk is Green
This is a common issue that can happen when eggs are boiled at too high a temperature. The green ring around the yolk is formed when iron from the egg white reacts with hydrogen sulfide in the yolk.
Solution: Use a gentler cooking method, such as simmering or pressure cooking.
Problem: The Eggs Crack
This can happen if you add the eggs to boiling water or if the eggs are too old.
Solution: Add the eggs to cold water and bring them to a boil gradually. You can also add a tablespoon of salt to the boiling water to help prevent cracking.
Problem: The Eggs are Rubber
This means the eggs have been overcooked.
Solution: Cook the eggs for a shorter period of time.
Problem: The Eggs are Hard to Peel
This can happen if the eggs are old or if they were not cooked properly.
Solution: Try using one of the peeling tips mentioned earlier, such as adding salt or baking soda to the boiling water or gently tapping the eggs before peeling.
(Part 8) FAQs: Your Hard-Boiled Egg Questions Answered
Let's address some frequently asked questions:
1. Can I reuse the same water for multiple batches of eggs?
It's not recommended to reuse the same water for multiple batches of eggs. The water becomes contaminated with egg whites and can affect the quality of the eggs.
2. How long can I store hard-boiled eggs in the refrigerator?
Hard-boiled eggs can be stored in the refrigerator for up to one week.
3. What happens if I don't cool the eggs after cooking?
If you don't cool the eggs quickly after cooking, the yolks will continue to cook and become rubbery.
4. Can I cook hard-boiled eggs in the microwave?
It's not recommended to cook hard-boiled eggs in the microwave. The eggs can explode or become unevenly cooked.
5. What are some good ways to use leftover hard-boiled eggs?
Leftover hard-boiled eggs can be used in a variety of dishes, such as salads, sandwiches, egg salad, deviled eggs, and even breakfast bowls.
(Part 9) Final Thoughts: Embrace the Egg-cellent Journey
There you have it, my friends! A comprehensive guide to the perfect hard-boiled egg. Now, go forth and conquer the kitchen! Experiment with different methods, find what works best for your taste, and embrace the joy of a perfectly cooked egg.
And remember, the journey to the perfect hard-boiled egg is a lifelong adventure. There's always something new to learn, a new technique to try, and a new flavor combination to discover. So, keep on cracking, my egg-cellent friends.
Everyone is watching

How to Cook Frozen Lobster Tails Perfectly: A Step-by-Step Guide
RecipesLobster. Just the word conjures up images of lavish meals, special occasions, and a taste of luxury. But let's...

Pigs in a Blanket Cooking Time: How Long to Bake for Perfect Results
RecipesAh, pigs in a blanket. Just the name conjures up images of those delightful little parcels of crispy pastry en...

Pork Fillet Cooking Time: How Long to Cook It Perfectly
RecipesPork fillet, or tenderloin as it's sometimes called, is a real favourite in our house. It's so versatile, and...

The Ultimate Guide to Cooking Delicious Frankfurters
RecipesLet's face it, we all love a good frankfurter. It's a classic, simple, and always satisfying. But let's be rea...

Wolf Meat Recipes: A Guide to Cooking Wild Game
RecipesLet's be honest, you don't see wolf meat at your local butcher shop every day. It's a bit of a wild card, but ...