Ah, ham. The star of countless holiday feasts, a picnic staple, and a comforting dinner any day of the week. But the one question that always seems to linger is: how long do I cook this glorious meat? Fear not, fellow cooks! I'm here to guide you through the world of ham cooking with a simple, comprehensive guide that'll have you serving up a perfectly cooked, juicy, and flavourful ham in no time. We'll cover everything from choosing the right ham to serving it up with a flourish, so let's dive in!
(Part 1) Choosing Your Ham: The First Step to Deliciousness
The journey to a delicious ham begins with making the right choice. The ham world, my friends, is surprisingly diverse. There are a few different types to choose from, each with its own personality and best uses.
The Ham Family: A Quick Look at the Players
- Cured and cooked hams: These are the "ready-to-eat" crowd. They've been cured and cooked to perfection, so all you need to do is warm them up. They're ideal for quick meals or when you crave that "set it and forget it" approach. Think of them as the "easy-going" family member.
- uncooked hams: These are the "hands-on" hams. They need to be fully cooked, whether they're bone-in or boneless. They're usually cured but not completely cooked, offering a more intense flavour. These hams are the "adventurous" sibling, needing a little more love and attention.
- spiral sliced hams: Imagine a pre-sliced ham, ready for serving – that's the beauty of a spiral sliced ham. They're often pre-cooked and just need a quick warming up. They are the "convenience-driven" member, perfect for a stress-free meal.
For this guide, we're focusing on the most common type: pre-cooked hams. These are readily available and require minimal effort, making them perfect for busy cooks like ourselves.
(Part 2) Getting Started: Preparing Your Ham for the Big Show
Before the oven even gets a whiff of your ham, let's get it prepped. This step is like prepping the stage for a fantastic performance.
1. Removing the Packaging: Giving Your Ham Some Breathing Room
Begin by carefully removing the ham from its packaging. If it's wrapped in plastic, remove it and rinse it gently under cold water. This simple step will remove any leftover residue and ensure a clean presentation.
2. The Scoring Ritual: A Touch of Elegance
Now, for a little bit of artistry. Scoring your ham, while not strictly necessary, adds a touch of elegance and helps the glaze penetrate the ham evenly. Use a sharp knife to make diagonal cuts across the ham, about ?? inch deep. Think of it as adding a touch of flair to your culinary masterpiece.
3. Setting the Stage: Preheating Your Oven for Success
While your ham is getting acquainted with the kitchen, preheat your oven to 325 degrees F (165 degrees C). This will create a consistent and stable cooking temperature for your ham, ensuring it cooks evenly and perfectly.
(Part 3) The Art of Glazing: Adding that Extra Sparkle to Your Ham
Okay, now we get to the fun part! Glazing your ham isn't just about aesthetics; it truly elevates the flavour. It's the finishing touch, the little something extra that takes your ham from good to great. There are countless glaze options, but here are a few of my personal favourites, tried and tested over the years.
Classic Glazes: Time-Tested Favourites
- honey mustard glaze: This is a classic for a reason! It's a harmonious blend of sweet and tangy, perfect for complementing the ham's flavour. Simply combine honey, Dijon mustard, and a touch of brown sugar. The result is a glaze that's both delicious and irresistible.
- maple glaze: Rich and luxurious, a maple glaze adds a touch of sophistication to your ham. Combine maple syrup, brown sugar, and a splash of orange juice. This glaze is the epitome of comfort food with a touch of elegance.
- pineapple glaze: This glaze brings a tropical twist to your ham, a delightful surprise for your taste buds. Combine pineapple juice, brown sugar, and a pinch of ginger. This glaze is a perfect balance of sweet and slightly tart, with a hint of exotic flavour.
Beyond the Basics: Unleashing Your Creativity
Don't be afraid to experiment with your glazes! Let your creativity run wild. Add different spices, fruits, or even a dash of vinegar. One of my personal favourites is adding a touch of smoked paprika for a subtle, smoky flavour that adds depth and complexity to the glaze. Remember, the beauty of cooking is in the exploration and the joy of creating your own unique flavour combinations.
(Part 4) cooking time: Unveiling the Secrets to Perfectly Cooked Ham
Now that your ham is prepped and ready, let's talk about cooking time. This is where things get a little more specific, as the cooking time depends on a few key factors.
Size Matters: Finding the Right Cooking Time
The most crucial factor in determining cooking time is the size of your ham. A smaller ham will cook faster than a larger one. Here's a general rule of thumb to get you started:
| Ham Weight | Cooking Time |
|---|---|
| 5-8 lbs | 15-20 minutes per pound |
| 9-12 lbs | 12-15 minutes per pound |
| 13-16 lbs | 10-12 minutes per pound |
Remember, these are just guidelines. Always refer to the packaging instructions for the specific ham you've chosen, as they may have specific cooking recommendations.
The internal temperature: Ensuring Safety and Deliciousness
The most reliable way to know if your ham is cooked through is to use a meat thermometer. Aim for an internal temperature of 140 degrees F (60 degrees C). This is especially important for uncooked hams, as it ensures the ham is safe to eat. A meat thermometer is your trusted friend in the kitchen, providing peace of mind and ensuring that your ham is cooked to perfection.
(Part 5) Cooking the Ham: Oven or Crockpot, You Decide
Now, for the grand finale – the cooking methods. There are two main ways to cook a ham: in the oven or in a slow cooker. Each method has its own advantages and quirks, allowing you to choose the best option for your needs and preferences.
Oven Cooking: The Classic Method for a Stellar Ham
Oven cooking is the traditional way to cook a ham, and for good reason. It's a reliable and consistent method that often results in a beautifully cooked ham. Here's a step-by-step guide to oven-cooked ham perfection:
- Place the Ham in a roasting pan: Position your ham in a roasting pan and add a cup of water to the bottom. This creates a moist environment, preventing the ham from drying out. Think of it as a little spa treatment for your ham.
- Cover with Foil: Cover the ham tightly with aluminum foil, ensuring the edges are well-sealed. This helps the ham cook evenly and retain moisture. Imagine it like a warm hug, protecting the ham from harsh temperatures and preserving its tenderness.
- Cook Until Almost Done: Bake the ham for about half the total cooking time, based on the size of your ham. After about half the cooking time, remove the foil and baste the ham with your glaze. Repeat this step a couple of times during cooking to ensure the ham is evenly glazed. This step adds a beautiful golden colour and intensifies the flavours of your glaze.
- Finish the Glaze: In the final 30 minutes of cooking, remove the foil again. This allows the glaze to caramelize and become a beautiful golden brown, creating a visually appealing and flavourful finish.
Slow Cooker Magic: Hands-Off Cooking for Busy Cooks
If you're seeking a more hands-off approach, the slow cooker is your perfect partner in crime. It's ideal for busy days when you want to set it and forget it. Here's how to cook a ham in your slow cooker:
- Place the Ham in the Slow Cooker: Position the ham in your slow cooker and add a cup of water or broth to the bottom. This will provide moisture and prevent the ham from becoming dry. Think of it as a gentle steam bath for your ham.
- Cook on Low: Cook the ham on low for 6-8 hours, or on high for 3-4 hours. Add your glaze during the last hour of cooking. The slow cooker will gently infuse the ham with flavour, resulting in a tender and succulent ham that's ready to impress.
(Part 6) Resting is Crucial: Giving Your Ham a Moment to Relax
After your ham is cooked to perfection, resist the temptation to carve it immediately. It's crucial to let it rest for at least 15 minutes before carving. This allows the juices to redistribute throughout the ham, resulting in a more succulent and tender final product. Think of it as a moment of calm before the culinary storm.
(Part 7) Carving the Ham: A Master Class in Ham Presentation
Now comes the exciting part – carving the ham. This may seem daunting, but with a little practice, you'll be a carving pro in no time.
Key Tips for Carving Success
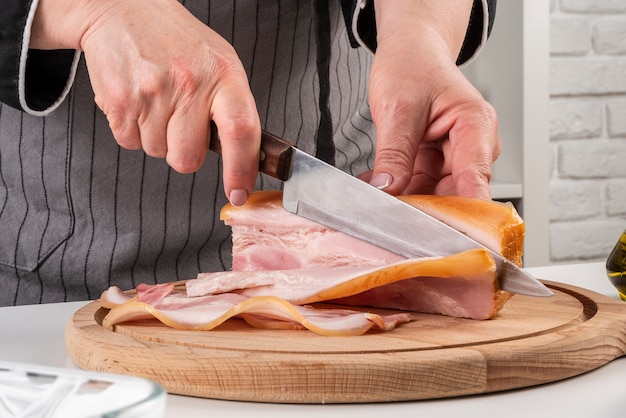
- Use a Sharp Knife: A sharp knife makes the carving process a breeze and prevents tearing the ham. A sharp knife is your trusted companion in this delicate operation, ensuring clean, even slices that showcase the beauty of your ham.
- Start at the Bone: If you're working with a bone-in ham, begin by carving slices along the bone. This is the starting point for your carving journey, creating a natural separation for easy slicing.
- Work in Thin Slices: Aim for thin, even slices, making it easier for guests to enjoy the ham. Think of it as creating a delicate dance of flavour with each slice.
- Be Patient: Carving a ham takes time, so be patient and don't rush the process. Patience is key to creating beautiful and evenly sized slices.
Don't hesitate to ask for help if you need it. There's no shame in getting a little assistance! After all, we're all about collaboration and sharing the joy of cooking.
(Part 8) Serving Up Deliciousness: The Final Touch
You've cooked a beautiful ham, carved it with care, and now it’s time to showcase your culinary masterpiece. Here are a few tips to make your ham presentation a showstopper.
Presentation Matters: Making Your Ham Shine
- Choose a Beautiful Platter: A nice serving platter elevates the presentation of your ham, making it a visual treat. It's like a stage for your culinary star.
- Garnish with Fresh Herbs: A sprig of rosemary or thyme adds a touch of freshness and colour, creating a visually appealing and aromatic touch.
- Add a Side of Fruit: A bowl of fresh fruit, like pineapple or berries, adds a vibrant and refreshing element to the platter, complementing the ham's flavour and creating a harmonious culinary experience.
(Part 9) Leftover Love: Putting Those Scraps to Good Use
Let's be honest, you probably have a little ham leftover. Don't worry, leftovers are a blessing in disguise! Here are a few ideas to make the most of them:
Delicious Leftover Ideas: Transforming Ham into New Delights
- ham and cheese sandwiches: A classic for a reason, a perfect way to enjoy the ham's flavour with a simple, comforting touch.
- Ham and bean soup: Add some chopped ham to your favourite bean soup for a hearty and flavourful meal. This is a great way to add a touch of richness and protein to your soup.
- Ham and potato salad: A light and refreshing salad perfect for a picnic or summer lunch, a delightful combination of creamy potatoes and delicious ham.
- Ham Quiche: Flaky pastry crust filled with ham, cheese, and eggs – a delicious and satisfying breakfast or brunch option, a perfect way to elevate your morning meal.
(Part 10) FAQs: Your Ham Questions Answered
Let’s address some frequently asked questions about cooking ham.
1. How long can I store a cooked ham in the fridge?
A cooked ham can be safely stored in the refrigerator for 3-5 days. Wrap it tightly in plastic wrap or aluminum foil to maintain its freshness. Proper storage ensures the ham stays safe and delicious.
2. Can I freeze a cooked ham?
Yes, you can freeze a cooked ham. It will keep for 2-3 months in the freezer. Make sure to wrap it tightly in freezer-safe wrap or aluminum foil. When you're ready to use it, thaw the ham in the refrigerator overnight. Freezing is a great way to extend the life of your ham and have it ready for future meals.
3. Can I cook a ham from frozen?
It's not recommended to cook a ham from frozen. It will take much longer to cook and may not cook evenly. Always thaw the ham in the refrigerator overnight before cooking. Thawed ham cooks more evenly and ensures a delicious and safe meal.
4. What's the best way to reheat a cooked ham?
To reheat a cooked ham, place it in a preheated oven at 325 degrees F (165 degrees C) for about 15-20 minutes, or until it's heated through. You can also reheat it in a slow cooker on low for 2-3 hours. Reheating allows you to enjoy your cooked ham for days after your initial meal.
5. What kind of ham is best for making ham sandwiches?
For ham sandwiches, you'll want to use a ham that has a good amount of moisture and is not overly salty. A spiral-sliced ham is a good choice, as it's already sliced and easy to use. The right ham makes all the difference in a delicious sandwich.
There you have it, folks! A comprehensive guide to cooking a ham, from choosing the right ham to serving it up with pride. Remember, cooking a ham is all about taking the time to do it right, embracing a little experimentation, and, most importantly, having fun in the kitchen. So next time you're looking for a delicious and crowd-pleasing meal, consider cooking a ham. You won't regret it!
Everyone is watching

How to Cook Frozen Lobster Tails Perfectly: A Step-by-Step Guide
RecipesLobster. Just the word conjures up images of lavish meals, special occasions, and a taste of luxury. But let's...

Pigs in a Blanket Cooking Time: How Long to Bake for Perfect Results
RecipesAh, pigs in a blanket. Just the name conjures up images of those delightful little parcels of crispy pastry en...

Pork Fillet Cooking Time: How Long to Cook It Perfectly
RecipesPork fillet, or tenderloin as it's sometimes called, is a real favourite in our house. It's so versatile, and...

The Ultimate Guide to Cooking Delicious Frankfurters
RecipesLet's face it, we all love a good frankfurter. It's a classic, simple, and always satisfying. But let's be rea...

Wolf Meat Recipes: A Guide to Cooking Wild Game
RecipesLet's be honest, you don't see wolf meat at your local butcher shop every day. It's a bit of a wild card, but ...