A perfectly cooked ham is a culinary triumph. It’s the centerpiece of countless celebrations, from festive gatherings to casual weeknight meals. But achieving that melt-in-your-mouth texture and rich flavor can feel like a culinary gamble if you're not familiar with the ins and outs of ham cooking. I've learned the hard way – dry, rubbery ham? I've been there. But through trial and error, I've finally cracked the code.
In this guide, I'm sharing my hard-earned knowledge to empower you to cook the most delicious ham, every single time. We'll break down the different types of ham, the best cooking methods, and the crucial temperature guidelines that will ensure your ham is always tender, juicy, and flavorful.
So, grab your apron, gather your ingredients, and let's embark on a journey to ham-cooking perfection.
(Part 1) The Different Types of Ham: Understanding Your Options
Before we dive into cooking techniques, it’s important to understand the different types of ham available. Each type has its unique characteristics, flavor profile, and ideal cooking method.
1. fresh ham: The Canvas for Flavor
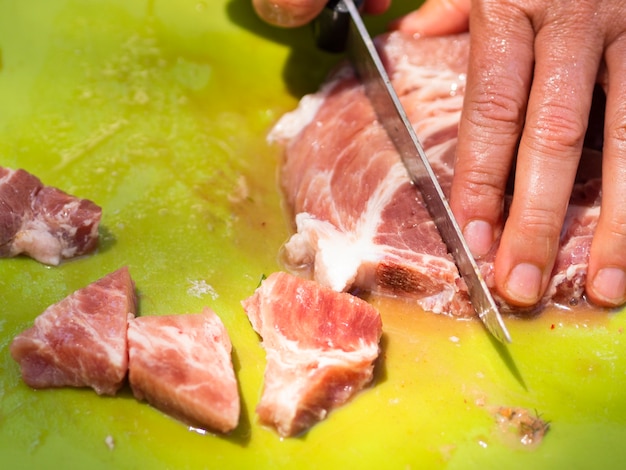
Fresh hams are the uncooked, raw hams you find at the butcher shop or supermarket. They're usually bone-in, offering a more traditional and satisfying experience. Fresh hams are incredibly versatile because you can season them to your liking and cook them using various methods, like roasting, grilling, or braising. They're perfect for creating a truly personalized ham experience.
2. cured ham: A World of Flavors
Cured hams are where things get interesting. They've undergone a process of salting and curing, which preserves the meat and gives it a distinct flavor. Many cured hams are also smoked, adding a rich, smoky aroma and complex flavor.
Cured hams come in several styles, each with its unique qualities:
- Cooked Ham: Ready-to-eat straight from the package, requiring only warming. It's a convenient option for quick meals.
- spiral sliced ham: Pre-sliced and cooked, offering ease of carving and serving. It's perfect for gatherings where presentation is key.
- bone-in ham: A whole cured ham with the bone intact, offering a classic ham experience. It's great for roasting and creating a beautiful centerpiece.
- Ham Steak: Thick slices of cured ham, ideal for grilling or pan-frying. They offer a quick and flavorful meal option.
The type of cured ham you choose influences your cooking method and temperature requirements.
(Part 2) Choosing the Right Ham: Matching Your Needs and Preferences
Now that we've explored the different types, let's talk about choosing the right ham for your culinary goals. It's all about considering your needs and preferences.
1. Size Matters: Serving Size and Crowd Size
Consider the number of people you're serving when choosing a ham. They come in various sizes, from small individual portions to large hams that can feed a crowd. For a small family gathering, a 3-5 pound ham is usually sufficient. For a larger crowd, a 10-15 pound ham might be a better choice.
2. Flavor Profile: Mild, Smoky, or Sweet?
Do you prefer a subtle, salty flavor or something with a bold, smoky character? If you crave a mild, sweet flavor, a honey-glazed ham might be your perfect match. For a more intense flavor, opt for a smoked ham, which boasts a rich, smoky aroma and a robust taste.
3. Cooking Method: Oven, slow cooker, or Grill?
Consider how you plan to cook the ham. For roasting, a bone-in ham is ideal as it maintains its shape better during cooking. If you're looking for a quick and easy option, a spiral-sliced ham, which is already pre-cooked, can be warmed up in the oven or slow cooker. For a smoky BBQ flavor, grilling is a fantastic choice.
(Part 3) The Magic Number: internal temperature for Ham Perfection
This is the critical factor that determines whether your ham turns out juicy, tender, and delicious or dry and rubbery. The USDA recommends an internal temperature of 145°F (63°C) for ham, ensuring the elimination of harmful bacteria.
However, for optimal flavor and texture, I recommend aiming for a slightly higher temperature, around 150°F (66°C). This allows the ham to cook through and develop a beautiful tenderness.
1. Your Essential Tool: The meat thermometer
A meat thermometer is non-negotiable for ham cooking. It provides accurate internal temperature readings, ensuring your ham is cooked to perfection and preventing overcooking.
I recommend using a digital meat thermometer with a probe that can be inserted into the thickest part of the ham. This allows for a precise reading without slicing into the ham.
2. Accurate Readings: Where to Insert the Thermometer
Insert the meat thermometer into the thickest part of the ham, making sure it doesn't touch any bones or fat. This ensures you get an accurate reading of the internal temperature, reflecting the core temperature of the ham.
3. Checking for Doneness: A Visual and Tactile Test
Once the internal temperature reaches 150°F (66°C), your ham is likely cooked. However, it's always wise to check for doneness by inserting a fork into the thickest part. If the juices run clear, your ham is perfectly cooked.
(Part 4) Cooking Methods: From Oven to Slow Cooker, Achieving Flavorful Results
Now that we've covered temperature, let's explore the various methods for cooking your ham. Each method offers a unique flavor profile and texture.
1. Oven-roasted ham: A Classic Approach
Oven-roasting yields a beautifully golden-brown ham with a crispy crust and a deliciously savory flavor.
a) Preheat the Oven: Setting the Stage for Cooking
Preheat your oven to 325°F (160°C). This ensures that the ham cooks evenly and develops a beautiful crust.
b) Prepare the Ham: Scoring for Flavor and Even Cooking
If your ham is bone-in, remove the packaging and place it in a roasting pan. For a spiral-sliced ham, you can leave it in its packaging. Score the fat of the ham with a sharp knife to create diamond shapes. This helps the fat render and adds a delicious flavor.
c) Glaze the Ham: Adding a Layer of Sweetness and Savory
Brush the ham with a glaze of your choice. A simple glaze can be made with honey, brown sugar, and mustard. Get creative and experiment with flavors like pineapple juice, orange marmalade, or even maple syrup.
d) Roast the Ham: cooking time and Temperature Guidelines
Roast the ham for 15-20 minutes per pound. Remember to check the internal temperature regularly using a meat thermometer. Don't forget to rotate the ham halfway through cooking for even browning.
e) Rest the Ham: Unlocking Tenderness and Flavor
Once the ham reaches the desired temperature, remove it from the oven and let it rest for 15-20 minutes before carving. This allows the juices to redistribute, resulting in a more tender and juicy ham.
2. slow cooker ham: Hands-Off Cooking for Tender Results
The slow cooker method is perfect for hands-off cooking and yields a tender and succulent ham, ideal for busy weeknights or large gatherings.
a) Prepare the Ham: Setting the Stage for slow cooking
Place the ham in the slow cooker, fat side up. If you're using a bone-in ham, you can remove the bone for easier carving.
b) Add Liquid: Keeping the Ham Moist
Pour in about 1 cup of liquid, such as apple cider, chicken broth, or water. This will help keep the ham moist during the long cooking time.
c) Cook the Ham: Time and Temperature Guidelines
Cook the ham on low for 6-8 hours or on high for 3-4 hours, or until it reaches an internal temperature of 150°F (66°C).
d) Glaze the Ham: Adding Flavor During the Final Stages
During the last hour of cooking, brush the ham with a glaze of your choice. This will create a beautiful glaze and infuse the ham with additional flavor.
e) Rest the Ham: Allowing the Juices to Redistribute
Once the ham is cooked, remove it from the slow cooker and let it rest for 15-20 minutes before carving. This step allows the juices to redistribute, resulting in a tender and flavorful ham.
3. grilled ham: A Smoky, BBQ Experience
For a smoky, BBQ flavor, grilling your ham can be a delicious option. It adds a unique depth of flavor and creates a beautiful char.
a) Preheat the Grill: Setting the Stage for Grilling
Preheat your grill to medium heat. This ensures the ham cooks evenly and develops a nice char.
b) Prepare the Ham: Scoring and Glazing
If using a bone-in ham, remove the packaging and place it on a grill pan. For a spiral-sliced ham, you can leave it in its packaging. Score the fat of the ham to help it render and add flavor. Apply your glaze of choice to the ham.
c) Grill the Ham: Time and Temperature Guidelines
Grill the ham for 15-20 minutes per pound, flipping it occasionally. Monitor the internal temperature using a meat thermometer.
d) Glaze the Ham: Adding Flavor During the Final Stages
During the last 15 minutes of grilling, brush the ham with a glaze of your choice. This will create a beautiful glaze and infuse the ham with additional flavor.
e) Rest the Ham: Allowing the Juices to Redistribute
Once the ham reaches the desired temperature, remove it from the grill and let it rest for 15-20 minutes before carving. This allows the juices to redistribute, resulting in a tender and juicy ham.
(Part 5) Serving and Storing: Presenting and Preserving Your Culinary Creation
Your perfectly cooked ham is ready to be enjoyed! Now let's explore how to present it beautifully and how to preserve any leftovers.
1. Serving: Presenting a Culinary Masterpiece
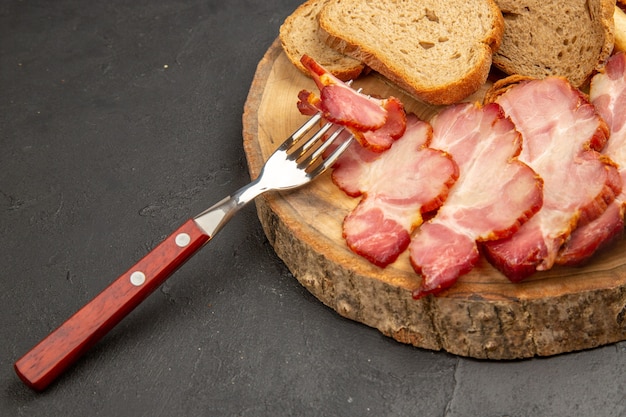
Serve your ham warm or cold, depending on your preference. Carve the ham into slices and arrange them on a platter. Surround the ham with your favorite side dishes, such as mashed potatoes, green beans, roasted vegetables, or a refreshing salad.
Get creative with your serving style! Try serving the ham on a bed of rice pilaf, use it as a filling for sandwiches or salads, or even add it to a hearty soup.
2. Storing Leftovers: Preserving Flavor for Later
If you have leftovers, store them in an airtight container in the refrigerator for up to 4 days. To reheat, simply warm it in the oven or microwave.
leftover ham is perfect for creating delicious dishes like ham and bean soup, ham and cheese quiche, or ham salad sandwiches. It's a great way to stretch your culinary creation and enjoy its flavor in a new way.
(Part 6) Getting Creative with Glazes: Elevating Your Ham to New Heights
A delicious glaze can elevate your ham from ordinary to extraordinary. It adds a layer of sweetness, tanginess, or spice that complements the ham's flavor profile.
1. honey mustard glaze: A Classic Choice
This classic glaze is sweet, tangy, and incredibly flavorful. Combine honey, Dijon mustard, and a pinch of cayenne pepper for a subtle kick. It's perfect for adding a touch of heat to your ham.
2. Maple Bourbon Glaze: A Sophisticated Touch
For a sophisticated touch, try a maple bourbon glaze. Combine maple syrup, bourbon whiskey, and a touch of brown sugar for a rich and complex flavor. It's a great option for special occasions or when you want to impress your guests.
3. Pineapple Ginger Glaze: A Tropical Twist
This glaze offers a tropical twist. Combine pineapple juice, ginger, and brown sugar for a sweet and tangy glaze. It's a perfect complement to the savory flavors of the ham.
4. Apricot Almond Glaze: Sweet and Nutty
This glaze is both sweet and nutty. Combine apricot preserves, almond extract, and a touch of honey for a delicious and unique glaze. It's a fantastic option for those who love a hint of almond flavor.
5. Cranberry Orange Glaze: Festive and Flavorful
This glaze is festive and flavorful, perfect for holiday meals or special occasions. Combine cranberry sauce, orange zest, and a pinch of cinnamon for a sweet and tart glaze. It adds a vibrant pop of color and flavor to your ham.
(Part 7) Tips for a Delicious Ham: Maximizing Flavor and Texture
Here are some additional tips to help you achieve ham-cooking perfection.
1. Don't Overcook: Avoiding Dryness
Ham is already partially cooked, so it's easy to overcook it, resulting in dry and rubbery ham. Monitor the internal temperature closely to prevent overcooking.
2. Glaze the Ham: Adding Moisture and Flavor
A glaze not only adds flavor but also helps to keep the ham moist. Apply the glaze during the last 30-60 minutes of cooking. The glaze will caramelize, creating a beautiful crust and adding a layer of sweetness.
3. Rest the Ham: Allowing the Juices to Redistribute
Allowing the ham to rest for 15-20 minutes after cooking allows the juices to redistribute, resulting in a more tender and juicy ham. This is a crucial step for achieving optimal texture.
4. Use a Thermometer: Ensuring Accurate Temperature Readings
A meat thermometer is essential for ensuring your ham is cooked to the right temperature. Don't rely on just looking at the ham or touching it to determine doneness. A thermometer provides accurate readings for safe and delicious cooking.
5. Enjoy the Process: Embracing Culinary Exploration
cooking a ham is a fun and rewarding experience. Don't be afraid to experiment with different glazes, flavors, and cooking methods. Each experiment offers a chance to discover new culinary delights.
(Part 8) FAQs: Addressing Common Questions
Here are some frequently asked questions about cooking ham:
1. Can I cook a ham from frozen?
It's not recommended to cook a ham from frozen. It's best to thaw the ham in the refrigerator for 24 hours before cooking. This allows the ham to thaw evenly and ensures safe cooking. You can also thaw the ham in a cold water bath, changing the water every 30 minutes.
2. What happens if I overcook a ham?
Overcooked ham will be dry and rubbery. If you think you might have overcooked your ham, you can try adding a little bit of moisture back in by adding some broth or juice to the pan. You can also try reheating the ham in a slow cooker or oven with a little bit of liquid.
3. Can I freeze leftover ham?
Yes, you can freeze leftover ham for up to 2 months. Wrap the ham tightly in plastic wrap and then in aluminum foil. When you're ready to use the ham, thaw it in the refrigerator overnight.
4. What are some good side dishes to serve with ham?
Ham goes well with a variety of side dishes. Some popular options include mashed potatoes, green beans, roasted vegetables, macaroni and cheese, and cranberry sauce. You can also create a medley of fresh salads or explore international flavors like a fruit salad or a potato salad with mustard and dill.
5. How do I reheat a cooked ham?
You can reheat a cooked ham in the oven, slow cooker, or microwave. If reheating in the oven, preheat the oven to 325°F (160°C) and bake the ham for 15-20 minutes, or until heated through. If reheating in the slow cooker, set the slow cooker to low and cook for 2-3 hours. If reheating in the microwave, cover the ham with a damp paper towel and microwave on high for 1-2 minutes, or until heated through.
I hope this comprehensive guide has equipped you with the knowledge and confidence to cook the perfect ham. Remember, it's all about embracing the process, experimenting with flavors, and most importantly, enjoying the fruits of your culinary labor! Bon appétit!
Everyone is watching

How to Cook Frozen Lobster Tails Perfectly: A Step-by-Step Guide
RecipesLobster. Just the word conjures up images of lavish meals, special occasions, and a taste of luxury. But let's...

Pork Fillet Cooking Time: How Long to Cook It Perfectly
RecipesPork fillet, or tenderloin as it's sometimes called, is a real favourite in our house. It's so versatile, and...

Pigs in a Blanket Cooking Time: How Long to Bake for Perfect Results
RecipesAh, pigs in a blanket. Just the name conjures up images of those delightful little parcels of crispy pastry en...

The Ultimate Guide to Cooking Delicious Frankfurters
RecipesLet's face it, we all love a good frankfurter. It's a classic, simple, and always satisfying. But let's be rea...

Wolf Meat Recipes: A Guide to Cooking Wild Game
RecipesLet's be honest, you don't see wolf meat at your local butcher shop every day. It's a bit of a wild card, but ...