Choosing the perfect brisket: A Foundation for Success
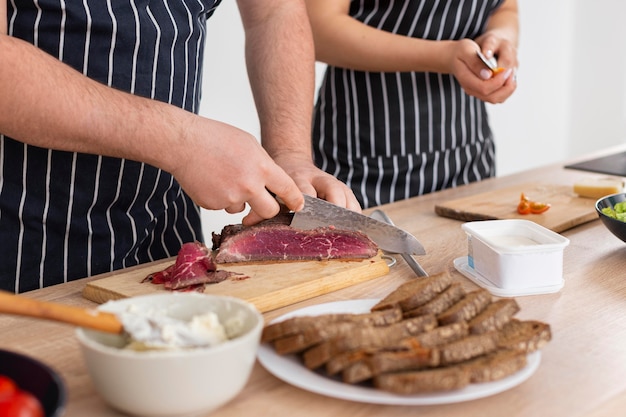
1. The Point Cut: Fat, Flavor, and a Juicy Dream
This is the fattier, more flavorful part. It’s got that gorgeous layer of fat on top, which renders down beautifully during cooking. It’s perfect for those who love a rich, juicy brisket. Think of it as the decadent, indulgent choice.2. The Flat Cut: Lean, Uniform, and a Bit More Manageable
This is leaner and more uniform, making it a bit more manageable. It’s a bit less flavorful, but tends to be more tender. It’s a good option for those who prefer a slightly less fatty experience.I usually go for the Point Cut because I love that extra richness. It’s like a luxurious, slow-cooked hug in every bite. But if you’re a bit more health-conscious, the Flat Cut is a good choice. Either way, make sure you get a piece of brisket that’s well-marbled – you want that fat throughout, not just on the surface. It adds flavor and juiciness.
Preparing for Success: From Brine to Rub
1. Dry Brine: Simple, Effective, and Time-Tested
This is my personal favorite. Just rub the brisket with salt and pepper, then wrap it up and leave it in the fridge for a couple of days. This allows the salt to break down the muscle fibers and draw out some moisture, giving you a juicier and more flavorful brisket. It’s a bit of a commitment, but trust me, it’s worth the wait.2. Wet Brine: Adding Moisture and Flavor
This involves soaking the brisket in a brine solution, usually a mixture of salt, sugar, and water. This helps to tenderize the meat and add flavor. You can also add aromatics like herbs, spices, or even citrus fruits to your brine. This is a fantastic option for those who want to add a bit of extra flavor to their brisket.3. Simple Rub: Quick, Easy, and Full of Flavor
This is a great option for those who don’t have a lot of time. Simply rub the brisket with a blend of spices, like salt, pepper, paprika, garlic powder, and onion powder. This adds a layer of flavor and helps to create a beautiful crust on the brisket.brisket trimming: A Crucial Step for Even Cooking
I usually trim the fat to about ?? inch thick. You can even leave a bit more on the thickest part of the brisket, called the "point." Don't worry, it’ll melt down beautifully.
Brisket Cooking Temperature: The Golden Rule for Tenderness
Now, onto the main event: the brisket cooking temperature. The magic number for brisket is 225°F (107°C). This low and slow method is key to getting that tender, melt-in-your-mouth brisket.Why Low and Slow? The Science of Tenderness
You see, when you cook brisket at a low temperature, the collagen in the meat breaks down and turns into gelatin. This is what gives you that incredibly tender texture. It’s like magic, but it’s actually science!Cooking at a higher temperature would make the meat tough and dry. So, don't even think about cranking up the heat. Slow and steady wins the brisket race, I tell you!
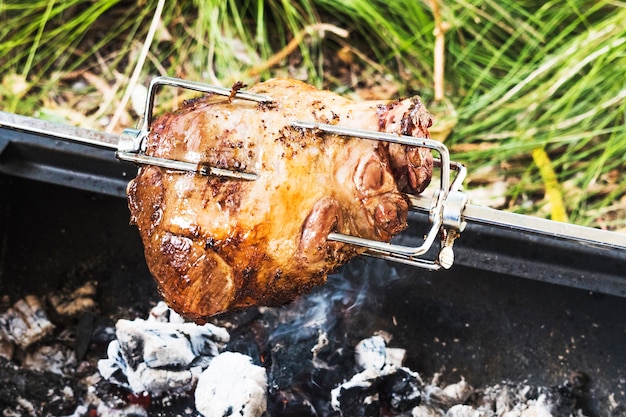
The Perfect Smoke: Adding Depth of Flavor
We're going to be using a smoker for this, and I’ll tell you why. Smoking adds that extra layer of flavor that you just can't get from any other method. It’s like adding a symphony of smoky notes to your brisket. But you can absolutely achieve a delicious brisket in an oven if you don't have a smoker.Smoking the Brisket: A Masterclass in Low and Slow
Now, there are different types of smokers out there, but the principle is the same: you want to cook your brisket at a low temperature over indirect heat. This means that the brisket is not directly over the heat source, but rather to the side of it.You want to maintain that 225°F (107°C) temperature throughout the cook. I usually use wood chips like hickory, applewood, or mesquite, but you can experiment with different types to find what you like best. Just remember to soak your wood chips in water for about 30 minutes before adding them to your smoker. This helps them smolder nicely and not burst into flames, giving you that smooth, delicious smoke flavor.
oven brisket: Delicious Results Without a Smoker
Now, if you don't have a smoker, you can still cook a great brisket in your oven. Just use a roasting pan or a dutch oven. You’ll need to wrap your brisket in foil for a portion of the cook to make sure it stays moist. We’ll get to that later.Preheat your oven to 225°F (107°C). Place the brisket in the pan, fat side up, and cook for about 4-6 hours. You might need to add a little bit of water to the pan every hour or so to keep things moist.
The Stall: A Brisket Mystery Solved
You'll likely encounter something called "the stall." This is a point during the cook when the brisket’s internal temperature plateaus. It can be frustrating, but it's a normal part of the process.The stall is caused by the moisture evaporating from the meat, and the temperature slows down. Don't worry, it's not the end of the world. Just be patient and keep on cooking. It will eventually rise again.
Dealing With the Stall: Techniques to Keep Things Moving
There are a few things you can do to help the brisket get past the stall:- Increase the temperature slightly: You can try increasing the smoker temperature to 250°F (121°C) for a short period, but be careful not to go too high. This should help the brisket to heat up again.
- Spritz the brisket with water or apple juice: This helps to add moisture and keep the brisket from drying out. Think of it as giving the brisket a little sip of refreshment to keep it going.
- Wrap the brisket in foil: We’ll talk more about this later, but wrapping the brisket can help to speed up the cooking process. It’s like giving it a warm, steamy hug to help it through the tough times.
Monitoring the Brisket: Temperature Check for Perfect Results
You need to keep a close eye on your brisket. This isn't a set-it-and-forget-it kind of cook. You want to make sure that the brisket is cooking evenly and that the temperature is staying within the desired range.Internal Temperature: The Key to Perfect Brisket
You'll need a good meat thermometer to check the internal temperature. You want to aim for an internal temperature of 200°F (93°C) in the thickest part of the brisket.Now, this is just a guideline. Every brisket is different, and the cooking time will vary depending on the size and thickness of your brisket. But this should give you a good starting point.
The texas crutch: A Brisket Savior for Ultimate Tenderness
Now, this is a bit of a game-changer: the Texas Crutch. This involves wrapping the brisket in foil at a certain point in the cook. It's not a must-do, but it can be a real lifesaver for those who are struggling with the stall or want to ensure that brisket is extra tender.You wrap the brisket in foil when it reaches about 160°F (71°C) internal temperature. This helps to create a steamy environment that speeds up the cooking process and prevents the brisket from drying out. It’s like giving the brisket a warm, cozy blanket to help it relax and become even more tender.
How to Wrap: A Simple, Effective Technique
1. Remove the brisket from the smoker or oven.2. Wrap it tightly in a double layer of heavy-duty aluminum foil.3. Return the brisket to the smoker or oven.Now, be careful! You might need to reduce the temperature a bit to make sure the brisket doesn't overcook. And you'll want to check the temperature every hour or so. But trust me, this little trick makes a world of difference.
The Rest: Allowing Time for Flavor to Bloom
Once the brisket reaches 200°F (93°C) internal temperature, it's time to take it out of the smoker or oven. But the cooking is not over yet. Now it's time to rest the brisket.This is a crucial step, as it allows the brisket to absorb the juices and become even more tender. Wrap the brisket in foil and let it rest for at least 2 hours, preferably in a cooler. It may seem like a long time, but it’s important to allow the brisket to rest and allow those juices to distribute evenly.
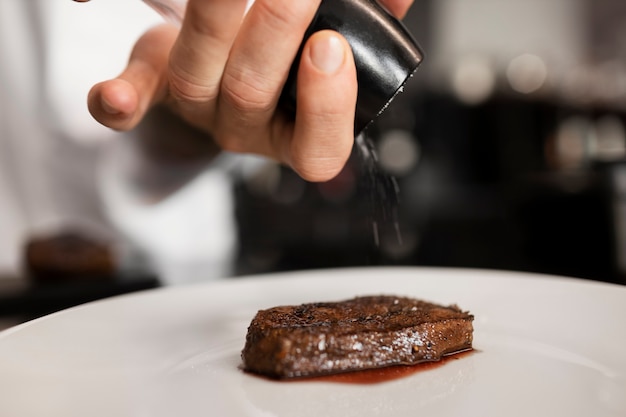
Slicing and Serving: Unveiling the Flavor
After the brisket has rested, it's time to slice and serve. You'll want to slice the brisket against the grain, which is the direction of the muscle fibers.This makes the brisket easier to chew and gives it a more tender texture. Slice it to about ?? inch thick. You can serve the brisket on its own, or you can pair it with sides like coleslaw, potato salad, baked beans, or cornbread.
(Part 2)brisket cooking temperatures: A Guide for Success
Now, let's get a bit more specific about the different temperatures and times involved in brisket cooking. Remember that every brisket is different, so these are just guidelines.Table for Brisket Cooking Temperatures and Times:
| Brisket Weight (lbs) | Estimated Cooking Time (hours) | Internal Temperature (°F) |
|---|---|---|
| 5-7 lbs | 8-12 hours | 200°F (93°C) |
| 8-10 lbs | 10-14 hours | 200°F (93°C) |
| 11-13 lbs | 12-16 hours | 200°F (93°C) |
Remember, those are just estimations. You'll want to use a meat thermometer to check the internal temperature of your brisket and adjust the cooking time accordingly. You’re aiming for that juicy, tender, melt-in-your-mouth texture.
Factors Affecting Cooking Time: Understanding the Variables
Brisket size and thickness: A larger and thicker brisket will take longer to cook. It’s like a big, slow-moving train that needs more time to reach its destination. Smoker or oven temperature: A lower temperature will require a longer cooking time. Think of it like a slow simmer, where the heat is gentle and the process takes longer. Fat content: A brisket with a higher fat content may take a bit longer to cook. The fat needs time to render down and add that extra juiciness.Brisket cooking techniques: Expanding Your Culinary Repertoire
We’ve already covered smoking and oven-cooking. Let’s dive a bit deeper into different methods.1. reverse searing: For a crispy bark and Juicy Interior
This is a method where you cook the brisket at a lower temperature for a longer period of time, then sear it at a high temperature to create a crispy bark. It gives the brisket a beautiful, golden crust and adds a delightful textural contrast.This method can be done in both a smoker and an oven. You can sear the brisket over direct heat on a grill or in a cast iron pan. Just make sure you don't overcook the brisket, as it will become tough. You want to create a beautiful crust while preserving the tenderness of the meat.
2. water bath Method: For the Ultimate in Moisture and Tenderness
This is a method where you cook the brisket in a water bath, which helps to keep the brisket moist and prevent it from drying out. This is a great option if you're concerned about the brisket getting too dry. You can use a large pot or a Dutch oven.Just place the brisket in a roasting pan, add a few cups of water, and cover the pan tightly with foil. Then cook the brisket in the oven at 225°F (107°C). You may need to add more water to the pan during the cooking process to keep it from drying out.
Brisket Mistakes to Avoid: Lessons Learned from Experience
Here are a few common mistakes that people make when cooking brisket. Avoid these pitfalls to ensure a perfect brisket.1. Overcooking: A Tenderness Tragedy
Brisket is a forgiving meat, but you can overcook it. If you cook the brisket for too long, it will become tough and dry. The key is to cook it until it reaches an internal temperature of 200°F (93°C). Then, take it off the heat and let it rest.2. Not Resting: A Flavor Fiasco
Resting the brisket is crucial. It allows the juices to redistribute, making the brisket more tender and flavorful. You should rest the brisket for at least 2 hours after cooking, preferably in a cooler.3. Forgetting the Thermometer: A Recipe for Disaster
This might seem obvious, but you need to use a good meat thermometer to check the internal temperature of your brisket. Don't rely on visual cues or your intuition. A meat thermometer is the only way to know for sure that the brisket is cooked through.4. Using the Wrong Cut: A Flavor Faux Pas
You need to use a good quality brisket for this. Look for a brisket that is well-marbled with a good amount of fat. The fat will render down during cooking, making the brisket juicy and flavorful.5. Being Impatient: The Art of Patience
Brisket takes time. You can't rush it. Be patient and let it cook low and slow. Trust the process. It’s a slow dance, not a sprint.(Part 3)brisket faqs: Your Questions Answered
You've got questions, I’ve got answers.1. How long does it take to cook a brisket?
The cooking time for a brisket will vary depending on the size and thickness of the brisket, as well as the cooking method. A general rule of thumb is to allow 1 hour of cooking time per pound of brisket. But it’s best to check the internal temperature of the brisket with a meat thermometer to determine when it’s done. This is the most accurate way to ensure that the brisket is cooked through.
2. What is the best wood to smoke brisket?
There are many different woods that you can use to smoke brisket. Some popular choices include hickory, mesquite, pecan, and applewood. The best wood to use will depend on your personal preferences. Hickory gives the brisket a smoky flavor, mesquite gives it a bolder flavor, pecan gives it a sweet and nutty flavor, and applewood gives it a mild flavor. Experiment with different woods to find your favorite combination.
3. How do I know when my brisket is done?
You know your brisket is done when it reaches an internal temperature of 200°F (93°C) in the thickest part of the meat. You can also check the tenderness of the brisket by poking it with a fork. If the fork goes in easily and the meat is falling apart, then it's done. If you're not sure, you can always take a small piece and try it. But remember, the internal temperature is the most reliable indicator of doneness.
4. Can I cook brisket in a Dutch oven?
Yes, you can absolutely cook brisket in a Dutch oven! It's a great option if you don't have a smoker. Just preheat your oven to 225°F (107°C). Place the brisket in the Dutch oven, fat side up, and cook for about 4-6 hours. You may need to add a little bit of water to the pan every hour or so to keep things moist. Remember to wrap the brisket in foil for part of the cook as we talked about before.
5. What can I do with leftover brisket?
Oh, there’s so much you can do with leftover brisket! You can slice it up and use it in sandwiches, tacos, or salads. You can also shred it and use it in soups, stews, or chili. The possibilities are endless! Don’t be afraid to get creative with it. It’s a fantastic base for a multitude of dishes. You can also freeze leftover brisket for later use.
(Part 4)The Joy of Brisket: A culinary adventure
There's something truly special about cooking a brisket. It's a labor of love, a testament to patience and precision. It's a journey, a slow and steady process that culminates in a masterpiece.You're not just cooking a piece of meat, you're creating an experience, a flavor explosion that brings people together. It's the aroma that fills your home, the anticipation that builds as the brisket rests, the smiles and satisfied sighs as everyone takes that first bite. It’s a dish that evokes shared memories and brings people closer together.
The Perfect Brisket: A Culinary Dream Come True
A perfect brisket is tender and juicy, with a beautiful, smoky bark. It melts in your mouth, leaving a lingering taste of smoky goodness. It's a dish that you'll remember long after the last bite.I hope this guide has helped you understand the intricacies of brisket cooking temperature. It's a journey, but one that is well worth taking. So, go forth and conquer that brisket. Embrace the process, learn from your experiences, and enjoy the journey. Happy brisket-making!
Everyone is watching

How to Cook Frozen Lobster Tails Perfectly: A Step-by-Step Guide
RecipesLobster. Just the word conjures up images of lavish meals, special occasions, and a taste of luxury. But let's...

Pigs in a Blanket Cooking Time: How Long to Bake for Perfect Results
RecipesAh, pigs in a blanket. Just the name conjures up images of those delightful little parcels of crispy pastry en...

Pork Fillet Cooking Time: How Long to Cook It Perfectly
RecipesPork fillet, or tenderloin as it's sometimes called, is a real favourite in our house. It's so versatile, and...

The Ultimate Guide to Cooking Delicious Frankfurters
RecipesLet's face it, we all love a good frankfurter. It's a classic, simple, and always satisfying. But let's be rea...

Wolf Meat Recipes: A Guide to Cooking Wild Game
RecipesLet's be honest, you don't see wolf meat at your local butcher shop every day. It's a bit of a wild card, but ...