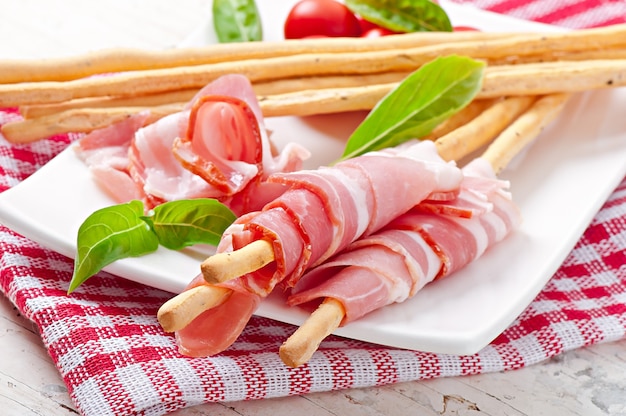
Let's talk about spiral ham - those pre-cooked beauties that practically beg to be devoured! I've been a fan for years, and I've learned a thing or two about getting them just right. Don't worry, we're not talking about complicated recipes here. I'm all about making things easy, and that's exactly what we're going to do. We'll cover everything from picking the right ham to perfecting the glaze, so get ready for some seriously delicious dinnertime goodness.
Part 1: Choosing Your Spiral Ham
The first step is finding the right ham. I've got a few tips to help you choose the perfect one for your needs.
Size Matters
Firstly, consider the size. How many people are you feeding? I usually go for a 10-12 pound ham for a good-sized family gathering, but there are smaller options available if you're cooking for a smaller group. You don't want to end up with a mountain of leftover ham, or worse, run out before everyone gets their fill! A good rule of thumb is to allow about 1/2 pound of ham per person.
Bone-In or Boneless?
Next, you've got the bone situation. bone-in hams are usually juicier, as the bone helps to retain moisture during cooking. They also tend to have a more intense flavour. boneless hams are easier to slice and serve, and they're great if you're looking for a more convenient option. Ultimately, it's a matter of personal preference.
Smoked or Cured?
Now, this is where things get interesting. You've got smoked ham and cured ham. Smoked ham, as the name suggests, is smoked over wood, giving it a distinctive, smoky flavour. Cured ham is a bit more subtle, and it's usually cured with salt and other seasonings. Both are delicious, but it depends on the kind of flavour profile you're after. Personally, I have a soft spot for smoked ham – that smoky aroma just fills the kitchen with such a comforting smell!
The Glaze: The Finishing Touch
And last but not least, the glaze! Some hams come with a glaze packet, but don't be afraid to experiment. You can find all sorts of delicious glaze recipes online or in cookbooks. My favourite is a honey mustard glaze – it's sweet and tangy, and it complements the ham perfectly. You can also get creative with fruit glazes, like apricot or pineapple, or even a maple syrup glaze for a richer flavour.
Part 2: Preparing Your Spiral Ham
Alright, you've chosen your perfect ham, now it's time to get it ready. It's actually quite simple, trust me!
Removing the Packaging
First things first, remove the packaging. You'll usually find a plastic wrap around the ham. Carefully peel that back, making sure not to tear the ham. Some hams also come with a paper or foil wrap. If your ham has one, it's best to remove it before cooking to prevent any uneven browning.
Scoring the Ham
Now, this is a fun part. Take a sharp knife and score the fat on the ham. This allows the glaze to penetrate better and creates a beautiful, caramelized crust. If you're feeling fancy, you can even make decorative cuts! You can score the fat in a criss-cross pattern, or even create a simple diamond design.
Place the Ham in a roasting pan
Find a roasting pan big enough for your ham. Make sure you've got some space to spare around the ham, because we're going to add some liquid to the pan. The liquid helps keep the ham moist and prevents it from drying out. You can use a roasting pan with a rack, or simply place the ham directly on the bottom of the pan.
Part 3: Choosing Your Cooking Method
Now we get to the meat of the matter (pun intended)! How are you going to cook your ham? There are a few options, and we'll explore them all.
Option 1: Oven Baking - A Classic Approach
This is probably the most common method, and it's pretty straightforward. Preheat your oven to 325°F (160°C). Add about 1 cup of water to the roasting pan. The water will create steam that will help keep the ham moist. Cover the ham with a piece of aluminum foil to trap the moisture. Now, pop the ham into the oven and let it bake for about 15-20 minutes per pound.
Option 2: slow cooker Magic - Effortless and Delicious
If you're looking for a super easy option, try the slow cooker! It's basically a set-it-and-forget-it method. Place the ham in the slow cooker, add about 1 cup of water, and cook on low for 6-8 hours or high for 3-4 hours. The ham will be incredibly tender and juicy. This method is perfect for a busy day, as you can simply set it and let it cook while you go about your other tasks.
Option 3: Smoker Delight - For a Smoky Flavour
If you're a BBQ enthusiast, consider smoking your ham! It's a wonderful way to add a delicious smoky flavour. There are a couple of things to keep in mind here. First, you'll need a smoker. Second, you'll want to use low heat – around 225°F (110°C). You'll also want to keep the smoker close to 225°F (110°C) for around 2 hours. You can use a dry rub for a more intense flavor or cook the ham with a glaze for an extra touch. This method is definitely more time-consuming, but the results are well worth the effort.
Part 4: Glazing Your Spiral Ham
Okay, here's where things get exciting. It's time to glaze your ham! The glaze adds a beautiful sheen and a burst of flavour.
Applying the Glaze
About 30 minutes before your ham is done, remove the foil (if you were using it) and start glazing! You can use a brush or spoon to apply the glaze. You'll want to apply it in thin layers, making sure to coat the entire ham. Don't be shy with the glaze – the more, the merrier!
The Art of Caramelization
As the ham continues to cook, the glaze will start to caramelize, creating a beautiful, golden-brown crust. Keep basting the ham with the glaze every 15-20 minutes, and you'll end up with a gorgeous, glistening ham. You can even use a spatula to loosen up the caramelized glaze and create a more even crust.
Part 5: Resting Your Ham and Carving
We're almost there! Once the ham is cooked, it's time for a little rest. This is crucial for letting the juices redistribute and create a more tender and flavorful ham.
The Importance of Resting
Let the ham rest for about 15-20 minutes before carving. Don't be tempted to cut into it right away – it'll be worth the wait! Resting the ham allows the juices to redistribute evenly throughout the meat, resulting in a much more succulent and flavorful ham.
Carving Time
When it's time to carve, use a sharp carving knife. Start by carving slices from the center of the ham, working your way outwards. You can slice the ham thin or thick, depending on your preference. If you're serving the ham on a platter, you can arrange the slices in a fan shape for a visually appealing presentation.
Part 6: Serving Your Spiral Ham
It's time for the grand finale! The ham is ready to be enjoyed.
Serving Suggestions
Serve your spiral ham with a variety of sides. I love pairing it with mashed potatoes, green beans, and a tangy cranberry sauce. You could also add cornbread muffins or a simple salad. The combination of sweet, savory, and tangy flavors creates a truly delicious and satisfying meal.
The Finishing Touches
To make your serving even more special, you can add a sprig of fresh rosemary or parsley to the ham. You can also place the ham on a platter and arrange the sides around it for a beautiful presentation. A few sprigs of fresh herbs and a drizzle of glaze can really elevate the presentation and make your ham the star of the show.
Part 7: Storage and Leftovers
You might have some leftovers, and that's a good thing! It's amazing to have tasty leftovers to enjoy for lunch the next day.
Storing Your Ham
You can store the remaining ham in the refrigerator for up to 4 days. To keep the ham moist, wrap it tightly in plastic wrap or aluminum foil. You can also store it in an airtight container to prevent any unwanted odors from absorbing into the ham.
Leftover Ideas
You can use the leftover ham in a variety of ways. It's great in sandwiches, salads, or even a ham and cheese quiche. You can also freeze leftover ham for later use. To freeze ham, wrap it tightly in plastic wrap and then aluminum foil. It can be frozen for up to 3 months.
Part 8: FAQ
Now, I know you might have some burning questions. Here are a few common ones:
1. Can I bake a spiral ham in a smaller oven?
Absolutely! Just make sure you choose a roasting pan that fits comfortably in your oven. The baking time will remain the same, as long as the oven temperature is consistent. If your oven is smaller, you may need to adjust the cooking time slightly based on your oven's capacity.
2. What if the ham looks dry?
If you notice the ham seems a little dry, you can add a bit more water or broth to the roasting pan. This will help to keep the ham moist during cooking. You can also check the ham's internal temperature to make sure it's reached 140°F (60°C) to ensure it's cooked through.
3. How can I make sure the glaze doesn't burn?
To prevent the glaze from burning, you can lower the oven temperature to 300°F (150°C) during the last 30 minutes of cooking. You can also use a glaze that is more resistant to burning, such as a honey glaze or a maple syrup glaze. It's also helpful to brush the glaze on in thin layers, allowing it to set before applying another coat.
4. Can I substitute the water in the roasting pan?
You can definitely substitute the water in the roasting pan with something else, like chicken broth, apple juice, or even a mixture of wine and spices. Just be sure to add enough liquid to keep the ham moist. Experiment with different liquids to create your own unique flavor profiles for your ham.
5. How can I tell if the ham is cooked?
The ham is cooked when the internal temperature reaches 140°F (60°C). You can check the temperature with a meat thermometer. Make sure you insert the thermometer into the thickest part of the ham, avoiding any bones. You can also check for doneness by inserting a fork into the ham. If the juices run clear, the ham is cooked.
Part 9: My Personal Experience
Okay, I have to share a little story. Remember that time I hosted a holiday dinner for 15 people? I was a bit nervous about making the ham, but I followed all the steps, and it turned out absolutely perfect! The ham was so juicy and tender, with a beautiful golden-brown glaze. Everyone raved about it, and I felt like a real culinary hero.
So, don't be afraid to try it yourself. It's a simple recipe that yields incredible results. With just a few easy steps, you can wow your friends and family with a delicious spiral ham that's guaranteed to be a hit.
Part 10: Tips for a perfect spiral ham
Here are a few extra tips to help you achieve spiral ham perfection:
1. Don't Overcook the Ham:
Spiral hams are already cooked, so they only need to be heated through. Overcooking can dry out the ham, so make sure to follow the recommended cooking times. You can also use a meat thermometer to check the internal temperature of the ham, ensuring it's reached 140°F (60°C).
2. Use a Glaze That Compliments the Ham:
There are endless glaze options available, so choose one that complements the flavor of your ham. If you're using a smoked ham, a sweet and tangy glaze will enhance the smoky flavor. For a cured ham, a more savory glaze with herbs or spices might be a better choice. Experiment with different glazes to discover your favorite combination.
3. Don't Be Afraid to Experiment:
Spiral ham is a versatile dish that allows you to get creative in the kitchen. Try adding different flavor combinations to your glaze, or even using different cooking methods to create unique results. Don't be afraid to deviate from the traditional approach and explore your culinary creativity.
4. Enjoy the Process!
Cooking a spiral ham is a fun and rewarding experience. Take your time, experiment with different flavors, and enjoy the process of creating a delicious meal for yourself and your loved ones.
With a little practice and some helpful tips, you'll be a spiral ham master in no time. So go ahead and give it a try! Your family and friends will thank you for it.
Everyone is watching

How to Cook Frozen Lobster Tails Perfectly: A Step-by-Step Guide
RecipesLobster. Just the word conjures up images of lavish meals, special occasions, and a taste of luxury. But let's...

Pigs in a Blanket Cooking Time: How Long to Bake for Perfect Results
RecipesAh, pigs in a blanket. Just the name conjures up images of those delightful little parcels of crispy pastry en...

Pork Fillet Cooking Time: How Long to Cook It Perfectly
RecipesPork fillet, or tenderloin as it's sometimes called, is a real favourite in our house. It's so versatile, and...

The Ultimate Guide to Tender, Juicy Pulled Pork
RecipesRight, let's talk pulled pork. It's one of those dishes that just screams "comfort food," doesn't it? I mean...

The Ultimate Guide to Cooking Sweet Potatoes: From Roasting to Mashing
RecipesSweet potatoes. Just the name conjures up images of warm, comforting dishes, bursts of vibrant color, and a to...