Let’s be honest, nothing beats the satisfaction of a perfectly cooked ribeye steak. You know, the kind that's juicy, tender, and bursting with flavor, with a crust that's crispy on the outside and a perfectly pink interior. While grilling might be the first thing that comes to mind, oven-baking offers a surprising level of control and consistent results. That's why I'm here to share my secrets to achieving the ultimate oven-baked ribeye steak - a recipe that's practically foolproof, even if you're not a seasoned chef.
This guide will take you step-by-step, from choosing the right cut of meat to achieving that iconic crust and ensuring your steak is cooked to your exact preference. So, gather your ingredients, grab your trusty oven-safe skillet, and let's get started on a culinary journey you won't soon forget!
Part 1: choosing the right steak: The Foundation of Flavor
The Importance of a Good Cut: Don't Settle for Second Best
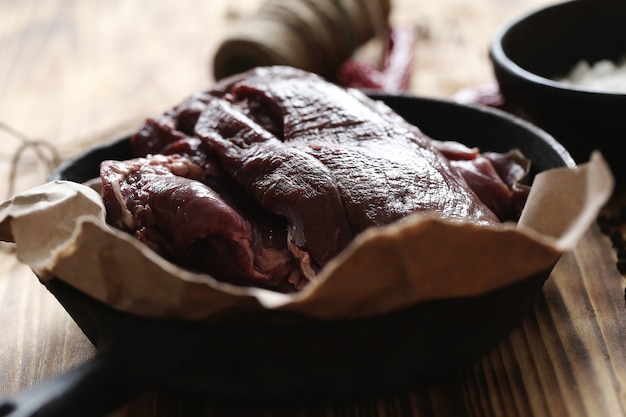
You wouldn't build a house on a shaky foundation, and the same goes for a delicious steak. A good ribeye is the cornerstone of a mouthwatering meal. You want to look for a cut that's bursting with flavor and has that perfect marbling of fat. This fat isn't just there for texture; it melts during cooking, adding incredible richness and juiciness to the finished product.
I’m talking about a ribeye that’s at least an inch thick. Why? It allows for a magnificent sear, giving you that crispy crust we crave. Plus, a thicker cut helps prevent the steak from drying out, ensuring a tender and succulent bite.
What to Look for When Buying a Ribeye: Your Guide to Choosing the Perfect Piece
Okay, so you're at the butcher counter or browsing the meat section at the supermarket. How do you choose the best ribeye? Here's my checklist:
- Marbling: Look for a nice even distribution of white fat throughout the muscle. This is the secret to juicy, flavorful steaks! It’s like the butter in a cake—it adds richness and depth.
- Uniform Thickness: A good steak should have an even thickness across the board. This ensures that it cooks evenly, so every bite is cooked to perfection. Avoid those steaks with skinny edges, they’ll cook too quickly and might end up dry.
- Vibrant Color: The steak should be a deep, rich red, like a blooming rose. This indicates freshness, which translates to better flavor. If you see any grayish or brownish tones, it might be an older steak that won’t be as tasty.
- Firm Texture: A good steak should feel firm to the touch, bouncing back slightly when you press it. If it's too soft or mushy, it could be a sign that it’s not as fresh as it should be.
Getting to Know Your Butcher: The Secret to Scoring the Best Meat
I'm a firm believer that building a good relationship with your butcher is essential. They're like the wizards of meat, experts in knowing the best cuts, how they're aged, and what's freshest. Don't be shy about asking questions! They're often a goldmine of information and tips. They can help you find the perfect cut for your needs, whether you want a steak for a casual dinner or a special occasion.
Part 2: Prepping the Steak: Setting the Stage for Success
Bringing the Steak to Room Temperature: A Key to Even Cooking
You've got your prime ribeye, but before you start cooking, there's one crucial step that often gets overlooked: bringing the steak to room temperature. It may seem like a small detail, but trust me, it makes a world of difference. It takes about 30 to 60 minutes, depending on the thickness of your steak.
Here's the science: When you cook a steak straight from the fridge, the cold center takes longer to cook, leading to uneven cooking and a less tender result. Bringing it to room temperature allows the steak to cook more evenly, ensuring a perfect, juicy result.
You might think, "Isn't that a little risky?" Not if you follow these simple tips:
- Avoid Direct Sunlight or Heat: Don’t leave your steak exposed to direct sunlight or heat, these can encourage bacterial growth. Keep it in a cool, dry area.
- Keep It Uncovered: Cover your steak with a plate to protect it from dust or airborne particles, but don't wrap it tightly. This helps the steak breathe and reach room temperature evenly.
Seasoning the Steak: Simple is Often Best
Now, let's talk seasoning. I'm a firm believer in keeping things simple. Salt and pepper are your best friends, bringing out the steak’s natural flavor. But don't be afraid to get creative! A pinch of garlic powder, onion powder, or even a sprinkle of paprika can add a delicious depth of flavor. Just remember, a little goes a long way. You want to enhance the steak’s flavor, not mask it.
The Importance of Salt: A Transformation in Flavor
Salt is more than just a seasoning; it's a magical ingredient. It draws out moisture from the steak, resulting in a more tender and flavorful final product. The trick is to season the steak well in advance, giving the salt ample time to work its magic. I usually season at least 30 minutes before cooking, but if you have time, let it sit for longer. The longer it sits, the more the salt will permeate the meat.
Here's my personal tip for perfectly seasoned steak: Sprinkle salt generously over the steak, gently rubbing it in. Then, place the steak on a wire rack, allowing it to rest for 30-60 minutes. This lets the salt work its magic evenly and helps draw out excess moisture. It’s a simple trick with a big impact on the final flavor.
Part 3: Achieving the perfect sear: Building the Foundation of Flavor
Choosing the Right Oven Temperature: Setting the Stage for a Crisp Crust
Now comes the fun part – the sear! For this step, you need a scorching hot oven, preferably at 500°F (260°C). This high temperature is the key to creating that beautiful, crispy crust that defines a great steak. And what better tool for this than a trusty cast iron skillet? It can withstand intense heat, distributing it evenly for that perfect sear.
Don’t have a cast iron skillet? No worries! A heavy-bottomed, oven-safe skillet will work just fine. Just remember to preheat the skillet along with your oven for a few minutes before you add the steak.
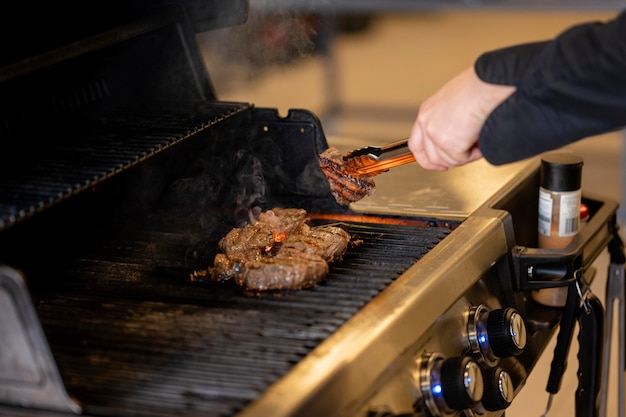
Searing the Steak: A Symphony of Sizzling Sounds
Heat the skillet over high heat until it’s smoking hot. This is crucial for achieving that delicious, caramelized crust. Carefully place the steak in the skillet and let it sear for 2-3 minutes per side. Don't move it around too much, let it sit undisturbed so it can develop that beautiful crust. You’ll hear the satisfying sizzle as the steak meets the hot skillet. That’s a sign that things are going right!
As the steak sears, it will develop a beautiful brown color. This is a testament to your skillful technique. The steak should have a nice, crispy texture with a captivating golden-brown hue. You’ve done it! You’ve created the perfect sear.
Using a meat thermometer: The Key to Precise Doneness
After the initial sear, it’s time to move your steak from the hot skillet into the oven. But before you do, grab your meat thermometer. It's a culinary essential for guaranteeing that your steak is cooked to your exact preference. There’s nothing worse than an overcooked steak, which can be dry and tough.
Here’s a quick guide to internal temperatures for different levels of doneness. This is your guide to getting your steak exactly how you like it.
| Doneness | Internal Temperature (Fahrenheit) | Internal Temperature (Celsius) |
|---|---|---|
| Rare | 125-130°F | 52-54°C |
| Medium-Rare | 130-135°F | 54-57°C |
| Medium | 140-145°F | 60-63°C |
| Medium-Well | 150-155°F | 65-68°C |
| Well-Done | 160°F or above | 71°C or above |
Part 4: Baking the Steak to Perfection: Reaching the Finish Line
Transferring the Steak to the Oven: Maintaining the Heat
Now that your steak has a beautiful sear on both sides, it’s time to transfer it to the preheated oven. Remember, you're aiming for 500°F (260°C) for this step. Carefully place the skillet directly onto the oven rack. This will allow the steak to cook evenly on all sides, ensuring that the entire steak reaches your desired doneness.
While the oven temperature is crucial, remember that ovens can vary slightly. It's important to keep a close eye on your steak. I recommend checking the internal temperature every 3-4 minutes using your trusty meat thermometer. For a 1-inch thick steak, it generally takes about 5-8 minutes to reach your desired level of doneness.
Resting the Steak: A Vital Step for Tenderness and Flavor
After baking, don't jump straight to slicing and serving! Allow the steak to rest for 5-10 minutes before you dig in. This is a crucial step that often gets overlooked, but it’s essential for unlocking the true potential of your steak.
Here’s why resting is vital: During cooking, the juices in the steak are pushed to the outside. When you rest the steak, these juices have a chance to redistribute throughout the meat, resulting in a more tender and flavorful steak. Think of it as giving the juices time to settle back in.
To help your steak rest properly, I recommend tenting it with aluminum foil. This helps keep the steak warm while it rests, preventing it from cooling down too quickly.
Part 5: Serving the Steak: A Feast for the Senses
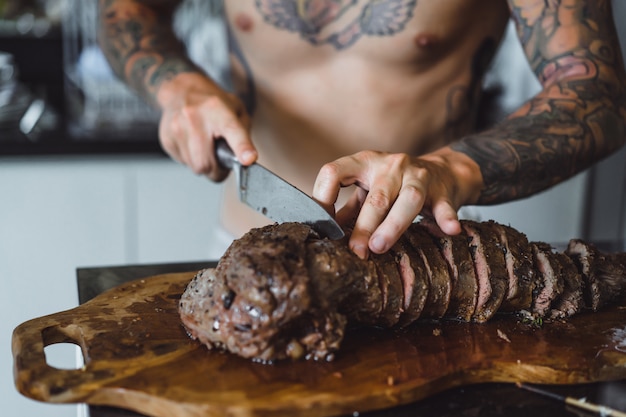
Slicing and Serving: A Culinary Masterpiece Unveiled
Finally, the moment of truth! Your steak is perfectly cooked and has had its well-deserved rest. Now, it's time to slice and serve. I use a sharp knife and slice the steak against the grain. This helps to break down the muscle fibers, making the steak easier to chew and creating a more tender bite.
You can serve your masterpiece with a variety of accompaniments, from classic mashed potatoes and roasted vegetables to a refreshing salad. Get creative! The possibilities are endless, and the right side dish can elevate the entire dining experience.
Flavorful Sauces: The Finishing Touch
A great steak deserves a great sauce! You can add a burst of flavor with a simple pan sauce. Deglaze the skillet with red wine or beef broth, scraping up the delicious browned bits from the bottom of the skillet. This will create a rich and flavorful sauce.
If you're feeling ambitious, try a more complex sauce like Béarnaise or Bordelaise. These classic sauces pair beautifully with a perfectly cooked ribeye. For a quicker option, a good quality steak sauce will also do the trick.
Part 6: Tips for Success: Mastering the Art of Oven-Baked Ribeye
Using a Cast Iron Skillet: The Secret to a Perfect Sear
As I mentioned earlier, a cast iron skillet is a game-changer for searing steaks. It heats up quickly and retains heat well, ensuring a beautiful, even sear. Remember to preheat the skillet for a few minutes before you add the steak. And, always use a heavy-bottomed skillet to distribute heat evenly, this will create a beautiful, even sear.
Choosing the Right Oven Temperature: The Key to Crispy Perfection
That high oven temperature is critical for searing the steak and achieving that perfect, crispy crust. Aim for 500°F (260°C). If your oven doesn't go that high, use the highest setting available. Just keep a close eye on the steak to ensure it doesn’t burn. A little patience and vigilance will be rewarded with a perfectly cooked steak.
Using a Meat Thermometer: The Ultimate Tool for Precision
A meat thermometer is your culinary compass when it comes to achieving perfect doneness. Don't rely on visual cues alone, as they can be deceiving. Use your meat thermometer to get an accurate reading of the internal temperature. Check it several times throughout the cooking process to ensure even cooking.
Resting the Steak: The Secret to a Tender Bite
Always, always rest the steak after cooking. It might seem like a small detail, but it's a crucial step that unlocks tenderness and flavor. Let it rest for at least 5-10 minutes before slicing and serving. The juices will redistribute, and you’ll be rewarded with a truly melt-in-your-mouth experience.
Don't Overcook the Steak: Avoiding Dryness and Toughness
Overcooking a steak is a culinary crime! It can turn a juicy, tender cut into a dry, tough disappointment. Use your meat thermometer to ensure the steak is cooked to your desired level of doneness, and don't overcook it. Remember, a well-cooked steak should be juicy and tender, not dry and chewy.
Part 7: FAQs: Solving Your Steak-Related Queries
What is the best way to store leftover ribeye steak?
Store leftover ribeye steak in an airtight container in the refrigerator for up to 3-4 days. You can also freeze it for up to 2-3 months. To freeze, wrap the steak tightly in plastic wrap, then in aluminum foil. Thaw the steak in the refrigerator overnight before cooking.
Can I bake a ribeye steak without searing it?
You can bake a ribeye steak without searing it, but the results won't be as flavorful or visually appealing. Searing creates that beautiful crust and helps lock in the juices. If you prefer a less crispy texture, you can skip the sear and cook the steak directly in the oven. Just remember, you’ll miss out on that delicious crust!
What are some good side dishes for ribeye steak?
The possibilities are endless when it comes to side dishes for ribeye steak. Some popular choices include mashed potatoes, roasted vegetables (like asparagus or Brussels sprouts), a vibrant salad, or even garlic bread. For a more adventurous touch, try risotto or polenta. Let your creativity guide you!
What kind of wine should I pair with ribeye steak?
A ribeye steak deserves a wine that can stand up to its boldness. Full-bodied red wines are a classic choice, like Cabernet Sauvignon, Merlot, or Shiraz. If you prefer a lighter wine, Pinot Noir or Zinfandel can be a good match. For a more adventurous pairing, try a Rh??ne blend or a Cabernet Franc. Let your palate be your guide!
How can I make sure my ribeye steak is cooked to my liking?
Your trusty meat thermometer is your best friend! Use it to ensure your steak is cooked to your desired level of doneness. Insert the thermometer into the thickest part of the steak, making sure it doesn’t touch any bone. Check the internal temperature several times throughout the cooking process to ensure even cooking.
Part 8: Conclusion: Embracing the steak master Within
There you have it! A comprehensive guide to baking a ribeye steak that’s both delicious and impressive. From choosing the right cut to achieving that perfect sear and ensuring your steak is cooked to your exact preference, we’ve covered everything you need to create a culinary masterpiece.
Remember, practice makes perfect. Don’t be afraid to experiment with different techniques and seasonings to discover your perfect recipe. With a little practice, you’ll be a ribeye steak baking pro in no time. Who knows, you might even become the next grill master of your family or circle of friends! So grab your favorite ribeye steak, gather your ingredients, and get cooking! You won’t be disappointed.
Everyone is watching

How to Cook Frozen Lobster Tails Perfectly: A Step-by-Step Guide
RecipesLobster. Just the word conjures up images of lavish meals, special occasions, and a taste of luxury. But let's...

Pigs in a Blanket Cooking Time: How Long to Bake for Perfect Results
RecipesAh, pigs in a blanket. Just the name conjures up images of those delightful little parcels of crispy pastry en...

Pork Fillet Cooking Time: How Long to Cook It Perfectly
RecipesPork fillet, or tenderloin as it's sometimes called, is a real favourite in our house. It's so versatile, and...

The Ultimate Guide to Tender, Juicy Pulled Pork
RecipesRight, let's talk pulled pork. It's one of those dishes that just screams "comfort food," doesn't it? I mean...

The Ultimate Guide to Cooking Sweet Potatoes: From Roasting to Mashing
RecipesSweet potatoes. Just the name conjures up images of warm, comforting dishes, bursts of vibrant color, and a to...