Ah, the ribeye steak. Just the name evokes images of smoky grill marks, juicy pink centers, and that satisfying sizzle as it hits the pan. It's a culinary masterpiece, a true celebration of meaty goodness. But let's be honest, nailing a perfect thin ribeye can be tricky. I've spent years experimenting, learning from countless triumphs (and some epic failures!) to finally master this delicious cut. Now, I'm ready to share my secrets with you.
This guide is your comprehensive roadmap to ribeye perfection. We'll delve into everything from picking the perfect cut to achieving that coveted medium-rare doneness, all while keeping it simple and approachable. So grab your apron, sharpen your knives, and let's embark on this flavorful journey together!
(Part 1) Choosing the Perfect Cut: A Foundation for Flavor
The quest for a perfect steak begins with selecting the right cut. A thin ribeye, with its ideal thickness for quick cooking and rich marbling, is the ideal canvas for our masterpiece. But with so many options, where do you begin?
The Importance of Thickness: Finding the Goldilocks Zone
You wouldn't try to bake a cake straight from the fridge, would you? The same logic applies to your steak. Too thin, and it'll cook too quickly, leading to a dry, chewy texture. Too thick, and you'll be wrestling with a tough, unevenly cooked piece of meat.
We're aiming for a sweet spot, a thickness around 1 inch (2.5 cm). This allows for a beautiful sear on the outside while ensuring a juicy, tender interior. I've learned this through countless trials. Remember, it's not just about the sear – it's about the delicate balance of texture and flavor that comes from a perfectly cooked thin ribeye.
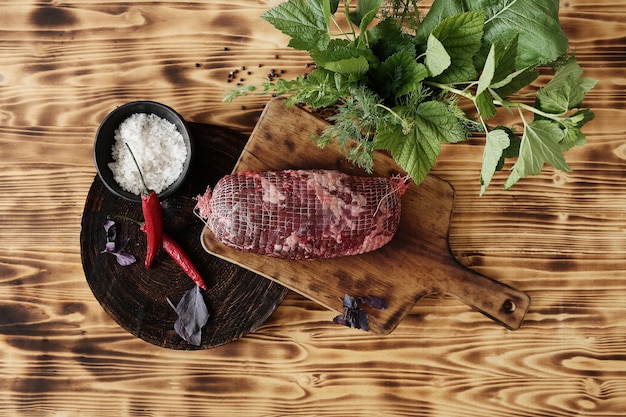
Know Your Marbling: The Key to Juiciness and Flavor
You've probably heard the term "marbling" when it comes to beef. Those white streaks of fat running through the meat aren't just for show – they're the key to flavour and tenderness. Think of it as nature's built-in butter, melting during cooking and basting the steak from the inside out.
Look for a ribeye with good marbling, and don't be afraid to splurge on a higher-quality cut. The extra fat renders down into juicy, flavorful goodness, making every bite a treat. It's a bit like investing in a fine wine – a little extra up front yields a much more rewarding experience in the end.
The Bone-in vs. Boneless Debate: A Matter of Preference
This is where personal preference reigns supreme. bone-in ribeyes, for me, are a delicious choice. That bone adds a unique flavor dimension, helps to keep the steak moist, and adds a touch of rustic charm. It's a visual delight as well, reminding you that you're enjoying a true cut of meat.
However, boneless ribeyes are equally delicious and often easier to cook evenly. They're also a great choice for smaller portions or if you're planning on grilling. Ultimately, it boils down to what you enjoy most – the choice is yours!
(Part 2) Preparing the Steak: Setting the Stage for Success
You've got your perfect cut. Now, let's get this steak ready for its culinary debut. This is a crucial step that sets the stage for a truly delicious end result.
Getting the Right Temperature: A Gentle Warm-up
Imagine trying to bake a cake straight from the fridge. It wouldn't turn out well, would it? The same principle applies to your steak. Bringing it to room temperature is a crucial step that ensures even cooking and prevents it from becoming tough.
I usually take my steak out of the fridge about 30 minutes before cooking. This allows it to gently warm up, ensuring that all parts of the meat cook evenly. It's a small detail, but it makes a big difference in the final result.
Pat it Dry: Achieving that Crisp Sear
Before you embark on the cooking journey, pat your steak dry with paper towels. This simple step is essential for achieving that crispy, golden-brown sear. It also prevents excess steam from forming, which can hinder browning and lead to a pale, soggy steak.
I've learned this the hard way, especially with thin steaks. The steam from a damp surface can make it nearly impossible to get a good sear, resulting in a disappointing texture. So, always pat it dry for a superior outcome.
Seasoning the Steak: Enhancing Natural Flavors
Don't go overboard with the salt and pepper! You want to enhance the natural flavour of the steak, not mask it. I generally season my steaks generously with salt and pepper about 30 minutes before cooking. This allows the salt to draw out moisture and create a more flavorful crust.
I prefer using kosher salt, as its larger flakes distribute more evenly and tend to be less salty than table salt. This subtle difference can make a significant impact on the overall flavor. It's a simple trick I learned from a seasoned chef, and it's one I always try to remember.
(Part 3) Cooking Methods: A Culinary Comparison
Now that our thin ribeye is prepped and ready, let's dive into the most popular methods for cooking it to perfection. From the simplicity of pan-frying to the versatility of the grill, each method offers a distinct flavour and texture profile.
Pan-Frying: The Classic Approach for Simplicity and Flavor
Pan-frying is my go-to method for thin ribeyes. It's simple, fast, and delivers consistently good results. The intense heat of the pan creates a beautiful sear while retaining the juiciness of the steak. It's like a culinary dance between heat and moisture, resulting in a symphony of flavors.
Tips for Pan-Frying Perfection: A Step-by-Step Guide
- Heat a heavy-bottomed pan over medium-high heat. Cast iron is my personal preference, but any pan that retains heat well will do the trick. The key is to ensure the pan is scorching hot before adding the steak. It's the foundation for that perfect sear.
- Add a tablespoon or two of oil, such as olive oil or grapeseed oil. Grapeseed oil has a higher smoke point, which is ideal for searing, ensuring you can achieve that crispy crust without burning the steak.
- Sear the steak for 2-3 minutes per side for a beautiful crust. Patience is key here. You want a nice, even brown color without burning the steak. The steak will release some moisture at first, and you'll need to resist the temptation to flip it too early. Let it form that crust, and you'll be rewarded with a flavorful and visually appealing steak.
- Reduce heat to medium-low and continue cooking for another 2-3 minutes per side, or until the desired level of doneness is reached. I always recommend using a meat thermometer to ensure accuracy. Thin ribeyes can cook quickly, so it's important to monitor the internal temperature to avoid overcooking.
Grilling: Outdoor Flavor with Smoky Notes
For those warm summer evenings, there's nothing quite like grilling a ribeye. It adds a smoky, charred flavor that's hard to beat, a flavor that can only be achieved over an open flame. The grill marks add a visual appeal that makes the steak even more tempting.
Grilling Secrets: Mastering the Art of the Grill
- Preheat your grill to medium-high heat. If you're using a gas grill, use the high heat setting to get those flames roaring.
- Clean the grill grates, ensuring they're nice and clean. This will prevent your steak from sticking and help to create beautiful grill marks.
- Place the steak on the grill and sear for 2-3 minutes per side, turning every 1-2 minutes to achieve those perfect grill marks. As with pan-frying, patience is key. Let the steak sit undisturbed for those initial 2-3 minutes to allow for a good sear. The grill marks not only add flavor but also make your steak look even more appealing.
- Reduce heat to medium-low and continue grilling for another 2-3 minutes per side, or until the desired level of doneness is reached. Don't forget your trusty meat thermometer to ensure accuracy. The key is to get that beautiful char without overcooking the steak. It's a delicate dance between heat and time.
Broiling: The Quick and Easy Option for Busy Nights
If you're short on time or don't want to fire up the grill, broiling is a fantastic alternative. It's a quick and easy way to cook a steak with a nice crispy crust. This method is ideal for those nights when you want a satisfying steak dinner without a lot of fuss.
Broiling Tips: Maximizing Speed and Efficiency
- Preheat your oven broiler to high. This is a high-heat method, so make sure your broiler is nice and hot before you start cooking.
- Place the steak on a baking sheet lined with aluminum foil. This will help to catch any drips and make cleanup easier.
- Broil the steak for 2-3 minutes per side, or until a beautiful crust has formed. Keep a close eye on the steak to avoid overcooking. Thin ribeyes can go from tender to dry pretty quickly, so keep that meat thermometer handy.
- Turn the steak over and broil for an additional 2-3 minutes per side, or until the desired level of doneness is reached. Remember, broiling is a high-heat method, so it's important to cook the steak quickly and efficiently. Don't be tempted to let it linger for too long, or you'll end up with a tough and chewy steak.
(Part 4) Achieving the Perfect Doneness: The Art of Temperature Control
No one wants a steak that's overcooked and tough. We're aiming for that juicy, tender, and flavorful "medium-rare" doneness, the sweet spot that balances tenderness with a slight pink center. But before we dive into that, let's talk about the different levels of doneness.
Doneness Levels Explained: A Guide to Your Preferences
The ideal doneness for a steak is a matter of personal preference. But here's a breakdown of the common levels to help you understand what you're aiming for.
| Level of Doneness | Internal Temperature | Texture |
|---|---|---|
| Rare | 125-130°F (52-54°C) | Red center with a cool, almost raw feel |
| Medium-Rare | 130-135°F (54-57°C) | Slightly pink center with a warmer, slightly springy feel |
| Medium | 135-140°F (57-60°C) | Pink center with a firmer, more cooked feel |
| Medium-Well | 140-145°F (60-63°C) | Slightly pink center with a firm feel |
| Well-Done | 145-150°F (63-66°C) | No pink center, completely cooked through |
I'm a big fan of medium-rare, but you might prefer a different level of doneness. It's a matter of personal taste. But remember, overcooking your steak will lead to dryness and toughness, so don't be afraid to err on the side of caution, especially with a thin ribeye.
The Importance of a Meat Thermometer: A Reliable Guide to Perfection
A meat thermometer is your best friend when it comes to achieving the perfect doneness. It takes the guesswork out of cooking and ensures that your steak is cooked to your exact specifications. I always keep a meat thermometer handy in my kitchen. It's a small investment that makes a big difference. It allows me to monitor the internal temperature of the steak and ensure that it's cooked to the desired level of doneness. It's also a great way to avoid overcooking your steak and ending up with a dry and tough piece of meat. Trust me, it's worth the investment!
How to Use a Meat Thermometer: A Simple and Effective Technique
Using a meat thermometer is simple. Simply insert the probe into the thickest part of the steak, making sure it doesn't touch the bone. Wait for a few seconds, and then read the temperature. You can also use a digital meat thermometer that beeps when the steak reaches the desired temperature. Just make sure to clean your thermometer after each use, which will help to prevent cross-contamination.
(Part 5) Resting the Steak: A Crucial Step for Tenderness and Juiciness
Once your steak is cooked to perfection, don't rush to slice into it right away. Allow it to rest for 5-10 minutes before cutting. Resting is crucial for several reasons. It allows the juices to redistribute evenly throughout the steak, resulting in a juicier, more tender, and flavorful experience.
Why Resting Matters: Unlocking the Full Potential of Your Steak
As the steak cooks, the juices are driven to the center. By resting the steak, you give the juices time to redistribute evenly throughout the meat, resulting in a juicier, more tender, and flavorful steak. I often find myself getting impatient and wanting to dig in right away, but I've learned the hard way that resting is essential. It's like giving the steak a chance to catch its breath after a long journey in the pan or on the grill. It's a simple but crucial step that yields a more satisfying steak.
How to Rest a Steak: A Simple Technique for Optimal Results
To rest a steak, simply transfer it to a cutting board and loosely cover it with aluminum foil. This will help to keep the steak warm and moist while it rests. If you want to be extra fancy, you can also rest the steak on a wire rack placed over a baking sheet. This will allow air to circulate around the steak, which will help to prevent it from getting soggy. The key is to create a warm and cozy environment for your steak to relax and redistribute its juices.
(Part 6) Slicing and Serving: The Final Touches for a Delicious Meal
Now that your steak is cooked to perfection and has rested, it's time to slice it and serve it up. But before you go wielding your knife, take a deep breath and remember these tips for a satisfying presentation.
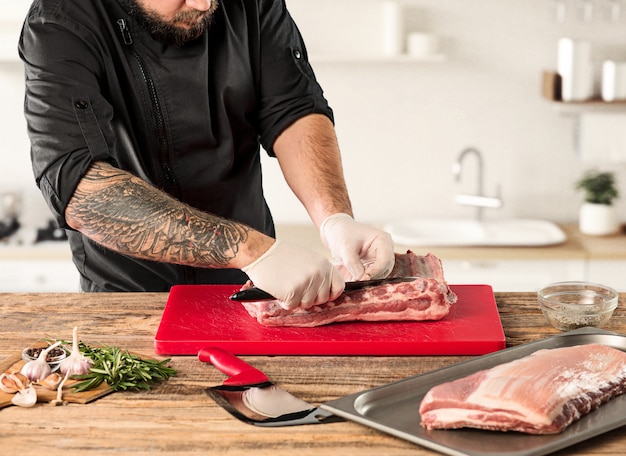
Slicing Techniques: Transforming Texture and Appearance
The way you slice a steak can make a big difference in its presentation and taste. I always use a sharp knife, such as a chef's knife or a carving knife, to ensure clean, even slices. When slicing, I work against the grain of the meat. This means cutting across the muscle fibers, which will make the steak more tender and easier to chew. This simple technique can transform your steak from chewy to melt-in-your-mouth delicious.
Serving Suggestions: Elevating Your Ribeye with Sides
Thin ribeye steaks are incredibly versatile and can be served with a variety of sides. I love pairing them with roasted vegetables, mashed potatoes, or a simple salad. I've also been experimenting with more adventurous combinations, like a chimichurri sauce or a creamy pesto. Don't be afraid to get creative and experiment with different flavors!
Here are a few of my favorite side dish ideas:
- Roasted vegetables: roasted asparagus, Brussels sprouts, or broccoli add a vibrant burst of color and flavor.
- Mashed potatoes: Creamy and comforting, mashed potatoes complement the richness of the steak perfectly.
- Simple salad: A crisp, refreshing salad with a light vinaigrette helps to balance the richness of the steak.
- grilled corn on the cob: A sweet and savory side that's perfect for summer barbecues.
- Mushroom risotto: A decadent and flavorful side that pairs well with the richness of the steak.
- grilled portobello mushrooms: A meaty and satisfying vegetarian option.
(Part 7) FAQs: Your Burning Steak Questions Answered
Let's face it, cooking a steak can be a bit daunting, and you might have some questions lingering. Here are answers to some of the most common ones.
1. How do I know if my steak is done?
The best way to determine the doneness of your steak is to use a meat thermometer. The internal temperature will vary depending on the desired level of doneness. Consult the doneness chart provided earlier for specific temperature ranges. If you don't have a thermometer, you can use the "finger test," but it's not as accurate.
2. Can I cook a steak to rare?
Yes, you can definitely cook a steak to rare. However, it's important to note that rare steak is not fully cooked and may contain bacteria that can make you sick. If you choose to cook your steak rare, make sure it's from a reputable source and is handled properly.
3. What if I overcook my steak?
Don't panic! While overcooking a steak can lead to dryness and toughness, it's not the end of the world. You can still salvage it by slicing it thinly and adding a flavorful sauce or topping. I like to use a pan sauce made with the drippings from the steak, or I'll add a dollop of butter or a sprinkle of herbs to boost the flavor. You can also use your overcooked steak in a stir-fry or in tacos. Don't throw it away!
4. How long should I rest my steak?
Allow your steak to rest for 5-10 minutes after cooking. This will give the juices time to redistribute evenly, resulting in a juicier and more tender steak.
5. How do I make a perfect pan sauce?
A pan sauce is a quick and easy way to add flavor to your steak. After cooking the steak, remove it from the pan and set it aside. Add a tablespoon or two of butter to the pan and let it melt. Add a splash of wine or broth, and scrape up the browned bits from the bottom of the pan. Simmer for a few minutes, until the sauce thickens, and then pour it over the steak. You can also add herbs, spices, or other flavorful ingredients to customize your sauce.
(Part 8) Conclusion: Embrace the Journey to steak perfection
So there you have it! My ultimate guide to cooking the perfect thin ribeye steak. I hope you've learned a few new tips and tricks to take your steak game to the next level. Remember, practice makes perfect. Don't be afraid to experiment, and most importantly, enjoy the process!
Everyone is watching

How to Cook Frozen Lobster Tails Perfectly: A Step-by-Step Guide
RecipesLobster. Just the word conjures up images of lavish meals, special occasions, and a taste of luxury. But let's...

Pigs in a Blanket Cooking Time: How Long to Bake for Perfect Results
RecipesAh, pigs in a blanket. Just the name conjures up images of those delightful little parcels of crispy pastry en...

Pork Fillet Cooking Time: How Long to Cook It Perfectly
RecipesPork fillet, or tenderloin as it's sometimes called, is a real favourite in our house. It's so versatile, and...

The Ultimate Guide to Cooking Delicious Frankfurters
RecipesLet's face it, we all love a good frankfurter. It's a classic, simple, and always satisfying. But let's be rea...

Wolf Meat Recipes: A Guide to Cooking Wild Game
RecipesLet's be honest, you don't see wolf meat at your local butcher shop every day. It's a bit of a wild card, but ...