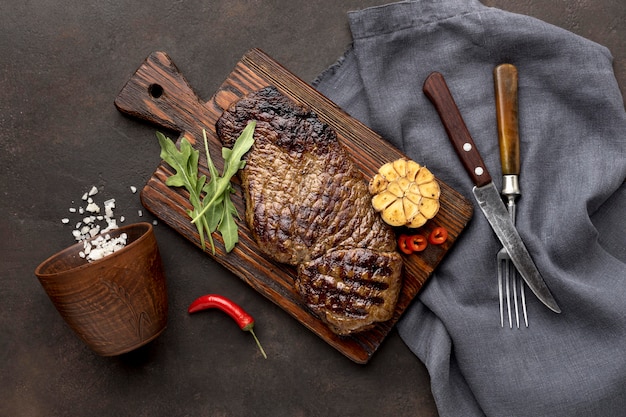
There's a certain magic to a perfectly cooked ribeye steak. The juicy, flavorful meat, the satisfying sizzle in the pan – it's a symphony of senses that never fails to delight. For years, I've been obsessed with getting that steak just right, experimenting with different techniques and always seeking that sweet spot between tenderness and a beautiful, crispy sear. It's been a journey of trial and error, but I've learned a thing or two along the way, and I'm excited to share my secrets with you.
This isn't some stuffy, complicated recipe. This is a straightforward guide, packed with tips and tricks that even a beginner can master. So, grab your trusty frying pan, let's get cooking, and embark on a delicious journey to ribeye perfection!
(Part 1) Choosing Your Ribeye: The Foundation of Flavor

Before we even start thinking about cooking, we need to choose our star ingredient: the ribeye. And it's not just any ribeye. We're after quality here, folks. A good ribeye should have a nice marbling, those beautiful streaks of fat that give it that incredible flavor and tenderness. Think of it as the steak's built-in butter!
Picking the Right Cut: Bone-In for the Win
When you're at the butcher's, ask for a "bone-in" ribeye. The bone adds flavor and helps keep the steak moist during cooking. It's like a little flavor bomb that adds depth to your steak. Aim for a steak that's about 1.5 inches thick – this ensures a nice crust on the outside and a perfectly pink center.
Marbling Matters: The Key to Juiciness
You'll want to look for a steak with good marbling. Those white streaks of fat are what make the ribeye so juicy and flavorful. The more marbling, the better. You can typically find different grades of ribeye, like "Select," "Choice," and "Prime." If you're going for the ultimate flavor experience, "Prime" is the way to go. But remember, even a "Choice" cut can be delicious if you pick one with good marbling. Look for those beautiful, evenly distributed streaks of fat – they're your friends!
Thickness is King: Finding the Sweet Spot
Thickness is crucial for a good ribeye. It allows for a nice even sear and prevents the steak from drying out. A steak that's too thin will cook too quickly, and you'll likely end up with a tough, chewy steak. A steak that's too thick might take too long to cook and could potentially overcook on the inside before the outside is perfectly seared. A 1.5-inch thickness is a good starting point for most ribeye steaks. But ultimately, it depends on your personal preference and how you like your steak cooked.
(Part 2) Prepping Your Steak: Setting the Stage for Success
So, you've got your beautiful ribeye. Now it's time to prep it for its star turn in the pan. These steps are crucial for ensuring even cooking and a delicious final result.
Room Temperature is Key: Warm and Ready to Cook
The first rule of ribeye prep? Take it out of the fridge at least 30 minutes before cooking. This allows the steak to come to room temperature, which means it cooks more evenly. You'll get a more consistent sear and a more tender steak. You don't want to be cooking a steak that's still cold from the fridge – it'll cook unevenly and you might end up with a cold center. Give it a good 30 minutes to chill out before it hits the hot pan.
Pat It Dry: Goodbye Moisture, Hello Crispy Crust
Once the steak has warmed up, pat it dry with paper towels. This ensures a nice, even sear. Excess moisture will steam the steak instead of creating a crispy crust. It's a small step, but it makes a big difference in achieving that satisfying sear.
Seasoning with Simplicity: The Power of Salt and Pepper
Don't overthink the seasoning. Salt and pepper is all you need for a truly delicious steak. Salt is your best friend – it helps to season the meat, but also draws out excess moisture, which helps to create a beautiful crust. I like to use kosher salt, as it's less likely to clump and allows you to season more liberally. Freshly ground black pepper adds a bit of spice and depth. Let the natural flavors of the ribeye shine through!
Adding Other Flavors: A Touch of Extra Flair
Feel free to get creative with your seasoning. A light dusting of garlic powder or onion powder can add a lovely aromatic touch. A sprinkle of paprika can give your steak a beautiful color and a hint of smokiness. Don't go overboard though. You don't want to mask the natural flavor of the ribeye. A little bit of spice goes a long way!
(Part 3) The Sizzling Pan Saga: The Heart of the Cooking Process
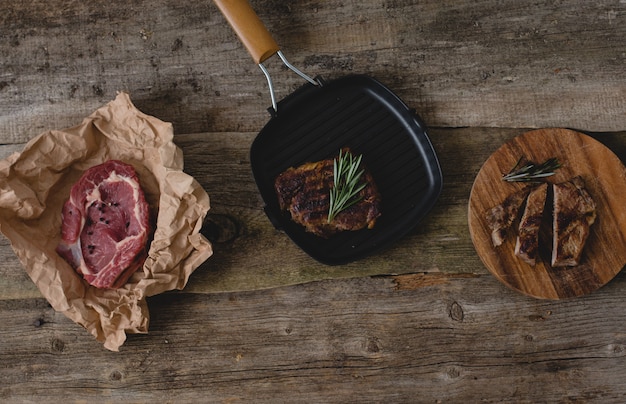
Now, for the moment we've all been waiting for: cooking the ribeye in the pan. It's a bit of a dance, a delicate balance of heat and time, but trust me, it's worth it. The pan is the stage, the oil is the spotlight, and your ribeye is the star of the show!
Choose Your Pan Wisely: Cast Iron for the Win
A heavy-bottomed cast iron skillet is the ultimate choice for searing steak. It heats evenly and holds heat beautifully, which is crucial for getting that perfect crust. If you don't have a cast iron pan, a thick-bottomed stainless steel pan will also do the trick. Avoid thin-walled pans, as they tend to heat unevenly and won't give you that desired sear.
Heat It Up: A Blazing Hot Start
Turn your pan on high heat and let it get blazing hot. You want the pan to be screaming hot before you even think about adding the steak. The hotter the pan, the better the sear. If you're using a cast iron pan, add a tablespoon of oil, such as vegetable oil or canola oil. The oil should start to shimmer and smoke before you add the steak. If you're using a stainless steel pan, you may need a bit more oil to prevent sticking.
Don't Crowd the Pan: Give Your Steak Space
Don't try to cook too many steaks at once. It will lower the temperature of the pan and you won't get a nice sear. Cook the steaks in batches if necessary, ensuring each steak has ample room to breathe in the pan. Let them bask in the heat and develop that beautiful crust!
(Part 4) Searing Your Steak to Perfection: The Art of the Crust
Alright, the pan is blazing hot, the oil is shimmering, and you're ready to sear your steak. This is the crucial moment, where patience and timing come into play. Remember, we're aiming for a beautiful, crispy crust on the outside while keeping the inside perfectly pink and juicy.
Don't Touch It!: Let It Sizzle and Settle
The first rule of searing is: don't touch the steak for at least 3 minutes. Let the steak settle into the pan and develop a crust. Resist the urge to flip it over too soon. The initial sear is crucial for locking in the juices and creating a flavorful crust. I know, it's hard to wait, but trust me, it's worth it. Let that beautiful crust develop – it's a sign of a well-cooked steak!
Flip It Like a Pro: A Gentle Turn for Even Cooking
After 3 minutes, carefully flip the steak using tongs. Don't use a fork, as it will pierce the steak and release precious juices. Continue to sear the other side for another 3 minutes. A gentle flip is all it takes to ensure even cooking and a beautiful sear on both sides.
Sear the Sides: A Touch of Crispy Goodness
Once you've seared both sides, you can sear the edges of the steak for another minute each to create a beautiful crust all around. This is optional, but it adds a touch of extra flavor and visual appeal. It's a little extra effort that goes a long way in creating a truly stunning steak.
(Part 5) The Art of Resting: A Moment for the Juices to Reunite
You've seared your steak to perfection, but we're not done yet. It's time to let the steak rest before slicing and serving. This crucial step is often overlooked, but it's key to ensuring a juicy, flavorful steak.
Why Rest Your Steak: The Secret to Juiciness
Resting a steak allows the juices to redistribute throughout the meat. When you cut into a steak right after cooking, the juices will run out, leaving you with a dry and less flavorful steak. By letting the steak rest, the juices are reabsorbed, resulting in a juicier and more flavorful steak. It's like giving your steak a chance to recover and regain its moisture.
How Long to Rest: A Moment of Patience
A good rule of thumb is to rest your steak for at least 5-10 minutes. This allows enough time for the juices to settle and redistribute. If you're cooking a thicker steak, it might need a bit longer to rest. While the steak is resting, you can prepare your sides or clean up your kitchen. Patience is key to achieving a truly delicious steak.
(Part 6) steak doneness: A Visual Guide to Your Perfect Bite
Now, we're talking about the holy grail of steak cooking: achieving the perfect doneness. The level of doneness you choose is a personal preference. Some like their steak rare, others prefer it well-done. Here's a visual guide to help you decide how long to cook your ribeye for your desired doneness:
| Doneness | internal temperature | Appearance | cooking time (per side) |
|---|---|---|---|
| Rare | 125-130°F (52-54°C) | Red center, cool to the touch | 3-4 minutes |
| Medium-Rare | 130-135°F (54-57°C) | Slightly pink center, warm to the touch | 4-5 minutes |
| Medium | 135-140°F (57-60°C) | Pink center, warm to the touch | 5-6 minutes |
| Medium-Well | 140-145°F (60-63°C) | Slightly pink center, hot to the touch | 6-7 minutes |
| Well-Done | 145-150°F (63-66°C) | No pink center, hot to the touch | 8-9 minutes |
Remember, these are just guidelines. Every steak is different, and factors like the thickness and marbling can affect the cooking time. It's always a good idea to use a meat thermometer to check the internal temperature of your steak for accurate doneness. It's better to be safe than sorry, especially when it comes to food safety.
(Part 7) Serving Your Steak: The Grand Finale
The moment of truth is here: slicing and serving your perfectly cooked ribeye. Don't rush this part. Take your time to admire your work and let the aroma fill your kitchen. It's a symphony of flavors and textures that deserves a moment of appreciation.
Resting is Key: A Final Moment of Patience
The steak should still be resting. Don't be tempted to cut into it right away. You've waited this long, a few more minutes won't hurt. Let the juices redistribute and make those final adjustments for a truly remarkable steak.
Slicing with Precision: Cutting with the Grain
Use a sharp knife to slice the steak against the grain. This means slicing perpendicular to the muscle fibers. Cutting with the grain can result in tougher, chewier meat. A sharp knife and the right cutting technique make all the difference in achieving a tender, flavorful steak.
Elevate Your Steak: The Perfect Accompaniments
Present your steak beautifully. A simple bed of roasted vegetables, mashed potatoes, or a side salad will elevate your dish. You could even drizzle a little pan sauce over your steak for added richness. A little creativity in the presentation can take your steak from good to great.
(Part 8) FAQs: Steak Cooking Queries Answered
I know you might have some questions about cooking the perfect ribeye. Here are some frequently asked questions, along with my insider tips.
1. How do I prevent my steak from sticking to the pan?
To prevent sticking, make sure your pan is screaming hot before you add the steak. Use a high-quality cooking oil that has a high smoke point, such as vegetable oil, canola oil, or avocado oil. Don't crowd the pan, and make sure the steak is dry before you place it in the pan.
2. What if my steak is too thin?
If your steak is too thin, you might want to consider grilling it instead of pan-searing it. Grilling will help to prevent the steak from drying out, as it allows for a more even cooking process.
3. What happens if I overcook my steak?
Overcooked steak can be dry and tough. If you've overcooked your steak, there's not much you can do to remedy it. However, you can try slicing it thinly to make it more tender. Don't worry, it's a learning curve, and next time you'll nail the perfect doneness!
4. Can I cook a steak in a non-stick pan?
Yes, you can cook a steak in a non-stick pan. However, it won't achieve the same crispy sear as a cast iron or stainless steel pan. Non-stick pans are generally designed for low-heat cooking, so you may find it difficult to get the pan hot enough for a good sear.
5. How can I keep my steak warm while I cook the rest of the meal?
If you're cooking a multi-course meal and want to keep your steak warm, you can transfer it to a preheated oven set to the lowest temperature. Alternatively, you can wrap the steak in aluminum foil and let it rest in a warm place, like a slow cooker.
(Part 9) Beyond the Basics: Experimenting with Flavors
Alright, now that you've mastered the basics, let's spice things up a little! Here are a few ways to add some extra flair to your ribeye game.
Infused Oils: A Touch of Aromatics
Try using infused oils for searing. Garlic infused oil, rosemary infused oil, or even chili-infused oil can add a burst of flavor to your steak.
Herbs and Spices: Adding Layers of Flavor
Experiment with different herbs and spices. A sprinkle of smoked paprika, a pinch of cayenne pepper, or a few sprigs of fresh thyme can take your steak to the next level.
Pan Sauce Magic: Elevating the Experience
After you sear the steak, you can create a delicious pan sauce. Add butter, chopped garlic, and herbs to the pan. Let the butter melt and the garlic infuse the oil. Deglaze the pan with a splash of red wine or beef broth, then simmer for a few minutes to create a rich sauce that will elevate your steak to a whole new level of deliciousness.
(Part 10) Sharing the Love: A culinary journey
Cooking the perfect ribeye steak is a journey. It's about mastering the basics, experimenting with flavors, and most importantly, enjoying the process. So, don't be afraid to get in the kitchen, try new things, and have fun! Remember, even seasoned chefs have their mishaps. It's all part of the learning process.
And when you've finally achieved that perfect sear, that juicy pink center, and a taste that will make you sing – share the love! Cook for your friends and family, and let them experience the joy of a perfectly cooked ribeye. It's a culinary adventure that's worth sharing!
Everyone is watching

How to Cook Frozen Lobster Tails Perfectly: A Step-by-Step Guide
RecipesLobster. Just the word conjures up images of lavish meals, special occasions, and a taste of luxury. But let's...

Pigs in a Blanket Cooking Time: How Long to Bake for Perfect Results
RecipesAh, pigs in a blanket. Just the name conjures up images of those delightful little parcels of crispy pastry en...

Pork Fillet Cooking Time: How Long to Cook It Perfectly
RecipesPork fillet, or tenderloin as it's sometimes called, is a real favourite in our house. It's so versatile, and...

The Ultimate Guide to Cooking Delicious Frankfurters
RecipesLet's face it, we all love a good frankfurter. It's a classic, simple, and always satisfying. But let's be rea...

Wolf Meat Recipes: A Guide to Cooking Wild Game
RecipesLet's be honest, you don't see wolf meat at your local butcher shop every day. It's a bit of a wild card, but ...