prime rib – the sound of it alone conjures up images of a grand feast, a celebratory dinner, a meal fit for a king (or queen!). It's a dish that demands respect, a little bit of know-how, and a whole lot of love. For years, I've been perfecting my prime rib recipe, and let me tell you, the journey has been delicious! This isn't just another recipe; it's a journey of flavour and technique, one that I'm eager to share with you. Buckle up, because we're about to embark on a prime rib adventure!
(Part 1) Choosing Your Prime Rib: The Foundation of Flavour
The first step in any good prime rib journey is choosing the right cut. This is where your culinary adventure truly begins. I'm a firm believer in the power of bone-in prime rib. There's something about that rich, deep flavour that comes from the bone that simply can't be replicated. You can usually find these beauties at your local butcher, and you'll have two main choices: a standing rib roast (with the ribs still attached) or a rib roast (where the ribs have been removed). I personally prefer the standing rib roast; it just looks so majestic. But, ultimately, the choice is yours!
Now, let's talk size. The size of the roast depends on the number of hungry mouths you're feeding. Remember, prime rib shrinks as it cooks, so it’s best to err on the side of caution. A good rule of thumb is to aim for about 1 pound of prime rib per person. If you're feeding a crowd, don't be afraid to go for a larger roast – it's always better to have leftovers!
The Art of Preparation: A Little TLC for Your Roast
Once you've got your prime rib, it’s time to give it a little pre-show TLC. Start by rinsing it under cold water and then pat it dry with paper towels. You want it nice and dry, otherwise, the crust won't brown properly, and we all know a beautiful crust is the key to a truly satisfying prime rib experience.
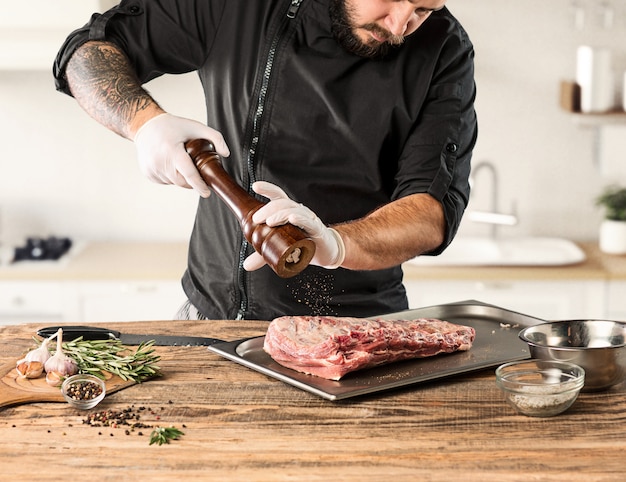
Now, onto the fun part: seasoning! Forget the simple salt and pepper routine. It's time to unleash your inner spice master. I love experimenting with different herb and spice combinations. Rosemary, thyme, garlic powder, paprika – the possibilities are endless! Don't be afraid to get creative and add your own personal touch to your prime rib. This is your chance to make it uniquely yours!
(Part 2) Heating Things Up: The Oven's Crucial Role
Getting the Oven Ready: The First Step to Success
The oven is your prime rib's best friend, so make sure you treat it right. Preheating the oven to 450°F (232°C) is non-negotiable. This initial high heat is crucial for developing that golden-brown crust, and we all know a good crust is the sign of a prime rib done right.
The Roast's Grand Entrance: Preparing for the Oven
While the oven is warming up, it’s time to prepare your roast for its grand entrance. Pat it with a little olive oil – a light coating is all you need. Now, for the seasoning: don’t hold back on the salt. Remember, salt is the key to a beautiful crust, so be generous! Add your chosen spices and get ready for the oven's magic. And if you're feeling extra fancy, use a meat thermometer to check the internal temperature of the roast. It's all about ensuring you're on the right track.
Placing the Roast: Fat Side Up is the Way to Go!
Now, carefully place your seasoned prime rib in a roasting pan – fat side up, always fat side up! The fat will melt and baste the roast, creating a symphony of tenderness and juiciness. It’s like nature’s own self-basting system! Remember, you can use a digital thermometer to monitor the roast's temperature.
(Part 3) The Art of Roasting: Unveiling the Prime Rib's Potential

Creating that Stunning Crust: The High-Heat Start
Here we go! Place the roast in the preheated oven and let it cook for 15 minutes. That's it – just 15 minutes. This initial high-heat cooking is all about creating that stunning crust. Don't worry, it's a beautiful process! You'll see it developing right before your eyes.
Reducing the Heat: The Path to Tenderness
After 15 minutes, reduce the oven temperature to 325°F (163°C). The roast should have a beautiful golden-brown crust by now. This is the start of the real magic, and it's a delightful sight to behold. This lower temperature will ensure that the roast cooks evenly and becomes deliciously tender.
Basting: The Secret to a juicy roast
While your prime rib is roasting, don't just stand there! It’s time to get involved. Every 30 minutes or so, baste the roast with the melted fat from the bottom of the pan. It's a simple step, but it makes a world of difference. You're keeping the roast moist, and that means tender, juicy meat. Remember, you want that beautiful crust, and basting helps to maintain its golden glory.
(Part 4) Timing is Everything: Mastering the Prime Rib Clock
The Art of Timing: How Long to Cook Your Roast
The art of prime rib cooking is all about timing. The exact cooking time will depend on the size of your roast and the level of doneness you desire. For a medium-rare roast, you'll need about 15 minutes per pound, while a medium roast takes around 20 minutes per pound. But don't stress! We'll get into more specific cooking times later. Just remember to check the internal temperature of the roast to ensure it’s cooked to your liking.
Checking the Temperature: A Meat Thermometer is Your Best Friend
To check the internal temperature, use a trusty meat thermometer. Insert it into the thickest part of the roast, away from the bone and fat. It’s important to make sure the thermometer isn’t touching any bone or fat, as this could give you an inaccurate reading. For a medium-rare roast, you want the internal temperature to be 130°F (54°C). For a medium roast, aim for 140°F (60°C). And if you're still unsure, you can always refer to a chart online. It’s all about finding the perfect balance between deliciousness and safety!
(Part 5) The Resting Phase: Patience is Key to a tender roast
Letting the Roast Rest: A Crucial Step in Prime Rib Cooking
The roast is done! But before you go carving, it's time for a little rest. Let the roast sit for at least 15 minutes before carving. This is a crucial step that many people overlook. You see, when the roast rests, the juices distribute evenly throughout the meat. This results in a tender, juicy, melt-in-your-mouth experience. So, grab a glass of wine, relax, and let the roast do its thing.
Carving Time: Unveiling the Beauty Within
After the roast has rested, you're ready to carve. Now's the moment you've been waiting for! Grab your carving knife (or a butcher's knife if you're feeling adventurous) and slice the roast against the grain. This helps to ensure tender, bite-sized pieces. The result? A stunning display of perfectly sliced prime rib, ready to be devoured! Don't forget to take a picture – it's prime rib perfection!
(Part 6) Cooking Times Decoded: A Guide to prime rib doneness
Here's a more detailed breakdown of cooking times for a bone-in prime rib roast, based on your desired level of doneness:
Cooking Times:
| Doneness | Internal Temperature (°F) | Cooking Time (minutes per pound) |
|---|---|---|
| Rare | 120-125°F (49-52°C) | 10-12 |
| Medium-Rare | 130-135°F (54-57°C) | 12-15 |
| Medium | 140-145°F (60-63°C) | 15-20 |
| Medium-Well | 150-155°F (66-68°C) | 20-25 |
| Well-Done | 160°F (71°C) and above | 25 and above |
(Part 7) Temperature Precision: Ensuring Your Prime Rib is Perfect
Remember, these cooking times are just guidelines. The best way to ensure your prime rib is cooked to your liking is to use a meat thermometer. Insert the thermometer into the thickest part of the roast, making sure it's not touching any bone or fat. If the temperature isn’t where you want it to be, simply continue cooking for a few more minutes, checking the temperature every few minutes. It's all about achieving that perfect level of doneness.
(Part 8) prime rib faqs: Answering Your Burning Questions
How do I know if my prime rib is done?
The answer is simple: use a meat thermometer! Insert it into the thickest part of the roast, making sure it's not touching any bone or fat. The internal temperature should be at your desired level of doneness.
How long should I rest my prime rib before carving?
It's essential to rest your prime rib for at least 15 minutes before carving. This allows the juices to redistribute throughout the roast, resulting in a more tender and juicy piece of meat.
Can I reheat prime rib?
Absolutely! The best way to reheat prime rib is to wrap it in foil and bake it in a preheated oven at 325°F (163°C) for 15-20 minutes. You can also reheat prime rib on the stovetop in a skillet or in a slow cooker.
What are some good side dishes to serve with prime rib?
Oh, there are so many delicious options! Here are a few ideas that will complement the richness of your prime rib:
- Roasted potatoes – a classic pairing for a reason!
- Asparagus – a light and vibrant contrast to the richness of the roast.
- green beans – another simple yet elegant side.
- Yorkshire pudding – a traditional English accompaniment, light and airy with a crispy exterior.
- Mushroom gravy – a rich and flavorful sauce that elevates the prime rib experience.
- Cranberry sauce – a sweet and tart contrast to the savory prime rib.
What can I do with leftover prime rib?
Don't waste those precious leftovers! They are a culinary treasure waiting to be transformed. Here are a few ideas:
- Prime rib sandwiches – a simple and satisfying way to use leftover prime rib.
- Prime rib salad – add a little crunch and freshness to your leftovers with a salad.
- Prime rib hash – a hearty and satisfying breakfast or brunch option.
- Prime rib soup – a flavorful and comforting way to use up leftover roast.
Don't be afraid to get creative! Leftover prime rib is a versatile ingredient that can be used in a variety of dishes.
(Part 9) Serving Up a prime rib masterpiece: A Feast for the Senses
With your prime rib perfectly rested and carved, it's time to assemble your culinary masterpiece. Arrange the sliced prime rib on a platter, drizzle some of the pan juices over it, and don't forget to offer a generous helping of gravy. Presentation matters – you want your prime rib to look as good as it tastes. It's a showstopper, a culinary triumph, a testament to your culinary prowess.
Serve your prime rib with your chosen side dishes and gather your loved ones for a celebratory feast. Let the aroma of roasted meat and the warmth of good company fill your home. Remember, it’s not just about the prime rib; it’s about creating a memorable experience, sharing a delicious meal, and creating moments that will be cherished long after the last bite has been savored. So, go on, unleash your inner chef and create a feast for the senses!
Everyone is watching

How to Cook Frozen Lobster Tails Perfectly: A Step-by-Step Guide
RecipesLobster. Just the word conjures up images of lavish meals, special occasions, and a taste of luxury. But let's...

Pigs in a Blanket Cooking Time: How Long to Bake for Perfect Results
RecipesAh, pigs in a blanket. Just the name conjures up images of those delightful little parcels of crispy pastry en...

Pork Fillet Cooking Time: How Long to Cook It Perfectly
RecipesPork fillet, or tenderloin as it's sometimes called, is a real favourite in our house. It's so versatile, and...

The Ultimate Guide to Cooking Delicious Frankfurters
RecipesLet's face it, we all love a good frankfurter. It's a classic, simple, and always satisfying. But let's be rea...

Wolf Meat Recipes: A Guide to Cooking Wild Game
RecipesLet's be honest, you don't see wolf meat at your local butcher shop every day. It's a bit of a wild card, but ...