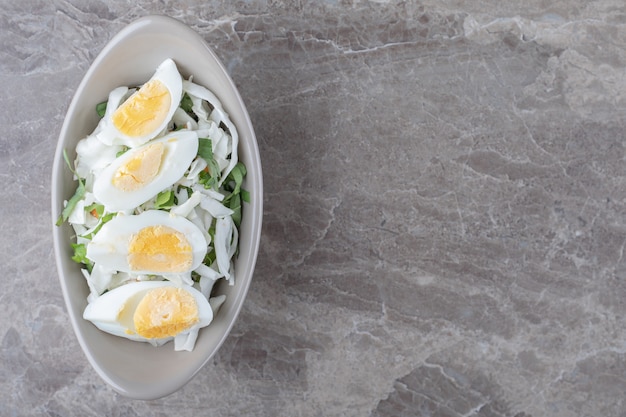
Remember those days when poaching eggs seemed like some mythical culinary feat, reserved for fancy chefs with years of experience? I used to think so too, fearing the dreaded rubbery whites or the egg just dissolving into the water. But trust me, it's not as intimidating as it seems! In fact, with a little practice and these tips, you can confidently turn out restaurant-quality poached eggs right in your own kitchen.
(Part 1) The Foundation: Setting the Stage for Poaching Success

Before you dive into cracking eggs, let's get the basics down. It's about having the right tools and creating the perfect environment for your eggs to shine.
1. The Essential Toolkit: Gear Up for Poaching
You don’t need a fancy gadget arsenal to poach eggs. A few simple tools will do the trick, making the process a breeze:
- Saucepan: Opt for a saucepan large enough to hold at least 2-3 inches of water, providing enough room for your eggs to swim comfortably. I prefer a stainless steel one because it heats up quickly and evenly, ensuring consistent cooking.
- Slotted Spoon: This is your egg-retrieving hero. A slotted spoon lets you gently lift the eggs out of the water without disturbing their delicate shape.
- Small Bowl: Crack your eggs into a small bowl. It allows you to inspect for any pesky shell fragments before sending them for their water bath.
- Ladle or Small Cup: Use this for carefully adding your eggs to the water, ensuring a gentle entry.
Once your toolkit is assembled, let's move on to the crucial element: the water.
2. Temperature Tango: Finding the Sweet Spot
The key to achieving a perfect poached egg is getting the water temperature just right. You don't want a raging boil; that's a recipe for scrambled eggs. Think of it as a gentle, rolling simmer, where the water is bubbling gently, not furiously.
Here’s a simple way to test the water: dip a spoon into the water. If it gently bubbles up around the spoon, you're in the simmering zone.
3. Vinegar: Friend or Foe in Poaching?
You'll often hear about adding vinegar to the poaching water. It's true that a splash of white or apple cider vinegar helps to coagulate the egg whites, creating a neater, more defined poached egg. But it’s not essential. I've found that with the right technique, you can achieve excellent results even without vinegar. So, don't sweat it if you don't have any on hand.
(Part 2) The Art of Cracking: Gentle, Gentle, Gentle!

This is where my early poaching attempts often went awry. I'd crack the eggs straight into the water, ending up with a chaotic, broken mess. Why even bother, right? The secret is to crack your eggs into a small bowl first. This gives you a chance to check for any shell pieces and gently slide the egg into the simmering water without disrupting the yolk.
1. Shell Check: Keeping It Clean
Gently tap the egg on the side of the bowl to create a small crack. Separate the egg halves carefully, making sure that precious yolk stays intact. Now, take a quick peek at the egg. Look for any stray bits of shell. If you spot any, gently remove them with your finger or a small spoon. The last thing you want is a shell-infused egg!
2. A Gentle Slide into the Water
With your egg prepped and ready to go, gently slide it into the simmering water. No dropping allowed! The more gentle the transition, the less likely the egg is to break apart. If you're using vinegar, swirl the water gently with a spoon before adding the egg. This creates a mini whirlpool that helps keep the egg whites neatly contained.
(Part 3) The Waiting Game: Patience is Your Best Weapon

You've successfully added your egg to the simmering water. Now, patience is your ally. The poaching time depends on how you like your eggs cooked.
1. Soft Poached Eggs: A runny yolk Delight
For a soft poached egg, with a luxuriously runny yolk, poach for about 2-3 minutes. The whites will be perfectly set, but the yolk will still be wonderfully liquid and vibrant. This is my personal favorite, enjoying that delightful contrast between the firm whites and the creamy, soft yolk.
2. Medium Poached Eggs: A Balanced Bite
If you prefer a slightly firmer yolk, poach for about 4-5 minutes. The yolk will have a bit more structure, but will still be deliciously creamy. This is a great option if you're seeking a bit more substance while still relishing that soft, tender texture.
3. Firm Poached Eggs: Fully Cooked and Ready
For a fully cooked yolk, poach for about 6-7 minutes. The yolk will be completely set, but it won't be tough or rubbery. I find that firm poached eggs work brilliantly in breakfast sandwiches, where you don’t want the yolk running all over the place.
(Part 4) The Moment of Truth: Checking for Doneness
Your chosen poaching time is up. Now, it’s time to delicately remove your egg from its watery bath. Gently scoop it out using your slotted spoon. If you're using a spoon, ensure it's nice and wide to securely hold the egg. If you're using a spatula, be extra cautious – these eggs are delicate!
1. The White Test: A Firm, Springy Feel
To check if the whites are cooked to your liking, gently press on the white with the back of your spoon. If it feels firm and springy, it's cooked through. If it's still soft and wobbly, give it a bit more time in the water.
2. The Yolk Test: Runny, Creamy, or Set?
If you're aiming for a soft or medium poached egg, gently poke the yolk with the spoon. If it's runny, you're ready to enjoy! For a firmer yolk, just give it a little extra time.
(Part 5) The Finishing Touches: Elevate Your Poached Egg Masterpiece
You've got your beautifully poached egg. Now, let's add those final touches to make it a culinary showstopper.
1. Drain Away Excess Moisture
Carefully lift the egg from the water and gently place it on a paper towel-lined plate to absorb any excess moisture. This prevents the egg from becoming soggy and maintains its perfect texture. Avoid patting the egg dry, as this can damage its delicate surface.
2. Seasoning: Salt, Pepper, and Beyond!
Season your poached egg to your heart's content. A sprinkle of salt and pepper is always a classic choice, but feel free to get creative. I often add a dash of paprika for a pop of color and a hint of smokiness.
3. Presentation: Make it a Feast for the Eyes
Don’t underestimate the power of presentation! A perfectly poached egg deserves to be showcased. Arrange it nicely on a plate, perhaps on a bed of greens, or top it with hollandaise sauce for a classic touch. The possibilities are endless!
(Part 6) Poaching Troubleshoot: Solving Common Poaching Perplexities
Even with all these tips, it’s inevitable that you might encounter a few bumps in the road. Don’t worry, it happens to everyone! Here are some common problems and how to avoid them:
1. The Egg Breaks Apart: Maintaining Its Integrity
This often happens when the water is too hot or if you're not gentle enough when adding the egg to the water. Remember to use a gentle simmer, not a rolling boil. And always slide the egg into the water instead of dropping it in.
2. The Whites Become Cloudy: Seeking Clear, Defined Whites
This can occur if the water is not hot enough. Ensure that the water is at a gentle simmer before adding the egg. If the whites start to look cloudy, try adding the egg to slightly hotter water to help them set more quickly.
3. The Egg Becomes Too Firm: Finding the Right Texture
Overcooking is the culprit here. Pay close attention to the poaching time and check your egg for doneness regularly.
(Part 7) Beyond the Basics: Unleashing Your Creative Poached Egg Potential
Now that you've mastered the art of poaching, it's time to get creative! Poached eggs are so versatile, they can be enjoyed in countless ways, making them a culinary chameleon.
1. Classic Eggs Benedict: A Brunch Staple
This classic is a testament to the deliciousness of poached eggs. english muffins, Canadian bacon, poached eggs, and creamy hollandaise sauce – it’s a breakfast dream come true.
2. Avocado Toast: A Modern Favorite
Poached eggs elevate avocado toast to new heights of deliciousness. The creamy avocado perfectly complements the richness of the egg.
3. Salads: A Hearty and Delicious Addition
Think beyond breakfast! Poached eggs bring a protein punch and a luxurious touch to salads. Try a salad with grilled chicken, roasted vegetables, and a poached egg for a truly satisfying meal.
4. Soups: Adding a Touch of Luxury
Poached eggs add a protein boost and a touch of elegance to soups. They complement a wide range of flavors, making your favorite soup recipes even more delightful.
(Part 8) Poaching Tips and Tricks: Level Up Your Poaching Game
Here are a few extra tips and tricks that I’ve picked up along my poaching journey.
1. Older Eggs: A Secret Weapon
Older eggs, believe it or not, are easier to poach. Their whites are a bit thicker and less prone to breaking apart, leading to a smoother poaching experience.
2. Don’t Overcrowd the Pan: Giving Eggs Space
If you're poaching multiple eggs, ensure there's enough space in the pan for each egg to cook evenly. Overcrowding can lead to unevenly cooked eggs.
3. Use a non-stick pan: Preventing Sticking
A non-stick pan helps prevent the egg from sticking to the bottom, especially if you're not using vinegar.
4. Keep the Water Moving: Gentle Swirling
Gently swirl the water with a spoon to ensure even cooking. This also helps prevent the whites from spreading too much.
(Part 9) FAQs: Addressing Common Poaching Questions
Here are some of the most frequently asked questions about poaching eggs:
1. What if my egg doesn't have a perfect shape?
Don't let a slightly imperfect shape deter you! It's more important that the egg is cooked to your liking. Even if it’s a little lopsided, it’ll still taste delicious!
2. Can I poach eggs in a microwave?
You can, but it’s not ideal for achieving perfectly poached eggs. The yolk can end up overcooked, and the whites can become rubbery. Stick to the stovetop method for the best results.
3. How can I prevent the whites from spreading too much?
Adding a splash of vinegar to the water helps to keep the whites together. You can also try gently swirling the water with a spoon before adding the egg. This creates a mini whirlpool that helps contain the whites.
4. Can I store poached eggs?
You can store poached eggs for a short period, but they are best enjoyed fresh. If you need to store them, carefully place them in an airtight container and refrigerate for up to 2 days.
5. Can I freeze poached eggs?
Poached eggs don’t freeze well. They tend to become rubbery and watery after thawing. Fresh is best!
With a little practice and a touch of patience, you’ll be poaching eggs like a pro in no time! It’s a skill well worth mastering. You'll be surprised how much more delicious your breakfast, brunch, or even dinner will be with a perfectly poached egg. Happy poaching!
Everyone is watching

How to Cook Frozen Lobster Tails Perfectly: A Step-by-Step Guide
RecipesLobster. Just the word conjures up images of lavish meals, special occasions, and a taste of luxury. But let's...

Pigs in a Blanket Cooking Time: How Long to Bake for Perfect Results
RecipesAh, pigs in a blanket. Just the name conjures up images of those delightful little parcels of crispy pastry en...

Pork Fillet Cooking Time: How Long to Cook It Perfectly
RecipesPork fillet, or tenderloin as it's sometimes called, is a real favourite in our house. It's so versatile, and...

The Ultimate Guide to Tender, Juicy Pulled Pork
RecipesRight, let's talk pulled pork. It's one of those dishes that just screams "comfort food," doesn't it? I mean...

The Ultimate Guide to Cooking Sweet Potatoes: From Roasting to Mashing
RecipesSweet potatoes. Just the name conjures up images of warm, comforting dishes, bursts of vibrant color, and a to...
