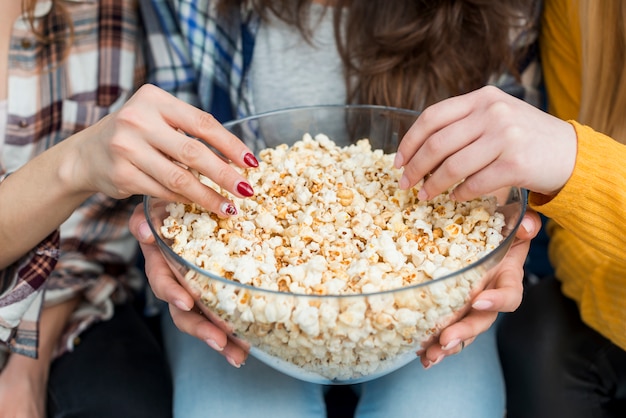
There's a certain charm to the classic act of popping popcorn on the stovetop. The enticing scent of hot butter mingling with the rhythmic symphony of popping kernels, the anticipation of each burst of fluffy goodness, and the joy of sharing a bowl with friends and family – it's a simple pleasure that transcends generations.
Over the years, I've become quite the popcorn aficionado, experimenting with various techniques and mastering the art of achieving that perfect, fluffy, and crispy popcorn. And today, I'm thrilled to share my secrets with you, helping you unleash your inner popcorn maestro.
Get ready to embark on this delicious journey with me as we explore the world of stovetop popcorn, from choosing the right kernels to the art of seasoning. We'll tackle common pitfalls, master the timing, and ensure your next batch of popcorn is the best you've ever made.
Part 1: The Foundation of Great Popcorn: Choosing the Right Kernels

Why Quality Matters
The key to achieving that perfectly fluffy, cloud-like popcorn lies in the quality of your kernels. You want kernels that are plump, dry, and have a high moisture content. These attributes ensure that each kernel has the potential to burst into a delicious, fluffy treat.
Choosing the best popcorn for Stovetop Success
While microwave popcorn offers convenience, it often lacks the satisfying crunch and fresh, wholesome flavor of stovetop popcorn. For the best results, opt for classic "butterfly" popcorn kernels. These kernels, known for their large, irregular shape, are designed to expand significantly during popping, creating those delightful, airy puffs.
My personal journey has led me to these consistently reliable popcorn brands, which I find deliver consistently delicious results:
- Orville Redenbacher's: A classic brand that consistently produces fluffy, flavorful popcorn, making it a go-to choice for many.
- Angie's Boom Chicka Pop: A healthier option that focuses on whole-grain kernels, offering a guilt-free snacking experience.
- Trader Joe's: Their popcorn is often a steal for the quality, consistently delivering delicious results at an affordable price.
Avoid brands that boast "extra butter" or "extra flavor" - these often contain artificial ingredients and unnecessary additives that can negatively impact the taste and texture of your popcorn.
Part 2: Preparing for the Perfect Pop

Gathering Your Tools
Before we start popping, let's gather our essential tools:
- A Large Pot: Choose a pot that's spacious enough to accommodate your desired amount of popcorn, allowing ample room for the kernels to expand freely.
- A Lid: A lid is crucial for trapping heat and steam, ensuring even popping and preventing kernels from escaping.
- A Heatproof Spoon or Tongs: You'll need these to gently stir the popcorn and avoid those unwelcome burns!
- Measuring Cups: For precise measurements of popcorn and oil, ensuring consistent results.
- A Bowl for Serving: Ready to catch those fluffy, freshly popped treasures.
Prepping the Popcorn Kernels
Now, let's prep our popcorn kernels. You can use fresh popcorn straight from the bag or give it a quick wash to remove any dust or debris. Personally, I find washing the kernels helps them pop more evenly, resulting in fewer stubborn unpopped kernels. Simply rinse them in a strainer under cold water and pat them dry with a clean kitchen towel.
Part 3: The Art of Popping: From Oil to Heat

Choosing the Right Oil
The oil you choose plays a pivotal role in the flavor and texture of your popcorn. Through years of experimentation, I've come to appreciate these different oils and their unique contributions:
- coconut oil: A healthy choice with a subtle, nutty flavor, perfect for those looking for a slightly sweet, tropical touch. It can solidify at room temperature, so it's best to warm it gently on the stovetop before adding the popcorn.
- Olive Oil: Adds a light, fruity flavor to the popcorn. However, its lower smoke point means it can burn easily at high temperatures, so keep a watchful eye.
- canola oil: A neutral oil that's a reliable choice for popcorn, as it has a high smoke point and won't impart any strong flavors, allowing the popcorn's natural flavor to shine.
- Peanut Oil: A classic choice for popcorn, offering a mild nutty flavor that complements the buttery goodness.
Heating the Oil and Adding the Popcorn
Now, let's get popping! Heat your chosen oil in a large pot over medium heat. Resist the temptation to crank up the heat – it can lead to burnt popcorn and a less enjoyable experience. You'll know the oil is ready when it shimmers and you can see a few wisps of smoke.
Once the oil is hot, carefully add 1/4 cup of popcorn kernels to the pot. Don't crowd the pot – leave enough space for the kernels to expand freely.
The Key to Even Popping: Maintaining a Rhythm
Cover the pot with a lid and listen closely. You'll hear a few scattered pops at first, followed by a rhythmic symphony of pops as the kernels heat up and burst open. This is the magic! You'll want to gently shake the pot every 30 seconds to ensure the kernels are evenly coated in oil and popping from all sides.
Remember, the key to achieving perfect popcorn is to keep the heat consistent and maintain a steady pace of popping. Don't let the pot sit idle for too long, or the kernels may burn.
Part 4: Timing is Everything: Knowing When to Stop
The Art of Listening and Watching
One of the most crucial aspects of stovetop popcorn is knowing when to remove the pot from the heat. Leaving it on too long can lead to burnt popcorn and a lingering aroma that's not quite as inviting.
Here's my foolproof method:
- The 3-Second Rule: Once the popping slows down to about 3 seconds between pops, it's time to remove the pot from the heat.
- The Visual Cue: When the popping slows down, take a peek inside the pot. If most of the kernels have popped and there are only a few remaining unpopped kernels, remove it from the heat.
Don't wait for the popping to completely stop – you want to catch it just before it reaches a standstill. This ensures that your popcorn is perfectly cooked and free of any burnt kernels.
Part 5: The Seasoning Symphony: From Classic Butter to Creative Blends
The Magic of Butter and Salt
Now for the truly enjoyable part – seasoning your popcorn! For me, the classic combination of melted butter and salt is pure indulgence. I prefer using unsalted butter so I can control the saltiness to my liking. Simply melt a tablespoon or two of butter in a small saucepan over low heat and drizzle it over your popcorn, gently tossing it with a spoon or tongs to ensure even distribution.
To elevate this classic pairing, I often add a pinch of sea salt for a subtle, briny flavor or a sprinkle of nutritional yeast for a cheesy tang.
Beyond the Basics: Unleashing Your Creativity
Once you've mastered the basics, experiment with different seasonings and create your own signature popcorn blends. Here are a few ideas to ignite your imagination:
- Spicy Kick: Add a pinch of cayenne pepper, chili flakes, or a dash of smoked paprika for a touch of heat.
- Herby Delight: Sprinkle with dried oregano, thyme, or rosemary for an aromatic burst of flavor.
- Sweet and Savory: Combine a sprinkle of sugar with a pinch of salt for a sweet and savory flavor profile.
- cheesy goodness: Toss with grated Parmesan cheese or crumbled feta for a cheesy treat.
- Savory Spice: Add a sprinkle of garlic powder, onion powder, or a touch of curry powder for a savory twist.
The world of popcorn seasonings is vast and exciting – feel free to experiment and create your own unique flavor combinations!
Part 6: Mastering the Stovetop: Tips and Tricks for Success
Essential Tips for Consistent Results
Making perfect stovetop popcorn is a skill that takes practice, but these tips and tricks can help you achieve consistent results:
- Don't Overcrowd the Pot: Give the kernels plenty of room to pop. Overcrowding the pot can lead to uneven popping and burnt popcorn.
- Shake the Pot Gently: Keep the kernels moving by gently shaking the pot. This ensures that they are evenly coated in oil and have a chance to pop properly.
- Use a Lid: A lid is crucial for trapping heat and steam, creating the ideal environment for popcorn to pop evenly.
- Listen Carefully: Pay close attention to the rhythm of the popping. When the pops slow down to a few seconds between bursts, it's time to remove the pot from the heat.
- Avoid Burning: Watch the pot carefully and adjust the heat as needed to prevent the popcorn from burning.
- Experiment with Seasonings: Don't be afraid to get creative and experiment with different seasonings and flavor combinations.
Part 7: Troubleshooting Common Issues
Tackling Burnt Popcorn
The dreaded burnt popcorn! It happens to the best of us, but it's easily avoidable with a few simple tips:
- Maintain Even Heat: Use a medium heat setting and avoid cranking up the temperature.
- Don't Overcrowd the Pot: Give the kernels enough space to pop.
- Keep an Eye on the Pot: Don't let the popcorn sit unattended for too long.
- Shake the Pot Regularly: This ensures that all the kernels are evenly coated in oil and have a chance to pop.
Dealing with Unpopped Kernels
Even with the best intentions, we sometimes end up with a few unpopped kernels. Here's why it happens and how to avoid it:
- Old Popcorn: Check the expiration date on your popcorn. Old kernels are less likely to pop.
- Insufficient Heat: Ensure the oil is hot enough before adding the kernels.
- Crowded Pot: Give the kernels ample room to pop.
- Humidity: Store popcorn in a cool, dry place. High humidity can make kernels less likely to pop.
Avoiding a Buttery Overload
While butter is a delicious addition to popcorn, too much of a good thing can make it greasy and heavy. Here's how to avoid a buttery overload:
- Start Small: Begin with a tablespoon or two of butter and adjust to your taste.
- Melt Gradually: Melt the butter over low heat to prevent burning.
- Drizzle Evenly: Gently drizzle the melted butter over the popcorn, ensuring even distribution.
Part 8: The Fascinating History of Popcorn: From Ancient Times to the Modern Era
A Snack with a Rich Past
Popcorn has a fascinating history dating back to ancient times. It was a staple food for ancient civilizations in Mexico and Peru, and evidence suggests that it was even enjoyed by Native Americans centuries ago.
A Wholesome and Versatile Treat
Popcorn is a surprisingly healthy snack. It's a whole grain that's packed with fiber, which aids in digestion. It's also a good source of antioxidants, which help protect your body from damage caused by free radicals.
It's incredibly versatile, transcending its status as a movie theater treat. From savory snacks to sweet treats, the possibilities are endless.
Part 9: FAQs
1. Can I use microwave popcorn kernels for stovetop popping?
It's not recommended. Microwave popcorn kernels are specifically designed for microwaves and often contain additives that might not be suitable for stovetop popping.
2. How can I make my popcorn extra crunchy?
To achieve extra-crunchy popcorn, avoid overcrowding the pot and ensure that the kernels are evenly coated in oil. After popping, spread the popcorn on a baking sheet and bake it in a preheated oven at 200°F (93°C) for about 10 minutes.
3. What should I do if my popcorn isn't popping?
If your popcorn isn't popping, it could be due to old kernels, insufficient heat, or high humidity. Make sure you're using fresh popcorn, and that the oil is hot enough before adding the kernels. You can also try storing the popcorn in a cool, dry place to reduce humidity.
4. Can I reuse the oil after popping popcorn?
While you can technically reuse the oil, it's not recommended. The oil can become burnt and impart an unpleasant flavor to your popcorn. It's best to use fresh oil for each batch.
5. What are some fun and creative ways to serve popcorn?
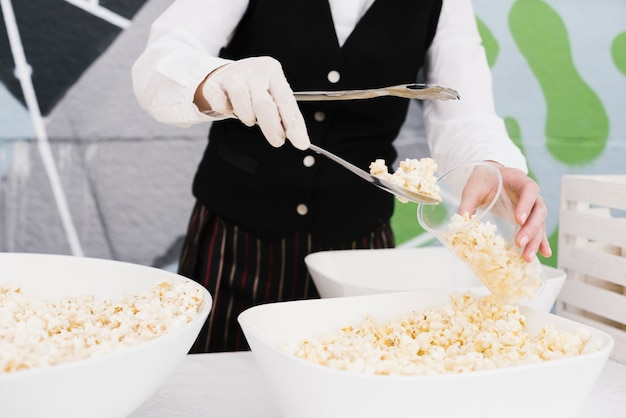
Get creative! You can serve popcorn in cones, bowls, or even in mason jars for a rustic touch. You can also add toppings like crumbled bacon, chopped nuts, or even shredded coconut for an extra boost of flavor and texture.
I hope this guide has inspired you to unleash your inner popcorn maestro and create the perfect batch of stovetop popcorn. Remember, practice makes perfect, and don't be afraid to experiment with different techniques and flavors. Happy popping!
Everyone is watching

How to Cook Frozen Lobster Tails Perfectly: A Step-by-Step Guide
RecipesLobster. Just the word conjures up images of lavish meals, special occasions, and a taste of luxury. But let's...

Pigs in a Blanket Cooking Time: How Long to Bake for Perfect Results
RecipesAh, pigs in a blanket. Just the name conjures up images of those delightful little parcels of crispy pastry en...

Pork Fillet Cooking Time: How Long to Cook It Perfectly
RecipesPork fillet, or tenderloin as it's sometimes called, is a real favourite in our house. It's so versatile, and...

The Ultimate Guide to Tender, Juicy Pulled Pork
RecipesRight, let's talk pulled pork. It's one of those dishes that just screams "comfort food," doesn't it? I mean...

The Ultimate Guide to Cooking Sweet Potatoes: From Roasting to Mashing
RecipesSweet potatoes. Just the name conjures up images of warm, comforting dishes, bursts of vibrant color, and a to...
