Let's talk steak. You know, those delicious, juicy cuts of meat that make you sigh with contentment? I've always had a soft spot for a good steak, but for a long time, I was convinced I was destined to a life of overcooked, dry, or just plain flavorless ones. Then, one day, I discovered the magic of the stovetop. It was like a revelation!
Now, I'm not saying this is the only way to cook a steak. The world is your oyster, and there are plenty of other fantastic methods out there, like grilling or oven-roasting. But for me, nothing beats the simplicity and control of the stovetop. You get this incredible connection with the meat, you can tweak the heat as you go, and you can achieve that perfect sear and juicy interior that just melts in your mouth. And let me tell you, once you master this technique, you'll be saying goodbye to those underwhelming steak experiences forever.
Ready to elevate your steak game? Let's dive in!
(Part 1) choosing the right steak
Navigating the World of Cuts and Grades
First things first, you need to pick the right steak. It's like choosing a good bottle of wine - you wouldn't just grab the first one you see, would you? You want a cut that's going to cook evenly, boast some beautiful marbling, and be bursting with flavor. For stovetop cooking, my go-to cuts are ribeye and strip steak. These bad boys are thick enough to handle the heat without drying out, and they have a nice balance of fat and leanness, giving them a rich, satisfying flavor.
Now, don't be intimidated by the different grades of beef. It's not as complicated as it seems. Prime is the top of the line, boasting the most marbling and intense flavor, but it can be a bit pricey. Select and Choice are excellent options for everyday cooking. It really boils down to your budget and taste buds.
Thickness Matters!
For a steak cooked on the stovetop, I find that a thickness of around 1.5 inches is ideal. This allows for that glorious sear on the outside while keeping the interior nice and juicy. But if you've got a thicker cut, don't worry! You can always adjust the cooking time accordingly. Just keep a watchful eye on the internal temperature – we'll talk more about that later.
Room Temperature is the Key
Here's a little secret that makes a big difference: bring your steak to room temperature before cooking. It's like giving it a warm-up before a big game. This helps the steak cook more evenly and prevents that dreaded cold, raw center. Simply take it out of the fridge about 30 minutes before you plan on cooking.
And speaking of temperature, don't forget your meat thermometer! It's not about being a perfectionist, it's about understanding how the steak cooks, and it'll help you avoid overcooking.
(Part 2) Prepping the Steak for Stardom
Pat it Down and Let It Dry
Once your steak is at room temperature, give it a good pat down with some paper towels. This dries it off, allowing for a crispier sear and preventing steam from forming, which can make the surface soggy. Nobody wants a soggy steak, right?
Salt and Pepper – The Classic Duo
Now it's time to season. I believe in keeping things simple. Salt and pepper, generously applied on both sides, are all you really need. You can get fancy with other seasonings if you like, but for me, these two simple flavors really enhance the natural deliciousness of the steak.
Rest, Relax, and Absorb the Flavor
Okay, here's where things get interesting. After you've seasoned your steak, let it rest for 15 minutes. This allows the salt to penetrate the meat, making it even more flavorful. It also gives the surface a chance to dry out a bit, promoting a better sear.
Some people think this step is unnecessary, but trust me, it's a game-changer. It's like giving the steak a little time to soak up the salt and get ready for its starring role. Plus, you can use this time to get your pan prepped and your side dishes going.
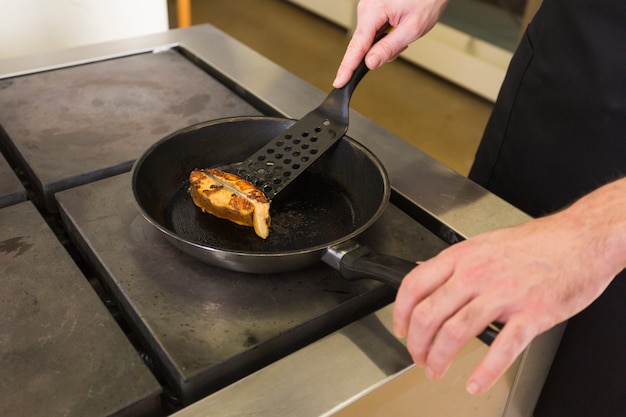
(Part 3) Searing the Steak - Creating a Perfect Crust
Hot Pan, Hot Steak, Happy Taste Buds
You'll need a good quality pan for this step. Cast iron is my personal favorite; it holds heat beautifully, but a heavy-bottomed stainless steel pan will do the trick. Now, get that pan screaming hot. We're talking high heat here, like medium-high to high. If you have a gas stove, aim for a medium-high flame. If you're using an electric stove, give it about 5 minutes to get really hot.
Oil Up and Get Ready
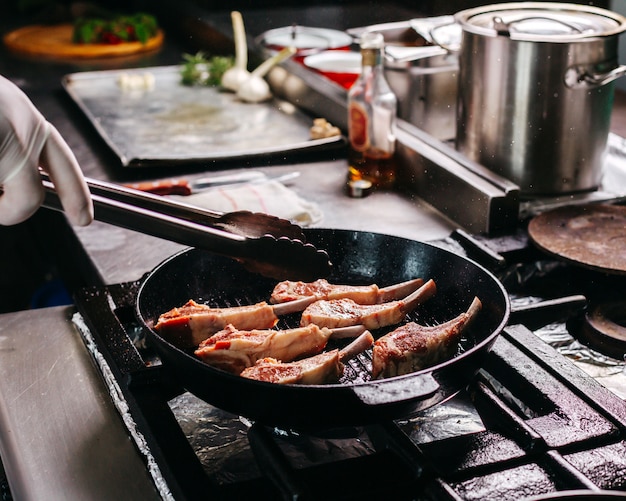
Add a good amount of oil to the pan - enough to coat the bottom. We're going for a nice, crispy sear that will give your steak that irresistible crunch. Once the oil is shimmering, carefully place your steak in the pan. Don't overcrowd the pan, you want to ensure each side gets a good sear.
Flip it, Sizzle it, Love it
Let the steak cook for 3-4 minutes per side, or until it develops a beautiful, golden-brown crust. It's okay to push the steak a little if it starts to stick - that means it's getting that lovely sear we want. Once the first side is done, carefully flip it over with tongs. You'll hear that satisfying sizzle as it hits the pan.
Temperature Check - Don't Fear the Thermometer
This is where your trusty meat thermometer comes in. Check the internal temperature of the steak after you've seared both sides. For medium-well, you're aiming for 140-150 degrees Fahrenheit. This is the sweet spot where the steak is cooked through but still retains its juicy tenderness.
(Part 4) Bringing it to Medium-Well – The Final Stretch
Finishing Touches for a Delicious Outcome
Once you've achieved that perfect sear, it's time to finish cooking the steak to your desired doneness. For medium-well, I typically reduce the heat to medium and let the steak cook for another 2-3 minutes per side. Keep a close eye on the internal temperature and adjust the cooking time as needed. We're aiming for that perfect balance – cooked through, but not dry.
Avoid Overcooking – It's a Steak Crime
Remember, the enemy of a delicious steak is overcooking. Overcooked steak is tough and dry, and nobody wants that! A little pink in the center is a sign of a well-cooked steak. You can always use your trusty thermometer, but it's also good to get a feel for the steak.
(Part 5) The Resting Ritual - The Secret to Juiciness
Patience is a Virtue, Especially with Steak
After you've cooked the steak to your liking, let it rest. This step is crucial! It allows the juices to redistribute throughout the steak, making it more tender and flavorful. It also gives the steak a chance to cool down, making it easier to cut and serve.
I usually let my steak rest for 5-10 minutes before slicing it. While it rests, you can prepare your sides or get your plate ready. This is the perfect time to take a quick breather and let the anticipation build for that delicious moment.
(Part 6) Serving and Enjoying Your Masterpiece
Slicing Against the Grain - A Tip for Tenderness
After resting, it's time to slice and serve. I prefer to slice the steak against the grain, which means cutting across the muscle fibers. This makes the steak easier to chew and more tender. I usually cut it into 1/2-inch thick slices, but you can adjust the thickness to your preference.
Harmonizing Flavors with the Right Side Dish
Now, for the finishing touch: pair your steak with your favorite side dishes. Roasted vegetables, mashed potatoes, or a simple salad are all great choices. I personally love a mix of textures and flavors, like asparagus with a squeeze of lemon juice and garlic, and creamy mashed potatoes. The contrast really brings out the richness of the steak.
Savor the Moment - You've Earned It!
There you have it - the perfect medium-well steak, cooked to juicy perfection on the stovetop. Now it's time to enjoy the fruits of your labor! Savor each bite and appreciate the simple pleasures of a great steak. You deserve it!
(Part 7) Common Mistakes to Avoid - Don't Let These Ruin Your Steak
Too Much Heat – A Recipe for Disaster
One of the biggest mistakes I see people make is using too much heat. You'll end up with a steak that's burnt on the outside and raw in the center. Remember, patience is key!
Overcrowding the Pan - Giving Your Steak a Crowded Party
Another common mistake is overcrowding the pan. This prevents the steak from searing properly and leads to uneven cooking. Make sure to cook the steaks in batches if you have more than one to cook.
Skipping the Rest - Let Your Steak Relax
I've said it before, and I'll say it again - don't skip the resting step! Letting the steak rest is essential for a juicy and flavorful steak. It's like giving the steak a little time to breathe and relax after its intense workout in the pan.
Cold Pan Syndrome - A Steak's Worst Nightmare
The pan needs to be piping hot before you add the steak. If you add the steak to a cold pan, it will just steam instead of sear. It's like trying to cook your eggs on a lukewarm pan – it just doesn't work.
Non-Stick Trouble – A Slick Mistake
non-stick pans are great for things like eggs and pancakes, but they're not ideal for searing steak. The pan needs to be hot enough to create a good crust on the steak, and non-stick pans just can't handle that kind of heat.
(Part 8) Frequently Asked Questions - Solving Your Steak Dilemmas
1. What if My Steak is Too Thin?
If your steak is too thin, you'll want to cook it for a shorter amount of time. I usually cook thin steaks for about 2-3 minutes per side. Just be sure to check the internal temperature to ensure it's cooked to your liking.
2. Can I Use Other Seasonings?
Absolutely! You can use any seasonings you like. Some popular options include garlic powder, onion powder, paprika, or even a blend of herbs. Just be sure to use them sparingly so that they don't overpower the natural flavor of the steak.
3. What if I Don't Have a Meat Thermometer?
You can still cook a great steak without a meat thermometer. Just pay attention to the feel of the steak. For medium-well, the steak should feel firm to the touch and have a little give. You can also use the "finger test" – press your finger into the thickest part of the steak. If it feels firm, it's probably close to medium-well.
4. Can I Cook a Steak on the Stovetop for a Different Doneness?
Absolutely! You can use this technique to cook steak to any level of doneness you desire. Just adjust the cooking time accordingly and make sure to use a meat thermometer to check the internal temperature. You can find a helpful table below to guide you.
5. How Do I Keep the Steak Juicy?
The key to keeping a steak juicy is to avoid overcooking it. Overcooked steak is dry and tough. Also, be sure to let the steak rest for at least 5 minutes after cooking. This allows the juices to redistribute throughout the steak, making it more tender and flavorful.
steak doneness chart
| Doneness | Internal Temperature (°F) | Internal Temperature (°C) | Feel of the Steak |
|---|---|---|---|
| Rare | 125-130 | 52-54 | Very soft and cool to the touch |
| Medium Rare | 130-135 | 54-57 | Soft and cool to the touch |
| Medium | 135-140 | 57-60 | Slightly firm to the touch |
| Medium Well | 140-150 | 60-65 | Firm to the touch |
| Well Done | 150-160 | 65-71 | Very firm and hot to the touch |
Everyone is watching

How to Cook Frozen Lobster Tails Perfectly: A Step-by-Step Guide
RecipesLobster. Just the word conjures up images of lavish meals, special occasions, and a taste of luxury. But let's...

Pigs in a Blanket Cooking Time: How Long to Bake for Perfect Results
RecipesAh, pigs in a blanket. Just the name conjures up images of those delightful little parcels of crispy pastry en...

Pork Fillet Cooking Time: How Long to Cook It Perfectly
RecipesPork fillet, or tenderloin as it's sometimes called, is a real favourite in our house. It's so versatile, and...

The Ultimate Guide to Cooking Delicious Frankfurters
RecipesLet's face it, we all love a good frankfurter. It's a classic, simple, and always satisfying. But let's be rea...

Wolf Meat Recipes: A Guide to Cooking Wild Game
RecipesLet's be honest, you don't see wolf meat at your local butcher shop every day. It's a bit of a wild card, but ...