There’s something truly magical about a perfectly grilled steak, especially when it’s cooked to that coveted medium-rare. The sear, the juicy pink interior, the aroma that fills the air – it’s a culinary experience that brings people together. But achieving that perfect medium-rare isn’t always a walk in the park. It takes practice, a bit of know-how, and the right tools.
I've been grilling for years, and I've learned a thing or two about mastering the art of the medium-rare steak. So, grab your tongs, fire up your grill, and let’s dive in!
(Part 1) The steak selection
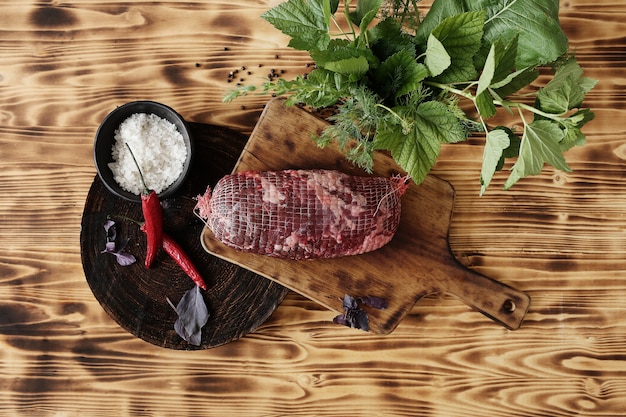
Choosing the Cut: A Matter of Preference
The first step to a fantastic steak is choosing the right cut. And this is where personal preferences come into play. A ribeye, for example, is known for its rich marbling and buttery flavour – it's a classic choice for a reason. new york strip steaks are leaner, with a more pronounced beefy flavour, while a thick-cut sirloin can be a bit more budget-friendly without sacrificing flavour.
I love experimenting with different cuts myself. A good flank steak, when cooked correctly, can be incredibly tender and juicy. For a more adventurous palate, consider a skirt steak, which offers a fantastically intense flavour.
The Importance of Thickness
No matter the cut, make sure your steak is at least an inch thick. This allows for even cooking, ensuring a perfect sear on the outside and a juicy, pink centre. You don’t want to end up with a dry, overcooked piece of meat!
(Part 2) Prepping the Steak: Setting the Stage
Now that you've chosen your steak, let's prep it for grilling. This is where you start building the foundation for flavour.
Patting Dry: The Key to a Great Sear
The first step is patting the steak dry with paper towels. This may seem like a small detail, but it’s incredibly important. A moist steak will steam on the grill, preventing a crisp sear and making it more likely to stick to the grates.
Seasoning with Simplicity
Next, comes the seasoning. I’m a firm believer in simplicity. A generous sprinkle of kosher salt and freshly ground black pepper is usually all you need to let the natural flavour of the steak shine through.
But if you’re feeling adventurous, you can add a touch of garlic powder, paprika, or even a homemade spice rub. Just remember, less is often more when it comes to seasoning. You want to enhance the steak’s flavour, not drown it out.
(Part 3) Getting the Grill Ready: The Foundation of Flavor
Now that your steak is prepped, it’s time to fire up the grill. A hot grill is essential for achieving that irresistible char and a perfectly cooked steak.
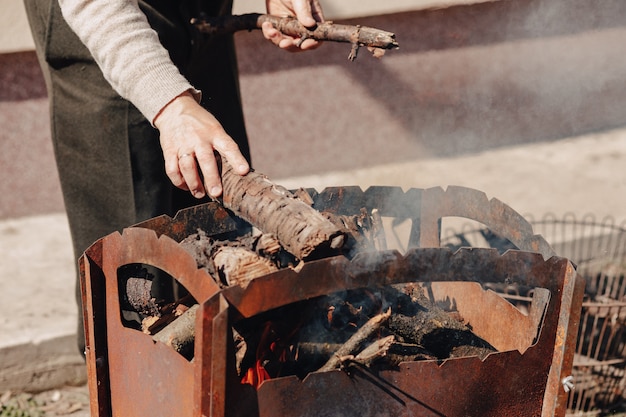
Choosing Your Grill: Gas or Charcoal?
Gas grills are convenient, offering precise temperature control. charcoal grills, on the other hand, impart a smoky flavour that many find irresistible. I prefer the flavour of charcoal, but both can deliver a delicious steak.
Heating It Up: The Art of the Hot Grill
If you’re using a gas grill, heat it to high heat – about 500°F (260°C). For a charcoal grill, you want a bed of hot coals that are covered in white ash, signifying they're ready to cook.
Two-Zone Grilling: A Controlled Approach
For both gas and charcoal grills, I recommend using a two-zone grilling technique. This involves creating a high heat zone (directly over the flames or coals) and a lower heat zone (off to the side). You'll use the high heat zone for searing, and the lower heat zone for finishing the steak. This ensures even cooking and prevents burning.
(Part 4) The Sear: Locking in Flavor
Now comes the fun part – searing the steak!
Grilling with Purpose: The Importance of Patience
Place your steak directly over the high heat zone, making sure it’s not too close to the flames. Resist the urge to fiddle with it! Let the steak cook undisturbed for about 2-3 minutes per side. This gives it time to develop a beautiful, crispy crust.
Knowing When to Flip: The Signs of a Perfect Sear
You’ll know it’s time to flip when you see a nice, dark char forming on the surface and the sides of the steak are nicely browned. Don’t worry if it seems like it’s taking longer than you expect, patience is key for a delicious steak.
(Part 5) The Journey to Medium-Rare: Finding the Sweet Spot
The steak is now seared, but it still needs to cook to that perfect medium-rare.
Moving to Lower Heat: Slow and Steady
For gas grills, carefully move the steak to the lower heat zone. For charcoal grills, adjust the charcoal arrangement to create a cooler area. Let the steak cook for another 4-6 minutes per side, depending on the thickness.
Using a meat thermometer: For Accuracy and Peace of Mind
This is where a meat thermometer comes in handy. It’s the most reliable way to ensure your steak is cooked to your liking. Insert the thermometer into the thickest part of the steak (not touching any bone) and aim for an internal temperature of 130-135°F (54-57°C) for medium-rare.
(Part 6) The Resting Ritual: Allowing the Juices to Redistribute
Once your steak is cooked to your liking, the final step is resting. This is essential for achieving a juicy, tender steak.
The Importance of Rest: A Culinary Pause
Transfer the steak to a cutting board and let it rest for 5-10 minutes, loosely covered with foil. This allows the juices to redistribute throughout the meat, making it incredibly tender and flavorful.
Taking Advantage of the Resting Time: Preparing Sides
While the steak rests, prepare your side dishes. I love a simple salad with a tangy vinaigrette, roasted vegetables, or a creamy mashed potato.
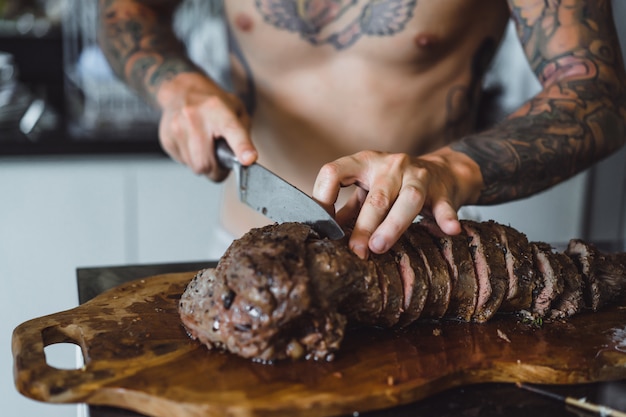
(Part 7) Slicing and Serving: Presentation is Key
After your steak has rested, it’s time to slice and serve.
Slicing Against the Grain: For Optimal Tenderness
Slice the steak against the grain, meaning perpendicular to the muscle fibers. This helps to break down the muscle fibers, making the steak easier to chew and more tender.
The Finishing Touches: Adding a Touch of Luxury
Arrange the sliced steak on a platter or individual plates. I always add a pat of butter on top – it melts beautifully, adding a touch of richness and flavour.
(Part 8) Mastering the Doneness: Knowing Your Steak
You've cooked the steak, rested it, and now it's time to enjoy. But how do you know if you've achieved that perfect medium-rare?
Methods for Checking Doneness: From Finger Test to Thermometer
There are a few methods you can use:
| Method | Description |
|---|---|
| Finger Test | This is a visual and tactile method. Press the palm of your hand just below your thumb – that’s about the same as rare. Press your thumb against your middle finger – that’s medium-rare. Press your thumb against your index finger – that’s medium. The firmness of the steak should feel similar. |
| Meat Thermometer | This is the most accurate way to check doneness. Here are the general internal temperature ranges for different levels of doneness:
|
(Part 9) Tips and Tricks: Taking Your Grilling to the Next Level
Here are a few extra tips that will help you grill a truly remarkable steak:
Seasoning with Flair: Exploring flavor combinations
Don’t be afraid to get creative with seasoning. Try a blend of herbs and spices, a simple sprinkle of smoked paprika, or even a drizzle of olive oil and balsamic vinegar. The possibilities are endless.
Protecting the Steak: Preventing Chilling
If you're grilling in cooler weather, use a grill cover or a heat shield to keep the steak warm and prevent it from cooling down too quickly.
The Importance of Patience: Allowing Time for Perfection
Remember, grilling is all about patience. Don't rush the process. Let the steak cook slowly and evenly. It’s worth the wait.
(Part 10) FAQs: Addressing Common Questions
Here are some frequently asked questions about grilling the perfect medium-rare steak:
1. What is the best way to prevent a steak from sticking to the grill?
The best way to prevent sticking is to ensure the grill is hot enough. A hot grill creates a good sear that helps the steak release. Lightly oiling the grill grates can also help.
2. How do I know when a steak is done?
The most accurate way is to use a meat thermometer. Aim for the temperature range mentioned earlier for the level of doneness you desire.
3. What should I serve with a medium-rare steak?
There are countless delicious pairings. I love roasted vegetables, mashed potatoes, and a simple green salad. But you can also try grilled corn on the cob, asparagus, or a creamy potato bake.
4. What are some good marinade recipes for steak?
Here's a simple and flavorful marinade:
Ingredients:
- 1/2 cup olive oil
- 1/4 cup red wine vinegar
- 2 tablespoons Dijon mustard
- 1 tablespoon Worcestershire sauce
- 1 teaspoon garlic powder
- 1 teaspoon onion powder
- 1/2 teaspoon black pepper
- 1/4 teaspoon salt
Instructions:
- Combine all ingredients in a bowl and whisk until well combined.
- Add steak to the marinade and refrigerate for at least 2 hours, or up to 24 hours.
- Remove steak from marinade and pat dry before grilling.
5. What should I do if I overcook my steak?
Don't panic! It’s still edible. You can try adding butter or gravy to add moisture. Or, you can use the overcooked steak for other dishes like a steak sandwich or salad.
I hope this comprehensive guide has equipped you with the knowledge and confidence to grill the perfect medium-rare steak. Remember, practice makes perfect. So fire up that grill, experiment with different cuts and seasonings, and enjoy the delicious results. Happy grilling!
Everyone is watching

How to Cook Frozen Lobster Tails Perfectly: A Step-by-Step Guide
RecipesLobster. Just the word conjures up images of lavish meals, special occasions, and a taste of luxury. But let's...

Pigs in a Blanket Cooking Time: How Long to Bake for Perfect Results
RecipesAh, pigs in a blanket. Just the name conjures up images of those delightful little parcels of crispy pastry en...

Pork Fillet Cooking Time: How Long to Cook It Perfectly
RecipesPork fillet, or tenderloin as it's sometimes called, is a real favourite in our house. It's so versatile, and...

The Ultimate Guide to Cooking Delicious Frankfurters
RecipesLet's face it, we all love a good frankfurter. It's a classic, simple, and always satisfying. But let's be rea...

Wolf Meat Recipes: A Guide to Cooking Wild Game
RecipesLet's be honest, you don't see wolf meat at your local butcher shop every day. It's a bit of a wild card, but ...