I've been making hard-boiled eggs for as long as I can remember, but it wasn't until recently that I finally cracked the code to getting them perfectly cooked every single time. No more rubbery whites or runny yolks! You see, I'm a bit of a perfectionist when it comes to my food, and a perfectly cooked hard-boiled egg is just a joy to behold. It's all about the texture, the vibrant yellow of the yolk, and that satisfying "thwack" when you crack it open.
So, if you're looking to master the art of hard-boiled eggs, you've come to the right place. I'm going to share all my secrets, from the best way to choose your eggs to the perfect timing for every level of doneness. Get ready to become a hard-boiled egg pro!
(Part 1) Choosing Your Eggs: The Foundation of Perfection
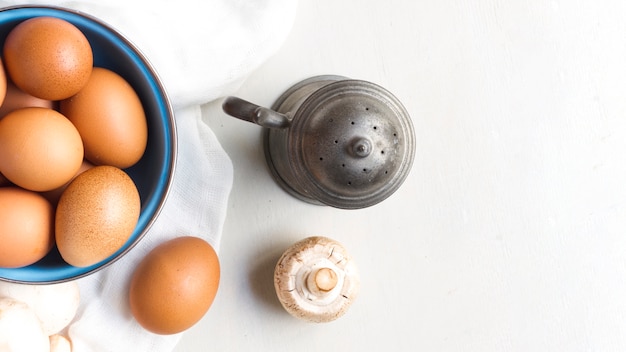
You might think that any old egg will do, but the freshness of your eggs actually makes a big difference in the texture of the cooked yolk. Older eggs have larger air pockets, which can lead to a rubbery, chalky texture. For the perfect hard-boiled egg, go for eggs that are no more than a week old. This will give you a lovely, smooth yolk that's a delight to eat.
The Colour Conundrum: Brown vs. White
You'll often see brown and white eggs sitting side by side at the supermarket. Does the colour of the shell matter? Nope! The colour of the shell depends on the breed of hen, not the taste or texture of the egg. So, feel free to grab whatever colour catches your eye.
Size Matters (Sometimes):
While size doesn't affect the cooking time, it can affect the yield. If you're making deviled eggs, you might want to choose medium or large eggs for a more substantial filling. However, if you're just having them for a quick snack, smaller eggs will be just fine.
(Part 2) Boiling Basics: Getting Started
Now that you've got your perfect eggs, let's get started with the boiling process. Over the years, I've tried all sorts of methods, but I've found that starting with cold water is the best way to ensure even cooking.
The Cold Start:
Place your eggs in a pot, cover them with cold water, and bring them to a boil. This ensures that the eggs heat up gradually and prevent cracking.
The Secret Ingredient: Salt
Adding a tablespoon of salt to the water is a little trick I learned from my grandma. It helps to prevent the eggs from cracking during cooking and adds a touch of flavour. Don't worry, the salt won't affect the taste of the eggs themselves.
(Part 3) Timing is Everything: The Perfect Hard-Boiled Egg
The key to getting perfectly cooked hard-boiled eggs is all about timing. Each level of doneness has a unique texture and appeal, so choose the one that suits your tastebuds.
soft-boiled eggs (2-3 minutes):
These are for those who like their yolks still runny and creamy. They're perfect for dipping toast in or enjoying as a light breakfast.
Instructions:
- Place your eggs in a pot and cover them with cold water.
- Add a tablespoon of salt and bring the water to a boil.
- Once boiling, reduce the heat to a simmer and cook for 2-3 minutes.
- Drain the eggs and immediately transfer them to a bowl of ice water to stop the cooking process.
medium-boiled eggs (5-6 minutes):
This is a good option for those who want a firmer yolk but still a little bit of runniness. It's a good choice for salads or sandwiches.
Instructions:
- Place your eggs in a pot and cover them with cold water.
- Add a tablespoon of salt and bring the water to a boil.
- Once boiling, reduce the heat to a simmer and cook for 5-6 minutes.
- Drain the eggs and immediately transfer them to a bowl of ice water to stop the cooking process.
Hard-Boiled Eggs (8-10 minutes):
This is the classic hard-boiled egg with a firm yolk that's perfect for slicing and dicing. It's versatile and can be enjoyed in many ways.
Instructions:
- Place your eggs in a pot and cover them with cold water.
- Add a tablespoon of salt and bring the water to a boil.
- Once boiling, reduce the heat to a simmer and cook for 8-10 minutes.
- Drain the eggs and immediately transfer them to a bowl of ice water to stop the cooking process.
(Part 4) The Cooling Down Process: Ice, Ice Baby!
Once your eggs are cooked, it's crucial to stop the cooking process immediately by transferring them to a bowl of ice water. This prevents the yolks from becoming rubbery and chalky. The rapid cooling helps maintain the texture and creates that perfect, vibrant yellow colour. Let them chill for at least 10 minutes before peeling.
(Part 5) Peeling Like a Pro: Tips and Tricks
peeling hard-boiled eggs can be a tricky business, but it doesn't have to be a frustrating experience. With a few helpful tricks, you can peel your eggs with ease and avoid those annoying bits of shell clinging to the white.
The Rolling Method:
This is my go-to method. It's simple and effective. Gently roll the egg on a hard surface, applying a bit of pressure. This helps to crack the shell without damaging the yolk. You'll hear the shell crack, and then you can peel it off easily.
The "Tapping" Method:
Tap the egg lightly on a hard surface to create a small crack. Then, gently peel away the shell, starting from the crack. This works well for eggs that are already a bit cooler.
The "Spoon" Method:
Use a spoon to gently pry off the shell. This works best when the eggs are still warm. Start by cracking the shell all around the egg, then use the spoon to gently lift off the pieces.
Peeling Tricks:
- Add baking soda to the water: Baking soda can help to loosen the shell. Add a teaspoon to the boiling water for a smoother peeling experience.
- Store your eggs in the refrigerator for a few hours: This makes the shell easier to peel. The colder temperatures help to contract the shell, making it more brittle.
- Add a tablespoon of vinegar to the boiling water: Vinegar can help to soften the shell. The acid in the vinegar helps to dissolve the calcium carbonate in the shell, making it more pliable.
(Part 6) Storage and Shelf Life: Keeping Your Eggs Fresh
Proper storage is important to ensure that your hard-boiled eggs stay fresh and delicious.
- Refrigerate: Store your peeled or unpeeled hard-boiled eggs in the refrigerator in an airtight container. This prevents them from drying out and absorbing other odours in your fridge.
- Shelf Life: Hard-boiled eggs can last for up to a week in the refrigerator. However, the fresher they are, the better they taste.
(Part 7) Hard-Boiled Egg Hacks: Beyond Basic
Now that you've mastered the basics, let's explore some fun and creative ways to elevate your hard-boiled egg game.
Colourful Eggs:
Add a few drops of food colouring to the boiling water for a fun twist. You can create vibrant colours for Easter or any occasion. You can also use natural dyes like beetroot juice for a more subtle colour. Just be sure to add the dye before the water comes to a boil.
Spice Up Your Eggs:
Add a pinch of turmeric, paprika, or curry powder to the boiling water for a hint of flavour and colour. These spices add a subtle warmth and depth of flavour to your eggs.
Deviled Egg Delight:
For deviled eggs, simply mash the yolks with mayonnaise, mustard, and your favourite seasonings. You can get creative with your flavour combinations, adding chopped gherkins, chives, paprika, or even a touch of sriracha.
(Part 8) Hard-boiled egg recipes: Get Creative
Here are a few ideas for using your perfectly cooked hard-boiled eggs to create delicious and satisfying meals and snacks.
Salads:
Hard-boiled eggs are a classic addition to salads like potato salad, macaroni salad, and egg salad. Their creamy texture and richness complement the other ingredients beautifully.
Sandwiches:
Slice them up and add them to your favourite sandwiches for a boost of protein. They're a great addition to chicken salad sandwiches, tuna salad sandwiches, or even just a simple egg salad sandwich.
Breakfast Bowls:
Dice them up and add them to your breakfast bowl for a protein-packed start to the day. They're a great way to add protein and texture to oatmeal, yogurt bowls, or overnight oats.
Snack Time:
Hard-boiled eggs are a healthy and portable snack. They're a great source of protein and can help keep you feeling full and satisfied between meals.
(Part 9) Table: A Quick Reference Guide
| Level of Doneness | Cooking Time | Best for... |
|---|---|---|
| Soft-Boiled | 2-3 minutes | Dipping, light breakfast |
| Medium-Boiled | 5-6 minutes | Salads, sandwiches |
| Hard-Boiled | 8-10 minutes | Slicing, dicing, deviled eggs |
(Part 10) FAQs: Common Questions Answered
What if my eggs crack during cooking?
Don't worry, a few cracks won't ruin your eggs. Just add a tablespoon of salt to the water, which helps to prevent cracking. You can also gently tap the eggs on the bottom of the pot before adding them to the water. This helps to create tiny air pockets that can help prevent cracking.
How do I know if an egg is fresh?
Place the egg in a bowl of cold water. If it sinks to the bottom and lies flat, it's fresh. If it stands upright on the bottom, it's older. If it floats, it's definitely old and should be discarded.
Can I use old eggs?
While older eggs can be used for cooking, they might not have the best texture. For the best results, use eggs that are no more than a week old. The older they are, the more likely the yolk will be rubbery and the white will have a chalky texture.
Why do the yolks sometimes turn green?
This is caused by overcooking the eggs. The iron in the yolk reacts with the sulfur in the white to create a green ring around the yolk. This doesn't affect the taste, but it does mean that your eggs are overcooked. To avoid this, stick to the recommended cooking times.
Can I cook eggs without using ice water?
Yes, but it's not recommended. The ice water stops the cooking process, preventing the yolks from becoming rubbery. If you don't have ice water, you can run the eggs under cold tap water until they are cool. However, the ice water method is the most effective way to ensure a perfectly cooked yolk.
With these tips and tricks, you're well on your way to becoming a hard-boiled egg expert! Remember, practice makes perfect, so keep trying different methods until you find what works best for you. Happy boiling!
Everyone is watching

How to Cook Frozen Lobster Tails Perfectly: A Step-by-Step Guide
RecipesLobster. Just the word conjures up images of lavish meals, special occasions, and a taste of luxury. But let's...

Pigs in a Blanket Cooking Time: How Long to Bake for Perfect Results
RecipesAh, pigs in a blanket. Just the name conjures up images of those delightful little parcels of crispy pastry en...

Pork Fillet Cooking Time: How Long to Cook It Perfectly
RecipesPork fillet, or tenderloin as it's sometimes called, is a real favourite in our house. It's so versatile, and...

The Ultimate Guide to Tender, Juicy Pulled Pork
RecipesRight, let's talk pulled pork. It's one of those dishes that just screams "comfort food," doesn't it? I mean...

The Ultimate Guide to Cooking Delicious Frankfurters
RecipesLet's face it, we all love a good frankfurter. It's a classic, simple, and always satisfying. But let's be rea...