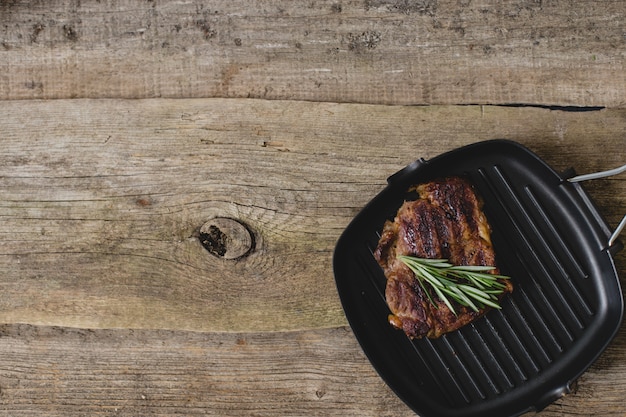
Alright, let's talk ribs, folks! You know, those gloriously tender, fall-off-the-bone beauties that send your taste buds into overdrive? Yeah, those. I've been a rib enthusiast for as long as I can remember, and I've tried almost every cooking method under the sun – from smoky grills to slow cookers, even the occasional dutch oven experiment. But nothing, absolutely nothing, beats a good old-fashioned oven roast when it comes to achieving that melt-in-your-mouth tenderness that makes ribs truly legendary.
So, you're ready to tackle your own rib masterpiece, eh? Fantastic! But before you dive headfirst into the world of spice rubs and slow cooking, let's get the basics sorted. This guide is all about getting your oven ribs absolutely spot-on, from selecting the right cut to nailing that perfect cooking time. Buckle up, folks, this is going to be a juicy ride.
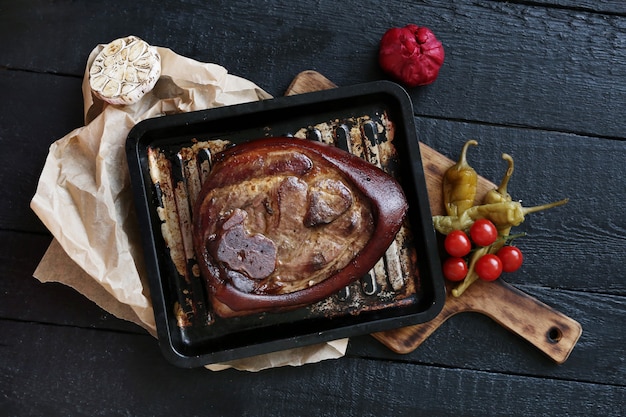
(Part 1) Picking the perfect ribs
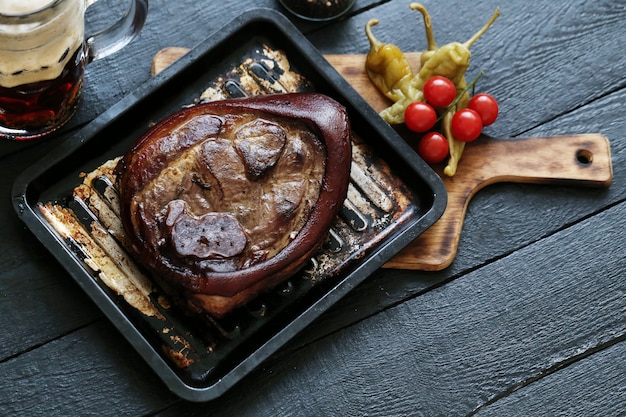
Choosing Your Cut: The Ribs of Your Dreams
Alright, let's start with the star of the show: the ribs. You've got two main contenders here, each with their own unique charms:
Baby back ribs: These are the fancier ones, boasting a smaller cut with a more delicate flavour. They’re perfect for those who prefer a more tender and flavorful experience. Think of them as the "gentle giants" of the rib world, offering a delightful balance of tenderness and taste.
spare ribs: These are the big boys, coming from the lower part of the rib cage. They've got a richer, more robust flavour, and they're known for being a bit chewier. Spare ribs are like the hearty, robust friends of the rib family, perfect for those who like a bit of chew and a deeper, more complex flavour.
Honestly, you can't really go wrong with either. It's really a matter of personal preference. If you're new to the rib game, I'd recommend starting with baby back ribs. They're a bit easier to manage, and they'll leave you feeling impressed with your culinary skills. Plus, their smaller size makes them perfect for smaller gatherings or even a solo rib feast!
Rib Anatomy: Understanding the Layers
Once you've chosen your cut, it's time to get acquainted with the anatomy of a rib. It's not as complex as you might think, but understanding these two key layers will help you master your rib game:
The Membrane: This thin, tough layer is often called the "silver skin." It's kinda like the rib's protective armor, and if you leave it on, it'll prevent the ribs from getting nice and tender. Think of it as a barrier to juicy deliciousness!
The Fat Cap: This layer of fat is your friend, folks. It helps to keep the ribs moist during cooking and adds flavour. Don't trim it all off! The fat cap is like a natural flavour booster and moisture retainer, ensuring your ribs stay succulent and full of flavour.
Prepping for Perfection
So, you've got your ribs, you've chosen your cut, and you're ready to get cooking. Before we get to the oven, there's a little prep work that needs to be done. Don't worry, it's quick and easy, but essential for those perfect ribs:
- Remove the Membrane: Grab a sharp knife and loosen the membrane from the back of the ribs. You can peel it off like a bandage, or you can use a paper towel to grip it and pull it off. It might take a bit of muscle, but trust me, it's worth it!
- Trim the Fat (But Not Too Much): Trim off any excess fat, but leave some of the fat cap intact. It's like a natural flavour boost and keeps your ribs juicy. You want just enough fat to keep things moist and flavorful, not a thick layer that might make the ribs greasy.
- Pat Them Dry: Pat the ribs dry with paper towels. This helps prevent the ribs from steaming in the oven, which can make them soggy. It's all about getting that perfect crispy crust!
(Part 2) The Art of Seasoning
Spice Rubs: A Rib's Best Friend
Now comes the fun part: seasoning those ribs. A good spice rub can transform your humble ribs into something truly spectacular. The beauty of spice rubs is that you can get creative and experiment with different flavour profiles. It's like a culinary adventure for your taste buds! Here are a few classic combinations to get you started:
- Classic BBQ: A simple blend of paprika, garlic powder, onion powder, black pepper, and brown sugar. This is the ultimate rib staple, offering a smoky sweetness that's perfect for a classic BBQ experience.
- Sweet and Smoky: A twist on the classic, adding in a touch of cayenne pepper and a hint of smoked paprika. This rub brings a subtle heat and smokiness that adds a touch of complexity to the classic flavour.
- Fiery Kick: For the adventurous, add in a generous dose of chili powder, cayenne pepper, and smoked paprika for a fiery punch. This is for those who like it hot! A bold combination that packs a punch and adds a unique kick to your ribs.
Applying the Rub: The Technique
Now, how do you apply the rub? Think of it like a massage. You don't want to just sprinkle it on, you want to really rub it in, getting every nook and cranny covered. This helps the spices penetrate the meat, bringing out all the flavour. Take your time and really get those spices into the meat for a flavour explosion!
The Magic of Dry Brine
Okay, here's a little secret weapon: dry brining. This technique involves rubbing your ribs with salt and letting them sit in the fridge for a few hours, or even overnight. It sounds simple, but it's a game-changer. The salt draws out the moisture from the ribs, then gets reabsorbed, making them incredibly juicy and flavorful. It's like a natural magic trick that transforms your ribs into succulent masterpieces!
(Part 3) Cooking Time: The Crucial Factor
Understanding the Oven's Role
Now we're getting to the heart of the matter: the cooking time. This is where you need to be patient, my friend. Oven ribs are all about slow and steady. The goal is to break down those tough collagen fibers, turning them into tender, succulent heaven. It's a process that takes time, but the results are worth every minute!
Calculating Cooking Time: The Basics
The ideal cooking time for ribs depends on several factors, including the size of the rack, the type of oven, and your desired level of tenderness. Here's a general guideline to help you get started:
| Type of Ribs | Cooking Time (at 300°F) |
|---|---|
| Baby Back Ribs | 2-3 hours |
| Spare Ribs | 3-4 hours |
Note: These are just general guidelines. You may need to adjust the cooking time based on your specific oven and the thickness of your ribs. It's always best to err on the side of caution and check for doneness a bit earlier than you think you might need to!
The "Fall-Off-the-Bone" Test: Your Ultimate Guide
Okay, you've cooked those ribs for hours, and you're starting to wonder if they're done. How do you know? Well, there's a simple test: the "fall-off-the-bone" test. If you can easily pull a rib bone away from the meat with minimal effort, then you're in business! Your ribs are perfectly tender, ready to be devoured!
(Part 4) The Art of Glazing
The Finishing Touch: A Glaze to Remember
Okay, your ribs are cooked to perfection, and they're looking magnificent. But we're not done yet! We need to add that final touch of magic: a delicious glaze. Think of it as the cherry on top, the finishing touch that elevates your ribs to the next level of deliciousness!
Glazing Techniques: Mastering the Art
Glazes come in all shapes and sizes, but the key is to apply them in the last 30-45 minutes of cooking. This allows the glaze to caramelize and create that sticky, flavorful finish. It's like a sweet, savory coating that brings out the best in your ribs.
- Basting: Use a brush to generously apply the glaze to the ribs. Get those ribs coated with a thick layer of glaze, ensuring every inch is covered for maximum flavour and caramelization.
- Spoon Drizzle: Gently spoon the glaze over the ribs, allowing it to drip down the sides. This is a more delicate approach, perfect for creating a thin, glossy glaze that coats the ribs evenly.
- Wrapping Up: For an extra-tender and juicy result, wrap the ribs in foil for the last 30 minutes of cooking. Then, in the final 15 minutes, remove the foil and baste the ribs with the glaze. This technique traps steam and moisture, resulting in incredibly tender ribs. The final glazing adds that extra layer of flavour and a beautiful caramelized crust.
(Part 5) Serving and Storage
Presentation Matters: The Feast Begins
Now it’s time to show off those beautiful ribs! Present them on a platter, surrounded by your favourite sides like mashed potatoes, coleslaw, or baked beans. Let the aroma waft through the air, teasing your guests with the promise of deliciousness. It's all about creating a feast for the senses!
Leftover Magic: A Rib Feast Continues
You’ve made a feast, and there’s bound to be leftovers. Don’t worry! Rib leftovers are a blessing. You can easily store them in the fridge for 3-4 days. Just be sure to refrigerate them in an airtight container. They’re even better the next day, so don’t feel bad about enjoying them again!
Reheating Ribs: Back to Glory
To reheat those delicious leftovers, you’ve got a few options:
- Oven Reheating: Preheat your oven to 350°F. Place the ribs in a baking dish and cover them tightly with foil. Bake for 15-20 minutes, or until heated through. This method is perfect for preserving the moisture and tenderness of your ribs.
- Slow Cooker Magic: Toss the ribs into your slow cooker with a little bit of bbq sauce and cook on low for 2-3 hours, or until heated through. This is a great option if you want to add a bit of extra flavour and tenderness to your leftovers.
(Part 6) Mastering the Temperature
Oven Temperatures: The Key to Perfection
Now, let’s talk about oven temperature. This is crucial for achieving that melt-in-your-mouth tenderness. A low and slow approach is the key, typically around 300°F. But, you can experiment with different temperatures to find what works best for you.
The Temperature Dance: High vs. Low
- High Heat (350-400°F): This method is faster, but it can result in dry ribs if you’re not careful. It’s better for ribs that are already fairly tender. If you're short on time or have already tender ribs, this method can work, but keep a close eye on them!
- Low and Slow (250-300°F): The classic method for achieving fall-off-the-bone tenderness. It’s the most forgiving approach, allowing for a longer cook time. This method is the best way to ensure your ribs are cooked to perfection, with the time and temperature combination guaranteeing melt-in-your-mouth tenderness.
(Part 7) The Smoke Factor
Adding Smoke: A Flavor Explosion
Here’s a tip that will take your oven ribs to the next level: smoke. It adds a depth of flavor that’s simply irresistible. Now, you can get fancy with a smoker, but you can also achieve smoky goodness in your regular oven. No need for fancy equipment, you can add that smoky flavour right at home!
smoked ribs in Your Oven: The Method
- Wood Chips: Soak your favourite wood chips (like hickory, pecan, or apple) in water for at least 30 minutes. The wood chips will infuse your ribs with a smoky aroma and flavour, adding a touch of complexity.
- Create a Smoker Box: You can use a small foil pan, a cast iron skillet, or a purpose-built smoker box. Place the box on the bottom rack of your oven, letting the chips release smoke as the ribs cook.
- Add the Chips: Place the soaked wood chips in your smoker box and place it on the bottom rack of your oven. You can add more chips as needed to maintain a consistent smoke level.
- Roast the Ribs: Roast your ribs according to your preferred method, allowing the wood chips to infuse your oven with delicious smoke. The smoke will gently infuse your ribs, adding a beautiful smoky aroma and flavour that elevates the experience.
(Part 8) FAQs
1. Can I Overcook Ribs?
Yes, it’s possible to overcook ribs. They’ll become dry and tough. The key is to keep an eye on them and use the fall-off-the-bone test to check for doneness. Don't be afraid to check them early and often!
2. How Long Can I Marinate Ribs?
You can marinate ribs for as little as 30 minutes or as long as overnight. Marinades help to tenderize the meat and add flavor. The longer you marinate, the more flavour your ribs will absorb.
3. What Happens if I Don’t Remove the Membrane?
If you leave the membrane on, it will prevent the ribs from getting tender and flavorful. It’s a crucial step to get those ribs perfect. It's like a barrier to tenderness and deliciousness, so remove it for the best results!
4. How do I Know if the Glaze is Done?
The glaze is done when it has caramelized and is slightly sticky. You’ll know it’s ready when it starts to bubble and brown. The glaze should look glossy and slightly caramelized, indicating it's reached its perfect texture and flavour.
5. What’s the Best Way to Store Leftover Ribs?
Store leftover ribs in an airtight container in the refrigerator for 3-4 days. Reheat them in the oven or slow cooker for a delicious second serving. Don't let those leftover ribs go to waste! They're even better the next day, perfect for a delicious lunch or dinner.
And there you have it, folks! The ultimate guide to oven ribs. You’re now equipped with the knowledge to create rib masterpieces that will leave your friends and family begging for more. So get out there, experiment, and enjoy the juicy journey! Let me know if you have any other questions, and happy ribbing!
Everyone is watching

How to Cook Frozen Lobster Tails Perfectly: A Step-by-Step Guide
RecipesLobster. Just the word conjures up images of lavish meals, special occasions, and a taste of luxury. But let's...

Pigs in a Blanket Cooking Time: How Long to Bake for Perfect Results
RecipesAh, pigs in a blanket. Just the name conjures up images of those delightful little parcels of crispy pastry en...

Pork Fillet Cooking Time: How Long to Cook It Perfectly
RecipesPork fillet, or tenderloin as it's sometimes called, is a real favourite in our house. It's so versatile, and...

The Ultimate Guide to Tender, Juicy Pulled Pork
RecipesRight, let's talk pulled pork. It's one of those dishes that just screams "comfort food," doesn't it? I mean...

The Ultimate Guide to Cooking Delicious Frankfurters
RecipesLet's face it, we all love a good frankfurter. It's a classic, simple, and always satisfying. But let's be rea...