Ah, the steak. It's the ultimate comfort food, a symbol of indulgence, and a culinary masterpiece when executed flawlessly. That beautifully caramelized crust, the tantalizing aroma, and the melting tenderness - it's a symphony of flavors that sends taste buds into a frenzy. But achieving that perfect steak experience isn't always a walk in the park. There have been times, I confess, where I've ended up with a dry, tough piece of meat that resembled a hockey puck more than a succulent steak. But fear not, my fellow steak enthusiasts! After years of trial and error, countless experiments, and a few (admittedly regrettable) burnt offerings, I've finally cracked the code to oven-baked steak perfection.
This comprehensive guide will take you on a journey, from choosing the right cut to mastering the art of resting, leaving you with the skills to transform your steak game. I'll share my personal tips and tricks, gleaned from countless kitchen adventures, to ensure your steaks are always tender, juicy, and brimming with flavor. So, grab your apron, fire up the oven, and let's embark on this delicious journey together.
Part 1: Choosing Your Weapon of Choice

The first step in our steak quest is selecting the right cut. This is where a little bit of understanding goes a long way. Different cuts have their own unique textures and flavour profiles, and choosing the right one can make all the difference between a culinary triumph and a disappointing meal.
The Cut That Fits Your Style
For the steak novice, navigating the world of cuts can be a little daunting. Here's a quick breakdown of some of the most popular steak cuts and what makes them special:
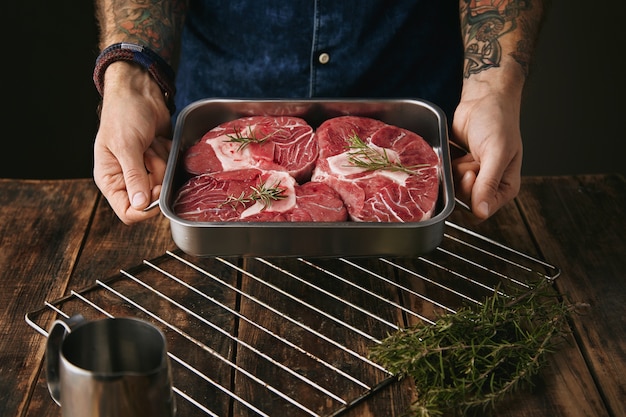
- Ribeye: This is the king of steaks, a classic for a reason. Its marbling, those beautiful streaks of fat throughout the meat, makes it incredibly juicy and flavorful. It's a cut for those who appreciate a tender, melt-in-your-mouth experience.
- new york strip: Leaner than the ribeye, the New York Strip still boasts excellent flavour. It's a great choice if you're looking for a slightly firmer texture and a more pronounced, beefy taste.
- filet mignon: This cut is renowned for its incredible tenderness, thanks to its lack of visible marbling. It's a luxurious choice for special occasions, offering a delicate and melt-in-your-mouth experience.
- Sirloin: A budget-friendly option that still delivers on flavour, sirloin is a versatile cut. It's a bit tougher than the others, but with proper cooking, it can be delicious and satisfying.
- T-bone: A true classic, the T-bone steak features both a tender filet mignon and a leaner strip steak, making it a great choice for a crowd, offering a variety of textures and flavors in one steak.
But don't be afraid to step outside the box! I've found that even less common cuts like skirt steak or flank steak can be incredibly delicious when cooked properly. They might require slightly different cooking methods, but they can offer unique textures and flavours that are well worth exploring.
Thickness Matters: A Tale of Two Steaks
There's a common misconception that thicker steaks are always better. While a thicker steak does hold onto its heat better, allowing for a more even cook, a thinner steak can be cooked just as well (and often faster). It's really about personal preference and the cooking method. For example, if you're grilling, a thinner steak might be better for achieving a quick sear. I personally tend to go for a 1-1.5 inch thickness, which offers a good balance of cooking time and texture.
Part 2: The Art of Prepping

You've chosen your cut, now it's time to give it some love before it even hits the oven. Proper prep is crucial for a delicious result, ensuring your steak is seasoned to perfection and ready for its oven encounter.
Pat It Dry, My Dear
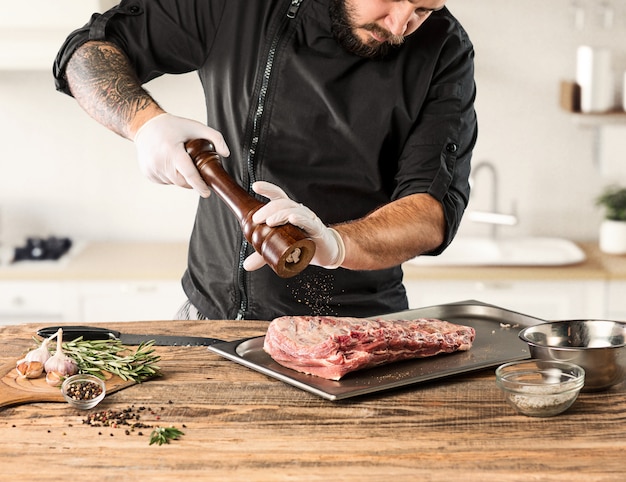
The first rule of prepping is to pat your steak dry. Excess moisture can steam the steak during cooking, resulting in a less crispy crust. I use paper towels to gently pat the surface until it's completely dry. This ensures a beautiful, golden-brown crust develops during the cooking process.
Salt and Pepper: A Simple, Yet Powerful Duo
Salt and pepper are the fundamental seasonings for steak, a dynamic duo that elevates the natural flavours of the meat. But don't overdo it! I typically salt my steaks about 30-60 minutes before cooking, allowing the salt to draw out moisture and then reabsorb it, creating a more tender and flavourful steak. Freshly ground pepper adds a lovely bite, but remember, we don't want to mask the beautiful taste of the steak.
Beyond Basic: Exploring Flavour Profiles
While salt and pepper are the foundation, there's a whole world of flavour waiting to be explored. I love experimenting with different herbs and spices, depending on my mood and the steak cut. Here are a few ideas to get you started:
- Herby Delight: Rosemary, thyme, and garlic are classic additions to steak, creating a fragrant and aromatic crust. A light dusting of these herbs will infuse the steak with a lovely earthy aroma.
- Spicy Kick: Cayenne pepper, paprika, and chili flakes add a fiery punch, perfect for those who like a little heat. A pinch of these spices will give your steak a satisfying kick.
- Citrus Zing: Lemon zest or orange zest provides a bright and refreshing touch, cutting through the richness of the beef. A sprinkle of zest will add a citrusy aroma and a hint of tang.
- Smokey Charm: Smoked paprika or smoked salt adds a smoky depth to the flavour. A light sprinkle of smoked paprika will give your steak a smoky aroma and flavour.
Remember, less is more. A subtle touch of seasoning can elevate the steak's natural flavours without overwhelming them.
Part 3: The Oven's Embrace: Mastering the Heat

The oven is our trusted companion in this steak journey. It's a powerful tool that can deliver consistent results when handled correctly. Let's explore how to use it to your advantage.
Preheating: The Key to Consistent Results
Always preheat your oven to the desired temperature before placing the steak inside. This ensures that the steak cooks evenly and develops a beautiful crust. I usually preheat my oven to 400°F (200°C) for a nice and crispy result.
Oiling the Situation: A Slick Move
Before the steak goes into the oven, I like to give it a light coating of oil. This helps create a crispy exterior and prevents the steak from sticking to the baking sheet. Olive oil is a classic choice, but avocado oil or even butter can also work wonders.
Don't Crowd the Kitchen: Giving Your Steak Space
When placing your steak in the oven, make sure it has enough space to breathe. Crowding the baking sheet can lead to uneven cooking and a steamed, rather than seared, result. I use a large baking sheet, with enough room to spread out the steaks, allowing for maximum airflow.
Part 4: The Art of the Flip: A Dance with Time
Now comes the fun part – flipping the steak! But timing is everything.
Don't Rush It: Letting the Crust Develop
Resist the urge to flip the steak too early. Let it cook for about 3-4 minutes on the first side to develop a nice sear and crust. This is where the magic happens, locking in the flavour and juices.
The Flip: A Moment of Truth
Once the first side has developed a beautiful golden brown crust, it's time to flip the steak. Use tongs or a spatula to gently flip it over, avoiding any accidental piercing, which can lead to moisture loss.
The Finishing Touch: A Quick Sear
After flipping, I like to give the second side a quick sear of 2-3 minutes to ensure both sides have a lovely crust. Remember, this is a quick sear, not a full cook. This final sear will ensure that both sides have a crispy, flavorful crust.
Part 5: The internal temperature: A Matter of Preference
We're almost there! Now comes the part where you decide how you like your steak done.
The Doneness Scale: Finding Your Sweet Spot
There's no right or wrong answer when it comes to doneness. It's all about personal preference. Here's a quick guide to the most common levels, but ultimately, it's about finding what you enjoy most:
| Doneness | Internal Temperature (°F) | Internal Temperature (°C) |
|---|---|---|
| Rare | 125-130 | 52-54 |
| Medium-Rare | 130-135 | 54-57 |
| Medium | 140-145 | 60-63 |
| Medium-Well | 150-155 | 65-68 |
| Well-Done | 160 | 71 |
Personally, I'm a big fan of medium-rare, where the center is still a vibrant pink, but I know many people prefer their steaks well-done, with a brown center. The most important thing is to cook it to your liking!
The meat thermometer: Your Reliable Guide
To ensure accuracy, I always use a meat thermometer to check the internal temperature of my steak. It's a simple tool that takes the guesswork out of cooking and helps prevent overcooking.
Insert the thermometer into the thickest part of the steak, avoiding any bone. The thermometer should read the desired temperature for your chosen level of doneness.
Part 6: The Resting Period: Patience is a Virtue
After the steak has reached its desired internal temperature, it's time to let it rest. This may seem like a trivial step, but it's crucial for achieving a juicy and flavourful result.
The Science Behind Resting
As the steak cooks, the juices are pushed to the surface. When you immediately cut into the steak, these juices will run out, leaving you with a dry, disappointing result. By letting the steak rest, the juices redistribute throughout the meat, resulting in a more tender and juicy steak.
Time Out for Flavor: How Long to Rest
I typically rest my steaks for 10-15 minutes before slicing. This is enough time for the juices to redistribute and for the steak to relax and become more tender.
Keeping It Warm: Preventing Cold Disappointment
To keep the steak warm while it rests, I cover it loosely with foil. This will prevent it from cooling down too quickly while the juices redistribute.
Part 7: The Grand Finale: Slicing and Serving
After patiently waiting for the steak to rest, it's time for the grand finale – slicing and serving.
Slicing Against the Grain: Unlocking Tenderness
When slicing your steak, it's essential to slice against the grain. This refers to the direction of the muscle fibers in the meat. By slicing against the grain, you're breaking down those fibers, resulting in a more tender and easier-to-chew steak.
Presentation Matters: A Visual Feast
I like to arrange my sliced steak on a plate or platter, creating a visually appealing presentation. A sprinkle of fresh herbs, a drizzle of olive oil, or a dollop of butter can elevate the visual appeal and add a finishing touch.
The Perfect Sidekicks: Complementary Companions
No steak is complete without the perfect accompaniments. I love to pair my steak with roasted vegetables, creamy mashed potatoes, or a simple salad. The possibilities are endless!
roasted asparagus with a sprinkle of lemon zest, creamy garlic mashed potatoes, a vibrant green salad with a tangy vinaigrette - these are just a few examples of side dishes that complement the richness of the steak. The key is to choose sides that balance the flavors and textures of the steak.
Part 8: FAQs
Here are some frequently asked questions about oven-baked steak:
1. What if my steak is overcooked?
Don't worry, even if your steak is overcooked, it's not a culinary disaster. It might be a bit tough, but there are ways to salvage it. Try slicing it thinly and using it in a dish like steak salad or steak sandwiches.
If the steak is still edible, but a little dry, you can try adding a sauce or gravy to help it regain some moisture. A flavorful pan sauce made with the drippings from the steak can add a boost of flavor and moisture.
2. How can I tell if my steak is done without a thermometer?
While a meat thermometer is the most accurate way to check doneness, there are some visual and tactile cues you can use. For rare, the center will be red and very soft. For medium-rare, the center will be a little firmer and pink. For medium, the center will be brown and firm.
You can also gently press the center of the steak to gauge its firmness. A rare steak will be very soft, while a well-done steak will be firm. But remember, these methods are not as precise as a thermometer, so it's best to use a thermometer for a reliable result.
3. Can I cook more than one steak at a time?
Absolutely! Just make sure you have enough space on the baking sheet to allow for proper airflow. And remember, cook time may vary depending on the thickness of your steaks.
If you're cooking multiple steaks, you may need to adjust the cooking time slightly. Thicker steaks will take longer to cook than thinner steaks. It's a good idea to check the internal temperature of the thickest steak to ensure even doneness.
4. What if I don't have an oven?
You can still achieve delicious results by using a cast iron skillet on the stovetop. Just make sure the skillet is very hot before adding the steak.
A hot cast iron skillet is ideal for creating a beautiful sear on the steak. Use high heat and cook the steak for 2-3 minutes per side, or until a crispy crust develops. Then, you can transfer the steak to a preheated oven to finish cooking to your desired doneness.
5. What are some tips for avoiding a tough steak?
To prevent a tough steak, use a tender cut of meat, cook it at a high temperature, and don't overcook it. Resting your steak after cooking is also essential for tenderness.
Tender cuts like ribeye, filet mignon, and strip steak are known for their tenderness. Using a high temperature will help to create a flavorful crust while maintaining the tenderness of the meat. Avoid overcooking your steak by using a meat thermometer to ensure it reaches your desired doneness. And remember, always rest your steak after cooking to allow the juices to redistribute for a more tender and flavorful experience.
Everyone is watching

How to Cook Frozen Lobster Tails Perfectly: A Step-by-Step Guide
RecipesLobster. Just the word conjures up images of lavish meals, special occasions, and a taste of luxury. But let's...

Pigs in a Blanket Cooking Time: How Long to Bake for Perfect Results
RecipesAh, pigs in a blanket. Just the name conjures up images of those delightful little parcels of crispy pastry en...

Pork Fillet Cooking Time: How Long to Cook It Perfectly
RecipesPork fillet, or tenderloin as it's sometimes called, is a real favourite in our house. It's so versatile, and...

The Ultimate Guide to Tender, Juicy Pulled Pork
RecipesRight, let's talk pulled pork. It's one of those dishes that just screams "comfort food," doesn't it? I mean...

The Ultimate Guide to Cooking Sweet Potatoes: From Roasting to Mashing
RecipesSweet potatoes. Just the name conjures up images of warm, comforting dishes, bursts of vibrant color, and a to...
