(Part 1) Choosing the Right Ribs: A Foundation for Success
Spare Ribs: The Hearty Hero
Spare ribs are longer and meatier than their baby back counterparts. They pack a punch with their robust flavour and are perfect for feeding a larger crowd. They also tend to be more budget-friendly, which is always a plus.baby back ribs: The Delicate Delight
Baby back ribs, on the other hand, are known for their delicate flavour and tenderness. They’re shorter and leaner, making them a fantastic choice for smaller gatherings or when you want a more refined experience.My Personal Preference: Embracing the Spare Rib
Personally, I’m a spare rib kind of guy. I love the hearty flavour and the way they hold up so well under the oven's heat. But hey, this is your culinary adventure. Choose the cut that speaks to your heart and your taste buds.Quality Check: Ensuring a Winning Start
No matter which cut you choose, it’s essential to pick ribs that are fresh and of high quality. Look for ribs that are firm and springy to the touch, with a healthy pink colour and no signs of discolouration or bruising. Avoid any ribs that feel dry or have a slimy texture. These are signs that the ribs haven’t been handled with care and might not be the best choice for your rib masterpiece.(Part 2) Preparing the Ribs: Setting the Stage for Tenderness
The Membrane: A Barrier to Tenderness
The first step in the preparation process is removing the membrane, a thin, tough layer found on the back of the ribs. This membrane can make your ribs tough and chewy, so it’s essential to get rid of it.Grab a sharp knife and slide it under the membrane, working your way across the entire surface. You can then gently peel it off with your fingers. It’s a bit of a messy task, but it’s well worth the effort.
The Seasoning: A Symphony of Flavours
Now comes the fun part – seasoning! This is where you can truly unleash your creativity and make your ribs uniquely yours.I’ve experimented with countless flavour combinations over the years, and I’ve found that a simple dry rub is the way to go. My go-to blend includes smoked paprika, garlic powder, onion powder, brown sugar, salt, and black pepper. This classic combination delivers a beautiful smoky depth and a hint of sweetness that’s simply irresistible.
But feel free to experiment! Add in other spices like cumin, chili powder, cayenne pepper, or even a touch of cinnamon to create your signature flavour profile.
Remember, the key is to rub the seasoning generously into the ribs, ensuring every surface is coated.
(Part 3) The Oven-Baked Method: Slow and Low for Tenderness
The Magic of Slow and Low
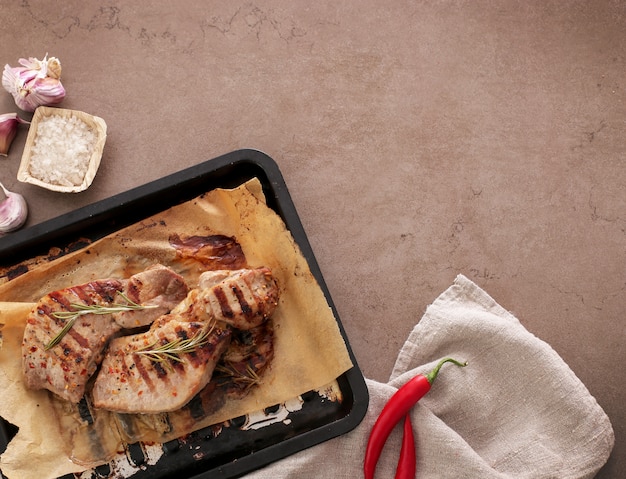
You might be tempted to crank up the heat and try to speed up the process. But resist that urge! High heat can actually dry out the ribs and make them tough. The key is to cook them slowly and gently, letting the heat work its magic and break down the connective tissue.The Setup: A Foil-Wrapped Paradise
To create the ideal environment for oven-baked ribs, I like to wrap them in foil. This helps to create a steamy, moist atmosphere that encourages tenderness and locks in all those delicious flavours.First, line a baking sheet with foil. Then, place the seasoned ribs on the foil, ensuring they’re evenly spaced. Now comes the secret ingredient: a good drizzle of your favourite barbecue sauce. This adds an extra layer of flavour and moisture, helping to create a lusciously glazed finish.
Next, wrap the ribs tightly in the foil, sealing the edges well. This creates a pouch-like environment that will help the ribs to cook evenly.
The Rack: Preventing Soggy Ribs
To prevent the ribs from becoming soggy, I like to place a rack over the foil-wrapped ribs. This lifts them slightly, allowing excess moisture to drain away and preventing them from stewing in their own juices.The Wet and Dry Heat Combo: A Multifaceted Approach
Here’s where the oven-baked method gets interesting. I’ve found that using a combination of wet and dry heat produces the most spectacular results.For the first part of the cooking process, the ribs are wrapped tightly in foil, creating a moist environment that encourages tenderness and flavour development.
After a couple of hours, the ribs are unwrapped and allowed to bake uncovered for a final hour. This allows the ribs to brown beautifully and soak up the flavours of the sauce, creating a delicious crust.
(Part 4) The Sauce: A Symphony of Sweet and Savoury Flavours
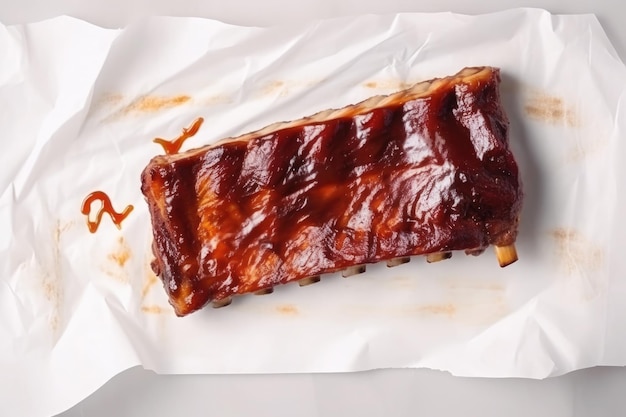
The right sauce is like the final flourish of a symphony, bringing everything together in a harmonious blend of sweet, savoury, and smoky notes.The Classic Barbecue Sauce: A Timeless Favourite
My go-to barbecue sauce is a simple combination of ketchup, brown sugar, Worcestershire sauce, apple cider vinegar, and a hint of hot sauce. It’s a classic for a reason – it's sweet, tangy, and has a nice kick that perfectly complements the smoky flavour of the ribs.The Adventurous Sauce: Experimenting with Flavours
But if you’re feeling adventurous, there’s a whole world of sauce possibilities out there. Try adding in ingredients like barbecue sauce, Dijon mustard, honey, molasses, or even a splash of rum for a unique twist.The key is to find a balance between sweet, savoury, and tangy notes, and to ensure the sauce has a good consistency. You want it to be thick enough to coat the ribs without being overly thick or runny.
(Part 5) The Finishing Touches: Achieving Perfection
The oven-baked ribs are now ready for the final touches that elevate them from good to exceptional.The Rest: A Moment of Relaxation
After the ribs have been cooking for the required time, it’s tempting to dive right in. But resist! A little rest is crucial for letting the juices redistribute and the flavours meld.Let the ribs rest, wrapped in foil, for at least 15 minutes before serving. This allows the meat to relax and become even more tender, resulting in a truly unforgettable dining experience.
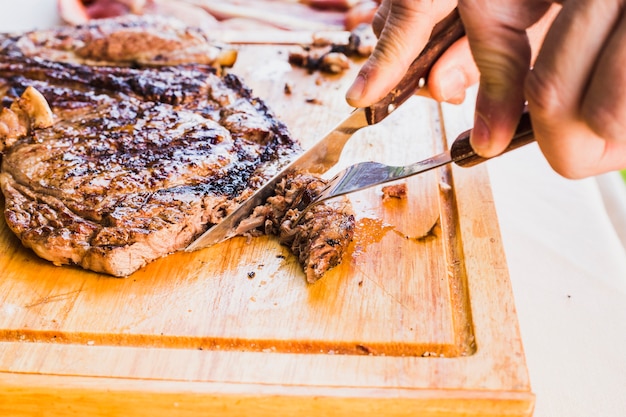
The Cut: Making It Easy to Enjoy
Now comes the satisfying part – cutting the ribs into manageable pieces. I like to use a sharp knife and cut them across the bone, creating nice, bite-sized pieces that are perfect for sharing (or not, we won't judge!).The Presentation: Making It a Feast for the Eyes
Don’t just throw those ribs on a plate and call it a day. Take a little extra time to create a beautiful presentation that truly showcases your culinary masterpiece.Arrange the ribs on a platter, with a generous drizzle of sauce and a sprinkle of chopped fresh herbs like parsley or cilantro. It’s a small touch, but it elevates the entire dining experience.
(Part 6) Serving Suggestions: Creating a Rib-tastic Feast
You’ve got the ribs, the sauce, the presentation – now it’s time to think about the perfect accompaniments.The Sides: A Symphony of Flavours
For sides, you can go classic with creamy coleslaw or mac and cheese. But I’m always up for a little adventure. A tangy vinegar-based slaw, a crunchy potato salad, or sweet and smoky baked beans can all complement the rich flavour of the ribs.Don’t forget about the bread. A warm slice of cornbread or a fluffy biscuit is the perfect vehicle for soaking up all those delicious sauces.
The Drinks: Quenching the Thirst
No rib feast is complete without the right beverages. A cold beer is always a classic choice, but you can also opt for a refreshing lemonade, a glass of dry red wine, or a fruity cocktail.(Part 7) Storage and Reheating: Enjoying Leftovers
Let’s be honest, leftovers are a good thing! But you need to know how to store and reheat them properly to ensure they remain delicious.The Storage: Keeping the Flavour Fresh
If you’re lucky enough to have leftovers (which I doubt), you can store them in an airtight container in the refrigerator for up to 3 days.The Reheating: Bringing Back the Magic
To reheat your ribs, I recommend wrapping them in foil and baking them in a low oven for about 30 minutes. This helps to retain moisture and ensures the ribs stay tender and juicy.(Part 8) FAQs: Addressing Common Questions
Let’s tackle some frequently asked questions about oven-baked ribs.1. Can I Use a Different Type of Ribs?
Absolutely! You can use any type of ribs you like, whether it's spare ribs, baby back ribs, or even St. Louis-style ribs. Just adjust the cooking time accordingly.2. What If My Ribs Aren't Tender Enough?
If your ribs aren't quite as tender as you'd like, you can always cook them for a bit longer. Just check the meat with a fork, and if it's still tough, pop them back in the oven for another 30 minutes or so.3. Can I Make the Ribs in Advance?
Yes, you can definitely make the ribs in advance. Just cook them according to the instructions, then let them cool completely. Then, store them in an airtight container in the refrigerator. When you're ready to serve, simply reheat them in the oven.4. What If I Don't Have a Rack?
If you don't have a rack, you can place the ribs directly on the foil. Just make sure to flip them halfway through the cooking time to ensure they cook evenly.5. What Are Some Other Ways to Cook Ribs?
You can cook ribs in a variety of ways, including smoking, grilling, or even using a slow cooker. But for the ultimate in tender, fall-off-the-bone ribs, oven-baking is my go-to method.There you have it, my friends. The ultimate guide to oven-baked spare ribs, a recipe that’s sure to impress your taste buds and leave you craving for more. So gather your ingredients, put on your favourite playlist, and get ready to create some magic in the kitchen!
Everyone is watching

How to Cook Frozen Lobster Tails Perfectly: A Step-by-Step Guide
RecipesLobster. Just the word conjures up images of lavish meals, special occasions, and a taste of luxury. But let's...

Pigs in a Blanket Cooking Time: How Long to Bake for Perfect Results
RecipesAh, pigs in a blanket. Just the name conjures up images of those delightful little parcels of crispy pastry en...

Pork Fillet Cooking Time: How Long to Cook It Perfectly
RecipesPork fillet, or tenderloin as it's sometimes called, is a real favourite in our house. It's so versatile, and...

The Ultimate Guide to Cooking Delicious Frankfurters
RecipesLet's face it, we all love a good frankfurter. It's a classic, simple, and always satisfying. But let's be rea...

Wolf Meat Recipes: A Guide to Cooking Wild Game
RecipesLet's be honest, you don't see wolf meat at your local butcher shop every day. It's a bit of a wild card, but ...