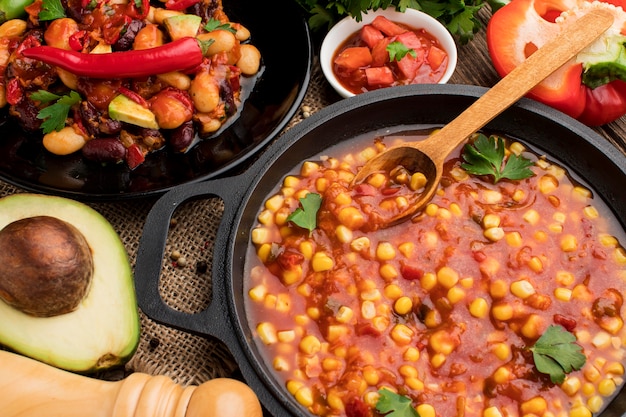
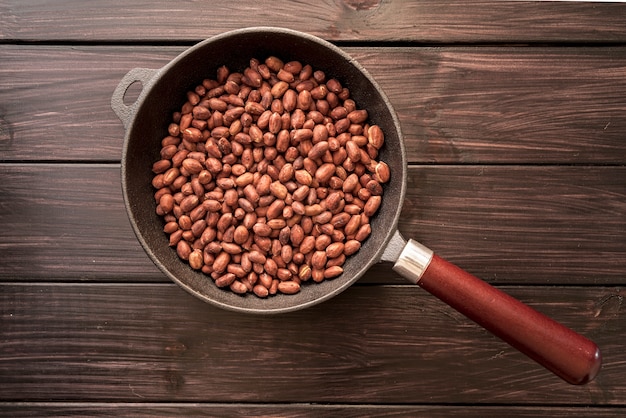
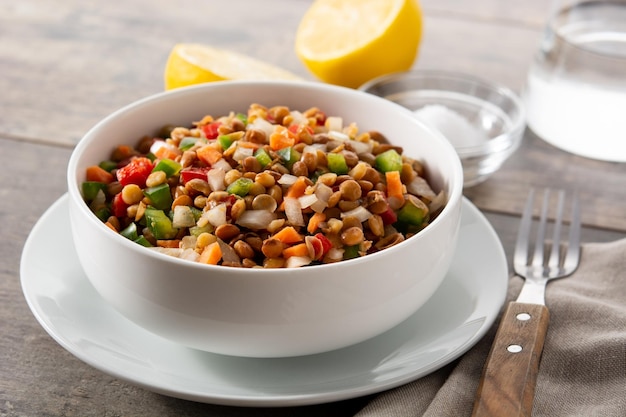
Let’s be honest, the prospect of cooking dried beans can feel a bit daunting, especially if you’re new to the world of legumes. The thought of those little hard nuggets transforming into a delicious meal can seem like a culinary mystery. But trust me, I’ve been there! I’ve had my fair share of bean disasters – those tough, unyielding little buggers just staring back at me from the pot. But after years of trial and error (and a few burnt bottoms!), I’ve finally cracked the code. This is my foolproof guide to cooking beans perfectly every single time.
Part 1: The Essentials – Setting the Stage for Bean Perfection

Why Dried Beans? A Culinary Treasure
Let’s get one thing straight: dried beans are not just a budget-friendly option, they’re a culinary treasure trove! They’re ridiculously versatile – think soups, stews, salads, dips, even as a base for veggie burgers. And don’t forget the health benefits. These little powerhouses are packed with fiber, protein, and essential vitamins and minerals. Plus, there’s just something incredibly satisfying about transforming these dried nuggets into a flavorful, comforting meal. It's a bit like a culinary magic trick!
The Power of Soaking: Unlocking the Potential
Soaking isn’t just an optional step, it’s a game-changer. It’s like giving your beans a little spa treatment. Soaking softens the beans, making them cook quicker and resulting in a smoother, more evenly cooked texture. It also helps remove some of the oligosaccharides, which can cause those unpleasant digestive issues for some people. Personally, I always soak my beans, but if you're short on time, don't fret. You can skip it and just add a little extra cooking time.
Choosing the Right Beans: A World of Flavor and Texture
The bean world can be a bit overwhelming, with so many varieties, each with its own unique flavor and texture. But don't worry, I'm here to help you navigate this exciting landscape! Here are some of my favorites:
- cannellini beans: These creamy white beans are perfect for soups, stews, and salads. They hold their shape well, but still have a wonderfully smooth texture. Think of them as the elegant, refined bean of the bunch.
- kidney beans: These firm, dark red beans are a staple in chili and other hearty dishes. They're bold and full of character, lending a robust flavor to any dish.
- black beans: These small, black beans are super versatile and delicious in everything from tacos to salads. They have a subtle earthy flavor, adding a touch of complexity to your dishes.
- pinto beans: These speckled brown beans are a classic choice for Mexican dishes, but they also work wonders in salads and soups. Their mild flavor and firm texture make them a real crowd-pleaser. They're the friendly, approachable bean, always up for any adventure.
- Chickpeas: These creamy, nutty beans are a favourite in Indian cuisine. They're perfect for hummus, salads, and curries. They're also a fantastic source of protein. These are the versatile and flavorful beans, ready to take center stage in any dish.
What You'll Need: Your culinary arsenal
Before we dive into the cooking process, gather your culinary arsenal:
- A large pot: You'll need enough space for the beans to cook comfortably and move freely.
- A colander: To rinse and drain the beans, removing any debris or broken beans.
- A measuring cup: To measure the beans and water accurately. This is key to achieving the perfect bean-to-water ratio for consistent results.
- A wooden spoon: To stir the beans and make sure they're cooking evenly. It's also gentler on the beans than a metal spoon, preventing them from getting scratched or mashed.
- A timer: To keep track of the cooking time. You don't want to overcook or undercook those beans!
Part 2: The Soaking Process: A Gentle Transformation

The Basics of Soaking: A Time for Rehydration
Soaking is all about giving your beans a little time to rehydrate and soften. This makes them cook faster and more evenly, resulting in a smoother, more satisfying texture. Here's the basic process:
- Rinse: Give your beans a good rinse in a colander, discarding any debris or broken beans. This is a crucial step to ensure your beans are clean and ready for soaking.
- Soak: Transfer the beans to a large bowl or pot. Add enough water to cover the beans by at least 2 inches. Cover the bowl or pot and leave it in a cool place for at least 8 hours, or even overnight. This allows the beans to absorb the water and begin to soften.
- Drain: After soaking, drain the beans in a colander. Don't worry, the soaking water will be a little cloudy. This is normal, as it's releasing some of those oligosaccharides that can cause digestive issues.
Tips for Soaking Success: Maximizing Your Bean Transformation
Here are a few tips to make your bean soaking experience even more successful:
- Use cold water: This helps prevent the beans from absorbing too much water and becoming mushy. Cold water also helps to keep the beans from cooking prematurely during the soaking process.
- Add a pinch of salt: This helps prevent the beans from becoming too soft. The salt also adds a touch of flavor to the beans during soaking.
- Store in the refrigerator: If you're soaking for longer than 8 hours, keep the beans in the fridge to prevent bacteria growth. Just make sure to bring them to room temperature before cooking. This ensures the beans are at the right temperature for optimal cooking.
Soaking Alternatives: Time-Saving Solutions
If you're in a rush, there are a few alternatives to traditional soaking:
- Quick Soak: You can soak your beans in boiling water for 1-2 hours. This works especially well for smaller beans like black beans and lentils. The boiling water helps to soften the beans more quickly, reducing the overall soaking time.
- No Soak: If you're really pressed for time, you can skip the soaking altogether. Just add extra cooking time. Be prepared for a slightly firmer texture. You'll need to add about 30-45 minutes to your cooking time if you skip soaking.
Part 3: The Cooking Process: Transforming Beans into a Culinary Masterpiece

The Big Cook-Off: A Symphony of Flavor and Texture
Now that your beans are nice and plump from their soaking session, it's time to get them cooking! This is where the magic happens, transforming those humble beans into a culinary masterpiece.
- Add the beans to a large pot: Make sure you have enough room for the beans to cook comfortably and move freely. This ensures they cook evenly and don't stick together.
- Add fresh water: Use about 6 cups of water for every 1 cup of beans. This provides enough liquid for the beans to cook properly and create a flavorful broth.
- Bring the beans to a boil: Cover the pot and bring the water to a full rolling boil. This helps remove any impurities and starts the cooking process. It also activates the beans, allowing them to soften quickly.
- Reduce the heat and simmer: Once the water is boiling, reduce the heat to a low simmer. Cover the pot and let the beans simmer gently for the recommended time, depending on the type of bean. Simmering allows the beans to cook evenly and develop their full flavor without overcooking them.
- Stir occasionally: Stir the beans occasionally to prevent them from sticking to the bottom of the pot. Stirring ensures even cooking and prevents scorching, ensuring your beans are cooked perfectly.
Cooking Time: A Bean-by-Bean Guide to Culinary Precision
Here's a general guide to cooking times for different types of beans. This is a good starting point, but remember, cooking times can vary depending on the age of the beans, the altitude, and the type of pot you're using. It's always best to check the beans for tenderness during the cooking process.
| Bean Type | Cooking Time (Soaked) | Cooking Time (Not Soaked) |
|---|---|---|
| Cannellini Beans | 1-1.5 hours | 2-3 hours |
| Kidney Beans | 1-1.5 hours | 2-3 hours |
| Black Beans | 1-1.5 hours | 2-3 hours |
| Pinto Beans | 1-1.5 hours | 2-3 hours |
| Chickpeas | 1-1.5 hours | 2-3 hours |
Tips for Perfect Beans: Mastering the Art of bean cooking
Here are some tips to help you achieve perfectly cooked beans. Remember, these are the secrets to unlocking the full potential of your bean-based creations.
- Don't overcook: Overcooked beans can become mushy and lose their texture. Check them for tenderness towards the end of the cooking time. Overcooked beans lose their shape and can become difficult to work with in recipes.
- Add salt at the end: Adding salt too early can toughen the beans. Wait until the very end of cooking to season with salt. This ensures the beans stay tender and the flavor is balanced.
- Add aromatics: For extra flavor, you can add aromatics like onions, garlic, bay leaves, or herbs to the pot during cooking. These aromatics infuse the beans with their delicious flavors, creating a more complex and satisfying dish.
Part 4: Checking for Doneness: The Ultimate Bean Test
The "Squish Test": A Simple and Reliable Method
The ultimate test for bean doneness is the "squish test." It's a simple and reliable way to determine if your beans are cooked to perfection. Take a bean out of the pot and gently squish it between your fingers. If it's soft and easily squishes, it's ready. If it's still firm, it needs more cooking time. You'll be amazed at how easy it is to tell if your beans are cooked perfectly with this simple technique.
Other Signs of Doneness: Visual Cues for Perfect Beans
Besides the squish test, there are other signs that your beans are ready:
- Beans have doubled in size: This is a good indicator that they've absorbed enough water and are fully cooked. As the beans cook, they absorb water and expand, becoming plump and tender.
- Water has thickened: As the beans cook, they release starches, which thicken the cooking liquid. This indicates that the beans are breaking down and becoming tender, releasing their starches into the broth.
- Beans are creamy: If you're cooking beans for soups or stews, they should have a creamy consistency when they're done. The beans should be soft enough to break down slightly, creating a creamy texture in your dish.
Part 5: Storing Your Cooked Beans: Keeping the Flavor Fresh
Keeping Your Beans Fresh: Preserving Flavor and Texture
Once your beans are cooked, it's important to store them properly to keep them fresh and flavorful. Here's how:
- Cool quickly: Transfer the cooked beans to a bowl filled with cold water. This will stop the cooking process and help preserve their texture. By cooling the beans quickly, you prevent them from overcooking and becoming mushy.
- Store in the refrigerator: Once the beans are cool, store them in an airtight container in the refrigerator for up to 5 days. Storing them in an airtight container prevents them from drying out and absorbing flavors from other foods in the refrigerator.
- Freeze for longer storage: For longer storage, you can freeze your cooked beans for up to 3 months. Simply transfer them to freezer-safe bags or containers and freeze. Freezing allows you to enjoy your cooked beans for a longer period of time, providing a convenient and healthy option for future meals.
Reheating Cooked Beans: Bringing Your Beans Back to Life
Reheating your cooked beans is a breeze. You can reheat them in a saucepan on the stovetop, in the microwave, or even in the oven. Just make sure to heat them through before serving. Reheating brings the beans back to life, ready to be enjoyed in your favorite dishes.
Part 6: bean recipes: A culinary adventure Awaits
A World of Bean Dishes: Endless Culinary Possibilities
Now that you've mastered the art of cooking beans, it's time to get creative! There are endless possibilities when it comes to bean recipes. Here are a few of my favorites:
- black bean salsa: This vibrant and flavorful salsa is perfect for topping tacos, burritos, and nachos. It's made with black beans, corn, tomatoes, onions, cilantro, and lime juice. Its bright and refreshing flavors add a burst of zest to your meals.
- Cannellini bean soup: This hearty and comforting soup is packed with flavor and nutrients. It's made with cannellini beans, carrots, celery, onions, and a flavorful broth. This is a perfect dish for cold evenings, providing a warm and satisfying meal.
- chickpea curry: This fragrant and flavorful curry is a classic Indian dish. It's made with chickpeas, onions, garlic, ginger, turmeric, cumin, and a blend of other spices. Its rich and complex flavors will transport you to another world with every bite.
- Pinto bean chili: This hearty and satisfying chili is a crowd-pleaser. It's made with pinto beans, ground beef, onions, tomatoes, chili powder, and cumin. This is a perfect dish for chilly days, providing a warm and comforting meal.
- Kidney bean salad: This refreshing and flavorful salad is perfect for summer. It's made with kidney beans, corn, tomatoes, bell peppers, red onion, and a tangy vinaigrette. Its bright and colorful flavors will brighten up any summer meal.
Part 7: bean faqs: Addressing Your Bean-Related Questions
1. Can I cook beans in a slow cooker?
Absolutely! Slow cookers are perfect for cooking beans. Simply combine the beans, water, and any desired seasonings in your slow cooker. Cook on low for 6-8 hours or on high for 3-4 hours. The slow cooker creates a gentle and even cooking environment, resulting in tender and flavorful beans.
2. Can I use canned beans instead of dried beans?
Yes, you can use canned beans if you're short on time. Simply drain and rinse the beans before using them in your recipes. However, keep in mind that canned beans tend to be softer and may have a slightly different flavor than cooked dried beans. Canned beans are a convenient option, but dried beans offer a more intense flavor and texture.
3. What are the best ways to use leftover beans?
Leftover beans are a culinary goldmine! You can use them in salads, soups, stews, dips, and even veggie burgers. Get creative and experiment with different flavors! Leftover beans are a versatile ingredient, adding flavor and substance to a variety of dishes.
4. What if my beans are still hard after cooking?
If your beans are still hard after cooking, they may need more time. Add a little more water and continue cooking until they are tender. If the beans are very hard, they may be old and not worth cooking. It's always best to use fresh beans for the best results. If you're using old beans, they may not soften properly, even with extended cooking time.
5. What are some tips for preventing beans from getting mushy?
To prevent beans from getting mushy, don't overcook them. Check them for tenderness towards the end of the cooking time and remove them from the heat as soon as they are tender. Also, avoid adding salt too early in the cooking process, as this can toughen the beans. Remember, the key to preventing mushy beans is to cook them just until they are tender, and to avoid adding salt too early in the cooking process.
Part 8: Bean-tastic Conclusion: A culinary journey Begins
There you have it – my foolproof guide to cooking beans perfectly every time. From soaking to cooking, checking for doneness, and storing them, I've covered everything you need to know. So next time you're looking for a delicious, healthy, and affordable meal, grab a bag of dried beans and get cooking! With a little patience and these tips, you'll be on your way to creating bean-tastic dishes that will impress your taste buds and leave you feeling full and satisfied. Embrace the world of beans, and embark on a culinary journey filled with flavor, texture, and endless possibilities. Happy bean cooking!
Everyone is watching

How to Cook Frozen Lobster Tails Perfectly: A Step-by-Step Guide
RecipesLobster. Just the word conjures up images of lavish meals, special occasions, and a taste of luxury. But let's...

Pigs in a Blanket Cooking Time: How Long to Bake for Perfect Results
RecipesAh, pigs in a blanket. Just the name conjures up images of those delightful little parcels of crispy pastry en...

Pork Fillet Cooking Time: How Long to Cook It Perfectly
RecipesPork fillet, or tenderloin as it's sometimes called, is a real favourite in our house. It's so versatile, and...

The Ultimate Guide to Tender, Juicy Pulled Pork
RecipesRight, let's talk pulled pork. It's one of those dishes that just screams "comfort food," doesn't it? I mean...

The Ultimate Guide to Cooking Delicious Frankfurters
RecipesLet's face it, we all love a good frankfurter. It's a classic, simple, and always satisfying. But let's be rea...
